Cover1.
AR-M237_keyope_SEC.book 1 ページ 2006年11月20日 月曜日 午後6時31分 The key operator code is initially set to "00000" at the factory.
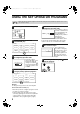
AR-M237_keyope_SEC.book 1 ページ 2006年11月20日 月曜日 午後6時31分 PURPOSE OF THE KEY OPERATOR PROGRAMS The key operator programs are used by the key operator (administrator of the machine) to customize certain features of the machine to better meet the needs of users.
AR-M237_keyope_SEC.book 2 ページ 2006年11月20日 月曜日 午後6時31分 USING THE KEY OPERATOR PROGRAMS When using the key operator programs for the first time, change the factory default key operator code to a new code. (Step 3 to step 5) Note 1 Press the [CUSTOM SETTINGS] key. 2 CUSTOM SETTINGS Touch the [KEY OPERATOR PROGRAMS] key.
AR-M237_keyope_SEC.book 3 ページ 2006年11月20日 月曜日 午後6時31分 USING THE KEY OPERATOR PROGRAMS KEYS USED IN KEY OPERATOR PROGRAMS Example: Auditing mode The following keys appear in screens that require the entry of numerical values. KEY OPERATOR PROGRAMS 1 2 20 OK ACCOUNT CONTROL AUDITING MODE TOTAL PAGES PER ACCOUNT (1 999) 1/3 3 RESETTING ACCOUNT 4 1 2 3 4 5 5 When a checkbox ( ) appears in front of a setting, a checkmark ( ) will appear when the checkbox is touched.
AR-M237_keyope_SEC.book 4 ページ 2006年11月20日 月曜日 午後6時31分 KEY OPERATOR PROGRAM LIST Note The key operator programs that can be accessed depend on the optional equipment that is installed.
AR-M237_keyope_SEC.
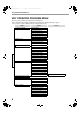
AR-M237_keyope_SEC.book 6 ページ 2006年11月20日 月曜日 午後6時31分 KEY OPERATOR PROGRAM LIST KEY OPERATOR PROGRAM MENU The key operator programs are arranged in the following menu. Refer to this menu when enabling or disabling the settings that are explained beginning on page 8. * Some programs contain an additional level of settings (setting screen).
AR-M237_keyope_SEC.
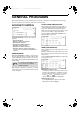
AR-M237_keyope_SEC.book 8 ページ 2006年11月20日 月曜日 午後6時31分 GENERAL PROGRAMS This chapter explains key operator programs that are common to all functions of the multifunction system (copy function, fax function, printer function, and network scanner function). ACCOUNT CONTROL KEY OPERATOR PROGRAMS ACCOUNT CONTROL OK AUDITING MODE 1/3 TOTAL PAGES PER ACCOUNT This program is used to display the page counts of each account. Misfed pages are not included in the page counts.
AR-M237_keyope_SEC.book 9 ページ 2006年11月20日 月曜日 午後6時31分 GENERAL PROGRAMS ACCOUNT NUMBER CONTROL ACCOUNT LIMIT SETTING This program is used to store, delete, and change account numbers for AUDITING MODE. A maximum of 100 account numbers can be stored. A limit for the number of copies that can be made can be set for a single account or for all accounts at once. The maximum limit that can be entered is 999,999. Touch the [ACCOUNT LIMIT SETTING] key to display the account limit setting screen.
AR-M237_keyope_SEC.book 10 ページ 2006年11月20日 月曜日 午後6時31分 GENERAL PROGRAMS ENERGY SAVE PREHEAT MODE SETTING KEY OPERATOR PROGRAMS OK ENERGY SAVE AUTO POWER SHUT-OFF AUTO POWER SHUT-OFF TIMER 60min PREHEAT MODE SETTING 15min "ENERGY SAVE" provides the following four programs to reduce your power costs. From an environmental perspective, this also helps conserve natural resources and reduce pollution.
AR-M237_keyope_SEC.
AR-M237_keyope_SEC.book 12 ページ 2006年11月20日 月曜日 午後6時31分 GENERAL PROGRAMS STREAM FEEDING MODE Use this program to enable stream feeding mode. When this mode is enabled and originals are scanned from the REVERSING SINGLE PASS FEEDER, an original can be added to the REVERSING SINGLE PASS FEEDER within 5 seconds after the previous original is fed, and be automatically scanned using the settings of the previous original. This function can be used with the copy function and the scanner function.
AR-M237_keyope_SEC.book 13 ページ 2006年11月20日 月曜日 午後6時31分 GENERAL PROGRAMS OUTPUT TRAYS RETURN FROM COPY MODE TIMING (When the printer or fax function is enabled and a JOB SEPARATOR TRAY KIT or FINISHER is installed) This program is used to select the respective output trays for the copy, printer, and fax functions. The factory default setting is "PATTERN 1". Example: When a FINISHER is installed * Settings that can be selected vary depending on the options that are installed.
AR-M237_keyope_SEC.book 14 ページ 2006年11月20日 月曜日 午後6時31分 GENERAL PROGRAMS KEY OPERATOR CODE CHANGE This program is used to change the key operator code that must be entered to configure the key operator programs. When the machine is first used, the key operator (adminstrator of the machine) should change the key operator code that was set at the factory to the desired 5-digit code. (A number that has been programmed as an account number cannot be used.) Only one key operator code can be programmed.
AR-M237_keyope_SEC.book 15 ページ 2006年11月20日 月曜日 午後6時31分 PROGRAMS FOR COPY MODE This chapter explains the key operator programs that are used for copy mode.
AR-M237_keyope_SEC.book 16 ページ 2006年11月20日 月曜日 午後6時31分 PROGRAMS FOR PRINT MODE This chapter explains key operator programs that are used for the printer function. These programs can only be configured on models that have the printer function.
AR-M237_keyope_SEC.book 17 ページ 2006年11月20日 月曜日 午後6時31分 PROGRAMS FOR PRINT MODE INTERFACE SETTINGS The "INTERFACE SETTINGS" are used to monitor and set limits for the data that is sent to the machine’s parallel port, USB port, or network port.
05_keyope_printer.fm 18 ページ 2006年11月28日 火曜日 午後5時30分 PROGRAMS FOR PRINT MODE PORT SWITCHING METHOD NETWORK SETTINGS (When the PRINTER EXPANSION KIT is installed) (When the PRINTER EXPANSION KIT is installed) This program is used to set the method for switching printer ports. The machine can use the following three printer ports: • Parallel port • USB port • Network port The factory default setting is "SWITCH AT END OF JOB".
AR-M237_keyope_SEC.book 19 ページ 2006年11月20日 月曜日 午後6時31分 PROGRAMS FOR PRINT MODE ENABLE EtherTalk This program must be enabled to use the machine on a network that uses EtherTalk protocol. This program is initially enabled (factory default setting). ENABLE NetBEUI This program must be enabled to use the machine on a network that uses NetBEUI protocol. This program is initially enabled (factory default setting).
AR-M237_keyope_SEC.book 20 ページ 2006年11月20日 月曜日 午後6時31分 PROGRAMS FOR NETWORK SCANNER MODE This chapter explains key operator programs that are used for the network scanner function. These programs can only be configured on models that have the network scanner function.
AR-M237_keyope_SEC.
Cover4.fm 1 ページ 2006年11月28日 火曜日 午後2時11分 AR-M257/AR-M317 AR-M257/AR-M317 KEY OPERATOR'S GUIDE SHARP ELECTRONICS CORPORATION Sharp Plaza, Mahwah, New Jersey 07430-2135. www.sharpusa.com SHARP ELECTRONICS OF CANADA LTD. 335 Britannia Road East, Mississauga, Ontario, L4Z 1W9 This manual has been printed using a vegetable-based soy oil ink to help protect the environment.
!Andromeda_copy_sec.
!Andromeda_copy_sec.book 1 ページ 2006年11月23日 木曜日 午後6時1分 ➢➣➢➣➢➣➢➣➢➣➢➣➢➣➢➣➢➣➢➣ FOR YOUR RECORDS ... To protect against loss or theft, record and retain for reference the copier’s serial number located on the back of the unit. Model Number Serial Number Date of Purchase Place of Purchase Authorized Sharp Copier Service Department Number ➢➣➢➣➢➣➢➣➢➣➢➣➢➣➢➣➢➣➢➣ ➢➣➢➣➢➣➢➣➢➣➢➣➢➣➢➣➢➣➢➣➢➣➢➣➢➣➢➣➢➣➢➣➢➣ ➢➣➢➣➢➣➢➣➢➣➢➣➢➣➢➣➢➣➢➣➢➣➢➣➢➣➢➣➢➣➢➣➢➣ For users in the USA This device complies with Part 15 of the FCC Rules.
!Andromeda_copy_sec.book 1 ページ 2006年11月23日 木曜日 午後6時1分 CONTENTS CAUTIONS................................................................................................................................................. 3 ● ● ● ● CAUTIONS ON USING THE MACHINE ........................................................................................................... 3 IMPORTANT POINTS WHEN SELECTING AN INSTALLATION SITE ...........................................................
!Andromeda_copy_sec.book 5 2 ページ 2006年11月23日 木曜日 午後6時1分 TROUBLESHOOTING AND MAINTENANCE DISPLAY MESSAGES..................................... 60 TROUBLESHOOTING ..................................... 62 MISFEED REMOVAL....................................... 66 ● ● ● ● ● ● ● ● MISFEED REMOVAL GUIDANCE .................66 MISFEED IN THE RSPF.................................67 MISFEED IN THE BYPASS TRAY .................68 MISFEED IN THE MACHINE..........................68 MISFEED IN THE CENTER TRAY....
!Andromeda_copy_sec.book 3 ページ 2006年11月23日 木曜日 午後6時1分 CAUTIONS Follow the cautions below when using this machine. CAUTIONS ON USING THE MACHINE Warning: • The fusing area is hot. Exercise care in this area when removing misfed paper. • Do not look directly at the light source. Doing so may damage your eyes. Caution: • Do not switch the machine rapidly on and off. After turning the machine off, wait 10 to 15 seconds before turning it back on.
!Andromeda_copy_sec.book 4 ページ 2006年11月23日 木曜日 午後6時1分 Be sure to connect the power cord only to a power outlet that meets the specified voltage and current requirements. Also make certain the outlet is properly grounded. Note Connect the machine to a power outlet which is not used for other electric appliances. If a lighting fixture is connected to the same outlet, the light may flicker. Be sure to allow the required space around the machine for servicing and proper ventilation.
!Andromeda_copy_sec.book 5 ページ 2006年11月23日 木曜日 午後6時1分 ENVIRONMENTAL INFORMATION Products that have earned the ENERGY STAR® are designed to protect the environment through superior energy efficiency. The Environmental Choice Program guidelines are applied to the products only in Canada. The products that meet the Environmental Choice Program guidelines carry the logo shown to the left. The products without the logo may not meet the Environmental Choice Program guidelines.
!Andromeda_copy_sec.book 6 ページ 2006年11月23日 木曜日 午後6時1分 THE MEANING OF "R" IN ORIGINAL AND PAPER SIZE INDICATIONS An "R" appearing at the end of an original or paper size (5-1/2" x 8-1/2"R, 8-1/2" x 11"R, etc.) indicates that the original or paper is oriented horizontally as shown below. Sizes that can be placed only in the horizontal (landscape) orientation (8-1/2" x 14", 11" x 17"), do not contain the "R" in their size indication.
00.fm 7 ページ 2006年11月29日 水曜日 午前9時22分 MAIN FEATURES High-speed laser copying • First-copy time*1 at 600 dpi*2 is only 4.8 seconds. • Copying speed is 25 copies/min. (AR-M257) or 31 copies/min. (AR-M317) at 600 dpi . This is ideal for business use and provides a big boost to workplace productivity. *1 First-Copy time may vary depending on the power-supply voltage, ambient temperature, and other operating conditions. *2 "dpi" ("dots per inch") is unit that is used to measure resolution.
!Andromeda_copy_sec.book 1 8 ページ 2006年11月23日 木曜日 午後6時1分 Chapter 1 BEFORE USING THE MACHINE This chapter contains basic information that should be read before using the machine. PART NAMES AND FUNCTIONS Exterior 3 1 6 2 7 16 8 4 5 12 11 17 9 19 13 10 14 18 20 21 15 1 Document feeder tray Place the original(s) that you wish to scan face up here. (p.23) 9 Power switch Press to turn the machine power on and off. (p.13) 10 2 Original guides Adjust to the size of the originals.
!Andromeda_copy_sec.book 9 ページ 2006年11月23日 木曜日 午後6時1分 BEFORE USING THE MACHINE Interior 22 23 1 27 24 25 26 15 Paper trays Each tray holds 500 sheets of copy paper. (p.15) 24 Roller rotating knob Turn to remove misfed paper. (p.68) 16 Upper right side cover Open to remove misfeeds when an optional job separator tray kit or a optional finisher is installed. (p.72) 25 Photoconductive drum Copy images are formed on the photoconductive drum. 17 Side cover Open to remove misfeeds. (p.
!Andromeda_copy_sec.book 10 ページ 2006年11月23日 木曜日 午後6時1分 BEFORE USING THE MACHINE OPERATION PANEL COPY PRINT ON LINE DATA SCAN DATA LINE DATA FAX JOB STATUS CUSTOM SETTINGS ACC.#-C 1 1 2 Touch panel The machine status, messages and touch keys are displayed on the panel. The display will show the status of printing, copying or network scanning according to the mode that is selected. For details see the next page.
!Andromeda_copy_sec.book 11 ページ 2006年11月23日 木曜日 午後6時1分 BEFORE USING THE MACHINE TOUCH PANEL Using the touch panel Selecting a function [Example 1] [Example 1] JOB QUEUE SETS / PROG COPY 003 / 000 SHARP001 003 / 000 Beep tone Items on the touch panel are selected by touching the key associated with the item. A beep will sound to confirm that the item was selected and the key will be highlighted. * A double-beep is sounded when an invalid key is touched.
01.fm 12 ページ 2006年11月29日 水曜日 午前8時42分 BEFORE USING THE MACHINE Job status screen (common to copy, print, network scan and fax) This screen appears when the [JOB STATUS] key on the operation panel is pressed. A job list showing the current job and the stored jobs or a list showing completed jobs can be displayed. The contents of jobs can be viewed and jobs can be deleted from the queue. The following screen shows the job queue for print jobs.
!Andromeda_copy_sec.book 13 ページ 2006年11月23日 木曜日 午後6時1分 POWER ON AND OFF The power switch is located on the left side of the machine. Note When the power switch is turned on, the machine starts up in the previously used mode. The following explanations assume that the previously used mode was copy mode. POWER ON POWER OFF Turn the power switch to the "ON" position. When the machine is not used for a long time, be sure to turn it off.
!Andromeda_copy_sec.book 14 ページ 2006年11月23日 木曜日 午後6時1分 BEFORE USING THE MACHINE INITIAL SETTINGS The machine reverts to the initial settings when it is first turned on, when the [CLEAR ALL] key ( ) is pressed, or the preset "auto clear time" elapses after the last copy is made in any mode. When the machine reverts to the initial settings, all settings and functions selected to that point are canceled. The auto clear time can be changed in the key operator programs. (See the "Key operator’s guide".
!Andromeda_copy_sec.book 15 ページ 2006年11月23日 木曜日 午後6時1分 LOADING PAPER When a tray runs out of paper, a message appears in the touch panel. Load paper in the tray. OPEN TRAY 1 AND ADD PAPER. 0 ORIGINAL 8½x11 AUTO EXPOSURE SPECIAL MODES AUTO 8½x11 PAPER SELECT 2-SIDED COPY 8½x11 8½x14 OUTPUT 100% COPY RATIO 1 PAPER The specifications for the types and sizes of paper that can be loaded in the paper trays are shown below. For best results, use only SHARP recommended paper. Tray No.
!Andromeda_copy_sec.book 16 ページ 2006年11月23日 木曜日 午後6時1分 BEFORE USING THE MACHINE Special papers Follow these guidelines when using special papers. Envelopes Do not use the following envelopes (Misfeeds will occur.). • Envelopes with metal tabs, clasps, strings, holes, or windows. • Envelopes with rough fibers, carbon paper, or glossy surfaces. • Envelopes with two or more flaps. • Envelopes with tape, film, or paper attached to the flap. • Envelopes with a fold in the flap.
!Andromeda_copy_sec.book 17 ページ 2006年11月23日 木曜日 午後6時1分 BEFORE USING THE MACHINE LOADING PAPER Make sure that the machine is not copying, printing, or printing a received fax, and then follow these steps to load paper. Loading the paper in the paper tray 1 Pull out the paper tray until it stops. If you are loading the same size of paper as was loaded previously, go to step 4. If you are loading a different size of paper, continue with the following step. 2 5 Load paper in the tray.
!Andromeda_copy_sec.book 18 ページ 2006年11月23日 木曜日 午後6時1分 BEFORE USING THE MACHINE Loading paper in the bypass tray 1 Unfold the bypass tray. 3 Insert the copy paper (print side down) all the way into the bypass tray. To enable correct detection of the paper size, be sure to pull out the bypass tray extension. 2 Set the paper guides to the copy paper width. Important points when inserting paper in the bypass tray • Be sure to place envelopes horizontally as shown in the following diagram.
!Andromeda_copy_sec.book 19 ページ 2006年11月23日 木曜日 午後6時1分 BEFORE USING THE MACHINE CHANGING A TRAY’S PAPER TYPE AND PAPER SIZE SETTINGS When you change the paper in a tray, follow the steps below to change the tray’s paper type and paper size settings. The settings cannot be changed when operation has stopped because the paper ran out or a misfeed occurred, or when an interrupt copy job is being performed.
!Andromeda_copy_sec.book 20 ページ 2006年11月23日 木曜日 午後6時1分 BEFORE USING THE MACHINE Setting the paper type in the bypass tray Use either of the following two methods to set the bypass tray's paper type setting. From the [CUSTOM SETTINGS] key From the [PAPER SELECT] key 1 Load paper in the bypass tray as explained in "Loading paper in the bypass tray" (p.18). 1 Load paper in the bypass tray as explained in "Loading paper in the bypass tray" (p.18). 2 Press the [CUSTOM SETTINGS] key.
!Andromeda_copy_sec.book 21 ページ 2006年11月23日 木曜日 午後6時1分 Chapter 2 2 COPY FUNCTIONS This chapter explains basic copying functions such as normal copying, reduction or enlargement, and exposure adjustment. MAIN SCREEN OF COPY MODE The main screen of copy mode shows messages, keys, and settings that are used for copying. Touch a key to make a selection. The main screen of copy mode appears when the [COPY] key is pressed (Except when the custom settings screen appears.).
!Andromeda_copy_sec.book 22 ページ 2006年11月23日 木曜日 午後6時1分 NORMAL COPYING COPYING FROM THE DOCUMENT GLASS Note 1 If "AUDITING MODE" (p.58) has been enabled, enter your 5-digit account number. Open the RSPF and place the original face down on the document glass. Note • To load paper, see "LOADING PAPER" (p.15). If you change the paper size in the tray, you will also need to change the tray's paper size and paper type settings. (p.
!Andromeda_copy_sec.book 23 ページ 2006年11月23日 木曜日 午後6時1分 COPY FUNCTIONS COPYING FROM THE RSPF Note 1 • If "AUDITING MODE" (p.58) is enabled, enter your 5-digit account number. • If the RSPF is disabled in the key operator programs, the RSPF cannot be used. See the "Key operator's guide". Make sure that an original has not been left on the document glass and then close the RSPF. Note If an original remains on the document glass after a copy was made, "REMOVE THE ORIGINAL FROM THE DOCUMENT GLASS.
!Andromeda_copy_sec.book 24 ページ 2006年11月23日 木曜日 午後6時1分 COPY FUNCTIONS POINTS TO NOTE WHEN MAKING COPIES Document glass and RSPF • Paper in a different orientation from the original can be selected if the auto paper select or auto image function has been selected. In this case, the image of the original will be rotated. • When copying a book or an original that has been folded or crumpled, press down gently on the RSPF.
!Andromeda_copy_sec.book 25 ページ 2006年11月23日 木曜日 午後6時1分 COPY FUNCTIONS Copying originals of mixed length (Mixed feeding) When using the RSPF, originals of mixed length can be fed together as long as the width of the originals is the same. To copy originals of mixed length, follow these steps: 1 Touch the [SPECIAL MODES] key. 4 Touch the [OK] key. OK SPECIAL MODES 8½x11 2-SIDED COPY 2 Touch the key and then the [ORIGINAL SIZE] key.
!Andromeda_copy_sec.book 26 ページ 2006年11月23日 木曜日 午後6時1分 COPY FUNCTIONS BYPASS FEED (special paper) The bypass tray must be used to feed special papers such as transparency film and labels. The bypass tray can also be used to feed standard copy paper. 1 Place the original(s). (p.22, p.23) 2 Insert the paper (print face down) all the way into the bypass tray. For paper that can be used in the bypass tray, see "PAPER" (p.15). To load paper, see "Loading paper in the bypass tray" (p.18).
!Andromeda_copy_sec.book 27 ページ 2006年11月23日 木曜日 午後6時1分 AUTOMATIC TWO-SIDED COPYING Two originals can be automatically copied onto both sides of a single sheet of paper. When the RSPF is used, two-sided copies of two-sided originals can easily be made.
!Andromeda_copy_sec.book 28 ページ 2006年11月23日 木曜日 午後6時1分 COPY FUNCTIONS 5 Make sure that a suitable paper size is automatically selected, or select another size using the [PAPER SELECT] key. 7 Remove the first original and then place the original for the back side on the document glass. Close the RSPF and then press the [START] key ( ). To cancel automatic two-sided copying, press the [CLEAR] key ( ).
!Andromeda_copy_sec.book 29 ページ 2006年11月23日 木曜日 午後6時1分 EXPOSURE ADJUSTMENT SELECTING THE ORIGINAL IMAGE TYPE AND MANUALLY ADJUSTING THE EXPOSURE [AUTO] is selected by default for automatic adjustment of the image according to the original. If you wish to specify the original image type or manually adjust the exposure, place the original in the RSPF or on the document glass, check the paper size, and then perform the following steps. 1 Touch the [EXPOSURE] key. 3 Manually adjust the copy exposure.
!Andromeda_copy_sec.book 30 ページ 2006年11月23日 木曜日 午後6時1分 REDUCTION/ENLARGEMENT/ZOOM There are three ways to enlarge and reduce copies: ● Automatic ratio selection according to the paper size ........................... AUTOMATIC RATIO SELECTION (below) ● Specifying a ratio with the reduce key, enlarge key, or zoom key ..................MANUAL RATIO SELECTION (p.31) ● Separately selecting vertical and horizontal ratios ........................................................... XY ZOOM copying (p.
!Andromeda_copy_sec.book 31 ページ 2006年11月23日 木曜日 午後6時1分 COPY FUNCTIONS MANUAL RATIO SELECTION There are four preset reduction ratios and four preset enlargement ratios. In addition, the [ZOOM] keys ( , ) can be pressed to select the ratio in increments of 1%. 1 Place the original(s). (p.22, p.23) 2 Touch the [COPY RATIO] key. 4 Use the enlargement key or reduction key, or the [ZOOM] key ( / ) to set the desired copy ratio.
!Andromeda_copy_sec.book 32 ページ 2006年11月23日 木曜日 午後6時1分 COPY FUNCTIONS 6 Make sure that a suitable paper size is automatically selected, or select another size using the [PAPER SELECT] key. EXPOSURE AUTO 8½x11 PAPER SELECT 77% If AUTO PAPER SELECT is enabled, the appropriate copy paper size is automatically selected based on the original size and selected copy ratios. 7 Select the number of copies and any other desired copy settings, and then press the [START] key ( ). ACC.
!Andromeda_copy_sec.book 33 ページ 2006年11月23日 木曜日 午後6時1分 COPY FUNCTIONS 4 X 100 1 Y 100 2 ZOOM 5 7 Touch the [X] key. 4 The [X] key is selected (highlighted) by default, so there is normally no need to perform this step (Go to step 5.). If the [X] key is not highlighted, perform this step. Use the reduction, enlargement, and [ZOOM] keys ( / ) to change the copy ratio in the vertical (Y) direction.
02.fm 34 ページ 2006年11月28日 火曜日 午後1時6分 INTERRUPTING A COPY RUN A copy run can be temporarily interrupted to allow another copy job to be performed. When the other job is finished, the copy run will resume using the original copy settings. Note 1 Automatic two-sided copying, sort/group copying, staple sort, pamphlet copy, job build, cover copy, job build, job programs, or multi shot copying cannot be used for interrupt copying. Press the [INTERRUPT] key ( interrupt the copy run.
!Andromeda_copy_sec.book 3 35 ページ 2006年11月23日 木曜日 午後6時1分 Chapter 3 CONVENIENT COPY FUNCTIONS This chapter explains special finishing functions and other convenient functions. COPY FINISHING FUNCTIONS This section explains the sort, group, and offset functions, as well as the staple sort function which is used to staple output collated with the sort function when a finisher is installed. SORT COPY GROUP COPY This function is used to collate sets of copies.
!Andromeda_copy_sec.book 36 ページ 2006年11月23日 木曜日 午後6時1分 CONVENIENT COPY FUNCTIONS 1 Place the originals in the RSPF or on the document glass. (p.22, p.23) 5 Touch the [OK] key. If originals are placed in the RSPF, the sort function is automatically selected. (To disable this function, see the "Key operator’s guide".) Example: 5 sets of copies or 5 copies per page of 3 originals OK OFFSET 6 Select the number of copies and any other desired copy settings, and then press the [START] key ( ).
37 ページ 2006年11月29日 水曜日 午前9時52分 CONVENIENT COPY FUNCTIONS STAPLE SORT (when the finisher (AR-FN5A) is installed) This function collates the copies, staples each set, and delivers the sets to the offset tray. The staple sort function can only be used when a finisher is installed. In addition to the staple sort function, other functions such as the pamphlet staple function can be used when the saddle stitch finisher (AR-F14N) is installed.
!Andromeda_copy_sec.book 38 ページ 2006年11月23日 木曜日 午後6時1分 CONVENIENT COPY FUNCTIONS 1 Place the original(s). (p.22, p.23) 2 Touch the [OUTPUT] key. 6 [When using the RSPF:] Copying will start after all originals have been scanned. [When using the document glass:] Replace the original with the next original and press the [START] key ( ). Repeat this step until all originals have been scanned, and then touch the [READ-END] key. 2-SIDED COPY OUTPUT PLACE NEXT ORIGINAL. PRESS [START].
03.fm 39 ページ 2006年11月28日 火曜日 午後1時7分 SPECIAL MODES When the [SPECIAL MODES] key in the main screen of copy mode is touched, the special modes screen will appear. This screen contains the following special function keys. Touch the [SPECIAL MODES] key in the main screen READY TO COPY.
!Andromeda_copy_sec.book 40 ページ 2006年11月23日 木曜日 午後6時1分 CONVENIENT COPY FUNCTIONS GENERAL PROCEDURE FOR USING THE SPECIAL FUNCTIONS 1 Touch the [SPECIAL MODES] key. SPECIAL MODES 2-SIDED COPY 2 Touch the key of the desired special mode. MARGIN SHIFT Example: Selecting the margin shift function PAMPHLET COPY Procedures for modes that require further settings are explained starting on the next page.
!Andromeda_copy_sec.book 41 ページ 2006年11月23日 木曜日 午後6時1分 CONVENIENT COPY FUNCTIONS MARGIN SHIFT COPY The margin shift function is used to automatically shift the text or image on the copy paper approximately 1/2" in its initial setting. One-sided copying Image shifted to the right Image shifted to the left • Right, left or down can be selected for the shift direction as shown in the illustration. Image shifted down Margin • The shift width (margin) can be set from 0" to 1" in increments of 1/8".
!Andromeda_copy_sec.book 42 ページ 2006年11月23日 木曜日 午後6時1分 CONVENIENT COPY FUNCTIONS ERASE COPY The erase function is used to erase the shadow lines on copies that are produced when copying thick originals or books. The erase modes that can be selected are shown below. The erase width is initially set to 1/2". EDGE ERASE Eliminates shadow lines around the edges of copies caused when heavy paper or a book is copied. CENTER ERASE Eliminates shadow lines produced by the bindings of bound documents.
!Andromeda_copy_sec.book 43 ページ 2006年11月23日 木曜日 午後6時1分 CONVENIENT COPY FUNCTIONS DUAL PAGE COPY The dual page copy function produces separate copies of two adjoining pages on the document glass. It is especially useful when copying books and other bound documents. [Example] Copying the right and left pages of a book Book original Dual page copy • A reduction setting can be selected when using the dual page copy function, however, an enlargement setting cannot be selected.
!Andromeda_copy_sec.book 44 ページ 2006年11月23日 木曜日 午後6時1分 CONVENIENT COPY FUNCTIONS PAMPHLET COPY The pamphlet copy function is used to arrange copies in the proper order for center-stapling and folding into a booklet. Two original pages are copied onto each side of the copy paper, such that a total of four pages are copied onto each sheet. This function is convenient for arranging copies into an attractive booklet or pamphlet.
!Andromeda_copy_sec.book 45 ページ 2006年11月23日 木曜日 午後6時1分 CONVENIENT COPY FUNCTIONS JOB BUILD MODE Use this function when you need to copy more originals than can be placed in the RSPF at once. (The maximum number of originals that can be placed in the RSPF at once is 100.) Note • If the memory becomes full while scanning the originals, "MEMORY IS FULL. PRESS [START] TO BEGIN COPYING OR [CA] TO CANCEL." will appear. To copy only the originals that have been scanned, press the [START] key ( ) .
!Andromeda_copy_sec.book 46 ページ 2006年11月23日 木曜日 午後6時1分 CONVENIENT COPY FUNCTIONS MULTI SHOT COPY The multi shot copy function is used to copy two or four originals onto one sheet of copy paper in a specified order. Example: Copying four originals onto one sheet of paper (Page number: 4 in 1 ( ), layout: ( )) • When using the multi shot copy function, place the originals, select the desired paper size, and select the copy mode before selecting the multi shot copy function in the special modes screen.
!Andromeda_copy_sec.book 47 ページ 2006年11月23日 木曜日 午後6時1分 CONVENIENT COPY FUNCTIONS ORIGINAL SIZE If you wish to use the paper other than the automatically selected original size, original size setting is specified by the special modes. The mix feeding setting (p.25) is also selected here. 1 Touch the key and then touch the [ORIGINAL SIZE] key in the special modes menu screen. The original size setting screen will appear. AL MODES Touch the [OK] key in the special modes menu screen.
!Andromeda_copy_sec.book 48 ページ 2006年11月23日 木曜日 午後6時1分 CONVENIENT COPY FUNCTIONS COVER COPY Cover copy mode is used to add a cover to the front or back, or both the front and back, of a multipage document. To use cover copy mode, the RSPF must be used.
!Andromeda_copy_sec.book 49 ページ 2006年11月23日 木曜日 午後6時1分 CONVENIENT COPY FUNCTIONS 1 Touch the key and then touch the [COVER] key in the special modes menu screen. L OT Select the cover(s) that you wish to add. CANCEL COVER BACK FRONT+BACK OK PRINT ON FRONT COVER? NO YES To add only a front cover, touch the [FRONT] key. To add only a back cover, touch the [BACK] key. To add both a front and back cover, touch the [FRONT+BACK] key. 3 4 About the steps that follow See page 23.
!Andromeda_copy_sec.book 50 ページ 2006年11月23日 木曜日 午後6時1分 CONVENIENT COPY FUNCTIONS B/W REVERSE COPY The B/W REVERSE feature is used to reverse black and white in a copy to create a negative image. original 1 Touch the key and then touch the [B/W REVERSE] key in the special modes menu screen. B/W REVERSE OVER 2 B/W reverse copy The [B/W REVERSE] key is highlighted. The B/W reverse icon ( ) will also appear in the screen to indicate that the function is enabled.
!Andromeda_copy_sec.book 51 ページ 2006年11月23日 木曜日 午後6時1分 CONVENIENT COPY FUNCTIONS CARD SHOT The front and back of a card can be copied onto one sheet of paper. This function is convenient for making copies for certification purposes and helps save paper. Original • Copying is only possible on standard size paper. • The image cannot be rotated when using this function.
!Andromeda_copy_sec.book 52 ページ 2006年11月23日 木曜日 午後6時1分 CONVENIENT COPY FUNCTIONS 5 Place the original on the document glass. Place the front side of the original face down and close the document cover/RSPF. 6 Select the number of copies and any other desired copy settings, and then press the [START] key ( ). The front side of the card is scanned. ACC.#-C 7 Place the back side of the original face down on the document glass. 8 Press the [START] key ( ).
!Andromeda_copy_sec.book 4 53 ページ 2006年11月23日 木曜日 午後6時1分 Chapter 4 USER SETTINGS CUSTOM SETTINGS The custom settings let you adjust certain features of the machine to better suit your needs. The custom settings include the following settings: ●TOTAL COUNT ........................... This displays the number of pages output by the machine. (p.55) ●DISPLAY CONTRAST ................ This is used to adjust the contrast of the touch panel. (p.55) ●LIST PRINT*1 ..............................
!Andromeda_copy_sec.book 54 ページ 2006年11月23日 木曜日 午後6時1分 USER SETTINGS GENERAL PROCEDURE FOR CUSTOM SETTINGS 1 Press the [CUSTOM SETTINGS] key. LINE DATA B STATUS CUSTOM SETTINGS 3 Touch the [OK] key in the setting screen to close it. 4 When you are ready to exit the custom settings, touch the [EXIT] key. CUSTOM SETTINGS 2 Touch the key of the desired setting. The setting screen will appear. Each of the custom settings is explained on the following pages.
!Andromeda_copy_sec.book 55 ページ 2006年11月23日 木曜日 午後6時1分 USER SETTINGS SETTINGS Total count Keyboard select The total page count display shows the following counts: • The total count shows the combined output total of the copy, fax, and printer functions.
!Andromeda_copy_sec.book 56 ページ 2006年11月23日 木曜日 午後6時1分 JOB PROGRAM MEMORY If you frequently use the same settings for copy jobs, you can store in the settings in a job program. Up to 10 job programs can be stored, and the programs are retained even when the power is turned off. By storing frequently used copy settings in a program, you can eliminate the bother of selecting the settings each time you use them for a copy job.
!Andromeda_copy_sec.book 57 ページ 2006年11月23日 木曜日 午後6時1分 USER SETTINGS EXECUTING A JOB PROGRAM 1 Press the [ ] key. 3 Place the original, check the original size, and then set the number of copies and any other desired copy settings not stored in the program. When finished, press the [START] key ( ). S ACC.#-C 2 Touch the program number key of the desired program. ACC.#-C The job program will be executed. A number for which no job program has been stored cannot be selected.
!Andromeda_copy_sec.book 58 ページ 2006年11月23日 木曜日 午後6時1分 AUDITING MODE When auditing mode is enabled, a count is kept of the number of pages printed or copied by each account (maximum of 100 accounts). The counts can be viewed whenever necessary. Note • Auditing mode can be enabled for all modes (copy mode, fax mode, network scanner mode, and printer mode) in the key operator programs. (See the "Key operator’s guide".
!Andromeda_copy_sec.book 5 59 ページ 2006年11月23日 木曜日 午後6時1分 Chapter 5 TROUBLESHOOTING AND MAINTENANCE This chapter describes troubleshooting and maintenance such as misfeed removal, replacing the toner cartridge and cleaning the machine. DISPLAY MESSAGES.................................................................................................................... 60 TROUBLESHOOTING ....................................................................................................................
!Andromeda_copy_sec.book 60 ページ 2006年11月23日 木曜日 午後6時1分 DISPLAY MESSAGES If one of the following messages appears in the display, take prompt action as instructed by the message. Message Cause and solution Page ENTER YOUR ACCOUNT NUMBER. Auditing mode is enabled. Enter your account number. A MISFEED HAS OCCURRED. Remove the misfeed as explained in "MISFEED REMOVAL". 2-SIDED COPIES CANNOT BE MADE ON THIS PAPER TYPE.
!Andromeda_copy_sec.book 61 ページ 2006年11月23日 木曜日 午後6時1分 TROUBLESHOOTING AND MAINTENANCE Message Cause and solution Page SELECTED PAPER TRAY IS OUT OF SERVICE. Contact your SHARP service center. CHECK STAPLER POSITION OR STAPLE JAM. Staples are jammed in the finisher or the staple case is not attached correctly. Check the staple case.
!Andromeda_copy_sec.book 62 ページ 2006年11月23日 木曜日 午後6時1分 TROUBLESHOOTING If you experience difficulty using the machine, check the following troubleshooting guide before calling for service. Many problems can be easily resolved by the user. If you are unable to solve the problem using the troubleshooting guide, turn off the power switch, unplug the machine, and contact your SHARP service center. The following problems are related to the general operation of the machine and copying.
!Andromeda_copy_sec.book 63 ページ 2006年11月23日 木曜日 午後6時1分 TROUBLESHOOTING AND MAINTENANCE Problem Cause and solution The RSPF was not opened completely when the original was placed on the document glass. → Open the RSPF completely, place the original on the document glass, and close the RSPF. Page - The original contains large black solid areas. Original size is not selected automatically, or copying does not take place on paper that matches the original size.
!Andromeda_copy_sec.book 64 ページ 2006年11月23日 木曜日 午後6時1分 TROUBLESHOOTING AND MAINTENANCE Paper feeding problems Problem When using paper fed from the bypass tray, the copied image is skewed. Cause and solution The number of sheets placed on the bypass tray exceeds the maximum number. Page 15 → Do not place more than the maximum number of sheets. The bypass guide is not adjusted to the size of the loaded paper. 18 → Adjust the bypass guide to the size of the loaded paper.
!Andromeda_copy_sec.book 65 ページ 2006年11月23日 木曜日 午後6時1分 TROUBLESHOOTING AND MAINTENANCE Image quality problems Problem Cause and solution Page The image of the original is too light or too dark. → Select the correct original image type in the exposure setting and adjust the copying exposure. The copying exposure is set to "AUTO". Copies are too dark or too light. → The "EXPOSURE ADJUSTMENT" key operator program can be used to adjust the exposure level used for "AUTO" exposure.
!Andromeda_copy_sec.book 66 ページ 2006年11月23日 木曜日 午後6時1分 MISFEED REMOVAL When a misfeed occurs during copying, the message "MISFEED HAS OCCURRED." will appear in the touch panel and printing will stop. ● If the misfed paper tears during removal, remove the torn pieces. Take care not to touch the photoconductive drum while removing the pieces. Nicks and scratches on the drum will cause dirty copies. First, locate the misfeed 1 A MISFEED HAS OCCURRED. 2 1 3 2 4 3 4 5 5 6 Misfeed in the RSPF (p.
!Andromeda_copy_sec.book 67 ページ 2006年11月23日 木曜日 午後6時1分 TROUBLESHOOTING AND MAINTENANCE MISFEED IN THE RSPF 1 Remove the misfed original. A B Section C Carefully remove the misfed original from the exit area. Check sections A, B, and C in the illustration at left and remove the misfed original. C Section A Document feeder cover Open the document feeder cover and carefully remove the misfed original from the document feeder tray. Close the document feeder cover.
!Andromeda_copy_sec.book 68 ページ 2006年11月23日 木曜日 午後6時1分 TROUBLESHOOTING AND MAINTENANCE MISFEED IN THE BYPASS TRAY 1 Carefully pull the misfed paper out. 2 Open and close the side cover. Make sure that the misfeed message is cleared. The message can also be cleared by opening and closing the front cover. If the message is not cleared, see "A. Misfeed in the paper feed area". MISFEED IN THE MACHINE Determine the location of the misfeed and remove it appropriately as indicated below.
!Andromeda_copy_sec.book 69 ページ 2006年11月23日 木曜日 午後6時1分 TROUBLESHOOTING AND MAINTENANCE 4 Close the front cover and side cover. Make sure that the misfeed message is cleared. B: Misfeed in the fusing area 1 Open the bypass tray and the side cover. 2 Press and pull it open gently on both sides of the front cover. 5 If you were unable to remove the misfeed in step 4, press down on the fusing unit paper guide knob to open the paper guide, and carefully remove the misfed paper.
!Andromeda_copy_sec.book 70 ページ 2006年11月23日 木曜日 午後6時1分 TROUBLESHOOTING AND MAINTENANCE MISFEED IN THE CENTER TRAY Remove the paper by pulling it into the center tray. MISFEED IN THE UPPER PAPER TRAY Make sure that there is no misfed paper in the machine before pulling the tray out. (p.68) 1 Lift and pull out the upper paper tray and then remove the misfed paper. Be careful not to tear the misfed paper during removal. 2 Replace the upper paper tray. Push the upper paper tray in completely.
!Andromeda_copy_sec.book 71 ページ 2006年11月23日 木曜日 午後6時1分 TROUBLESHOOTING AND MAINTENANCE MISFEED IN THE LOWER PAPER TRAY ● Make sure that there is no misfed paper in the machine before pulling the tray out. (p.68) ● Use the following procedure to remove misfeeds that occur in the 500-sheet paper feed unit or 2 x 500-sheet paper feed unit. 1 Open the lower side cover. 2 Remove the misfed paper. Be careful not to tear the misfed paper during removal.
!Andromeda_copy_sec.book 72 ページ 2006年11月23日 木曜日 午後6時1分 TROUBLESHOOTING AND MAINTENANCE MISFEED IN THE UPPER EXIT AREA (when a job separator tray kit or finisher (AR-FN5A) is installed) If a job separator tray kit or a finisher is installed, a misfeed may occur in the upper exit area. 1 Open the upper right side cover. 3 Close the upper right side cover. Make sure that the misfeed message is cleared. 2 Gently pull the misfed paper out. Be careful not to tear the misfed paper during removal.
!Andromeda_copy_sec.book 73 ページ 2006年11月23日 木曜日 午後6時1分 TROUBLESHOOTING AND MAINTENANCE 3 If staple sort copying is being performed, open the paper guide and remove any misfed paper from the stapler compiler. 4 Close the stapler compiler cover. 5 If the offset tray is being used, remove any misfed paper from the offset tray. 5 6 If the top tray is being used, open the top cover, remove any misfed paper, and close the top cover. Make sure that the misfeed message is cleared.
!Andromeda_copy_sec.book 74 ページ 2006年11月23日 木曜日 午後6時1分 REPLACING THE TONER CARTRIDGE To check how much toner remains in the toner cartridge (p.76), hold down the [COPY] key. The amount of toner remaining will appear in the display. When less than 25% of the toner remains, obtain a new toner cartridge as soon as possible. When "TONER SUPPLY IS LOW." appears in the display, be sure to have a new cartridge on hand for replacement at any time as little toner remains. When "CHANGE THE TONER CARTRIDGE.
!Andromeda_copy_sec.book 75 ページ 2006年11月23日 木曜日 午後6時1分 STAPLE CARTRIDGE REPLACEMENT (when the finisher (AR-FN5A) is installed) When the message "ADD STAPLES." appears, replace the staple cartridge as follows: 1 Open the stapler cover. 5 Remove the tape from the cartridge. 2 Grasp the green portion of the staple box and remove the staple box from the stapler. 6 Insert the staple box into the stapler unit until it clicks into place. 3 7 Close the stapler cover.
!Andromeda_copy_sec.book 76 ページ 2006年11月23日 木曜日 午後6時1分 TROUBLESHOOTING AND MAINTENANCE STAPLE JAM REMOVAL If staples become jammed in the stapler, the message "CHECK STAPLER POSITION OR STAPLE JAM." will appear. Follow these steps to remove the jammed staples. 1 Open the stapler cover. 4 Return the lever to its original position. 2 Grasp the green portion of the staple box and remove the staple box from the stapler. 5 Insert the staple box into the stapler unit until it clicks into place.
!Andromeda_copy_sec.book 77 ページ 2006年11月23日 木曜日 午後6時1分 CLEANING THE MACHINE DOCUMENT GLASS AND RSPF If the document glass, RSPF, or scanning glass for originals fed from the RSPF (the long narrow glass surface on the right side of the document glass) become dirty, the dirt may appear on copies. Always keep these parts clean. Stains or dirt on the document glass/RSPF will also be copied. Wipe the document glass, the RSPF and the scanning window on the document glass with a soft, clean cloth.
06.fm 78 ページ 2006年11月29日 6 水曜日 午後2時6分 Chapter 6 PERIPHERAL DEVICES AND SUPPLIES Optional equipments and supplies are explained in this chapter. To purchase optional equipment and supplies contact your SHARP service center. PERIPHERAL DEVICES FINISHER (AR-FN5A) See page 79. 500-SHEET PAPER FEED UNIT (AR-D30) See page 80. 2 x 500-SHEET PAPER FEED UNIT (AR-D31) See page 80. SADDLE STITCH FINISHER (AR-F14N) The staple and pamphlet staple functions can be used.
!Andromeda_copy_sec.book 79 ページ 2006年11月23日 木曜日 午後6時1分 PERIPHERAL DEVICES AND SUPPLIES FINISHER (AR-FN5A) When an optional finisher (AR-FN5A) is installed, the machine can automatically staple the sorted copies. Each collated set of copies or group of copies can be stacked offset from the previous set. (Offset function p.
!Andromeda_copy_sec.book 80 ページ 2006年11月23日 木曜日 午後6時1分 PERIPHERAL DEVICES AND SUPPLIES 500-SHEET PAPER FEED UNIT/ 2 x 500-SHEET PAPER FEED UNIT These paper feed units provide the convenience of increased paper capacity for the machine and a greater choice of paper sizes readily available for copying. The AR-D30 contains one 500-sheet paper tray and the AR-D31 contains two 500-sheet paper trays.
!Andromeda_copy_sec.book 81 ページ 2006年11月23日 木曜日 午後6時1分 STORAGE OF SUPPLIES Standard supplies for this product that are to be replaced by the user are paper and the toner cartridge. For best copying results, be sure to use only SHARP Genuine Supplies which are designed, engineered and tested to maximize the life and performance of SHARP copiers. Look for the Genuine Supplies label on the toner package.
!Andromeda_copy_sec.book 7 82 ページ 2006年11月23日 木曜日 午後6時1分 Chapter 7 APPENDIX SPECIFICATIONS Model AR-M257 Type Digital Multifunction System, Desktop Photoconductive type OPC drum Document glass type Fixed Copy system Dry, electrostatic transfer Originals Sheets, bound documents Originals size Max. 11" x 17" (A3) Copy size Max. 11" x 17" (A3) Min. 5-1/2" x 8-1/2" (A6) Image loss: Max. 5/32" (4 mm) (leading and trailing edges) Max.
!Andromeda_copy_sec.book 83 ページ 2006年11月23日 木曜日 午後6時1分 APPENDIX Dimensions 24-17/32" (W) x 24" (D) x 30-15/16" (H) (623mm (W) x 609.5mm (D) x 785.5mm (H)) Operating conditions Temperature: 59°F to 86°F (15°C to 30°C), Humidity: 20% to 85% Noise level Sound Power Level LwA(1B=10dB) Copying: 6.3[B] Standby: 3.
!Andromeda_copy_sec.book 84 ページ 2006年11月23日 木曜日 午後6時1分 MATERIAL SAFETY DATA SHEET Page: 1/4 Data Revised: Jul. 31. 2002 Data Issued: Apr. 2. 2001 MSDS No. F-00981 1. PRODUCT AND COMPANY IDENTIFICATION Product Name : AR-270NT / AR-270T / AR-270ST / AR-270FT / AR-270NT-J / AR-270ST-C/ AR-270FT-T (Black Toner) Supplier Identification : Sharp Corporation 22-22 Nagaike-cho, Abeno-ku, Osaka, Japan Local suppliers are listed below. Please contact the nearest supplier for additional information.
!Andromeda_copy_sec.book 85 ページ 2006年11月23日 木曜日 午後6時1分 MATERIAL SAFETY DATA SHEET Page: 2/4 Data Revised: Jul. 31. 2002 Data Issued: Apr. 2. 2001 MSDS No. F-00981 3. HAZARDS IDENTIFICATION Most Important Hazards and Effects of the Products Human Health Effects : There are no anticipated carcinogenic effects from exposure based on animal tests performed using toner. When used as intended according to instructions, studies do not indicate any symptoms of fibrosis will occur.
!Andromeda_copy_sec.book 86 ページ 2006年11月23日 木曜日 午後6時1分 MATERIAL SAFETY DATA SHEET Page: 3/4 Data Revised: Jul. 31. 2002 Data Issued: Apr. 2. 2001 MSDS No. F-00981 Exposure limit values OSHA-PEL (USA) ACGIH-TLV (USA) Personal Protective Equipment Respiratory Protection Hand Protection Eye Protection Skin Protection Other Protective Equipment : 15mg/m3 (Total Dust) , 5mg/m3 (Respirable Dust) : 10mg/m3 (Total Dust) , 3mg/m3 (Respirable Dust) : : : : : Not required under intended use.
!Andromeda_copy_sec.book 87 ページ 2006年11月23日 木曜日 午後6時1分 MATERIAL SAFETY DATA SHEET Page: 4/4 Data Revised: Jul. 31. 2002 Data Issued: Apr. 2. 2001 MSDS No.
!Andromeda_copy_sec.book 88 ページ 2006年11月23日 木曜日 午後6時1分 MATERIAL SAFETY DATA SHEET Page: 1/4 Data Issued: Aug. 1. 2003 MSDS No. F-31201 1. PRODUCT AND COMPANY IDENTIFICATION Product Name : AR-271ND / AR-271DV / AR-271SD / AR-271SD-C (Black Developer) Supplier Identification : Sharp Corporation 22-22 Nagaike-cho, Abeno-ku, Osaka, Japan Local suppliers are listed below. Please contact the nearest supplier for additional information. Area North America Oceania Europe Middle East (Country) U.S.A.
!Andromeda_copy_sec.book 89 ページ 2006年11月23日 木曜日 午後6時1分 MATERIAL SAFETY DATA SHEET Page: 2/4 Data Issued: Aug. 1. 2003 MSDS No. F-31201 3. HAZARDS IDENTIFICATION Most Important Hazards and Effects of the Products Human Health Effects : There are no anticipated carcinogenic effects from exposure based on animal tests performed using toner. When used as intended according to instructions, studies do not indicate any symptoms of fibrosis will occur. Environmental Effects : No data are available.
!Andromeda_copy_sec.book 90 ページ 2006年11月23日 木曜日 午後6時1分 MATERIAL SAFETY DATA SHEET Page: 3/4 Data Issued: Aug. 1. 2003 MSDS No. F-31201 Exposure limit values OSHA-PEL (USA) ACGIH-TLV (USA) Personal Protective Equipment Respiratory Protection Hand Protection Eye Protection Skin Protection Other Protective Equipment : 15mg/m3 (Total Dust) , 5mg/m3 (Respirable Dust) : 10mg/m3 (Total Dust) , 3mg/m3 (Respirable Dust) : : : : : Not required under intended use. Not required under intended use.
!Andromeda_copy_sec.book 91 ページ 2006年11月23日 木曜日 午後6時1分 MATERIAL SAFETY DATA SHEET Page: 4/4 Data Issued: Aug. 1. 2003 MSDS No.
!Andromeda_copy_index.fm 92 ページ 2006年11月29日 水曜日 午前9時1分 INDEX Symbols [#/P] key ...................................................... 10, 56, 57 2-8 2 x 500-sheet paper feed unit ..................... 71, 78, 80 256MB expansion memory board ........................... 78 [2-SIDED COPY] key .................................. 21, 27, 28 500-sheet paper feed unit ........................... 71, 78, 80 512MB expansion memory board ........................... 78 8MB fax memory ..............................
!Andromeda_copy_sec.book 93 ページ 2006年11月23日 木曜日 午後6時1分 H Handles ..................................................................... 8 Heavy paper............................................................ 15 How to place the original - Document glass ............................................... 22 - RSPF ............................................................... 23 I Icon (Job status screen)..........................................
!Andromeda_copy_index.fm 94 ページ 2006年11月29日 水曜日 午前8時38分 Paper type................................................... 15, 19, 20 Paper weight ........................................................... 15 Part names and functions - Operation panel ............................................... 10 Peripheral devices................................................... 78 Photoconductive drum ........................................ 9, 68 Plain paper .......................................................
!Andromeda_copy_sec.book 95 ページ 2006年11月23日 木曜日 午後6時1分 INDEX BY PURPOSE Preparations Bypass tray, loading paper in...................................18 Initial settings, returning to .......................................14 Paper size, changing................................................19 Paper type, changing ...............................................19 Paper, loading ..........................................................17 Power, turning off .............................................
!Andromeda_copy_sec.book 96 ページ 2006年11月23日 木曜日 午後6時1分 Trademark acknowledgments The following trademarks and registered trademarks are used in conjunction with the machine and its peripheral devices and accessories. • Microsoft®, Windows®, Windows® 98, Windows® Me, Windows NT® 4.0, Windows® 2000, Windows® XP, Windows® Server 2003 and Internet Explorer® are registered trademarks or trademarks of Microsoft Corporation in the U.S.A. and other countries.
!Andromeda_copy_sec.
!Andromeda_copy_sec.
!Andromeda_copy_sec.
!Andromeda_copy_sec.book 1 ページ 2006年11月23日 木曜日 午後6時1分 Connectors Caution: This connector is only intended for service purposes. Any connection to this terminal may cause malfunctions of the copy machine. Instruction for service technician: The cable length for the service terminal has to be less than 10 feet (3 m).
!Andromeda_copy_sec.book 1 ページ 2006年11月23日 木曜日 午後6時1分 NOTICE for users in the USA BE SURE TO ASK YOUR AUTHORIZED SHARP DEALER ABOUT THE WARRANTY THAT YOUR SELLING DEALER EXTENDS TO YOU. In order to assure you, the end-user, of warranty protection, Sharp extends a limited warranty to each of its authorized dealers and, in turn, requires each of its authorized dealers to extend its own warranty to you on terms that are no less favorable than those given to the dealer by Sharp.
!Andromeda_copy_sec.book 1 ページ 2006年11月23日 木曜日 午後6時1分 AR-M257/AR-M317 (for copier) AR-M257/AR-M317 OPERATION MANUAL (for copier) SHARP ELECTRONICS CORPORATION Sharp Plaza, Mahwah, New Jersey 07430-1163. www.sharpusa.com SHARP ELECTRONICS OF CANADA LTD. 335 Britannia Road East, Mississauga, Ontario, L4Z 1W9 This manual has been printed using a vegetable-based soy oil ink to help protect the environment.
!Andromeda-NS_Sec.
!Andromeda-NS_Sec.book 2 ページ 2006年11月27日 月曜日 午後5時10分 Warranty While every effort has been made to make this operation manual as accurate and helpful as possible, SHARP Corporation makes no warranty of any kind with regard to its content. All information included herein is subject to change without notice. SHARP is not responsible for any loss or damages, direct or indirect, arising from or related to the use of this operation manual.
!Andromeda-NS_Sec.book 1 ページ 2006年11月27日 月曜日 午後5時10分 INTRODUCTION The network scanner expansion Kit enables the machine to be used as a network scanner. • To enable the network scanner function of this machine, a product key (password) must be entered using a key operator program. This is only required once. Use the "PRODUCT KEY" program to enter the product key. If you do not know your product key, please ask your dealer. (For information on using key operator programs, refer to key operator's guide.
!Andromeda-NS_Sec.book 2 ページ 2006年11月27日 月曜日 午後5時10分 CONTENTS INTRODUCTION ............................................... 1 1 BEFORE USING THE NETWORK SCANNER FUNCTION 3 TROUBLESHOOTING ABOUT THE NETWORK SCANNER FUNCTION.... 3 TROUBLESHOOTING.....................................32 SETTINGS AND PROGRAMMING REQUIRED FOR THE NETWORK SCANNER FEATURE........ 4 ● DISPLAY MESSAGES.................................. 33 ● IF YOUR E-MAIL IS RETURNED .................
!Andromeda-NS_Sec.book 1 3 ページ 2006年11月27日 月曜日 午後5時10分 Chapter 1 BEFORE USING THE NETWORK SCANNER FUNCTION ABOUT THE NETWORK SCANNER FUNCTION When the network scanner function is added to the machine, a document or photo can be scanned into an image file and sent over a network or the Internet to a file server, e-mail destination, or your own computer. The scanned image can be sent to the following types of destinations: 1.
!Andromeda-NS_Sec.book 4 ページ 2006年11月27日 月曜日 午後5時10分 SETTINGS AND PROGRAMMING REQUIRED FOR THE NETWORK SCANNER FEATURE To use the Network Scanner feature, settings for the SMTP server, DNS server, and destination addresses must be established. To establish the settings, use a computer that is connected to the same network as the machine to access the machine's Web page. The Web page can be displayed with your Web browser (Internet Explorer 6.0 or later, or Netscape Navigator 7.0 or later).
!Andromeda-NS_Sec.book 5 ページ 2006年11月27日 月曜日 午後5時10分 BEFORE USING THE NETWORK SCANNER FUNCTION ABOUT THE WEB PAGE When you access the Web page in the machine, the following page will appear in your browser. A menu frame appears on the left side of the page. When you click an item in the menu, a screen appears in the right frame that allows you to establish settings for that item. For detailed explanations of the procedures for establishing settings, click "Help" in the menu frame.
!Andromeda-NS_Sec.book 6 ページ 2006年11月27日 月曜日 午後5時10分 BEFORE USING THE NETWORK SCANNER FUNCTION BASIC SETTINGS FOR NETWORK SCANNING Click "Network Scanning" in the menu frame, and then establish the required settings. These settings should only be established by the network administrator. For detailed explanations of the procedures for establishing settings, click "Help" in the menu frame. 1 Click "Network Scanning" in the menu frame.
!Andromeda-NS_Sec.book 7 ページ 2006年11月27日 月曜日 午後5時10分 BEFORE USING THE NETWORK SCANNER FUNCTION SMTP SERVER AND DNS SERVER SETTINGS SMTP is used to transmit e-mail that is sent using Scan to E-mail or Scan to FTP (Hyperlink). To use these transmission methods, your SMTP server settings must be configured. Configuring SMTP server settings 1 Click "Services" in the menu frame. 3 Enter the required information in "SMTP Setup".
!Andromeda-NS_Sec.book 8 ページ 2006年11月27日 月曜日 午後5時10分 BEFORE USING THE NETWORK SCANNER FUNCTION CONFIGURING LDAP SERVER SETTINGS (WHEN USING AN LDAP SERVER) If mail addresses are managed on your network by an LDAP server, the e-mail addresses stored in the LDAP server can be used for Scan to E-mail. In addition, user authentication can be enabled to restrict use of the network scanner function by means of user passwords stored in the LDAP server. (p.
!Andromeda-NS_Sec.book 9 ページ 2006年11月27日 月曜日 午後5時10分 BEFORE USING THE NETWORK SCANNER FUNCTION PROGRAMMING CUSTOM INDEX NAMES Stored destinations appear as one-touch keys in the Address book screen of the touch panel (p.19). Each stored destination appears in the ABC (alphabetical) index, and can also be included in one of the six custom indexes (note that these are called "group indexes" in the touch panel). To program names for the custom indexes, follow the steps below.
!Andromeda-NS_Sec.book 10 ページ 2006年11月27日 月曜日 午後5時10分 BEFORE USING THE NETWORK SCANNER FUNCTION SETTING UP DESTINATION INFORMATION To store the name and address of a destination in a one-touch key, click "Destination" in the Web page menu frame. "Destination" can also be used to edit or clear stored destinations. (p.14) A total of 200 destinations can be stored, including E-mail, FTP, Desktop, and Group destinations.
!Andromeda-NS_Sec.book 11 ページ 2006年11月27日 月曜日 午後5時10分 BEFORE USING THE NETWORK SCANNER FUNCTION Storing destinations for Scan to FTP 1 Click "Destination" in the menu frame. 2 Click "FTP". Note 4 If you select the "Enable Hyperlink to FTP server to be e-mailed" checkbox and select a previously stored recipient (p.10) from "E-mail Destination", an e-mail will be sent to the recipient informing them of the file format and location of the scanned image data.
!Andromeda-NS_Sec.book 12 ページ 2006年11月27日 月曜日 午後5時10分 BEFORE USING THE NETWORK SCANNER FUNCTION Storing destinations for Scan to Desktop The destination for Scan to Desktop is stored by the Sharp Network Scanner Tool Setup Wizard when "Network Scanner Tool" is installed in your computer. For this reason, there is no need to store the Scan to Desktop destination in the Web page. (The Network Scanner Tool is on the CD-ROM that accompanied the Network Scanner Expansion Kit .
!Andromeda-NS_Sec.book 13 ページ 2006年11月27日 月曜日 午後5時10分 BEFORE USING THE NETWORK SCANNER FUNCTION Storing Groups (Scan to E-mail) If you are using Scan to E-mail, a scanned image can be sent to multiple destinations in a single operation. Note 1 Up to 100 destinations can be stored in one group. Click "Destination" in the menu frame. 3 Enter the destination information. For detailed explanations of the procedures for establishing settings, click "Help" in the menu frame. 2 1 Click "Group".
!Andromeda-NS_Sec.book 14 ページ 2006年11月27日 月曜日 午後5時10分 BEFORE USING THE NETWORK SCANNER FUNCTION Editing and deleting programmed transmission destinations To edit or delete programmed destinations, click "Destination" in the menu frame of the Web page. 1 Click "Destination" in the menu frame of the Web page. 3 To edit the selected destination, click "Edit" under the Destinations List. The programming screen of the destination selected in step 2 appears.
!Andromeda-NS_Sec.book 15 ページ 2006年11月27日 月曜日 午後5時10分 BEFORE USING THE NETWORK SCANNER FUNCTION STORING THE SENDER INFORMATION (Scan to E-mail) Use this procedure to store the sender information (sender name and e-mail address) that appears when you send an image by Scan to E-mail. Up to 200 senders can be stored (only one sender can be selected for a transmission). The sender name appears in the recipient's e-mail program. 1 Click "Sender" in the menu frame. 3 Enter the sender information.
!Andromeda-NS_Sec.book 16 ページ 2006年11月27日 月曜日 午後5時10分 BEFORE USING THE NETWORK SCANNER FUNCTION PROTECTING INFORMATION PROGRAMMED IN THE WEB PAGE ("Passwords") Passwords can be established to protect the settings and information stored in the Web page. Note that it is not necessary to set passwords; the network scanner functionality can also be used without passwords. A password can be set for the administrator and a password can be set for users.
!Andromeda-NS_Sec.book 17 ページ 2006年11月27日 月曜日 午後5時10分 BEFORE USING THE NETWORK SCANNER FUNCTION RESTRICTING USE OF THE NETWORK SCANNER FUNCTION (USER AUTHENTICATION) Use of the network scanner function can be restricted by means of user passwords stored in an LDAP server. Settings required for user authentication To implement user authentication, the following settings are required: • Enable user authentication (step 3 on page 6) • Configure LDAP server settings (p.8) • Store login names (p.
!Andromeda-NS_Sec.book 18 ページ 2006年11月27日 月曜日 午後5時10分 INITIAL SCREEN OF SCANNER MODE The condition setting screen of scanner mode is displayed by pressing the [SCAN] key (refer to the operation manual for copier) while the copy mode, print mode, fax mode, or job status screen appears in the touch panel. If user authentication is enabled, the initial screen will appear after authentication. (p.
!Andromeda-NS_Sec.book 19 ページ 2006年11月27日 月曜日 午後5時10分 BEFORE USING THE NETWORK SCANNER FUNCTION Address book screen Touch the [ADDRESS BOOK] key in the condition setting screen (previous page) to display the screen shown below at right. Destinations stored using the Web page are grouped in indexes ( 6 ) according to the letter entered in "Initial" for each destination, and the name entered in "Display Name" is displayed in the one-touch key ( 1 ). 1 2 3 1/2 CONDITION SETTINGS 4 READY TO SEND.
!Andromeda-NS_Sec.book 20 ページ 2006年11月27日 月曜日 午後5時10分 Chapter 2 2 HOW TO USE THE NETWORK SCANNER FUNCTION SENDING AN IMAGE BASIC TRANSMISSION METHOD 1 Make sure the machine is in scanner mode. COPY PRINT ON LI DATA SCAN DATA 2 When the [SCAN] key light is on, the machine is in scanner mode. If the light is not on, press the [SCAN] key. If user authentication is enabled, you must log in. (p.17) 4 For detailed information on loading an original, refer to the operation manual for copier.
!Andromeda-NS_Sec.book 21 ページ 2006年11月27日 月曜日 午後5時10分 HOW TO USE THE NETWORK SCANNER FUNCTION 8 Touch the one-touch key of the desired destination. READY TO SEND. TEST1 TEST2 TEST3 TEST4 TEST5 TEST6 TEST7 TEST8 FREQUENT USE Note 9 ABCD EFGHI JKLMN OP The key you touched is highlighted. If you touch the wrong key, touch the key again to cancel the selection. The key display will return to normal. • Refer to pages 10 to 13 for information on programming one-touch key destinations.
!Andromeda-NS_Sec.book 22 ページ 2006年11月27日 月曜日 午後5時10分 HOW TO USE THE NETWORK SCANNER FUNCTION TRANSMISSION METHODS FOR SCAN TO E-MAIL The destination for a Scan to E-mail transmission can be selected from the address book or entered manually. You can also use an e-mail address stored on an LDAP server. It is possible to select multiple destinations for a Scan to E-mail transmission using a combination of these methods.
!Andromeda-NS_Sec.book 23 ページ 2006年11月27日 月曜日 午後5時10分 HOW TO USE THE NETWORK SCANNER FUNCTION Sending an image by selecting an e-mail address in an LDAP server To use an LDAP server, the LDAP server settings must be configured in the Web page. 1 Perform steps 1 through 6 of "BASIC TRANSMISSION METHOD". (p.20) 2 Touch the [ADDRESS BOOK] key. ADDRESS BOOK 5 Touch the [OK] key. The server begins searching. When the search is finished, a list of the matching e-mail addresses appears.
!Andromeda-NS_Sec.book 24 ページ 2006年11月27日 月曜日 午後5時10分 HOW TO USE THE NETWORK SCANNER FUNCTION SCANNING AND TRANSMITTING A TWO-SIDED ORIGINAL (when an RSPF is installed) Follow these steps to automatically scan a two-sided original. 1 Make sure the machine is in scanner mode and then load the document in the RSPF. (p.20) 4 Touch the [OK] key. INAL SIZE OK MANUAL 2 You will return to the initial screen. Touch the [ORIGINAL] key.
!Andromeda-NS_Sec.book 25 ページ 2006年11月27日 月曜日 午後5時10分 HOW TO USE THE NETWORK SCANNER FUNCTION SCANNING A LARGE NUMBER OF ORIGINALS (when an RSPF is installed) If you have a large number of originals, the originals can be scanned in batches using the RSPF. 1 2 Make sure the machine is in scanner mode and then load the document in the RSPF. (p.20) Touch the [ORIGINAL] key. 5 Perform steps 4 through 9 of "BASIC TRANSMISSION METHOD". (p.20 to 21) 6 Press the [START] key ( ).
!Andromeda-NS_Sec.book 26 ページ 2006年11月27日 月曜日 午後5時10分 SCANNING SETTINGS (ORIGINAL SIZE, QUALITY, RESOLUTION, FILE FORMAT, AND SEND SETTING) When sending an image, you can change the original scan size, quality, resolution, file format, and file name. MANUALLY SETTING THE SCANNING SIZE If you load an original that is not a standard size, or if you wish to change the scanning size, touch the [ORIGINAL] key and set the original size manually.
!Andromeda-NS_Sec.book 27 ページ 2006年11月27日 月曜日 午後5時10分 HOW TO USE THE NETWORK SCANNER FUNCTION SELECTING THE QUALITY You can adjust the quality manually to match the type of original. After loading the original in scanner mode, follow the steps below. The factory default settings are "TEXT/PHOTO" for the image quality, and "AUTO" for the density. 1 Touch the [QUALITY] key. 4 Adjust the density.
!Andromeda-NS_Sec.book 28 ページ 2006年11月27日 月曜日 午後5時10分 HOW TO USE THE NETWORK SCANNER FUNCTION SELECTING THE RESOLUTION The resolution for scanning an original can be selected. Load the original in scanner mode and then follow the steps below. The factory default setting for the resolution is "300 dpi". Change the resolution 1 Touch the [RESOLUTION] key. QUALITY 300dpi RESOLUTION TIFF-G4 FILE FORMAT AUTO 8½X11 ORIGINAL 2 Touch the desired resolution key.
!Andromeda-NS_Sec.book 29 ページ 2006年11月27日 月曜日 午後5時10分 HOW TO USE THE NETWORK SCANNER FUNCTION SELECTING THE FILE FORMAT You can select the format of the image file that will be created (file type, compression mode, and pages per file). The factory default settings are "TIFF" for the file type, "MMR (G4)" for the compression mode, and "ALL" for the pages per file. 1 Touch the [FILE FORMAT] key.
!Andromeda-NS_Sec.book 30 ページ 2006年11月27日 月曜日 午後5時10分 HOW TO USE THE NETWORK SCANNER FUNCTION CHANGING THE SEND SETTINGS The file name of the scanned image can be changed. When performing Scan to E-mail, the subject and sender can also be changed. If the send settings are not changed, these items are entered automatically using the information stored in the Web page. 1 Touch the [SEND SETTINGS] key.
!Andromeda-NS_Sec.book 31 ページ 2006年11月27日 月曜日 午後5時10分 CANCELING AN E-MAIL/FTP TRANSMISSION You can cancel a transmission job that is in progress. Cancellation is done from the scanner job status screen. Note 1 You can cancel a transmission after scanning is finished by pressing the [CLEAR] key ( key ( ) while "SENDING. PRESS [C] TO CANCEL." appears in the touch key. Press the [JOB STATUS] key. LINE DATA FAX JOB STATUS 2 ) or the [CLEAR ALL] CUSTOM SE 2 Touch the [E-MAIL/FTP] key.
!Andromeda-NS_Sec.book 3 32 ページ 2006年11月27日 月曜日 午後5時10分 Chapter 3 TROUBLESHOOTING TROUBLESHOOTING If a problem or question arises, try to solve the situation using the following information before contacting your authorized SHARP dealer. Problem Cause and solution Page The original is loaded upside down. The image cannot be scanned. → If you are using the document glass, the original must be placed face down. If you are using the RSPF, the original must be inserted face up.
!Andromeda-NS_Sec.book 33 ページ 2006年11月27日 月曜日 午後5時10分 TROUBLESHOOTING Problem Cause and solution Page An incorrect destination was selected. Otherwise, there is a mistake in the information stored for the destination (e-mail address or FTP server information). The recipient does not receive transmitted data. The recipient does not receive data sent by e-mail (Scan to E-mail). Transmission takes a long time.
!Andromeda-NS_Sec.book 34 ページ 2006年11月27日 月曜日 午後5時10分 TROUBLESHOOTING Message Solution Page YOUR FILENAME IS WRONG. The characters ¥/;:*?"<> cannot be used in a file name. Select a name that does not use those characters. NO MATCHING ADDRESS FOUND. PRESS [OK] THEN [SEARCH AGAIN]. There are no addresses in the LDAP server that match your search text. Select a different server or change the search text. UNABLE TO ACCESS THE SERVER. CHECK SERVER ADDRESS ON DEVICE WEB PAGE.
!Andromeda-NS_Sec.book 35 ページ 2006年11月27日 月曜日 午後5時10分 TROUBLESHOOTING IMPORTANT POINTS WHEN USING SCAN TO E-MAIL Be very careful not to send image data files that are too large. Your mail server's system administrator may have placed a limit on the amount of data that can be sent in one e-mail transmission. If this limit is exceeded, the e-mail will not be delivered to the recipient.
!Andromeda-NS_Sec.book 36 ページ 2006年11月27日 月曜日 午後5時10分 CHECKING THE IP ADDRESS To check the IP address of the machine, print out the settings list from the operation panel of the machine. 1 Press the [CUSTOM SETTINGS] key. The custom settings screen will appear. LINE DATA CUSTOM SETTINGS B STATUS 2 Touch the [LIST PRINT] key. LAY AST LIST PRINT CL ESS ROL RECEIVE MODE FA F 3 Touch the [PRINTER TEST PAGE] key.
!Andromeda-NS_Sec.book 4 37 ページ 2006年11月27日 月曜日 午後5時10分 Chapter 4 METADATA DELIVERY METADATA DELIVERY (DATA ENTRY) When the application integration module is installed and an image file is generated for a scan send transmission, metadata (data indicating the attributes of the image file and how it is to be processed) can be generated based on pre-stored information and transmitted as a separate file. The metadata file is created in XML format.
!Andromeda-NS_Sec.book 38 ページ 2006年11月27日 月曜日 午後5時10分 PREPARATIONS FOR METADATA TRANSMISSION SETTINGS REQUIRED IN THE WEB PAGES All settings related to metadata are configured in the Web pages. (Administrator rights are required.) To configure metadata settings, click [Metadata Settings] in the Web page menu frame. Storing Metadata Sets Store the items (the metadata set) that are written to the XML file that is generated during scanning. Up to 10 metadata items can be configured in a metadata set.
!NS_05.fm 39 ページ 2006年11月27日 月曜日 午後5時26分 TRANSMITTING METADATA Follow the steps below to select a metadata set, enter each item, and perform metadata transmission. Installing Acrobat Reader 1 Touch the [DATA ENTRY] key. 5 Touch the key of the value that you wish to enter. CANCEL ADDRESS ADDRES SEND S DATA ENTRY 3 6 OK DIRECT ENTRY 1/9 Value2 Value4 Value6 Note 2 If no metadata sets have been stored, the [DATA ENTRY] key cannot be selected.
!NS_05.fm 40 ページ 2006年11月27日 月曜日 午後5時28分 METADATA DELIVERY 8 Touch the [OK] key. ATA SET CANCEL 9 Select image settings and any other settings, and perform the scan send procedure. READY TO SEND. OK 1/4 AUTO QUALITY 200dpi RESOLUTION PDF-NONE FILE FORMAT A3 ORIGINAL ADDRESS BOOK ADDRESS REVIEW ADDRESS ENTRY DATA ENTRY SEND SETTINGS • The procedures for selecting settings and performing transmission are the same as for scan send.
!Andromeda-NS_Sec.book 41 ページ 2006年11月27日 月曜日 午後5時10分 METADATA DELIVERY METADATA FIELDS The following three types of metadata are included in the XML file that is transmitted. ● Data automatically generated by the machine: These data are always included in the XML file and are automatically stored on your computer. ● Previously defined fields: These fields are automatically recognized by the machine and assigned to appropriate XML tags.
!Andromeda-NS_Sec.book 5 42 ページ 2006年11月27日 月曜日 午後5時10分 Chapter 5 SPECIFICATIONS For information on power requirements, power consumption, dimensions, weight, and other specifications that are common to all features of the machine, refer to the operation manual for copier.
!Andromeda-NS_Sec.
!Andromeda-NS_Sec.
!Andromeda-NS_Sec.
!NS_07_cover34.fm 2 ページ 2006年11月27日 月曜日 午後6時36分 Sharp Plaza, Mahwah, New Jersey 07430-1163. www.sharpusa.com SHARP ELECTRONICS OF CANADA LTD. 335 Britannia Road East, Mississauga, Ontario, L4Z 1W9 This manual has been printed using a vegetable-based soy oil ink to help protect the environment.
AR-M256/M257/M258/M316/M317/M318 Online Manual (for network printer) Start Click this "Start" button.
Introduction This manual describes the printer function of the AR-M256/M257/M258/M316/M317/M318 digital multifunctional system. ● Note For information on loading paper, replacing toner cartridges, clearing paper misfeeds, handling peripheral devices, and other copier-related information, please refer to your operation manual for copier. ● The machine's default settings and default settings for the printer function can be changed using the key operator programs.
How to use the online manual This section explains how to view the online manual. Please read this section before using the online manual. For information on using Acrobat Reader, see Acrobat Reader Help. How to Control the Online Manual Following Links In this manual, the following buttons are displayed at the bottom of each page. Click these buttons to move quickly to pages that you wish to view. This manual uses a link function that allows you to jump to a related page.
Contents Introduction How to use the online manual (part 1) 2 3 2 ADVANCED PRINTING (WINDOWS) Print hold function Printing using the print hold function 1 PRINTING FROM WINDOWS Basic printing ● When "Paper Selection" is set to "Auto Select" When the "Paper Selection" setting is "Paper Source" or "Paper Type" ● Auditing mode ● About the "No Offset" function setting ● Opening the printer driver from the "start" button Printer driver settings Two-sided printing ● Pamphlet style Printing multiple pages o
Contents (part 2) 4 PRINTING FROM MACINTOSH Basic printing ● SELECTING PAPER SETTINGS PRINTING ● When "Paper Feed" is set to "Auto Select" ● When "Paper Feed" is set to paper tray or paper type ● Two-sided printing ● Pamphlet style Printing multiple pages on one page Fitting the printed image to the paper Rotating the print image 180 degrees Printing a watermark Stapling printed pages (when a finisher is installed) ● ● When a finisher is installed When a saddle stitch finisher is installed Job contr
Contents (part 3) 7 WEB PAGE IN THE MACHINE About the Web page ● Accessing the Web page About the Web page (FOR USERS) Directly printing a file in a computer About the Web page (FOR THE ADMINISTRATOR) E-mail print function ● 78 78 79 80 81 82 Setting up the E-mail print function Using the E-mail print function 82 83 E-mail status and e-mail alert settings 84 ● ● Information setup SMTP setup ● Status message setup ● Alerts message setup ● Protecting information programmed in the web page ("Pass
PRINTING FROM WINDOWS 1 Basic printing (part 1) The following example explains how to print a document from WordPad. Before printing, make sure that the correct size of paper for your document has been loaded in the machine. 1 Make sure that the ON LINE indicator on the operation panel is lit. COPY PRINT ON LINE DATA SCAN DATA If the ON LINE indicator is not on, press the [PRINT] key to switch to printer mode and then touch the [ONLINE] key.
PRINTING FROM WINDOWS 1 5 Basic printing Click the "Print" button ("OK" button in Windows 98/Me/NT 4.0). Printing begins. The print job is delivered to one of the following trays (depending on which output devices are installed): ● Job separator tray kit is installed: Upper tray ● Finisher is installed: Center tray ● Note The output tray can be selected in the key operator programs (see "OUTPUT TRAYS" in the key operator's guide).
1 PRINTING FROM WINDOWS Basic printing (part 3) When the "Paper Selection" setting is "Paper Source" or "Paper Type" When "Paper Selection" in the "Paper" tab of the printer driver setup screen is set to: ● "Paper Source", select the tray that you wish to use for printing from the pull-down menu. ● "Paper Type", select the type of paper that you wish to use for printing from the pull-down menu.
1 PRINTING FROM WINDOWS Basic printing (part 4) Auditing mode When "AUDITING MODE" is enabled in the key operator programs, a 5-digit account number must be entered in the printer driver setup screen in order to print. Account numbers are stored in the key operator programs. (See "ACCOUNT CONTROL" in the key operator's guide.) To open the account number entry screen, click the "Job Control" button in the "Main" tab of the printer driver.
PRINTING FROM WINDOWS 1 Opening the printer driver from the "start" button Printer driver settings can be configured by opening the printer driver from the Windows "start" button. Settings adjusted in this way will be the initial settings when you print from an application. (If you change the settings in the printer driver setup screen at the time of printing, the settings will revert to the initial settings when you quit the application.) Windows 2000/XP/Server 2003 1 Windows 98/Me/NT 4.
1 PRINTING FROM WINDOWS Printer driver settings To view Help for a setting, click the button in the upper right-hand corner of the window and then click the setting. Some restrictions exist on the combinations of settings that can be selected in the printer driver setup screen. When a restriction is in effect, an information icon ( ) will appear next to the setting. Click the icon to view an explanation of the restriction.
1 PRINTING FROM WINDOWS Two-sided printing (part 1) This feature allows you to print on both sides of the paper. To use this function, open the printer driver setup screen and select "2-Sided (Book)" or "2-Sided (Tablet)" from "Document Style" in the "Main" tab. ☞See Basic printing for details on how to open the printer driver. ● Note Paper sizes that can be used for two-sided printing are Ledger, Letter, Letter-R, Legal, A3, A4, A4R, A5, B4, B5, B5R, and Foolscap.
1 PRINTING FROM WINDOWS Two-sided printing (part 2) Pamphlet style Pamphlet style prints two pages each on the front and back of each sheet of paper (four pages total on one sheet) so that the sheets can be folded down the center and bound to create a pamphlet. This function is convenient when you wish to compile printed pages into a pamphlet. To use this function, open the printer driver and select "Tiled Pamphlet" or "2-Up Pamphlet" in "Document Style" in the "Main" tab.
1 PRINTING FROM WINDOWS Printing multiple pages on one page This feature allows you to reduce and print two, four, six, eight or sixteen document pages on a single sheet of paper. To use this function, open the printer driver setup screen and select the number of pages per sheet (2-Up, 4-Up, 6-Up, 8-Up, or 16-Up) in "N-Up Printing" in the "Main" tab. The order of the pages can be changed in the "Order" menu. ☞See Basic printing for details on how to open the printer driver.
PRINTING FROM WINDOWS 1 Fitting the printed image to the paper The printer driver can adjust the size of the printed image to match the size of the paper loaded in the machine. Follow the steps shown below to use this function. The explanation below assumes that you intend to print a Ledger size document on letter size paper. ☞See Basic printing for details on how to open the printer driver. Note 1 The "Fit To Paper Size" setting is not available when "N-Up Printing" is selected.
1 PRINTING FROM WINDOWS Rotating the print image 180 degrees The print image can be rotated 180 degrees. This feature is used to enable correct printing on envelopes and other paper with flaps that can only be loaded in one orientation. Use this feature when automatic rotation (which takes place when the loaded paper is the same size as the print image and the orientations are different) results in reversal of the top and bottom of the image.
1 PRINTING FROM WINDOWS Printing a watermark You can print a watermark such as "CONFIDENTIAL" on your document. To print a watermark, open the printer driver, click the "Watermarks" tab, and follow the steps below. ☞See Basic printing for details on how to open the printer driver. How to Print a Watermark From the "Watermark" drop-down list, select the watermark that you wish to print (for example "CONFIDENTIAL"), and start printing. Print sample You can enter text to create your own custom watermark.
1 PRINTING FROM WINDOWS Stapling printed pages (when a finisher is installed) (part 1) When a finisher is installed, printed pages can be stapled. To use this feature, open the printer driver setup screen and select it in the "Finishing" field of the "Main" tab. ☞See Basic printing for details on how to open the printer driver. ● Note The maximum number of sheets that can be stapled is 30.
1 PRINTING FROM WINDOWS Stapling printed pages (when a finisher is installed) (part 2) When a saddle stitch finisher is installed When a saddle stitch finisher is installed, the binding edge and number of staples can be selected to produce the following printing results: Staple Left Right Top 1 Staple 2 Staples Punch function When a punch module is installed on a saddle stitch finisher, the "Punch" checkbox can be selected to punch holes in the printed output.
2 ADVANCED PRINTING (WINDOWS) Print hold function A print job sent to the machine can be held in the machine's memory until the operator initiates printing from the operation panel of the machine. This is called the Print Hold function. There are four methods for holding print jobs with the Print Hold function. Hold After Print Hold Before Print When this method is selected, the print job is printed and then retained in the machine's print hold job list.
2 ADVANCED PRINTING (WINDOWS) Printing using the print hold function (part 1) Selecting print hold settings in the printer driver at the time of printing Select the Print Hold function in the job control screen (see below), which is opened by clicking the "Job Control" button in the "Main" tab of the printer driver setup screen. ☞Basic printing 2 "Notify Job End" checkbox 1 2 3 1 "Retention" menu Select the Print Hold method that you wish to use.
2 ADVANCED PRINTING (WINDOWS) Printing using the print hold function (part 2) How to print a print hold job When you print a job using the Print Hold function, the job is stored in the print hold job list in the initial screen of printer mode. Follow the steps below to print the print hold job. 1 3 Press the [PRINT] key to switch to the initial screen of printer mode. COPY ON LINE DATA PRINT SCAN If you set a PIN number in the printer driver, press the numeric keys to enter the 5-digit number.
ADVANCED PRINTING (WINDOWS) 2 5 Printing using the print hold function Touch the [PRINT AND DELETE THE DATA] key or the [PRINT AND SAVE THE DATA] key. product_information.pdf CANCEL PRINT AND DELETE THE DATA PRINT AND SAVE THE DATA Note DELETE To delete the job after printing, touch the [PRINT AND DELETE THE DATA] key. To retain the job, touch the [PRINT AND SAVE THE DATA] key. 6 (part 3) Printing begins. If another print job is already in progress, the job is stored.
2 ADVANCED PRINTING (WINDOWS) Carbon copy print Carbon copy print is used to print copies of the same page on different types of paper. Each paper type is loaded in a different tray, and the different paper types must all be the same size. For example, carbon copy print can be performed with standard paper in tray 1 and colored paper in tray 2 for output as an invoice original and copy.
2 ADVANCED PRINTING (WINDOWS) Printing using carbon copy print To use the carbon copy print function, select the "Carbon Copy" checkbox in the "Paper" tab of the printer driver setup screen, and then click the "Carbon Copy Settings" button to configure print settings. 1 "Top Copy" menu Select the tray that will be used for the original. 2 "Carbon Copy" menu 1 2 Select the tray or trays that will be used for the carbon copies.
ADVANCED PRINTING (WINDOWS) 2 Printing text and lines in black Color text and lines that are faint when printed normally can be printed in black to improve legibility. Printing text in black Printing lines in black Text that is any color other than white is printed in black. To use this function, open the printer driver setup screen and select the "Text To Black" checkbox in the "Advanced" tab. Lines and solids that are any color other than white are printed in black.
3 PRINTER UTILITIES (WINDOWS) Printer utilities The "Software" CD-ROM contains the following two printer utilities. Printer Status Monitor (for general users) This allows the user to check on the computer screen whether or not the machine is able to print. It provides information on error states such as paper misfeeds and shows the configuration of the machine (number of trays, whether or not there is a finisher, etc.) by means of illustrations.
3 PRINTER UTILITIES (WINDOWS) Using the printer utilities (part 1) Starting up the printer utilities Using the printer utilities If the Printer Status Monitor or Printer Administration Utility is not running, use the following procedure to start the utilities. For information on using the Printer Status Monitor and Printer Administration Utility, see the Help files for each.
PRINTER UTILITIES (WINDOWS) 3 Using the printer utilities (part 2) Changing the Printer Status Monitor settings Once installed, the Printer Status Monitor normally runs in the background in Windows. If you need to change the Printer Status Monitor settings, follow the steps below. 1 Right-click the Printer Status Monitor icon ( ) on the task bar, and select "Preferences" from the pop-up menu. Note 2 Change the Printer Status Monitor settings as desired.
PRINTER UTILITIES (WINDOWS) 3 Using the printer utilities (part 3) Checking the printer status The Printer Status Monitor allows you to check whether or not toner and paper remain in the machine. 1 Right-click the Printer Status Monitor icon ( ) on the task bar, and select "SHARP AR-XXXX Status" from the pop-up menu. Note 2 The icon turns red when printing is not possible due to a machine error or other problem. Click the "Detail" button. To collapse the window, click the "Hide detail" button.
PRINTING FROM MACINTOSH 4 Basic printing (part 1) To use the machine as a printer for the Macintosh, and the PS3 expansion kit must be installed and the machine must be connected to a network. To install the PPD file and configure the printer driver settings, see the software setup guide for network printer. Before printing, make sure that the correct size of paper for your document has been loaded in the machine.
PRINTING FROM MACINTOSH 4 Basic printing (part 2) Mac OS 9 1 Select [Page Setup] from the [File] menu of SimpleText. 2 Make sure that the correct printer is selected. 3 Select paper settings. 4 Click the [OK] button. (2) The paper size, paper orientation, and enlarge/reduce can be selected. Note (3) (4) The machine name that appears in the "Format for" menu is normally [SCxxxxxx]. ("xxxxxx" is a sequence of characters that varies depending on your machine model.
PRINTING FROM MACINTOSH 4 Basic printing (part 3) PRINTING 1 Make sure that the ON LINE indicator on the operation panel is lit. COPY PRINT ON LINE DATA SCAN DATA 4 Make sure that the correct printer is selected. If the ON LINE indicator is not on, press the [PRINT] key to switch to printer mode and then touch the [ONLINE] key. The status of the printer function is indicated by the ON LINE and DATA indicators next to the [PRINT] key.
PRINTING FROM MACINTOSH 4 5 Basic printing Configure print settings. Click next to "Copies & Pages" ("General" in Mac OS 9.0 to 9.2.2) and select the settings that you wish to configure from the pull-down menu. The corresponding setting screen will appear. ☞Two-sided printing,Printing multiple pages on one page, Fitting the printed image to the paper, Rotating the print image 180 degrees, Printing a watermark, Stapling printed pages (when a finisher is installed), Job control function (Mac OS 9.0 to 9.2.
4 PRINTING FROM MACINTOSH Basic printing (part 5) When "Paper Feed" is set to "Auto Select" If "Paper Feed" is set to "Auto Select" in the Print window and the correct size of paper is not loaded in the machine, the printing method will vary depending on the "FORCED OUTPUT OF PRINT" setting in the key operator programs (see the key operator's guide).
4 PRINTING FROM MACINTOSH Basic printing (part 6) When "Paper Feed" is set to paper tray or paper type If "Paper Feed" (or "Paper Source" in "General" in Mac OS 9.0 to 9.2.
PRINTING FROM MACINTOSH 4 Two-sided printing (part 1) This feature allows you to print on both sides of the paper. Mac OS X Mac OS X (1) (1) (2) (2) 1 Select [Layout]. 1 Select [Output/Document Style]. 2 Select [Long-edged binding] or [Short-edged binding]. 2 Select [Flip on long edge] or [Flip on short edge]. ● Note In Mac OS X v10.1.5, select the settings in [Duplex]. ● In Mac OS X v10.2.8, select the settings in [Advanced].
4 PRINTING FROM MACINTOSH Two-sided printing (part 2) ● Note Paper sizes that can be used for two-sided printing are Ledger, Letter, Letter-R, Legal, A3, A4, A4R, A5, B4, B5, B5R, and Foolscap. ● Paper types that can be used for two-sided printing are Plain, Letter Head*, Recycled and Color. * The use of Letter Head paper for two-sided printing can be prohibited in the "TRAY SETTINGS" of the custom settings. (See "CUSTOM SETTINGS" in the operation manual for copier.
4 PRINTING FROM MACINTOSH Two-sided printing (part 3) Pamphlet style Pamphlet style prints two pages each on the front and back of each sheet of paper (four pages total on one sheet) so that the sheets can be folded down the center and bound to create a pamphlet. This function is convenient when you wish to compile printed pages into a pamphlet. Mac OS X (This function cannot be used in Mac OS X v10.1.5.) (1) (3) CONTENTS (2) 1 2 Select [Printer Features].
4 PRINTING FROM MACINTOSH Two-sided printing (part 4) Mac OS 9 (1) (2) 1 2 3 Select [Output/Document Style]. Select [Pamphlet(Left)] or [Pamphlet(Right)]. To staple, select [2 Stapling Pattern 7 (Pamphlet)]. [2 Stapling Pattern 7 (Pamphlet)] can be selected when a saddle stitch finisher is installed.
4 PRINTING FROM MACINTOSH Two-sided printing (part 5) The following examples show how 8 pages are printed when pamphlet style is selected. Print data Printing result Left Right ● Note Because four pages are printed on each sheet of paper, blank pages are automatically added at the end when the total number of pages is not a multiple of four. ● When "Tiled Pamphlet" is selected, printing will take place on paper that is twice the size of the paper size specified in the application.
4 PRINTING FROM MACINTOSH Printing multiple pages on one page (part 1) This feature allows you to reduce and print two, four, six, nine or sixteen document pages on a single sheet of paper. ☞See Basic printing for details on how to open the printer driver. For example, when "2-Up" or "4-Up" is selected, the result will be as follows depending on the selected order.
4 PRINTING FROM MACINTOSH Printing multiple pages on one page Mac OS X (part 2) Mac OS 9 (1) (1) (2) (4) (2) (3) (4) (3) 1 Select [Layout]. 1 Select [Layout]. 2 Select the number of pages per sheet. 2 Select the number of pages per sheet. 3 Select the order of the pages. 3 Select the order of the pages. 4 If you wish to print borderlines, select the desired type of borderline. 4 If you wish to print borderlines, select the desired type of borderline.
4 PRINTING FROM MACINTOSH Fitting the printed image to the paper The printer driver can adjust the size of the printed image to match the size of the paper loaded in the machine. (This function can only be used in Mac OS X v10.4 to 10.4.8.) Follow the steps shown below to use this function. The explanation below assumes that you intend to print a letter size document on Ledger size paper. ☞See Basic printing for details on how to open the printer driver. (2) (1) 1 Select [Paper Handling].
4 PRINTING FROM MACINTOSH Rotating the print image 180 degrees (part 1) The print image can be rotated 180 degrees. This feature is used to enable correct printing on envelopes and other paper with flaps that can only be loaded in one orientation. Use this feature when automatic rotation (which takes place when the loaded paper is the same size as the print image and the orientations are different) results in reversal of the top and bottom of the image.
4 PRINTING FROM MACINTOSH Rotating the print image 180 degrees Mac OS X (part 2) Mac OS 9 (1) (1) (2) (3) (2) 1 Select [Page Setup] from the [File] menu and click the button. 1 Select [Page Setup] from the [File] menu and select [PostScript Options]. 2 Click the [OK] button. 2 Select the [Flip Horizontal] and [Flip Vertical] checkboxes . The print image will show an image of the print result. 3 CONTENTS Click the [OK] button.
4 PRINTING FROM MACINTOSH Printing a watermark (part 1) You can print a watermark such as "CONFIDENTIAL" on your document. ☞See Basic printing for details on how to open the printer driver. How to Print a Watermark From the "Watermark" drop-down list, select the watermark that you wish to print (for example "CONFIDENTIAL"), and start printing.
PRINTING FROM MACINTOSH 4 Printing a watermark Mac OS X Mac OS 9 (2) 1 2 (part 2) (1) Select [Watermarks]. (1) (2) 1 Select [Watermark]. 2 Configure watermark settings. Detailed watermark settings can be configured. Select the text from the "Watermark" menu. Select the size and angle of the text from the corresponding menus. Click the [Watermark] checkbox and configure watermark settings. Detailed watermark settings can be configured such as selection of the text and editing of the font.
4 PRINTING FROM MACINTOSH Stapling printed pages (when a finisher is installed) (part 1) When a finisher is installed, printed pages can be stapled. ☞See Basic printing for details on how to open the printer driver. ● Note The maximum number of sheets that can be stapled is 30. When a saddle stitch finisher is installed, up to 50 sheets can be stapled (up to 25 sheets when the paper size is B4, Foolscap, or larger).
4 PRINTING FROM MACINTOSH Stapling printed pages (when a finisher is installed) (part 2) When a saddle stitch finisher is installed When a saddle stitch finisher is installed, the binding edge and number of staples can be selected to produce the following printing results: Staple Left Right Top 1 Staple 2 Staples Punch function When a punch module is installed on a saddle stitch finisher, holes can be punched in the printed output.
PRINTING FROM MACINTOSH 4 Stapling printed pages (when a finisher is installed) Mac OS X Mac OS 9 (1) 1 2 3 (part 3) (2) (1) (3) Select [Printer Features]. Select the "Binding Edge". Select the staple function or the punch function. For the staple function, select the number of staples in the "Staple" menu. For the punch function, click the [Punch] checkbox so that a checkmark appears. 1 2 (2) Select [Output/Document Style]. Select the staple function or the punch function.
4 PRINTING FROM MACINTOSH Job control function (Mac OS 9.0 to 9.2.2 and Mac OS X v10.2 to 10.4) Printing when auditing mode is enabled Using the print hold function When "AUDITING MODE" is enabled in the key operator programs, enter your 5-digit account number in "Account Number" in the "Job Control" menu of the Print window. The print hold function is enabled in "Job Control" in the Print window. Select the function that you wish to use in the "Retention" menu. ● Note In Mac OS 9.0 to 9.2.
OPERATION AT THE MACHINE 5 Giving priority to a print job / Canceling a print job (part 1) Giving priority to a print job When a print job is waiting because the machine is copying or printing a received fax, the following procedure can be used to interrupt the current job and immediately print the print job. Use the print job status screen to give priority to the job. For more information on using the job status screen, see operation manual for copier. 1 Press the [JOB STATUS] key.
OPERATION AT THE MACHINE 5 Giving priority to a print job / Canceling a print job (part 2) Canceling a print job A print job in progress or waiting to be printed can be canceled. Use the print job status screen to cancel the job. 1 Press the [JOB STATUS] key. 3 LINE DATA FAX JOB STATUS The job in progress and the jobs waiting to be printed appear. Touch the key of the job that you wish to cancel. The touched key is highlighted. CUSTOM SETTING 4 Touch the [STOP/DELETE] key.
OPERATION AT THE MACHINE 5 Configuring the printer condition settings (part 1) The printer condition settings allow basic printer settings to be configured. The following items can be set: ● DEFAULT SETTINGS: Basic settings used in printing. ● PostScript SETTINGS*: Sets whether a PostScript error ● PCL SETTINGS: PCL symbol set, font, line feed code, and page is printed or not when a PostScript error occurs. other settings. *Appears when the PS3 expansion kit is installed.
5 4 OPERATION AT THE MACHINE Configuring the printer condition settings Touch the desired setting on the setting screen of the desired item and touch the [OK] key. 5 (part 2) When finished, touch the [EXIT] key. EXIT CONDITION SETTINGS OK DEFAULT SETTINGS DEFAULT SETTINGS PCL SETTINGS 1/4 TONER SAVE COPIES 1 ORIENTATION P PostScript SETTINGS To set another item, repeat steps 3 and 4.
OPERATION AT THE MACHINE 5 Configuring the printer condition settings (part 3) Printer condition setting menu Click on a setting to view an explanation of the setting.
5 OPERATION AT THE MACHINE Configuring the printer condition settings (part 4) Printer condition settings Factory default settings are indicated in bold.
5 OPERATION AT THE MACHINE Configuring the printer condition settings Item SMOOTHING Selections Enabled, Disabled (no checkmark) RESOLUTION EXTRA PRINT MODE 300dpi, 600dpi Enabled, Disabled (no checkmark) (part 5) Description This enables or disables smoothing. This function improves image quality by smoothing angles and curves in the image. When smoothing is enabled using a resolution of 600 dpi, an image quality equivalent to 1200 dpi can be obtained.
5 OPERATION AT THE MACHINE Configuring the printer condition settings Item 2-SIDE PRINT PAGE PROTECTION ROPM CONTENTS Selections 1-SIDED, 2-SIDED (Book), 2-SIDED (Tablet) Enabled (checkmark appears), Disabled Enabled (checkmark appears), Disabled (part 6) Description When "2-SIDED (Book)" is selected, two-sided printing takes place so as to allow binding at the left side. When "2-SIDED (Tablet)" is selected, two-sided printing takes place so as to allow binding at the top.
5 OPERATION AT THE MACHINE Configuring the printer condition settings (part 7) PCL SETTINGS Item PCL SYMBOL SET SETTING Selections Description This specifies which country's characters (PCL symbol set) are assigned to certain of the symbols in the character code list. The factory default setting is "3" (PC-8). The numbers corresponding to each PCL symbol set can be viewed by printing "PCL SYMBOL SET LIST" in "LIST PRINT" in the custom settings.
5 OPERATION AT THE MACHINE Configuring the printer condition settings (part 8) PostScript SETTINGS "PostScript SETTINGS" only appears when the PS3 expansion kit is installed. Item PRINT PS ERRORS CONTENTS Selections Enabled, Disabled (no checkmark) Description When this setting is enabled, an error description is printed each time a PostScript error occurs.
OPERATION AT THE MACHINE 5 Printing the printer setting and font lists To check the current printer condition settings or fonts that can be used, print the printer setting list or one of the font lists. 1 Press the [CUSTOM SETTINGS] key. LINE DATA B STATUS 2 3 CUSTOM SETTINGS Touch the [LIST PRINT] key. Y T LIST PRINT S L RECEIVE MODE Touch the [PRINTER TEST PAGE] key. 4 Touch the list that you wish to print. Printing begins.
6 TROUBLESHOOTING Troubleshooting This chapter describes how to solve printer problems. Refer to the relevant section based on the problem. To load paper, remove paper misfeeds, load staples in the finisher, remove jammed staples, or replace the toner cartridge, see "TROUBLESHOOTING" in operation manual for copier.
6 TROUBLESHOOTING Printing does not take place (part 1) Check the connections USB or parallel connection in Windows Network connection ■ Is the interface cable compatible with the machine and computer? ■ Is the LAN cable disconnected? Interface cables compatible with this machine are USB and parallel cables. Check which type of cable is supported by your computer. For the specifications of the interface cable, see "CONNECTING TO A COMPUTER" in the software setup guide for network printer.
6 TROUBLESHOOTING Printing does not take place (part 2) Check Your Computer ■ Is there enough computer memory or hard disk space? To use the machine, your computer must have sufficient memory and hard disk space. If there is insufficient hard disk space, delete unnecessary files to increase the free space of the hard disk. If there is insufficient memory, close unnecessary applications to increase memory available for printing.
6 TROUBLESHOOTING Printing does not take place (part 3) Check the machine ■ Power switch on? ■ Copy job being performed? Turn the power switch on. (See "POWER ON AND OFF" in the operation manual for copier) ■ Is the machine online? When the ON LINE indicator next to the [PRINT] key on the operation panel is lit, the machine is online and ready to print. If the ON LINE indicator is off, press the [PRINT] key and then touch the [ONLINE] key. (When [ONLINE] is highlighted, the machine is online.
TROUBLESHOOTING 6 Printing does not take place (part 4) Checking the printer driver ■ Is your machine selected correctly in the current application for the print job? Select the printer driver of the machine in the print settings window of the application. ● If the printer drivers appear as icons, click the icon of the machine. ● If the printer drivers are selected from a pull-down menu, select the printer driver of the machine from the menu.
6 TROUBLESHOOTING Improper printing operation Printing is slow ■ Simultaneous use of two or more application software programs? Start printing after quitting all unused application software programs. ■ Is an appropriate print quality selected in the printer driver? It takes longer to process the print data when "SMOOTHING" is enabled, and this may slow the printing speed. Be sure to select print quality settings that are appropriate for the image being printed.
6 TROUBLESHOOTING Improper printing operation ■ Does the print job include page sizes that cannot be stapled? Stapling is not possible if the print job includes page sizes that cannot be stapled. ■ Is the paper tray that is selected in the printer driver set to a paper size or paper type that cannot be used for stapling? On the machine, set the paper tray to be used for staple printing to a paper size and paper type that can be used for stapling.
6 TROUBLESHOOTING Print quality is not satisfactory (part 1) Check the paper being used ■ Non-standard paper used? Check that the paper conforms to the specifications. Refer to "LOADING PAPER" in the operation manual for copier. ■ Are you using paper with a high moisture content? Use paper that is in good condition, with a low moisture content and no curling. ■ Is the paper loaded with the wrong side up? Some types of paper have a front and a back side.
6 TROUBLESHOOTING Print quality is not satisfactory (part 2) The printed image is coarse Part of the printed image is missing ■ Have the printer driver settings been specified to suit both paper and the print job? ■ Did you set sufficient margins in the paper settings of your application? The printing resolution can be set to 600 dpi or 300 dpi. When 600 dpi or 300 dpi is selected, "SMOOTHING" can also be selected to improve the image quality.
6 TROUBLESHOOTING If a notice page is printed (part 1) If you find that a notice page has been printed at the end of a print job, the print data received from the computer has not been printed as specified. Fix the problem as explained below and then try printing again.
6 TROUBLESHOOTING If a notice page is printed Notice Page regarding memory full on the printer board **************************************************** Notice Page **************************************************** (part 2) Disabling notice page printing Notice page printing can be disabled using a key operator program (see "PROHIBIT NOTICE PAGE PRINTING" in the key operator's guide). The memory full error had occurred, a normal output was not able to be executed.
TROUBLESHOOTING 6 Removing the software (part 1) In the event that you need to remove the printer driver or utilities, follow these steps: Windows 1 Click the "start" button, and then click "Control Panel". On Windows 98/Me/NT 4.0/2000, click the "Start" button, select "Settings", and then click "Control Panel". 2 Click "Add or Remove Programs". 3 Select the driver or utility that you wish to remove from the list, and click the appropriate button to remove it. On Windows 98/Me/NT 4.
TROUBLESHOOTING 6 Removing the software (part 2) Mac OS X 1 Delete the printer that uses the machine's PPD file from the printer list. 2 Delete the PPD file. The PPD file has been copied to the following folder on the startup disk. [Library] - [Printers] - [PPDs] - [Contents] - [Resources] [en.lproj] Delete the PPD file of the machine from this folder. 3 Delete the installation information. The installation information file has been copied to the following folder on the startup disk.
7 WEB PAGE IN THE MACHINE About the Web page When the machine is connected to a network, you can access the machine's settings from your computer using a Web browser.
7 WEB PAGE IN THE MACHINE About the Web page (FOR USERS) When you access the user Web pages in the machine, the following page will appear in your browser. A menu frame appears on the left side of the page. When you click an item in the menu, a screen appears in the right frame that allows you to configure settings for that item. When you have finished configuring settings, be sure to click [Submit] to save them. For explanations of the settings, click [General] under [Help] in the menu frame.
7 WEB PAGE IN THE MACHINE Directly printing a file in a computer A file that can be accessed by your computer can be directly printed without using the printer driver by specifying the file's address. Any file that can be accessed by your computer can be printed by this method, including not only files in your computer but files in other computers connected to the same network. To directly print a file by this method, click "Submit Print Job" in the menu frame of the Web page.
7 WEB PAGE IN THE MACHINE About the Web page (FOR THE ADMINISTRATOR) In addition to the menus that appear for users, other menus that can only be used by the administrator appear in the administrator Web pages. A menu frame appears on the left side of the page. When you click an item in the menu, a screen appears in the right frame that allows you to configure settings for that item. Settings that can only be configured by the administrator are explained here.
7 WEB PAGE IN THE MACHINE E-mail print function (part 1) An e-mail account can be set up for the machine. When this is done, the machine will periodically check the e-mail server for e-mail and automatically print out any file attachments it receives. This provides a means for printing a file from a computer that does not have the printer driver installed, as the user can simply send the file to the machine as an e-mail attachment.
WEB PAGE IN THE MACHINE 7 E-mail print function (part 2) Using the E-mail print function To use the e-mail print function, attach the file that you wish to print to an e-mail message and send the e-mail to the machine's e-mail address. The machine can print the following file types: PCLXL, PCL5e, PS, PDF, and TIFF, with file extensions pcl, ps, pdf, tiff, and tif Control commands can be entered in the message of the e-mail to specify the number of copies and print format.
7 WEB PAGE IN THE MACHINE E-mail status and e-mail alert settings (part 1) These functions send information on machine use (print count, copy count, etc.) and error conditions (paper misfeed, out of paper, out of toner, etc.) via e-mail to the administrator of the machine or the dealer. Information setup SMTP setup Machine identification information for the status & alert E-mail function is configured in the "Information Setup" screen.
7 WEB PAGE IN THE MACHINE E-mail status and e-mail alert settings (part 2) Status message setup Use the status message function to send the current counter information, such as copy count, print count, and total output count, on a basis of the specified schedule. The destinations can be set for administrators and dealers respectively. To set up the status message, follow these steps: 1 In the link menu, click [Status Message].
7 WEB PAGE IN THE MACHINE E-mail status and e-mail alert settings (part 3) Alerts message setup Use the alert message function to send alert information, such as empty toner and trouble including paper misfeeds, to specified destinations when such problems occur. The destinations can be set for administrators and dealers respectively. To set up the alert message, follow the procedure shown below. 1 In the link menu, click [Alerts Message]. 2 Enter the destination addresses.
WEB PAGE IN THE MACHINE 7 Protecting information programmed in the web page ("Passwords") When the Web server is accessed, the user Web page initially opens. The user Web page shows only the menu that regular users use to perform tasks such as checking the machine's status, directly printing a file on a computer, and storing and editing destinations.
SPECIFICATIONS 8 Printer specifications Printing speed AR-M256/AR-M257/AR-M258: 25 pages/min. at 600 dpi AR-M316/AR-M317/AR-M318: 31 pages/min.
8 SPECIFICATIONS Printer driver specifications Function Frequently used functions Paper *1 *2 *3 *6 Number of copies Printing orientation Two-sided printing Binding Style Pamphlet Style N-up Number Order Border Paper Size Custom Paper Size Source Selection Cover Settings PCL6 PCL5e PS 1 to 999 Yes Yes Book/Tablet 1 to 999 Yes Yes Book/Tablet 1 to 999 Yes Yes Book/Tablet Yes Yes Yes 2, 4, 6, 8, 9, 16 2, 4, 6, 8, 9, 16 2, 4, 6, 8, 9, 16 Selectable Selectable Selectable On/Off On/Off On/Off Yes Ye
8 SPECIFICATIONS Printer driver specifications Function Graphics Fonts *4 *5 *7 *8 Resolution Halftone Graphics Mode Zoom Mirror Image Negative Image Fit to Page Resident fonts Selectable download fonts PCL6 PCL5e 600x600dpi/ 300x300dpi No Yes No No No Yes 80 fonts bitmap, TrueType, Graphics 600x600dpi/ 300x300dpi No Yes Yes No No Yes 80 fonts bitmap, TrueType, Graphics (part 2) PS Windows PPD Macintosh PPD 600x600dpi 600x600dpi 600x600dpi Yes No Yes Yes Yes Yes 136 fonts bitmap, Type 1, T
8 SPECIFICATIONS Printer driver specifications Function Other functions Auto configuration Settings Overlay Watermark Job Compression Bitmap Compression (part 3) Yes Windows PPD No Macintosh PPD Yes*7 Yes Yes Yes Yes No Yes No No No Yes No No PCL6 PCL5e PS Yes Yes Yes Yes No No Yes Yes No No *7 Cannot be used in Mac OS X.
AR-M256/M257/M316/M317/5625/5631 Online Manual Start Click this "Start" button.
Introduction This manual describes the printer function of the M256/M257/M316/M317/5625/5631digital multifunctional system. ● Note For information on loading paper, replacing toner cartridges, clearing paper misfeeds, handling peripheral devices, and other copier-related information, please refer to your operation manual for copier. ● The machine's default settings and default settings for the printer function can be changed using the key operator programs.
How to use the online manual This section explains how to view the online manual. Please read this section before using the online manual. For information on using Acrobat Reader, see Acrobat Reader Help. How to Control the Online Manual Following Links In this manual, the following buttons are displayed at the bottom of each page. Click these buttons to move quickly to pages that you wish to view. This manual uses a link function that allows you to jump to a related page.
Contents Introduction How to use the online manual 2 3 1 PRINT Basic printing Opening the printer driver from the "start" button Printer driver settings Two-sided printing Printing multiple pages on one page Fitting the printed image to the paper Rotating the print image 180 degrees Printing a watermark Stapling printed pages (when a finisher is installed) Giving priority to a print job Canceling a print job 5 8 9 10 11 12 13 14 15 17 18 3 TROUBLESHOOTING Troubleshooting Printing does not take place Imp
1 PRINT Basic printing (part 1) The following example explains how to print a document from WordPad. Before printing, make sure that the correct size of paper for your document has been loaded in the machine. 1 Make sure that the ON LINE indicator on the operation panel is lit. COPY PRINT ON LINE DATA SCAN DATA If the ON LINE indicator is not on, press the [PRINT] key to switch to printer mode and then touch the [ONLINE] key.
PRINT 1 5 Basic printing Click the "Print" button ("OK" button in Windows 98/Me/NT 4.0). Printing begins. The print job is delivered to one of the following trays (depending on which output devices are installed): ● Job separator tray kit is installed: Job separator tray ● Finisher is installed: Offset tray ● Note The output tray can be selected in the key operator programs (see "OUTPUT TRAYS" in the key operator's guide).
1 PRINT Basic printing (part 3) When the "Paper Selection" setting is "Paper Source" or "Paper Type" When "Paper Selection" in the "Paper" tab of the printer driver setup screen is set to: ● "Paper Source", select the tray that you wish to use for printing from the pull-down menu. ● "Paper Type", select the type of paper that you wish to use for printing from the pull-down menu.
1 PRINT Opening the printer driver from the "start" button Printer driver settings can be configured by opening the printer driver from the Windows "start" button. Settings adjusted in this way will be the initial settings when you print from an application. (If you change the settings in the printer driver setup screen at the time of printing, the settings will revert to the initial settings when you quit the application.) Windows 2000/XP 1 Click the "start" button, and then click "Control Panel".
1 PRINT Printer driver settings To view Help for a setting, click the button in the upper right-hand corner of the window and then click the setting. Some restrictions exist on the combinations of settings that can be selected in the printer driver setup screen. When a restriction is in effect, an information icon ( ) will appear next to the setting. Click the icon to view an explanation of the restriction.
1 PRINT Two-sided printing This feature allows you to print on both sides of the paper. To use this function, open the printer driver setup screen and select "2-Sided (Book)" or "2-Sided (Tablet)" from "Document Style" in the "Main" tab. ☞See Basic printing for details on how to open the printer driver. ● Note Paper sizes that can be used for two-sided printing are Ledger, Letter, Letter-R, Legal, A3, A4, A4R, A5, B4, B5, B5R, and Foolscap.
1 PRINT Printing multiple pages on one page This feature allows you to reduce and print two or four document pages on a single sheet of paper. To use this function, open the printer driver setup screen and select "2-Up" or "4-Up" for "N-Up Printing" on the "Main" tab. ☞See Basic printing for details on how to open the printer driver. Note The "N-Up Printing" setting is not available when "Fit To Paper Size" is selected.
PRINT 1 Fitting the printed image to the paper The printer driver can adjust the size of the printed image to match the size of the paper loaded in the machine. Follow the steps shown below to use this function. The explanation below assumes that you intend to print a Ledger size document on letter size paper. ☞See Basic printing for details on how to open the printer driver. Note 1 2 The "Fit To Paper Size" setting is not available when "N-Up Printing" is selected.
1 PRINT Rotating the print image 180 degrees The print image can be rotated 180 degrees. This feature is used to enable correct printing on envelopes and other paper with flaps that can only be loaded in one orientation. Use this feature when automatic rotation (which takes place when the loaded paper is the same size as the print image and the orientations are different) results in reversal of the top and bottom of the image.
1 PRINT Printing a watermark You can print a watermark such as "CONFIDENTIAL" on your document. To print a watermark, open the printer driver, click the "Watermarks" tab, and follow the steps below. ☞See Basic printing for details on how to open the printer driver. How to Print a Watermark From the "Watermark" drop-down list, select the watermark that you wish to print (for example "CONFIDENTIAL"), and start printing. Print sample You can enter text to create your own custom watermark.
1 PRINT Stapling printed pages (when a finisher is installed) (part 1) When a finisher is installed, printed pages can be stapled. To use this feature, open the printer driver setup screen and select it in the "Finishing" field of the "Main" tab. ☞See Basic printing for details on how to open the printer driver. ● Note The maximum number of sheets that can be stapled is 30.
1 PRINT Stapling printed pages (when a finisher is installed) (part 2) When a saddle stitch finisher is installed When a saddle stitch finisher is installed, the binding edge and number of staples can be selected to produce the following printing results: Staple Left Right Top 1 Staple 2 Staples Punch function When a punch module is installed on a saddle stitch finisher, the "Punch" checkbox can be selected to punch holes in the printed output. Select the punch hole positions in "Binding Edge".
PRINT 1 Giving priority to a print job When a print job is waiting because the machine is copying or printing a received fax, the following procedure can be used to interrupt the current job and immediately print the print job. Use the print job status screen to give priority to the job. For more information on using the job status screen, see operation manual for copier. 1 Press the [JOB STATUS] key. LINE DATA FAX JOB STATUS 4 Touch the [PRIORITY] key.
PRINT 1 Canceling a print job A print job in progress or waiting to be printed can be canceled. Use the print job status screen to cancel the job. 1 Press the [JOB STATUS] key. 3 LINE DATA FAX JOB STATUS The job in progress and the jobs waiting to be printed appear. Touch the key of the job that you wish to cancel. The touched key is highlighted. CUSTOM SETTING 4 Touch the [STOP/DELETE] key. TING DETAIL 2 Make sure that the [PRINT JOB] key is highlighted.
2 PRINTER SHARING Sharing the printer using windows networking The machine can be used as a shared printer in a Windows 98/Me/NT 4.0/2000/XP network environment. Note that the Windows network environment must already be established. Shared printer Print server Client Client Client "Print server" as explained here is a computer that is directly connected to the machine, and a "Client" is any other computer that is connected to the same network.
PRINTER SHARING 2 Shared printer settings On the computer to which the machine is directly connected Follow the steps below to use the computer directly connected to the machine as a print server. If your operating system is Windows 98/Me, start from step 1. If your operating system is Windows NT 4.0, 2000 or XP, open the control panel and then start from step 6. Note For detailed setting procedures, refer to the Operation Manual or the help file of your operating system.
PRINTER SHARING 2 Client settings (part 1) Follow the procedure below to install the printer driver in the client. Note 1 If your operating system is Windows NT 4.0, refer to "Settings in Windows NT 4.0". Click the "start" button, and click "Control Panel". In Windows 98/Me/2000, click the "Start" button and select "Settings". 2 Click "Printers and Other Hardware", and click "Printers and Faxes". 4 Click the "Next" button.
2 6 PRINTER SHARING Client settings Select "Browse for a printer", and click the "Next" button. (part 2) 7 In Windows 98/Me, click the "Browse" button. In Windows 2000, select "Type the printer name, or click Next to browse for a printer", and click the "Next" button. Select the printer to be shared in the network, and click the "Next" button. In Windows 98/Me, select the printer to be shared in the network, click the "OK" button and then click the "Next" button.
2 PRINTER SHARING Client settings (part 3) Settings in Windows NT 4.0 If your operating system is Windows NT 4.0, establish settings as follows in the printer properties after installing the printer driver. For the procedure for installing the printer driver, see "INSTALLING THE SOFTWARE" in the Software Setup Guide. 1 2 Click the "Start" button, select "Settings", and then click "Printers". 4 Select "Local Port" in the "Available Printer Ports" list, and click the "New Port" button.
3 TROUBLESHOOTING Troubleshooting This chapter describes how to solve printer problems. Refer to the relevant section based on the problem. To load paper, remove paper misfeeds, load staples in the finisher, remove jammed staples, or replace the toner cartridge, see "TROUBLESHOOTING" in operation manual for copier.
3 TROUBLESHOOTING Printing does not take place (part 1) Check the connections ■ Is the interface cable compatible with the machine and computer? Interface cables compatible with this machine are USB and parallel cables. Check which type of cable is supported by your computer. For the specifications of the interface cable, see "CONNECTING TO A COMPUTER" in the software setup guide.
3 TROUBLESHOOTING Printing does not take place (part 2) Check Your Computer ■ Is there enough computer memory or hard disk space? To use the machine, your computer must have sufficient memory and hard disk space. If there is insufficient hard disk space, delete unnecessary files to increase the free space of the hard disk. If there is insufficient memory, close unnecessary applications to increase memory available for printing.
3 TROUBLESHOOTING Printing does not take place (part 3) Check the machine ■ Power switch on? ■ Copy job being performed? Turn the power switch on. (See "POWER ON AND OFF" in the operation manual for copier) ■ Is the machine online? When the ON LINE indicator next to the [PRINT] key on the operation panel is lit, the machine is online and ready to print. If the ON LINE indicator is off, press the [PRINT] key and then touch the [ONLINE] key. (When [ONLINE] is highlighted, the machine is online.
3 TROUBLESHOOTING Printing does not take place (part 4) Checking the printer driver ■ Has the printer driver been installed properly? Check if the printer driver has been installed, following the steps listed below. 1 Click the "start" button, click "Control Panel", click "Printers and Other Hardware", and then click "Printers and Faxes". On Windows 98/Me/NT 4.0/2000, click the "Start" button, select "Settings" and then click "Printers". 2 Check if the "SHARP AR-XXXX" printer driver icon is shown.
3 TROUBLESHOOTING Improper printing operation Printing is slow ■ Simultaneous use of two or more application software programs? Start printing after quitting all unused application software programs. ■ Is an appropriate print quality selected in the printer driver? When the "Print quality" setting in the "Advanced" tab of the printer driver is "Normal" or "Photo", slow printing may result. Be sure to select a print quality that is suitable for the document or image being printed.
3 TROUBLESHOOTING Improper printing operation ■ Does the print job include page sizes that cannot be stapled? Stapling is not possible if the print job includes page sizes that cannot be stapled. ■ Is the paper tray that is selected in the printer driver set to a paper size or paper type that cannot be used for stapling? On the machine, set the paper tray to be used for staple printing to a paper size and paper type that can be used for stapling.
3 TROUBLESHOOTING Print quality is not satisfactory (part 1) Check the paper being used ■ Non-standard paper used? Check that the paper conforms to the specification. Refer to "LOADING PAPER" in the operation manual for copier. ■ Are you using paper with a high moisture content? Use paper that is in good condition, with a low moisture content and no curling. ■ Is the paper loaded with the wrong side up? Some types of paper have a front and a back side.
3 TROUBLESHOOTING Print quality is not satisfactory (part 2) The printed image is coarse Part of the printed image is missing ■ Has the printer driver been specified to suit both paper and the print job? ■ Did you set sufficient margins in the paper settings of your application? You can select "Draft", "Normal" or "Photo" for the print quality in the "Advanced" tab of the printer driver setup screen.
3 TROUBLESHOOTING If a Notice Page is printed If you find that a notice page has been printed at the end of a print job, the print data received from the computer has not been printed as specified. Fix the problem as explained below and then try printing again. If a Notice Page is printed If the following Notice Page is printed, check your settings for the Staple function.
TROUBLESHOOTING 3 Uninstalling the printer driver To delete a printer driver that has been installed using the installer, follow the procedure shown below. 1 Click the "start" button, and then click "Control Panel". On Windows 98/Me/NT 4.0/2000, click the "Start" button, select "Settings", and then click "Control Panel". 2 Click "Add or Remove Programs". 3 Delete the "SHARP M256/M257/M316/M317/5625/5631 Printer Driver" from the list of applications. On Windows 98/Me/NT 4.
4 SPECIFICATIONS Printer specifications Printing speed AR-M256/AR-M257/AR-5625: 25 pages/min. AR-M316/AR-M317/AR-5631: 31 pages/min. Resolution 600 dpi IMC Memory 32 MB* Additional memory slots 2 slots (maximum of 1024 MB of additional memory modules (168-pin SDRAM DIMM) can be installed) Interface IEEE 1284-compliant bi-directional parallel interface/USB 2.0 (Full-Speed/Low-Speed) interface * The factory default setting for memory used for the printer function is 16 MB.