MODEL Connections and Setup PG-A10X PG-A10S Introduction OPERATION MANUAL Basic Operation SHARP CORPORATION Easy to Use Functions LCD PROJECTOR Appendix Printed in Japan TINS-A505WJN1 03P02-JWM A10X_A10S#E_Print#H1+4.p65 1 03.2.
IMPORTANT For your assistance in reporting the loss or theft of your Projector, please record the Serial Number located on the bottom of the projector and retain this information. Before recycling the packaging, please be sure that you have checked the contents of the carton thoroughly against the list of “Supplied accessories” on page 14. Model No.: Serial No.: This equipment complies with the requirements of Directives 89/336/EEC and 73/23/EEC as amended by 93/68/ EEC.
SPECIAL NOTE FOR USERS IN THE U.K. The mains lead of this product is fitted with a non-rewireable (moulded) plug incorporating a 5A fuse. Should or and of the same rating as the fuse need to be replaced, a BSI or ASTA approved BS 1362 fuse marked above, which is also indicated on the pin face of the plug, must be used. Always refit the fuse cover after replacing the fuse. Never use the plug without the fuse cover fitted.
The supplied CD-ROM contains operation instructions in English, German, French, Swedish, Spanish, Italian, Dutch, Portuguese, Chinese (Traditional Chinese and Simplified Chinese) and Korean. Carefully read through the operation instructions before operating the projector. Die mitgelieferte CD-ROM enthält Bedienungsanleitungen in Englisch, Deutsch, Französisch, Schwedisch, Spanisch, Italienisch, Niederländisch, Portugiesisch, Chinesisch (Traditionelles Chinesisch und einfaches Chinesisch) und Koreanisch.
Before using the projector, please read this operation manual carefully. Introduction Introduction ENGLISH There are two important reasons for prompt warranty registration of your new SHARP Projector, using the REGISTRATION CARD packed with the projector. 1. WARRANTY This is to assure that you immediately receive the full benefit of the parts, service and labor warranty applicable to your purchase. 2.
WARNING: The cooling fan in this projector continues to run for about 90 seconds after the projector is turned off. During normal operation, when turning the power off always use the POWER OFF button on the projector or on the remote control. Ensure the cooling fan has stopped before disconnecting the power cord. DURING NORMAL OPERATION, NEVER TURN THE PROJECTOR OFF BY DISCONNECTING THE POWER CORD. FAILURE TO OBSERVE THIS WILL RESULT IN PREMATURE LAMP FAILURE.
Outstanding Features Introduction 1. Light and Compact Design • A4 / letter size projector weighing only 2.9 kg / 6.4 lbs can be easily transported from room to room or location to location. 2. Comfortable Operation, Classroom and Meeting Room Friendly • Low fan noise and front directed exhaust outlet insure minimal disturbance to your audience seated adjacent to the projector. • Short throw lens allows for image size of 100" at just 3.2 meters (10' 6"). 3.
Contents Introduction Easy to Use Functions Outstanding Features ......................................... 3 Contents ............................................................... 4 IMPORTANT SAFEGUARDS ............................... 6 How to Access the PDF Operation Manuals ..... 9 Part Names ........................................................ 10 Picture Display Mode ........................................ 40 Projector (Front and Top View) ................................
Introduction Italiano Appendix Carrying the Projector ...................................... 51 How to Use the Carrying Case ................................ 51 Maintenance ...................................................... 52 Replacing the Air Filter ..................................... 53 Cleaning and Replacing the Air Filter ..................... 53 Maintenance Indicators .................................... 55 Regarding the Lamp ......................................... 57 Lamp ................
IMPORTANT SAFEGUARDS CAUTION: Please read all of these instructions before you operate this product and save these instructions for later use. Electrical energy can perform many useful functions. This product has been engineered and manufactured to assure your personal safety. BUT IMPROPER USE CAN RESULT IN POTENTIAL ELECTRICAL SHOCK OR FIRE HAZARDS. In order not to defeat the safeguards incorporated in this product, observe the following basic rules for its installation, use and servicing. 1.
Unplug this product from the wall outlet and refer servicing to qualified service personnel under the following conditions: a. When the power-supply cord or plug is damaged. b. If liquid has been spilled, or objects have fallen into the product. c. If the product has been exposed to rain or water. d. If the product does not operate normally by following the operating instructions.
IMPORTANT SAFEGUARDS Be sure to read the following safeguards when setting up your projector. Caution concerning the lamp unit ■ Potential hazard of glass particles if lamp ruptures. In case of lamp rupture, contact your nearest Sharp Authorized Projector Dealer or Service Center for a replacement. See “Replacing the Lamp” on page 57.
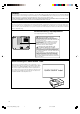
How to Access the PDF Operation Manuals Introduction PDF operation manuals in several languages are included in the CD-ROM, so that you can work with the projector, even if you do not have this manual. To utilize these manuals, you need to install Adobe Acrobat Reader on your PC (Windows or Macintosh). If you have not installed Acrobat Reader yet, you can install it from the CD-ROM. To install Acrobat Reader from the CD-ROM For Windows: 1 Insert the CD-ROM in the CD-ROM drive.
Part Names Numbers in refer to the main pages in this operation manual where the topic is explained. Projector (Front and Top View) Power indicator 26 55 Illuminates red when the projector is in standby. When the power is turned on, this indicator will illuminate green. Power ON/OFF buttons Illuminates green indicating normal function. Replace the lamp when the indicator illuminates red. 26 55 27 For entering the Keystone Correction mode.
Introduction Projector (Rear View) 18 INPUT 1 terminal Terminal for computer RGB and component signals. RS-232C terminal INPUT 2 terminal Terminal for connecting video equipment with an S-video terminal. 16 18 20 INPUT 3 terminal Terminal for connecting video equipment. For controlling the projector using a computer. 16 AUDIO INPUT terminal Shared audio input terminal for INPUT 1, 2 and 3.
Part Names Numbers in refer to the main pages in this operation manual where the topic is explained. Remote Control (Front View) Power ON/OFF buttons 26 For turning the power on or off. KEYSTONE button 32 For displaying adjustment and setting screens. 29 For entering the Keystone Correction mode. MENU button 32 Adjustment buttons (', ", \, |) For selecting menu items. UNDO button 29 For undoing an operation or returning to the previous display.
Using the Remote Control Introduction Usable Range ■ The remote control can be used to control the projector within the ranges shown in the illustration. Remote control sensor 45° Note • The signal from the remote control can be reflected off a screen for easy operation. However, the effective distance of the signal may differ depending on the screen material. When using the remote control: • Be sure not to drop, expose to moisture or high temperature.
Accessories Supplied accessories Remote control RRMCGA138WJSA Two R-6 batteries (“AA” size, UM/SUM-3, HP-7 or similar) Power cord* (1) (2) For U.S., Canada, etc. (6' (1.8 m)) QACCDA016WJPZ (4) (3) For Europe, except U.K. For U.K., Hong Kong and (6' (1.8 m)) Singapore QACCVA006WJPZ (6' (1.8 m)) QACCBA015WJPZ For Australia, New Zealand and Oceania (6' (1.8 m)) QACCLA005WJPZ * Use the power cord that corresponds to the wall outlet in your country. RGB cable (9'10" (3.
Connecting the Projector to Other Devices Before Connecting Note Connections and Setup • Before connecting, be sure to turn off both the projector and the devices to be connected. After making all connections, turn on the projector and then the other devices. When connecting a computer, be sure that it is the last device to be turned on after all the connections are made. • Be sure to read the operation manuals of the devices to be connected before making connections.
Connecting the Projector to Other Devices Connecting the Projector to a Computer Connecting to a Computer Using the RGB Cable 1 Connect the projector to the computer using the supplied RGB cable. Supplied accessories RGB cable Computer To RGB output terminal • Secure the connectors by tightening the thumbscrews. 2 To audio output terminal To input an audio signal, connect the projector to the computer using a ø3.
“Plug and Play” function (when connecting to a 15-pin terminal) ■ This projector is compatible with VESA-standard DDC 1/DDC 2B. The projector and a VESA DDC compatible computer will communicate their setting requirements, allowing for quick and easy setup. ■ Before using the “Plug and Play” function, be sure to turn on the projector first and the connected computer last.
Connecting the Projector to Other Devices Connecting to Video Equipment Connecting to Video Equipment Using an S-video, a Composite Video or an Audio Cable VCR or other audio-visual equipment To S-video output terminal To video output terminal To audio output terminal Using an S-video, video, or audio cable, a VCR, laser disc player or other audio-visual equipment can be connected to INPUT 2, INPUT 3 and AUDIO input terminals.
Connecting to Component Video Equipment *DTV is the umbrella term used to describe the 3RCA to 15-pin D-sub cable Type: AN-C3CP (9'10" (3.0 m)) To analog component output terminal Connections and Setup Use a 3 RCA to 15-pin D-sub cable when connecting to the INPUT 1 terminal, component video equipment such as DVD players and DTV* decoders. Optional cable To audio output terminal DVD player or DTV* decoder new digital television system in the United States.
Connecting the Projector to Other Devices Controlling the Projector Using a Computer Connecting to a Computer Using a DIN-Dsub RS-232C Adaptor and an RS-232C Serial Control Cable When the RS-232C terminal on the projector is connected to a computer with a DIN-D-sub RS232C adaptor and an RS-232C serial control cable (cross type, sold separately), the computer can be used to control the projector and check the status of the projector. See page 61 for details.
Setup Using the Adjustment Feet Rear adjustment foot (on the bottom) The height of the projector can be adjusted using the adjustment feet at the front and rear of the projector when the surface the projector is placed on is uneven or when the screen is slanted. The projection of the image can be made higher by adjusting the projector when it is in a lower place than the screen.
Setup Adjusting the Lens Focus Focusring ring Zoomknob knob Zoom The image is focused and adjusted to the desired size using the focus ring or zoom knob on the projector. 1 Adjust the focus by rotating the focus ring. 2 Adjust zooming by moving the zoom knob. ut mo Zoo m in Zoo 22 A10X_A10S#E_Print#p21_25.p65 22 03.2.
Setting up the Screen Position the projector perpendicular to the screen with all feet flat and level to achieve an optimal image. Note Connections and Setup • The projector lens should be centered in the middle of the screen. If the horizontal line passing through the lens center is not perpendicular to the screen, the image will be distorted, making viewing difficult. • For an optimal image, position the screen so that it is not in direct sunlight or room light.
Setup Screen Size and Projection Distance Base line: Horizontal line passing through the lens center Screen Lens center H L:Projection distance NORMAL Mode (4:3) Picture (Screen) size Diag. (χ) Width Projection distance (L) Height 300" (762 cm) 240" (610 cm) 180" (457 cm) Maximum (L1) Minimum (L2) 38' 9" (11.8 m) 32' 2" (9.8 m) Distance from the lens center to the bottom of the image (H) 18 3/16" (46.2 cm) 250" (635 cm) 200" (508 cm) 150" (381 cm) 32' 2" (9.8 m) 26'11" (8.
Projecting a Reversed/Inverted Image Projection from behind the Screen ■ Place a translucent screen between the projector and the audience. ■ Reverse the image by setting “Rear” in the “PRJ Mode” menu. See page 50 for use of this function. Connections and Setup Projection Using a Mirror When using the default setting. ▼On-screen Display The image is reversed. ■ Place a mirror (normal flat type) in front of the lens.
Image Projection Basic Procedure Connect the required external equipment to the projector before carrying out the following procedures. Info Lamp Power replacement indicator indicator Power ON button Power OFF button INPUT button • The language preset at the factory is English. If you want to change the on-screen display to another language, reset the language according to the procedure on page 28. 1 Volume buttons Plug the power cord into the wall outlet.
"On-screen Display (Example) Press , or on the remote control to select the INPUT mode. • After pressing use Using RGB once on the projector, to select the desired input mode. Note INPUT 2 mode Using S-Video INPUT 3 mode Using Video ➝ Basic Operation About the INPUT mode INPUT 1 Used for projecting im(RGB/ ages from equipment that Component) sends RGB signals or component signals connected to the RGB input terminal.
Image Projection 6 Press on the projector or on the remote control, then press that button again while the confirmation message is displayed, to turn off the projector. Power OFF button ENTER button MENU button ', ", \, | buttons Note • If you accidentally pressed or and do not want to turn off the power, wait until the confirmation message disappears. • The projector cannot be operated while a message “Shutting down. Please wait.” is displayed.
Keystone Correction (Correcting Trapezoidal Distortion) Correcting Trapezoidal Distortion This function allows for Keystone (On-screen Trapezoidal Distortion) Correction. KEYSTONE button UNDO button ', ", \, | buttons Note • When the image is projected either from the top or from the bottom towards the screen at an angle, the image becomes distorted trapezoidally. The function for correcting trapezoidal distortion is called Keystone Correction.
Menu Items This list shows the items that can be set in the projector.
■ INPUT 2 / 3 Mode Main menu Picture Page 36 Sub menu Contrast −30 +30 Bright −30 +30 Color −30 +30 Tint −30 +30 Sharp −30 +30 Red −30 +30 Blue −30 +30 Main menu Language Page 28 English Deutsch Español Nederlands Français Italiano Svenska Português Reset Page 44 5500 K 6500 K 7500 K 8500 K 9300 K 10500 K Gamma Standard Presentation Cinema Game Memory Memory 1 Memory 5 Memory OFF PRJ Mode Page 50 Front Ceiling+Front Rear Ceiling+Rear Basic Operation Options CLR Temp Lamp
Using the Menu Screen The menu screens allow you to adjust the image and various projector settings. You can operate the menus from the remote control using the following procedure. Example: “Picture” menu screen for INPUT 1 (RGB) mode Menu Selections (Adjustments) 1 Press . • The “Picture” menu screen for the selected input mode is displayed. ENTER button UNDO button MENU button ', ", \, | buttons Note • The on-screen display shown on the right is displayed when the INPUT 1 (RGB) mode is selected.
3 Press ' or " to select the item you want to adjust. • The selected item is highlighted. Note • To display a single adjustment item, press after selecting the item. Only the selected adjustment item will be displayed. Then if you press ' or ", the following item (“Red” after “Bright”) will be displayed. • Press to return to the previous screen. 4 Basic Operation Press \ or | to adjust the item selected. • The adjustment is stored. 5 Press . • The menu screen will disappear.
Using the Menu Screen Menu Selections (Settings) 1 Press . • The “Picture” menu screen for the selected input mode is displayed. ENTER button UNDO button MENU button ', ", \, | buttons Note • The on-screen display shown on the right is displayed when INPUT 1 (RGB) mode is selected. Menu icons 2 Press \ or | to display the other menu screens. • The menu icon for the selected menu screen is highlighted.
3 Press ' or " to select the item you want to set, and then press | to display the sub menu. • The selected item is highlighted. Note • Press or \ to return to the previous screen. • For some items, press \ or | to se”. lect the icon using “ Sub menu Press ' or " to select the setting of the item displayed in the sub menu. 5 Press 6 Press Basic Operation 4 . • The item selected is set. . • The menu screen will disappear. 35 A10X_A10S#E_Print#p32_39.p65 35 03.2.
Picture Adjustment You can adjust the projector’s picture to your preferences using the “Picture” menu. For operation of the menu screen, see pages 32 to 35. Example: “Picture” screen menu for INPUT 1 (RGB) mode Adjusting the Image Select the item on the “Picture” menu and adjust the image. Description of Adjustment Items Selectable items Contrast Bright Color Tint Sharp Red Blue Press \ Press | for less contrast. for less brightness. for less color intensity. for making skin tones purplish.
Gamma (Gamma Correction) Gamma is an image quality enhancement function that offers a richer image by brightening the darker portions of the image without altering the brightness of the brighter portions. When you are displaying images with frequent dark scenes, such as a film or concert, or when you are displaying images in a bright room, this feature makes the dark scenes easier to see and gives the impression of greater depth in the image. Select “Gamma” on the “Picture” menu and the desired gamma mode.
Computer Image Adjustment Using the “Fine Sync” menu, you can adjust the computer image, match the computer display mode, and check the input signal. For operation of the menu screen, see pages 32 to 35. Example: “Fine Sync” menu screen for INPUT 1 mode Adjusting the Computer Image In case of irregularities such as vertical stripes or flickering in portions of the screen, adjust “Clock”, “Phase”, “H-Pos” or “V-Pos” to obtain an optimal computer image.
Signal Info (Checking the Input Signal) Select “Signal Info” on the “Fine Sync” menu to check the current input signal information. Note • The projector will display the number of scanned lines available from audio-visual equipment such as a DVD player or Digital Video. Basic Operation 39 A10X_A10S#E_Print#p32_39.p65 39 03.2.
Picture Display Mode This function allows you to modify or customize the picture display mode to enhance the input image. Depending on the input signal, you can choose “NORMAL”, “DOT BY DOT”, “BORDER” or “STRETCH” image. Switching the Picture Display Mode Press UNDO button RESIZE button . • Pressing changes the display as shown on pages 40 and 41. • To return to the standard image, press “RESIZE” is displayed on the screen.
VIDEO NORMAL PG-A10X PG-A10X 480I, 480P, 540P, NTSC, PAL, SECAM 720P, 1080I 4:3 aspect ratio. Letter box, squeeze 16:9 aspect ratio BORDER PG-A10X PG-A10S STRETCH PG-A10X PG-A10S 1024 × 768 800 × 600 768 × 576 600 × 450 — — — — 1024 × 576 800 × 450 • “STRETCH” is fixed when 720P or 1080I signals are entered. Output screen image Input Signal DVD / Video NORMAL BORDER STRETCH Projects a full screen image. Projects 4:3 image fully in STRETCH (the following column) image.
Still and Zoom Image You can instantly freeze a moving image and enlarge a specific portion of an image with the remote control. Using these functions, you can explain the image to the audience more effectively. UNDO button ', ", \, | buttons ENLARGE (Enlarge/ Reduce) buttons FREEZE button Freezing a Moving Image 1 Press Displaying an Enlarged Portion of an Image 1 . Press . • Pressing or the projected image. • The projected image is frozen.
Keylock Function Use this function to lock the operation buttons on the projector. Power ON button Locking the Operation Buttons Hold down on the projector for about 3 seconds while the projector is being turned on. Note Taking the Keylock off Hold down on the projector for about 3 seconds while the projector is being turned on. • You can take the keylock off by holding down on the projector for about 3 seconds while the projector is in standby mode.
Using the “Options” Menu You can use the “Options” menu to enhance the usage for the projector. For operation of the menu screen, see pages 32 to 35. Example: “Options” menu screen for INPUT 2 (S-Video) mode Lamp Timer (Life) (Check- OSD Display (Setting On- ing the Lamp Life Status) screen Display) You can confirm the cumulative lamp usage time and the remaining lamp life (percentage). This function allows you to turn the on-screen messages on or off.
Video System (Setting the Background (Selecting a Video System) Startup and Background Image) The video input system mode is preset to “Auto”; however, a clear picture from the connected audiovisual equipment may not be received, depending on the video signal difference. In that case, switch the video signal. Select “Background” on the “Options” menu and the image displayed upon the projector’s startup and when no signal is being sent to the projector.
Using the “Options” Menu Example: “Options” menu screen for INPUT 2 (S-Video) mode Auto Power Off (Auto Menu Position (Selecting Power Off Function) the Menu Screen Position) When no input signal is detected for more than 15 minutes, the projector will automatically power off if set to “ON”. The Auto Power Off function will be disabled if it has been set to “OFF”. Select “Menu Position” on the “Options” menu and the desired position for the menu screen.
Password 1 Press ', " and | to enter the password in “Old Password” and press . 2 Press ', " and | to set the new . password and press 3 Enter the new 4-digit password again in “Reconfirm” and press (Setting a Pass- word) A password must be set to activate the “Anti-Theft” function (Page 48). There is no factory preset for the password or the “Anti-Theft” settings. In this way, anyone can freely set a new password and “Anti-Theft” settings.
Using the “Options” Menu Example: “Options” menu screen for INPUT 2 (S-Video) mode Anti-Theft 1 (Setting the Anti- Theft) The anti-theft function prevents unauthorized use of the projector. You can choose to use this function or not. If you do not want to use this function, just do not enter the keycode. Once the anti-theft function is activated, users will need to enter the correct keycode each time the projector is turned on. Failure to enter the correct keycode will cause images to not be projected.
If you want to change the keycode, follow the procedure below. Note • When “Anti-Theft” is selected, the password input box will appear. After the password has been entered, you can change the keycode. 1 Press the buttons on the remote control or the projector to enter the preset 4-digit keycode in “Old Code”. 2 Press any button you like on the remote control or the projector to enter the new keycode. 3 Enter the same 4-digit keycode in “Reconfirm”.
Reversing/Inverting Projected Images You can reverse or invert the projected image for various applications using the “PRJ Mode” menu. For operation of the menu screen, see pages 32 to 35. Example: “PRJ Mode” menu screen for INPUT 1 (RGB) mode Setting the Projection Mode Display the “PRJ Mode” menu and select the desired projection mode.
Carrying the Projector How to Use the Carrying Case When carrying the projector, attach the lens cap to the lens, and place it in the supplied carrying case. 1 Open the cover of the carrying case. 2 Remove the inner padding from the carrying case, and fold it in the direction of the arrows. 3 Reinsert the inner padding into the carrying case. Info • Be sure to insert the inner padding to protect the lens and the projector. 4 Lens cap Place the projector and the accessories in the carrying case.
Maintenance Cleaning the projector Cleaning the lens ■ Be sure to unplug the power cord before cleaning the projector. ■ The cabinet as well as the operation panel is made of plastic. Avoid using benzene or thinner, as these can damage the finish on the cabinet. ■ Do not use volatile agents such as insecticides on the projector. Do not attach rubber or plastic items to the projector for a long time.
Replacing the Air Filter • This projector is equipped with air filters to ensure the optimal operating condition of the projector. • The air filters should be cleaned every 100 hours of use. Clean the filters more often when the projector is used in a dusty or smoky location. • Ask your nearest Sharp Authorized Projector Dealer or Service Center to exchange the filter (PFILDA008WJZZ) when it is no longer possible to clean.
Replacing the Air Filter 4 Clean the air filter. 5 Replace the air filter. 6 Replace the filter/lamp unit cover. • Clean the dust off the air filter and cover with a vacuum cleaner extension hose. • Place the air filter underneath the tabs on the filter/lamp unit cover. • Align the tab on the filter/lamp unit cover (1) and place it while pressing the tab (2) to close it. Then tighten the user service screw (3) to secure the filter/ lamp unit cover.
Maintenance Indicators ■ The warning lights on the projector indicate problems inside the projector. ■ If a problem occurs, either the temperature warning indicator or the lamp replacement indicator will illuminate red, and the power will turn off. After the power has been turned off, follow the procedures given below.
Maintenance Indicators Info • If the temperature warning indicator illuminates, and the power turns off, follow the above possible solutions and then wait until the projector has cooled down completely before plugging in the power cord and turning the power back on. (At least 5 minutes.) • If the power is turned off and then turned on again, as during a brief test, the lamp replacement indicator may be triggered, preventing the power from going on.
Regarding the Lamp Lamp ■ It is recommended that the lamp (sold separately) be replaced when the remaining lamp life becomes 5% or less, or when you notice a significant deterioration in the picture and color quality. The lamp life (percentage) can be checked with the on-screen display. See page 44. ■ For lamp replacement, please consult your nearest Sharp Authorized Projector Dealer or Service Center. IMPORTANT NOTE TO U.S.
Regarding the Lamp Removing and Installing the Lamp Unit Lamp unit BQC-PGA10X//1 Info • Be sure to remove the lamp unit using the handle. Be sure not to touch the glass surface of the lamp unit or the inside of the projector. • To avoid injury to yourself and damage to the lamp, be sure to carefully follow the steps below. • Do not loosen other screws except for the filter/lamp unit cover and lamp unit. • Please refer to the installation manual included with the lamp unit.
5 Remove the lamp unit. 6 Insert the new lamp unit. 7 Replace the filter/lamp unit cover. Handle • Loosen the securing screws from the lamp unit. Hold the lamp unit by the handle and pull it in the direction of the arrow. At this time, keep the lamp unit horizontal and do not tilt it. • Press the lamp unit firmly into the lamp unit compartment. Fasten the securing screws. Securing screws • Align the tab on the filter/lamp unit cover (1) and place it while pressing the tab (2) to close it.
Connecting Pin Assignments INPUT 1 RGB Signal Terminal: 15-pin Mini D-sub female connector RGB Input 5 10 15 1 6 11 1. 2. 3. 4. 5. 6. 7. 8. 9. 10. 11. 12. 13. 14. 15. Component Input Video input (red) Video input (green/sync on green) Video input (blue) Not connected Not connected Earth (red) Earth (green/sync on green) Earth (blue) Not connected GND Not connected Bi-directional data Horizontal sync signal Vertical sync signal Data clock 1. 2. 3. 4. 5. 6. 7. 8. 9. 10. 11. 12. 13. 14. 15.
RS-232C Specifications and Command Settings PC control A computer can be used to control the projector by connecting an RS-232C serial control cable (cross type, sold separately) to the projector. (See page 20 for connection.) Communication conditions Set the serial port settings of the computer to match that of the table. Signal format: Conforms to RS-232C standard.
Computer Compatibility Chart Computer • Multiple signal support Horizontal Frequency: 15–70 kHz, Vertical Frequency: 43–85 Hz, Pixel Clock: 12–108 MHz • Compatible with sync on green and composite sync signals • SXGA+ and SXGA compatible in intelligent compression • Intelligent Compression and Expansion System resizing technology The following is a list of modes that conform to VESA. However, this projector supports other signals that are not VESA standards.
Troubleshooting Problem No picture and no sound or projector does not start. Check • Projector power cord is not plugged into the wall outlet. • Power to the external connected devices is off. • The selected input mode is wrong. • The AV MUTE function is working. • Cables incorrectly connected to rear panel of the projector. • Remote control batteries have run out. • External output has not been set when connecting notebook computer. • The filter/lamp unit cover is not installed correctly.
Troubleshooting Problem Check • Change the input signal type setting. Picture is green on INPUT 1 COMPONENT. Picture is pink (no green) on INPUT 1 RGB. • The lamp replacement indicator is illuminating in red. Replace Picture is dark. the lamp. Picture is too bright and • Picture adjustments are incorrectly set. whitish. 64 A10X_A10S#E_Print#p63_70.p65 64 03.2.
For SHARP Assistance If you encounter any problems during setup or operation of this projector, first refer to the “Troubleshooting” section on pages 63 and 64. If this operation manual does not answer your question, please contact the SHARP Service departments listed below. U.S.A. Sharp Electronics Corporation 1-888-GO-SHARP (1-888-467-4277) lcdsupport@sharpsec.com http://www.sharplcd.com Canada Sharp Electronics of Canada Ltd. (905) 568-7140 http://www.sharp.
Specifications Product type LCD Projector Model PG-A10X / PG-A10S Video system NTSC3.58/NTSC4.43/PAL/PAL-M/PAL-N/PAL-60/SECAM/ DTV480I/DTV480P/DTV540P/DTV580I/DTV580P/DTV720P/DTV1035I/DTV1080I Display method LCD panel × 3, RGB optical shutter method LCD panel Panel size: 0.79" (20.0 mm) (12 [H] × 16 [W] mm) No. of dots: [PG-A10X] 786,432 dots (1,024 [H] × 768 [V]) [PG-A10S] 480,000 dots (800 [H] × 600 [V]) Standard lens 1–1.2 × zoom lens, F1.9–2.
Dimensions Units: inches (mm) Rear View Top View 11 45/64 (297) Side View 9 1/32 (229) Side View ø 66 25/32 (19.5) Front View 10 13/64 (258.8) 1 59/64 (48.5) 6 21/32 49/64 3 33/64 (89) 3 13/64 (81) 1 35/64 (39.2) 3 9/64 (79.5) (19.1) (169) M4 7 3/32 (180) 7 7/64 (180.5) Appendix 7 53/64 (198.5) Bottom View M4 M4 13/64 5 55/64 (148.5) (5) 7 11/16 (195) 67 A10X_A10S#E_Print#p63_70.p65 67 03.2.
Glossary Anti-Theft Phase If the “Keycode” set in the projector is not correctly entered, the projector will not operate even if signals are entered. Aspect Ratio Width and height ratio of an image. The normal aspect ratio of a computer and video image is 4:3. There are also wide images with an aspect ratio of 16:9 and 21:9. Auto Sync Optimizes projected computer images by automatically adjusting certain characteristics. Background Initial setting image projected when no signal is being output.
Index AC socket ............................................................. 15 Adjusting the Lens ............................................... 22 Adjustment buttons .............................................. 32 Adjustment feet .................................................... 21 Air filter ................................................................. 53 Anti-Theft ............................................................. 48 Aspect ratio ...................................................
MEMO 70 A10X_A10S#E_Print#p63_70.p65 70 03.2.
Bitte lesen Sie diese Bedienungsanleitung vor der Verwendung des Projektors sorgfältig durch. Einführung DEUTSCH Es gibt zwei wichtige Gründe für die baldige Garantie-Registrierung dieses neuen Projektors von SHARP mit Hilfe der dem Projektor beiliegenden REGISTRIERUNGS-KARTE: 1. GARANTIE Hierdurch wird sichergestellt, dass Sie sofort den vollständigen Anspruch auf die Garantie auf Bauteile, Service und Personalkosten dieses Gerätes haben. 2.
WICHTIGE SICHERHEITSHINWEISE ACHTUNG: Vor der ersten Inbetriebnahme dieses Gerätes sollten Sie diese Bedienungsanleitung durchlesen und für die Bezugnahme gut aufbewahren. Elektrische Energie kann viele nützliche Funktionen ausführen. Dieses Gerät wurde so konstruiert, dass es die Sicherheit von Personen gewährleistet. FALSCHE VERWENDUNG KANN ZU ELEKTRISCHEN SCHLÄGEN ODER ZU EINEM BRAND FÜHREN.
Lesen Sie beim Setup Ihres Projektors unbedingt die folgenden Sicherheitshinweise. Vorsichtsmaßnahmen bei der Handhabung der Lampeneinheit ■ Wenn die Lampe zerspringt, kann es zu Verletzungen durch Glassplitter kommen. Falls die Lampe zerspringt, sollten Sie die Lampe von einem von SHARP autorisierten Händler für Projektoren oder vom Kundendienst austauschen lassen.
Zugriff auf die PDF-Bedienungsanleitungen Die CD-ROM beinhaltet Bedienungsanleitungen im PDF-Format in mehreren Sprachen, damit Sie auch dann mit dem Projektor arbeiten können, wenn Sie dieses Handbuch nicht vorliegen haben. Zur Verwendung dieser Anleitungen muss der Adobe Acrobat Reader auf Ihrem PC (Windows oder Macintosh) installiert sein. Sollten Sie Acrobat Reader noch nicht installiert haben, können Sie das Programm von der CD-ROM herunterladen.
Avant d’utiliser ce projecteur, veuillez lire attentivement ce mode d’emploi. Introduction FRANÇAIS Il y a au moins deux raisons valables pour enregistrer sans retard l’acquisition de ce projecteur SHARP en retournant la carte de garantie que contient l’emballage du projecteur. 1. GARANTIE Vous êtes assuré de bénéficier pleinement des pièces et services attachés à la garantie aussitôt que la carte nous est retournée. 2.
MESURES DE SÉCURITÉ IMPORTANTES ATTENTION : Veuillez lire toutes ces instructions avant de faire fonctionner ce produit et les conserver pour toutes consultations ultérieures. L’électricité peut être utilisée pour beaucoup de fonctions utiles. Ce produit a été conçu et fabriqué pour assurer une utilisation en toute sécurité. CEPENDANT, TOUTE UTILISATION INCORRECTE PEUT CAUSER UNE ÉLECTROCUTION OU DÉCLENCHER UN INCENDIE.
Assurez-vous de lire les mesures de sécurité suivantes lors de la mise en route de votre projecteur. Mise en garde concernant l’ensemble lampe ■ Prenez les précautions nécessaires en raison des risques potentiels présentés par les particules de verre en cas de rupture de la lampe. En cas de rupture, contactez le revendeur ou SAV agréé Sharp le plus proche pour effectuer son remplacement.
Comment accéder aux modes d’emploi PDF Les manuels techniques au format PDF et en plusieurs langues sont inclus dans le CD-ROM afin que vous puissiez travailler avec le projecteur même si vous ne possédez pas ce manuel. Pour utiliser ces manuels, le progamme Adobe Acrobat Reader doit être installé sur votre PC (Windows ou Macintosh). Si Acrobat Reader n’est pas encore installé sur votre machine, vous pouvez l’installer à partir du CDROM.
Läs noga denna bruksanvisning innan projektorn tas i bruk. Introduktion SVENSKA Det finns två viktiga anledningar till att snabbt registrera garantin för din SHARP-projektor med hjälp av registreringskortet som medföljer projektorn. 1. GARANTI Denna är till för att försäkra att du erhåller alla förmåner ifråga om reservdelar, service och arbete som garanteras för enheten vid inköpet. 2.
VIKTIGA SÄKERHETSFÖRESKRIFTER OBSERVERA: Läs dessa föreskrifter innan du använder produkten för första gången och spara dem för framtida bruk. Man kan använda elektricitet till många praktiska saker. Denna produkt har utvecklats och tillverkats för att kunna säkerställa din personliga säkerhet. FELAKTIG HANTERING KAN MEDFÖRA RISK FÖR ELEKTRISKA STÖTAR ELLER BRAND.
Observera följande säkerhetsföreskrifter vid projektorns uppställning. Observera angående lampenheten Blockera inte ventilationsöppningarna. ■ Det föreligger risk för skärsår om lampan råkar spricka. Kontakta närmaste auktoriserade Sharp-projektorhandlare eller en serviceverkstad för att köpa en byteslampa om detta inträffar. ■ Lämna ett utrymme på minst 7 7/8'' (20 cm) mellan luftuttaget och närmaste vägg eller annat föremål. ■ Se till att luftintaget och ventilationsöppningarna inte blockeras.
Hur du läser PDF-bruksanvisningarna På CD-ROM-skivan finns bruksanvisningar i PDF-format på flera olika språk så att du kan använda projektorn även om du inte har denna bruksanvisning. För att kunna använda dessa anvisningar måste du installera Adobe Acrobat Reader i din persondator (Windows eller Macintosh). Om du inte redan har installerat Acrobat Reader, kan du göra det från CD-ROM-skivan. Installation av Acrobat Reader från din CD-ROM-skiva För Windows: 1 Sätt in CD-ROM-skivan i din CD-ROM-enhet.
Antes de emplear el proyector, lea con atención este manual de manejo. Introducción ESPAÑOL Hay dos razones importantes por las que debe registrar rápidamente la garantía de su nuevo proyector SHARP, empleando para ello la TARJETA DE REGISTRO entregada con el proyector. 1. GARANTÍA Ésta es para asegurar que usted reciba inmediatamente todos los beneficios relacionados con la garantía de los componentes, servicio y mano de obra aplicables a su adquisición. 2.
IMPORTANTES MEDIDAS DE SEGURIDAD PRECAUCIÓN: Lea completamente estas instrucciones antes de usar el producto y consérvelas para poder consultarlas en el futuro. La energía eléctrica puede tener muchas aplicaciones útiles. Este producto ha sido diseñado y fabricado para garantizar la seguridad del usuario. SIN EMBARGO, EL USO INCORRECTO DEL PRODUCTO PUEDE OCASIONAR DESCARGAS ELÉCTRICAS E INCENDIOS.
Al instalar el proyector, asegúrese de leer y observar las siguientes medidas de seguridad. Advertencia acerca de la lámpara No bloquee las aberturas de entrada y salida de aire. ■ Si la lámpara se rompe las partículas de cristal pueden ser un peligro. Si la lámpara se rompe, solicite el reemplazo de la misma en el centro de servicio o distribuidor Sharp autorizado más cercano. ■ Deje un espacio de al menos 7 7 / 8" (20 cm) entre la abertura de ventilación y la pared u objeto más cercano.
Cómo acceder a los manuales de manejo en formato PDF El CD-ROM incluye los manuales de manejo en varios idiomas en formato PDF, para que pueda utilizar el proyector aunque no tenga el presente manual. Para poder usar estos manuales debe tener instalado Adobe Acrobat Reader en su PC (Windows o Macintosh). Si todavía no tiene instalado el programa Acrobat Reader, puede hacerlo desde el CD-ROM. Para instalar Acrobat Reader desde el CD-ROM Para Windows: 1 Inserte el CD-ROM en la unidad de CD-ROM.
Prima di utilizzare il proiettore, leggere con attenzione il presente manuale di istruzioni. Introduzione ITALIANO Vi sono due ragioni di rilievo per registrare rapidamente la garanzia del nuovo proiettore SHARP appena acquistato servendosi della CARTOLINA DI REGISTRAZIONE contenuta nella sua confezione. 1. GARANZIA La prima consiste nell’assicurarsi la possibilità di ricevere immediatamente tutti i vantaggi della garanzia su componenti, assistenza e manodopera applicabili all’acquisto effettuato. 2.
NORME DI SICUREZZA IMPORTANTI ATTENZIONE: Leggete queste istruzioni prima di usare il prodotto e poi conservate le istruzioni per ogni riferimento futuro. L’energia elettrica può effettuare molte funzioni utili. Questo prodotto è stato prodotto per assicurare la vostra sicurezza personale. MA L’USO ERRATO PUO’ CAUSARE POTENZIALI SCOSSE ELETTRICHE O RISCHI DI INCENDI.
Assicuratevi di leggere le seguenti norme di sicurezza prima di impostare il proiettore. Precauzioni riguardanti l’unità lampada Non bloccate le valvole di aspirazione e scarico. ■ Se si rompe la lampada si possono verificare dei danni causati dai frammenti di vetro. In caso si dovesse rompere la lampada, rivolgetevi al più vicino rivenditore autorizzato dalla Sharp o al centro di servizio per una sostituzione.
Per accedere ai manuali di istruzioni nel formato PDF Nel CD-ROM sono disponibili i manuali d’uso in formato PDF in più lingue, in modo da poter utilizzare il proiettore anche senza questo manuale. Per usare questi manuali, bisogna installare Adobe Acrobat Reader nel PC (Windows o Macintosh). Se non è stato ancora installato Acrobat Reader, è possibile installarlo dal CD-ROM. Per installare Acrobat Reader dal CD-ROM Per Windows: 1 Inserite il CD-ROM nel drive CD-ROM.
Lees deze gebruiksaanwijzing zorgvuldig door voordat u de projector in gebruik neemt. Inleiding NEDERLANDS Er zijn twee belangrijke redenen om de garantie van uw nieuwe SHARP-projector onmiddellijk in orde te brengen met de REGISTRATIEKAART die verpakt zit bij de projector. 1. GARANTIE U komt meteen in aanmerking voor de volledige garantie op onderdelen, service en reparatiewerkzaamheden die van toepassing is op dit product. 2.
BELANGRIJKE VEILIGHEIDSVOORSCHRIFTEN LET OP: Lees al deze instructies door alvorens dit apparaat in gebruik te nemen en bewaar ze voor later gebruik. Met elektrische energie kunt u heel wat nuttige functies uitvoeren. Dit apparaat is zodanig ontworpen en vervaardigd dat uw persoonlijke veiligheid wordt gevrijwaard. ONJUIST GEBRUIK KAN EVENWEL LEIDEN TOT EEN EVENTUELE ELEKTRISCHE SCHOK OF BRANDGEVAAR.
Lees de volgende veiligheidsvoorschriften voordat u uw projector opstelt. Voorzichtig met de lampeenheid ■ Als de lamp gesprongen is, kunnen glassplinters gevaar veroorzaken. Indien de lamp gesprongen is, neemt u contact op met de dichtstbijzijnde erkende Sharp projector dealer of servicecentrum om de lamp te laten vervangen.
Toegang krijgen tot de PDF-gebruiksaanwijzingen De cd-rom bevat handleidingen in PDF-formaat in verscheidene talen zodat u de projector kunt bedienen, zelfs als u deze handleiding niet tot uw beschikking heeft. Om deze handleiding te kunnen gebruiken, moet eerst Adobe Acrobat Reader op uw PC (Windows of Macintosh) geïnstalleerd zijn. Als u Acrobat Reader nog niet heeft, kunt u dit programma installeren vanaf de cd-rom.
Antes de utilizar este projetor, leia atentamente este Manual de Operação. INTRODUÇÃO PORTUGUÊS Existem duas boas razões para que você faça, sem demora, o registro de garantia do seu novo Projetor SHARP, usando o CARTÃO DE REGISTRO que acompanha o aparelho. 1. GARANTIA Para assegurar que você receba imediatamente todos os benefícios de garantia para peças, assistência técnica e mão de obra especializada a que você tem direito. 2.
INFORMAÇÕES DE SEGURANÇA ATENÇÃO: Leia por favor todas estas instruções antes de operar este produto e guarde-as para uso posterior. A energia elétrica pode realizar muitas funções úteis. Este produto foi concebido e fabricado para garantir a sua segurança pessoal. MAS A UTILIZAÇÃO INCORRETA PODERÁ RESULTAR EM POTENCIAL CHOQUE ELÉTRICO OU PERIGO DE INCÊNDIO. A fim de não neutralizar as seguranças incorporadas neste produto, observe as seguintes regras básicas para a sua instalação, uso e assistência. 1.
Leia cuidadosamente as seguintes informações de segurança quando instalar o seu projetor. Cuidados relativos à lâmpada ■ Perigo de ferimentos com partículas de vidro caso a lâmpada se quebre. Caso a lâmpada venha a quebrar, contatar um Revendedor Autorizado de Projetores Sharp ou um Centro de Assistência para trocar a lâmpada.
Como Aceder os Manuais de Operação PDF O CD-ROM inclui os manuais de operação (em formato PDF) em vários idiomas, para que você possa trabalhar com o projetor, mesmo que você não possua este manual. Para utilizar estes manuais, você precisará instalar Adobe Acrobat Reader no seu PC (Windows ou Macintosh). Mesmo que você não tenha instalado o Acrobat Reader, você poderá instalá-lo desde o CD-ROM. Para instalar Acrobat Reader a partir do CD-ROM Para Windows: 1 Insira o CD-ROM no compartimento do CD-ROM.
MEMO 110 A10X_A10S#Memo_Print#p110.p65 110 03.2.