
Specifications
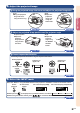

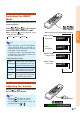
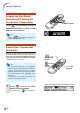
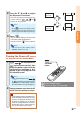
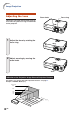
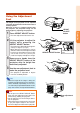
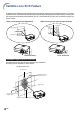
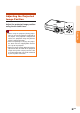
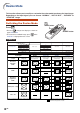
Table Of Contents
- Introduction
- Basic Operation
- Projection
- Functions
- Using the Menu
- Menu Items
- Using the Menu Screen
- Picture Adjustment
- Computer Image Adjustment
- Using the “Options” Menu
- Lamp Timer (Life) (Checking the Lamp Life Status)
- OSD Display (Setting On-screen Display)
- Video System (Setting the Video System)
- Background (Selecting a Startup and Background Image)
- Eco Mode (Setting the Eco Mode)
- Auto Power Off (Auto Power Off Function)
- Menu Position (Selecting the Menu Screen Position)
- Menu Color (Selecting the Menu Color)
- Password (Setting a Password)
- If You Forget Your Password
- Anti-Theft (Setting the Anti-Theft)
- Using the “Language” Menu
- Using the “PRJ Mode” Menu
- Connections
- Screen Setup
- Appendix

-17
Basic Operation
Select the “INPUT 1” using the INPUT button on the projector or the INPUT 1 button on the remote control.
••
••
• When pressing on the projector, input mode switches in order of
INPUT 1 INPUT 2 INPUT 3
.
••
••
• When using the remote control, press
//
to switch the INPUT mode.
On the remote
control
On the
projector
4. Adjust the projected image
33
33
3 Correct trapezoidal distortion
5. Select the INPUT mode
On-screen display (RGB)
Correcting trapezoidal distortion using the Keystone Correction.
Compresses
upper side.
On the remote
control
On the projector
Compresses
lower side.
Page 20
On-screen display (Component)
Page 19
11
11
1 Bring the projected image into focus and adjust the projected image size
Page 22
Page 22
22
22
2 Adjust the projected image position and the projector angle
Page 23
Page 25
Focus
••
••
•
Bring the projected
image into focus
using the focus ring.
Zoom
••
••
• Adjust the
projected
image size
using the
zoom knob.
Projection position
••
••
•
Adjust the
projected
image position
using the lens
shift lever.
Angle
••
••
•
Adjust the
projector
angle using
the HEIGHT
ADJUST
button.
zoom in
zoom out