
User Manual


6
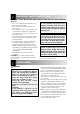
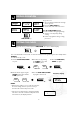
SETTING THE CLOCK
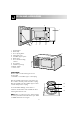
BEFORE OPERATION
Plug in the oven.
1. The oven display will flash the message
shown opposite.
2. Press the STOP/CLEAR key.
3. Set the clock, refer to the next section.
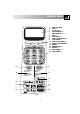
Use the STOP/CLEAR key to:
1. Erase a mistake during programming.
2. Stop the oven temporarily during
cooking.
3. Cancel a programme during cooking,
press twice.
STOP/
CLEAR
STOP/CLEAR key
After plugging in the oven, if you haven’t pressed STOP/CLEAR, do so now to clear the display.
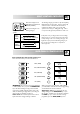
Your oven is fitted with a 12-hour clock. To set the time of day, follow the guidelines given in the example below:
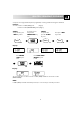
EXAMPLE:
To set the time of day, 12:35.
7. Press the AUTO START/ CLOCK
key again to set the clock.
1. Press the AUTO START/CLOCK
key once.
Check the display.
5. Press the AUTO START/
CLOCK key again.
6. Enter the minutes by pressing the
10 MIN key three times and the
1 MIN key five times.
2. Enter the hours, by pressing
the 10 MIN key once and
the 1 MIN key twice.
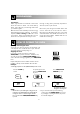
NOTES:
• Once the time of day is set, you need only reset when
the clocks change, if there is a power cut or if you
disconnect the oven from the power socket.
• If the clock is set and cooking is complete, the display
will return to show the correct time of day. If the clock
has not been set, the display will show:
STOP/
CLEAR
x1
AUTO START
CLOCK
x1
10min.
1min.
10min.
1min.
AUTO START
CLOCK
AUTO START
CLOCK
x1x1 x2
x3
x5 x1