WA100970XD Access Point SX-AP-4800AN User's Guide
Index 1. Introduction............................................................1 1-1. Introduction.......................................................................................... 1 Disclaimers.................................................................................................. 1 Trademarks................................................................................................. 1 1-2. Safety Instructions.........................................................................
3. Setup.................................................................... 21 3-1. Setup Using Configuration Mode...............................................21 Starting in Configuration Mode........................................................21 Setup...........................................................................................................23 Connecting to Network........................................................................26 3-2. Setup via a Network ......................
-2. Log Output.....................................................................................................61 Getting Started........................................................................................61 Log Output Settings..............................................................................62 Retrieving the Log saved into USB storage device.....................64 Notice When Using the Log Output................................................68 5-3.
5-9. VLAN Feature....................................................................................115 VLAN Configuration.............................................................................116 5-10. Fast Roaming Feature..................................................................121 Conditions to Use Fast Roaming Feature.....................................122 Configuring Fast Roaming.................................................................123 A. Appendix............................
1. Introduction 1. Introduction Thank you for purchasing the Access Point SX-AP-4800AN (called "SX-AP-4800AN" below). 1-1. Introduction This manual provides information on how to configure and use SX-AP-4800AN. Please read the Safety Instructions carefully before you begin. Disclaimers - The unauthorized transfer or copying of the content of this manual, in whole or in part, without prior written consent is expressly prohibited by law. - The content of this manual is subject to change without notice.
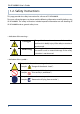
SX-AP-4800AN User's Guide 1-2. Safety Instructions This page provides the safety instructions for safe use of SX-AP-4800AN. To ensure safe and proper use, please read the following information carefully before using SX-AP-4800AN. The safety instructions include important information on safe handling of SX-AP-4800AN and on general safety issues.
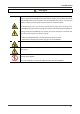
1. Introduction Danger * Do not allow physical impact: When damaged, turn off your network device, unplug the AC plug of SX-AP-4800AN from power outlet (unplug the network cable from Ethernet HUB when receiving power over the Ethernet) and contact your point of purchase. Failure to take this action could cause fire or an electrical shock.
SX-AP-4800AN User's Guide Warning * When unplugging SX-AP-4800AN, do not pull on the cord. The cord may break resulting in fire and/or electric shock. Pull only on the plug. * When moving SX-AP-4800AN, turn off your network device and SX-AP-4800AN by unplugging the power cables from the outlet (if you are receiving power over the Ethernet (PoE), unplug the network cable from the HUB). * Always use the AC adapter bundled with SX-AP-4800AN. Other AC adapters may cause SX-AP-4800AN to malfunction.
1. Introduction 1-3. User Registration and Customer Services User registration To enable us to provide better services (support and repair), please perform the user registration process from our website below: URL USA Europe Japan http://www.silexamerica.com/us/regist/index.html http://www.silexeurope.com/en/home/support/registration/ http://www.silex.jp/register/ - For user registration, a serial number is required. It can be found on the bottom of SX-AP-4800AN.
SX-AP-4800AN User's Guide 6
2. About SX-AP-4800AN 2. About SX-AP-4800AN SX-AP-4800AN is an Access Point that supports IEEE 802.11a/b/g/n (delivers up to 300Mbps) and can be used as a base station to connect your wireless client devices each other. In addition to high performance wireless connectivity, SX-AP-4800AN also supports enterprise-level wireless security and PoE (Power over Ethernet). Note - PoE is a technology to supply electrical power over Ethernet cable (Category 5 or above).
SX-AP-4800AN User's Guide 2-2. Parts and Functions The parts name and functions are as follows: Front ① ② ③ ④ ⑤ ⑥ ⑦ ⑧ (1) Wireless LAN Antenna (2) Smart Wireless Setup Switch (SET2) Wireless antenna for wireless communication When pressed together with the one on your wireless device while SX-AP-4800AN is active, wireless configuration can be performed.
2. About SX-AP-4800AN Bottom ⑨ ⑩ ⑪ ⑫ (9) (10) (11) (12) AC Connector Network Port Status LED (Yellow) Link LED (Green) Connect an AC adaptor. Connect a network cable. Blinks while communicating in a wired LAN. Turns on when connected to a wired LAN.
SX-AP-4800AN User's Guide 2-3.
2. About SX-AP-4800AN FCC / IC Notice This device complies with part 15 of the FCC Rules. Operation is subject to the following two conditions: (1) This device may not cause harmful interference, and (2) this device must accept any interference received, including interference that may cause undesired operation FCC CAUTION Changes or modifications not expressly approved by the party responsible for compliance could void the user's authority to operate the equipment.
SX-AP-4800AN User's Guide WARNING: The FCC / Industry Canada regulations provide that changes or modifications not expressly approved by the party responsible for compliance could void the user’s authority to operate the equipment. CE Notice 2-4.
2. About SX-AP-4800AN 2-5. Power Supply SX-AP-4800AN can receive electrical power via a AC adaptor or network cable. SX-AP-4800AN can receive electrical power from the IEEE802.3af compliant power supply unit over a network cable. For details, please see the operating manual that came with your power supply devices. Note TIP - PoE is a technology to supply electrical power over Ethernet cable (Category 5 or above).
SX-AP-4800AN User's Guide 2-6. Wireless Interference Information Notes Do not use SX-AP-4800AN near the following devices or places. - Microwave, scientific instruments, pacemaker or other medical equipment, etc. - Licensed radio station in a factory - Small power radio station (A non-licensed radio station) These devices may use the same band. If you use SX-AP-4800AN near these devices, the radio waves emitted from SX-AP-4800AN may interfere with them.
2. About SX-AP-4800AN Wireless devices using 2.4GHz band The same frequency band of SX-AP-4800AN is used for a microwave, industry, science, medical equipment and licensed in room or low power (non-licensed) radio stations. - Before you use SX-AP-4800AN, check that it does not interfere with other devices. - If interference occurs, stop using SX-AP-4800AN or change the wireless band. Please consider to create a wall between these devices to avoid interference. Contact us to for possible solution.
SX-AP-4800AN User's Guide DFS SX-AP-4800AN supports DFS (Dynamic Frequency Selection) of the IEEE 802.11h wireless standard. When radar signals are detected, the channel will automatically be switched to avoid interference with radar systems (e.g. weather radar, etc). One alternative channel can individually be set for W53/W56 channels beforehand, which will be used when radar signals are detected and the channel needs to be switched.
2. About SX-AP-4800AN 2-7. OpenSSL License This product includes software developed by the OpenSSL Project for use in the OpenSSL Toolkit. ( http://www.openssl.org/ ) OpenSSL License --------------/* ==================================================================== * Copyright (c) 1998-2005 The OpenSSL Project. All rights reserved. * * Redistribution and use in source and binary forms, with or without * modification, are permitted provided that the following conditions * are met: * * 1.
SX-AP-4800AN User's Guide * THIS SOFTWARE IS PROVIDED BY THE OpenSSL PROJECT ``AS IS'' AND ANY * EXPRESSED OR IMPLIED WARRANTIES, INCLUDING, BUT NOT LIMITED TO, THE * IMPLIED WARRANTIES OF MERCHANTABILITY AND FITNESS FOR A PARTICULAR * PURPOSE ARE DISCLAIMED.
2. About SX-AP-4800AN * Redistribution and use in source and binary forms, with or without * modification, are permitted provided that the following conditions * are met: * 1. Redistributions of source code must retain the copyright * notice, this list of conditions and the following disclaimer. * 2. Redistributions in binary form must reproduce the above copyright * notice, this list of conditions and the following disclaimer in the * documentation and/or other materials provided with the distribution.
SX-AP-4800AN User's Guide 20
3. Setup 3. Setup This chapter explains how to configure SX-AP-4800AN. Following configuration methods are available: - Setup using Configuration Mode (recommended) - Setup via a network - Setup using an external registrar 3-1. Setup Using Configuration Mode How to configure SX-AP-4800AN using the Configuration Mode is explained. In this setup method, you have to connect SX-AP-4800AN directly to the PC and configure it one by one. Starting in Configuration Mode 1.
SX-AP-4800AN User's Guide 2. Connect the AC adapter to SX-AP-4800AN, and the AC adapter's plug to an electrical outlet. Electrical Outlet SX-AP-4800AN ② ① AC Adaptor - If wireless LAN is enabled on your PC, please disable it. TIP 3. When the front Power LED starts blinking in Orange and then turns on to Green, press and hold the push switch with a fine tipped object such as a pen or pencil. Release the push switch when Mode LED starts blinking in Orange (It may take 3sec until blinking).
3. Setup Setup 1. Check for proper connection between the PC and SX-AP-4800AN. - Confirm that an IP Address is correctly configured to the PC. - How to check on Windows 7 Note See the tasktray icon ( ) to check the wired LAN is enabled on the PC. - Confirm that a wireless LAN is disabled on the PC. 2. Start a Web browser (Internet Explorer, Safari, etc) on the PC you are using for the setup. The Web page of SX-AP-4800AN is displayed.
SX-AP-4800AN User's Guide 3. In the Web page, configure the necessary settings. For details on each setting, see Appendix - A-1. List of All Settings on this User's Guide. When finished, click Submit on the bottom right of Web page. 4. 24 If "Setting is completed" is displayed, the configuration is finished.
3. Setup 5. Unplug the AC plug from the outlet and then AC adaptor from SX-AP-4800AN. Electrical Outlet SX-AP-4800AN ① ② AC Adaptor 6. Unplug the network cable from SX-AP-4800AN and PC.
SX-AP-4800AN User's Guide Connecting to Network 1. Connect SX-AP-4800AN and Ethernet Hub via a network cable. SX-AP-4800AN Ethernet HUB Network Cable 2. Connect the AC adapter to SX-AP-4800AN and AC plug to a power outlet.
3. Setup 3-2. Setup via a Network How to setup SX-AP-4800AN from your PC via a network is explained. In this method, two or more of SX-AP-4800AN can be configured at once by connecting them to a network. TIP - To continue this configuration, the network settings on your PC needs to be changed temporarily.
SX-AP-4800AN User's Guide Connect SX-AP-4800AN to a network 1. Connect SX-AP-4800AN and Ethernet Hub via a network cable. SX-AP-4800AN Ethernet HUB Network Cable 2. Connect the AC adapter to SX-AP-4800AN and AC plug to a power outlet. Electrical Outlet SX-AP-4800AN ② ① AC Adaptor - Repeat the same process if you are to configure two or more of SX-AP-4800AN.
3. Setup Changing Network Settings on the PC Change the network settings on your PC so that you can access SX-AP-4800AN from the PC. Connect the PC to a network Connect the PC (to use for setup) and Ethernet Hub using a network cable. Following Web browsers are recommended: - Microsoft Internet Explorer 5.5 or newer - Firefox 2.0.
SX-AP-4800AN User's Guide Change the network settings on the PC Change the network settings on the PC to access SX-AP-4800AN. Example: In case the default IP Address of SX-AP-4800AN is 10.0.17.34, change the network settings on your PC to the following: - IP Address : 10.1.2.3 - Subnet Mask : 255.0.0.0 TIP Note - By default, a Class A address (10.xxx.xxx.xxx) is set to SX-AP-4800AN. Please be sure to set a unique address to your PC, that is not used for SX-AP-4800AN.
3. Setup Setup How to access the Web page: Note 1. - The following instructions will use the screenshots captured using Windows 7 and Internet Explorer 9.0. They may vary depending on the version of operating systems or Web browsers. Start a Web browser (Internet Explorer, Safari, etc) on the PC you are using for the setup, enter the IP address of SX-AP-4800AN in the address bar and press the ENTER key. - The default IP Address can be found on the bottom label of SX-AP-4800AN. Note 2.
SX-AP-4800AN User's Guide General Configuration Basic settings to operate SX-AP-4800AN can be configured. 1. From the left menu on the Web page, click General Configuration - General. 2. In the General Configuration page, configure each setting. Note - For details on each configuration item, refer to A. Appendix - A-1. List of All Settings. 3. After entering the settings, click Submit on the bottom right of Web page. 4. When finished, restart SX-AP-4800AN.
3. Setup Device Configuration Host name or IP address, etc. can be configured. 1. From the left menu on the Web page, click Detail Configuration - Device. 2. In the Device Configuration page, configure each setting. - For details on each configuration item, refer to A. Appendix - A-1. List of All Settings. Note 3. After entering the settings, click Submit on the bottom right of Web page. 4. When finished, restart SX-AP-4800AN.
SX-AP-4800AN User's Guide Wired LAN Configuration Wired LAN settings can be configured. 1. From the left menu on the Web page, click Detail Configuration - Wired LAN. 2. In the Wired LAN Configuration page, configure each setting. Note - For details on each configuration item, refer to A. Appendix - A-1. List of All Settings. - You can switch between 2 tabs on the Wired LAN Configuration page. It is not necessary to click Submit each time you have switched the tab.
3. Setup Wireless LAN - General Configuration Basic wireless settings can be configured. 1. From the left menu on the Web page, click Detail Configuration - Wireless LAN. 2. In the General Configuration page, configure each setting. Note - For details on each configuration item, refer to A. Appendix - A-1. List of All Settings. - You can switch between 4 tabs on the Wireless LAN Configuration page. It is not necessary to click Submit each time you have switched the tab.
SX-AP-4800AN User's Guide TIP - If Smart Wireless Setup is enabled on the wireless interface, MAC Address filtering cannot be used. In such a case, the message below is displayed. In order to use MAC Address filtering, disable Smart Wireless Setup at Smart Wireless Setup tab or select the wireless interface which does not have MAC Address filter setting at Smart Wireless Setup tab. 3. After entering the settings, click Submit on the bottom right of Web page. 4. When finished, restart SX-AP-4800AN.
3. Setup VLAN Configuration VLAN settings can be configured. SX-AP-4800AN allows to configure VLAN ID to SSID of the wireless LAN. By using SX-AP-4800AN and the switching HUB supporting a tagged VLAN (hereinafter, the "VLAN HUB"), virtual network groups can be established. As SX-AP-4800AN supports Multi SSID, up to 4 virtual network groups can be created. For details, refer to 5-9. VLAN Feature.
SX-AP-4800AN User's Guide DHCP Server Configuration DHCP server settings can be configured. 1. From the left menu on the Web page, click Detail Configuration - DHCP Server. 2. In the DHCP Server Configuration page, configure each setting. - For details on each configuration item, refer to A. Appendix - A-1. List of All Settings. Note 3. After entering the settings, click Submit on the bottom right of Web page. 4. When finished, restart SX-AP-4800AN.
3. Setup NTP Configuration NTP settings can be configured. 1. From the left menu on the Web page, click Detail Configuration - NTP. 2. If ENABLE is selected for NTP in the NTP Configuration page, the NTP Server and Local Time Zone settings will become active. Once Time synchronization button is clicked, the time will be synchronized with those of NTP server registered to SX-AP4800AN. 3. After entering the settings, click Submit on the bottom right of Web page. 4. When finished, restart SX-AP-4800AN.
SX-AP-4800AN User's Guide Password Configuration Password can be configured. 1. From the left menu on the Web page, click Detail Configuration - Password. 2. In the Password Configuration page, enter a new password. 3. After entering the password, click Submit on the bottom right of Web page. 4. When finished, restart SX-AP-4800AN. TIP - No password is set by default. In such case, just click Login. Please be sure to set a password when you connect SX-AP-4800AN to a public network.
3. Setup 3-3. Setup Using an External Registrar Setup Using Windows Network Setup Feature How to setup SX-AP-4800AN via network using the network setup feature of Windows 7 is explained. TIP - To continue this configuration, External Registrar must be set to ENABLE and Wireless LAN config status needs to be Unconfigured on SX-AP-4800AN. Before you begin, please check these settings at the Smart Wireless Setup page on the Web page.
SX-AP-4800AN User's Guide 3. Select Set up a new network and click Next. 4. Select SX-AP-4800AN and click Next. Note 42 - If two or more of SX-AP-4800AN are displayed, select the correct one by checking the host name on the right.
3. Setup 5. Enter the PIN code of SX-AP-4800AN to PIN: field and click Next. - PIN code is a 8-digit number that can be found on the bottom label of SX-AP-4800AN. TIP 6. Enter an SSID to Type your network name. Click the down arrow button on the right of Change passphrase, security level and encryption type (advanced) to configure Security key, Security level, Encryption type and Connect automatically. When finished entering the settings, click Next.
SX-AP-4800AN User's Guide 7. Click Close. Setup Wirelessly from the PC SX-AP-4800AN can be configured via a wireless LAN using the wireless connection of your PC. In case of this configuration, please use your own wireless configuration utility. TIP - To continue this configuration, External Registrar must be set to ENABLE and Wireless LAN config status needs to be Unconfigured on SX-AP-4800AN. Before you begin, please check these settings at the Smart Wireless Setup page on the Web page.
4. Connecting Your Wireless Device 4. Connecting Your Wireless Device This chapter explains how to connect your PC and wireless devices to SX-AP-4800AN. 4-1. Connecting Your PC How to connect your PC to SX-AP-4800AN by changing the wireless settings of the PC using the wireless connection feature of Windows: 1. Click the network icon ( ) on the tasktray.
SX-AP-4800AN User's Guide 2. Select the SSID configured on SX-AP-4800AN from a list and click Connect. - The default SSID can be found on the bottom label of SX-AP-4800AN. Note 3. Enter the WEP key (or Pre-Shared key if the network authentication mode is WPA-PSK, WPA2-PSK or WPA/WPA2-PSK) to Security key and click OK. Note 46 - The default security key can be found on the bottom label of SX-AP-4800AN. See the "Key" information in the label.
4. Connecting Your Wireless Device 4-2. Connecting Your Wireless Device How to connect your wireless device to SX-AP-4800AN by changing the wireless settings of your device using easy wireless setup feature: Following methods are available to connect your wireless devices.
SX-AP-4800AN User's Guide 3. Press the wireless setup switch also on your wireless device. TIP - The name, position and shape of the wireless setup switch( WPS button) will differ depending on your wireless device. For details, refer to the operation manual that came with your wireless device. - Please use only one wireless device. Even if two or more devices are waiting for wireless connections, SX-AP-4800AN can configure only one device which has replied first. 4.
4. Connecting Your Wireless Device 3. From the left menu on the Web page, click Smart Wireless Setup - Smart Wireless 4. Click Execute at Push Button. 5. Press the wireless setup switch on your wireless device. Setup. TIP 6. - The name, position and shape of the wireless setup switch( WPS button) will differ depending on your wireless device. For details, refer to the operation manual that came with your wireless device. - Please use only one wireless device.
SX-AP-4800AN User's Guide Making a Connection Using a PIN Code TIP - To continue, Smart Wireless Setup needs to be set to ENABLE. Before you begin, please check the setting at the Smart Wireless Setup page on the Web page. - During this configuration, please place your wireless device closer to SX-AP-4800AN so that they can communicate better. 1. Check that your wireless device supports WPS and is powered on. 2. Login to the Web page of SX-AP-4800AN using your Web browser. 3.
5. Other Features 5. Other Features This chapter explains the other features of SX-AP-4800AN. 5-1. Device Server Feature The USB devices connected to SX-AP-4800AN can be shared over the network. To use the device server feature, the USB connection utility, "SX Virtual Link" is required. How to install and use SX Virtual Link is as follows: TIP - To use this feature, the following conditions must be met.
SX-AP-4800AN User's Guide Downloading & Installing SX Virtual Link What is SX Virtual Link? SX Virtual Link allows you to connect your PC to a USB device that is connected to SX-AP4800AN. Use SX Virtual Link when you connect/disconnect to/from the USB device. SX-AP-4800AN allows you to use USB devices as if they were connected directly to your PC. How to download SX Virtual Link: 1. Access our website below. USA Europe 2. Go to the support section and download SX Virtual Link.
5. Other Features How to install SX Virtual Link: - Administrator privilege is required for installation. TIP 1. Decompress the file you have downloaded and then double-click Cosetup.exe. 2. The User Account Control message is displayed In Windows 7, click Yes. In Windows Vista, click Continue. 3. SX Virtual Link installer is started and the language selection menu is displayed. Select English and click Next. 4. Click Next.
SX-AP-4800AN User's Guide 5. Read the SOFTWARE LICENSE AGREEMENT and click Yes. 6. Select a folder to install into and click Next. - By clicking Browse, the folder can be changed. Note 7. 54 Enter a group name to be displayed in the start menu and click Next.
5. Other Features 8. Click Start to begin the installation. - When Windows Security screen is displayed, click Install. TIP 9. SX Virtual Link has been installed. Click Finish. TIP - If using a firewall function of commercial security software, please add SX Virtual Link to the exception list in your security software. Refer to the FAQ on our website ( http://www. silexamerica.com/ ) for details on adding an application to the exception list.
SX-AP-4800AN User's Guide Sharing USB Devices over the Network How to start SX Virtual Link: 1. Click the SX Virtual Link icon ( Note ) in the task tray. - If SX Virtual Link is not running, click Start - All Programs - silex Device Server - SX Virtual Link - SX Virtual Link. - In Windows 7, click the ( ) button on the notification area (bottom right corner of your desktop) to display the tasktray icons. 2. The SX Virtual Link's main window appears.
5. Other Features How to connect/disconnect to/from USB devices: 1. Select the USB device in SX Virtual Link's main window and connect to it. 2. When successfully connected to the USB device, Windows Plug and Play will run and the USB device will become ready to use. 3. When finished using the USB device, disconnect it using SX Virtual Link. How to connect: Double-click Double-click the USB device in SX Virtual Link's main window.
SX-AP-4800AN User's Guide How to open the SX Virtual Link's Online Help 1. Start SX Virtual Link. 2. In SX Virtual Link's main window, click the Help button ( the menu displayed. 3. 58 Online Help will open.
5. Other Features Uninstalling SX Virtual Link How to uninstall the USB device connection utility, SX Virtual Link is explained. Follow the procedures below to uninstall SX Virtual Link. - To uninstall SX Virtual Link, administrator privilege is required. TIP 1. Click Start - Control Panel - Uninstall a program. - In Windows XP, click Add or Remove Programs. Note 2. Select SX Virtual Link from the list and click Uninstall.
SX-AP-4800AN User's Guide 3. A confirmation message is displayed. Click Yes to start the uninstallation. 4. When the below window is displayed, click Finish.
5. Other Features 5-2. Log Output The log information (access log, etc.) can be sent to the Syslog server as well as saved to the USB storage device connected to SX-AP-4800AN. Once the log file is saved to the USB storage device, it can be retrieved over a network using SX Virtual link. How to output the log and retrieve it from the USB storage device is explained. TIP - To use this feature, the following conditions must be met.
SX-AP-4800AN User's Guide Log Output Settings 1. Login to the Web page of SX-AP-4800AN using your Web browser. - The Web page of SX-AP-4800AN can be opened using SX-Finder or SX Virtual Link. Note 2. 62 From the left menu on the Web page, click Log Output.
5. Other Features 3. In the Log Output page, specify where to output the log and file names and then click Submit. Note - To save the log to USB storage device, select ENABLE for USB Log Output and configure the settings such as a file name, etc. - To send the log to Syslog server, select ENABLE for Syslog Server Log Output and set the address of Syslog server. - The log can be saved to USB storage device and sent to Syslog server at the same time. The same log information will be output for both side.
SX-AP-4800AN User's Guide Retrieving the Log saved into USB storage device To retrieve the log files saved in the USB storage device connected to SX-AP-4800AN, disable the USB log output feature first. The log can be retrieved using SX Virtual Link. How to disable the USB log output: 1. Login to the Web page of SX-AP-4800AN using your Web browser. - The Web page of SX-AP-4800AN can be opened using SX-Finder or SX Virtual Link. Note 2. 64 From the left menu on the Web page, click Log Output.
5. Other Features 3. In the Log Output page, select DISABLE for USB Log Output and click Submit. Note 4. - It is not necessary to disable Syslog Server Log Output if it is enabled to send the log also to Syslog server. When finished, restart SX-AP-4800AN. Note - For how to restart SX-AP-4800AN, refer to Chapter 5-7 Maintenance Feature - Restarting. - If you continue to configure the other settings, you do not have to restart. Please restart when you completed all other settings.
SX-AP-4800AN User's Guide How to retrieve the log files: 1. Click the SX Virtual Link icon ( Note ) in the task tray. - If SX Virtual Link is not running, click Start - All Programs - silex Device Server - SX Virtual Link - SX Virtual Link. - In Windows 7, click the ( ) button on the notification area (bottom right corner of your desktop) to display the tasktray icons. 2. The SX Virtual Link's main window appears. The USB devices running on a network are displayed in the device list.
5. Other Features 3. When successfully connected, Windows Plug and Play will run and the USB storage device will become ready to use. Now you can retrieve the saved log files. - The log files are saved as the following formats: Note Format Details Date System time when the event occurred. Program Name of the program at which the event occurred.
SX-AP-4800AN User's Guide Notice When Using the Log Output Please DO NOT remove the USB storage device while the USB log output is enabled. When you remove the USB storage device, be sure to disable the USB log output feature beforehand. For how to disable the USB log output, refer to Retrieving the Log saved into USB storage device - How to disable the USB log output. If the USB storage device is removed without turning off the USB log output feature, the POWER LED on SX-AP-4800AN will blink in Red.
5. Other Features 5-3. Configuration Import/Export By exporting the configuration, the current settings can be saved on to an external device. Once the configuration is saved, it can be imported back to SX-AP-4800AN anytime to restore the settings. Use a Web browser or FTP client software to export/import the configuration file since HTTP or FTP transfer is available for this operation. In the following instructions, how to export/import configuration file using Web page and command prompt is explained.
SX-AP-4800AN User's Guide Exporting/Importing Using the Web Page How to export using the Web page: 1. Login to the Web page of SX-AP-4800AN using your Web browser. - The Web page of SX-AP-4800AN can be opened using SX-Finder or SX Virtual Link. Note 2. 70 From the left menu on the Web page, click Export Configuration.
5. Other Features 3. In the Export Configuration page, click Yes. 4. A message dialog to confirm where to save the configuration file (config.txt) is displayed. Click Save. - By clicking , you can select Save as option.
SX-AP-4800AN User's Guide How to import using the Web page: 1. Login to the Web page of SX-AP-4800AN using your Web browser. - The Web page of SX-AP-4800AN can be opened using SX-Finder or SX Virtual Link. Note 2. 72 From the left menu on the Web page, click Import Configuration.
5. Other Features 3. In the Import Configuration page, click Browse. 4. A window to select the configuration file (config.txt) is displayed. Select the file to upload and click Open. - The configuration file you can import to SX-AP-4800AN must be the one you had exported from SX-AP-4800AN.
SX-AP-4800AN User's Guide 5. In the Import Configuration page, check the configuration file you have selected is displayed at the New Configuration File field. Click Submit. 6. 74 Click OK in a confirmation message.
5. Other Features 7. After the import is completed, a completion message is displayed. Please restart SX-AP-4800AN to take effect of the changes. - For how to restart SX-AP-4800AN, refer to Chapter 5-7 Maintenance Feature - Restarting.
SX-AP-4800AN User's Guide Exporting/Importing Using the FTP Client How to export using Command Prompt: 1. Click Start - All Programs - Accessories - Command Prompt. 2. In the Command Prompt window, connect to SX-AP-4800AN using the FTP command. Sample: C:\Users>ftp 192.168.20.
5. Other Features 3. Enter "root" for the user name and the password that is configured on SX-AP-4800AN for password. Sample User(192.168.20.123:(none)):root 331 Please specify the password Password:xxxxxxxx 4. After you have logged in SX-AP-4800AN, download the configuration file (config.txt) using the get command. Sample ftp>get config.txt d:\config.txt 5. When the file download is finished, the export is complete. Terminate the FTP connection using the bye command.
SX-AP-4800AN User's Guide How to import using Command Prompt: 1. Click Start - All Programs - Accessories - Command Prompt. 2. In the Command Prompt window, connect to SX-AP-4800AN using the FTP command. Sample: C:\Users>ftp 192.168.20.
5. Other Features 3. Enter "root" for the user name and the password that is configured on SX-AP-4800AN for password. Sample User(192.168.20.123:(none)):root 331 Please specify the password Password:xxxxxxxx 4. After you have logged in SX-AP-4800AN, upload the configuration file using the put command. Sample ftp>put d:\config.txt config.
SX-AP-4800AN User's Guide 5. When the file upload is finished, the import is complete. Terminate the FTP connection using the bye command. 6. Please restart SX-AP-4800AN to take effect of the changes. - For how to restart SX-AP-4800AN, refer to Chapter 5-7 Maintenance Feature - Restarting.
5. Other Features 5-4. Product Search Utility How to install and use the product search utility, "SX Finder" is explained. Downloading & Installing the Product Search Utility How to download the product search utility: 1. Access our website below. USA Europe 2. URL http://www.silexamerica.com/ http://www.silexeurope.com/ Go to the support section and download SX-Finder.
SX-AP-4800AN User's Guide How to install the product search utility: 1. Decompress the file you have downloaded and then double-click Setup.exe. 2. The User Account Control message is displayed In Windows 7, click Yes. In Windows Vista, click Continue. 3. SX-Finder installer is started and the language selection menu is displayed. Select English and click Next. 4. 82 Click Next.
5. Other Features 5. Read the SOFTWARE LICENSE AGREEMENT and click Yes. 6. Select a folder to install into and click Next. - By clicking Browse, the folder can be changed. Note 7. Enter a group name to be displayed in the start menu and click Next.
SX-AP-4800AN User's Guide 8. Click Start to begin the installation. 9. SX-Finder has been installed. Click Finish.
5. Other Features Using Product Search Utility The product search utility, "SX-Finder" displays a list of SX-AP-4800AN running on a network. If SX-Finder is used, the Web page can be opened easily. TIP - The PC used for this configuration needs to have a proper IP address to communicate with SX-AP-4800AN. If you fail to access the Web page of SX-AP-4800AN, check the IP address of the PC first. If the IP address is not correct, configure a correct address.
SX-AP-4800AN User's Guide How to access the Web page: 1. Select SX-AP-4800AN to configure and click Configure. Note 2. - If two or more of SX-AP-4800AN are displayed, select the correct one by checking the IP address and MAC address. The Web browser runs and the login menu for SX-AP-4800AN is displayed. Enter the password and click Login. - No password is set by default. In such case, just click Login.
5. Other Features Uninstalling the Product Search Utility How to uninstall the product search utility, "SX-Finder" is explained. If SX-Finder is not necessary, you can uninstall it by following the instructions below. - To uninstall SX-Finder, administrator privilege is required. TIP 1. Click Start - Control Panel - Uninstall a program. - In Windows XP, click Add or Remove Programs. Note 2. Select SX-Finder from the list and click Uninstall.
SX-AP-4800AN User's Guide 3. A confirmation message is displayed. Click Yes to start the uninstallation. 4. When the below window is displayed, click Finish.
5. Other Features 5-5. DHCP Server Feature If DHCP Server Function is used, an IP address can automatically be assigned to PCs or network devices. TIP 1. - To assign an IP address to your PC automatically using the DHCP server feature of SX-AP4800AN, your PC must be set to Obtain an IP address automatically. Log in to the Web page of SX-AP-4800AN using your Web browser. - The Web page of SX-AP-4800AN can be opened using SX-Finder or SX Virtual Link. Note 2.
SX-AP-4800AN User's Guide 3. Enter the necessary settings at DHCP Server Configuration. If ENABLE is selected at DHCP Server Function, the following settings will become available. - Start IP Address - End IP Address - Subnet Mask - Default Gateway - Lease Time 4. After entering the settings, click Submit on the bottom right of Web page. 5. When finished, restart SX-AP-4800AN. - For how to restart SX-AP-4800AN, refer to Chapter 5-7 Maintenance Feature - Restarting.
5. Other Features 5-6. Checking System Status at Web Page How to check the system status from the Web page is explained. 1. Login to the Web page of SX-AP-4800AN using your Web browser. - The Web page of SX-AP-4800AN can be opened using SX-Finder or SX Virtual Link. Note 2. The system status page will be displayed after you have logged into the Web page. This page shows the general settings such as TCP/IP information, Wireless LAN settings, etc.
SX-AP-4800AN User's Guide 5-7. Maintenance Feature Restarting How to restart SX-AP-4800AN by unplugging the AC adaptor: 1. Unplug the AC adaptor of SX-AP-4800AN from the outlet. - When receiving power over the Ethernet (PoE), unplug the network cable from the HUB. Note 2. Plug the AC adaptor back into the outlet. - When receiving power over the Ethernet (PoE), plug the network cable back into the HUB. Note 3.
5. Other Features How to restart SX-AP-4800AN using the Web Page: 1. Login to the Web page of SX-AP-4800AN using your Web browser. 2. From the left menu on the Web page, click Maintenance - Restart. 3. In the page displayed, click Yes. 4. When Power LED starts blinking in Orange and then turns to Green, the restart is completed. 5. Close your Web browser.
SX-AP-4800AN User's Guide Factory Default Configuration How to reset SX-AP-4800AN to factory defaults using the Push Switch: 1. Unplug the AC adaptor of SX-AP-4800AN from the outlet. - When receiving power over the Ethernet (PoE), unplug the network cable from the HUB. Note 2. Press and hold the push switch (SET1) on SX-AP-4800AN while inserting the AC plug back into the electrical outlet. When the Power LED (Orange) starts to blink, release the push switch.
5. Other Features How to reset SX-AP-4800AN to factory defaults using the Web page: 1. Login to the Web page of SX-AP-4800AN using your Web browser. 2. From the left menu on the Web page, click Maintenance - Factory Default. 3. In the page displayed, click Yes. 4. When a confirmation message is displayed, click OK. 5. When Power LED starts blinking in Orange and then turns to Green, the factory default configuration is completed. 6. Close your Web browser.
SX-AP-4800AN User's Guide Firmware Update The latest firmware file can be downloaded from our website. See the instructions below to download the firmware file. For how to upload the firmware file to SX-AP-4800AN, refer to the firmware update procedure sheet file contained in the firmware file you download. - The current firmware version can be identified at the bottom left of the Web page. Note How to download the firmware file: 1. Access our website below. USA Europe 2. 96 URL http://www.
5. Other Features 5-8. WDS Feature If this mode is used, two or more SX-AP-4800AN Access Points can communicate each other. By linking several Access Points wirelessly, wireless distance can be expanded as well as wireless dead spots can be eliminated. The connection and configuration methods to use WDS are explained. Extend the wireless distance SX-AP-4800AN SX-AP-4800AN SX-AP-4800AN - Please check that all SX-AP-4800AN Access Points are running on the same version of firmware.
SX-AP-4800AN User's Guide WDS Connection The WDS(Wireless Distribution System) is composed of one Root AP (running as a host device) and plural Repeater APs (running as client devices). Root AP Repeater Repeater Repeater : WDS When connecting Access Points, use the first AP as Root AP and the second or later APs as Repeater APs. As shown in below image, connect APs starting from the Root AP. TIP - Only one Repeater AP can be connected in WDS mode.
5. Other Features TIP - For Root AP and Repeater APs to connect in WDS mode, configure the same wireless settings. Following settings must be the same: - Wireless channel - SSID - Network authentication - Encryption - When using WDS, the following features cannot be used. - 802.
SX-AP-4800AN User's Guide WDS Configuration How to configure Root AP: Configure the first unit of SX-AP-4800AN as Root AP. 1. Log in to the Web page of SX-AP-4800AN to use as Root AP using your Web browser. - The Web page of SX-AP-4800AN can be opened using SX-Finder or SX Virtual Link. Note 2. From the left menu in the Web page, click Wireless LAN - General Configuration.
5. Other Features 3. Select a wireless interface to use for WDS connection and click WDS Configuration tab. Note 4. - For details on each configuration item, refer to A. Appendix - A-1. List of All Settings. - The wireless settings of the selected interface will be necessary again when you configure Repeater AP. Please take notes of the settings such as channel, SSID, network authentication, encryption mode, etc.
SX-AP-4800AN User's Guide 5. When finished, restart SX-AP-4800AN. Note - For how to restart SX-AP-4800AN, refer to Chapter 5-7 Maintenance Feature - Restarting. - If you continue to configure the other settings, you do not have to restart. Please restart when you completed all other settings. - The WDS setting will not take effect unless you restart SX-AP-4800AN. - If MAC Address filtering is active, it can block access from the Repeater AP's MAC Address.
5. Other Features How to configure Repeater AP: Set the second or later SX-AP-4800AN Access Points as Repeater APs. The Access Point to connect in WPS can be specified using the MAC Address. In order to make WDS connection, specify the MAC Address of the host AP to connect in WDS and configure the same wireless settings. Enter the MAC Address that you have taken a note of when you had configured the host AP to connect in WPS AP to connect in WDS Re pe Root AP / Repeater 1.
SX-AP-4800AN User's Guide 2. From the left menu in the Web page, click Wireless LAN - General Configuration. 3. Select a wireless interface to use for WDS connection and click WDS Configuration tab. Note 104 - For details on each configuration item, refer to A. Appendix - A-1. List of All Settings. - Use the same wireless settings for the Repeater AP as configured on the Root AP when using WDS.
5. Other Features 4. Configure the settings according to the table below and click Submit. Name WDS Mode Wireless Interface Access Point MAC Address Note Setting Repeater Select the interface you have selected to use for WDS connection. Enter the MAC Address of the host AP to connect in WDS. - For details on each configuration item, refer to A. Appendix - A-1. List of All Settings. - The MAC Address displayed under the selected interface will be necessary again when you configure another Repeater AP.
SX-AP-4800AN User's Guide 5. When finished, restart SX-AP-4800AN. Note - For how to restart SX-AP-4800AN, refer to Chapter 5-7 Maintenance Feature - Restarting. - If you continue to configure the other settings, you do not have to restart. Please restart when you completed all other settings. - The WDS setting will not take effect unless you restart SX-AP-4800AN. The Repeater AP setting is completed. To connect more Repeater APs in WDS mode, repeat the same process from Step1-5.
5. Other Features Checking the WDS Connection Status To see if SX-AP-4800AN is connected in WDS mode properly, check the status page on the Web page in the order from the client (Repeater AP) to the host (Root AP or Repeater AP). In the Web page, the host AP connected in WDS is displayed. How to check the WPS connection to the host AP: Check that Repeater AP is properly connected to the host AP in WDS mode. 1. Log in to the Web page of the Repeater AP using your Web browser.
SX-AP-4800AN User's Guide 2. From the left menu in the Web page, click System. 3. In the System Status page, check the WDS Information. If Access Point MAC Address and Wireless Signal Strength(dBm) are displayed, the WDS connection is established successfully. To continue to see the connection status at the host AP, repeat the same process from Step1-3 at the host AP's Web page. WDS Connection Success: WDS Connection Failure: Note 108 - For details on each configuration item, refer to A.
5. Other Features Note - SX-AP-4800AN uses two MAC Addresses for the WDS connection. - The MAC Address used to connect to the host AP in WDS is displayed in the System Status page. - The MAC Address of the wireless interface is displayed in WDS Configuration tab of Wireless Configuration page. This will be the MAC Address of the wireless interface assigned for WDS connection.
SX-AP-4800AN User's Guide What If WDS Connection Fails? If SX-AP-4800AN fails in WDS connection, one of followings might be the reason: 1) The client AP has different wireless settings from the host AP. 2) MAC Address filtering is active on the host AP and it blocks access from the client AP. 3) Too many station devices are connected to the host AP and it has reached the max number of connectable devices.
5. Other Features 2. From the left menu in the Web page, click System. 3. In the System Status page, check the status information as shown in a table below: Setting Wireless LAN Common Configuration Wireless LAN Configuration WDS Information Item Channel Interface SSID Network Authentication Encryption Mode WDS Mode Wireless Interface The MAC Address used to connect to the host AP in WDS is displayed at WDS Mode under WDS Information. - For details on each configuration item, refer to A.
SX-AP-4800AN User's Guide How to check the settings on host AP: Check the Root AP or Repeater AP settings of the host AP. 1. Log in to the Web page of SX-AP-4800AN (host AP) using your Web browser. - The Web page of SX-AP-4800AN can be opened using SX-Finder or SX Virtual Link. Note 2. From the left menu in the Web page, click System.
5. Other Features 3. In the System Status page, check that WDS Mode is set to Root AP or Repeater. Check that status information as show in a table below are the same as those you previously checked at the client AP. From the left menu in the Web page, click Wireless LAN - Security. Setting Wireless LAN Common Configuration Wireless LAN Configuration WDS Information Note 4.
SX-AP-4800AN User's Guide 5. In the System Status page, check the Encryption Mode used for the wireless LAN. The max number of connectable devices for SX-AP-4800AN will differ depending on the encryption mode used. Please check that too many station devices or APs exceeding that number are not connected in your environment. Note - For details on each configuration item, refer to A. Appendix - A-1. List of All Settings.
5. Other Features 5-9. VLAN Feature A VLAN ID can be set to the SSID of wireless LAN structured by SX-AP-4800AN. If SX-AP-4800AN is used with the switching HUB that supports tagged-VLAN (hereinafter the "VLAN HUB"), you can establish the virtual network groups. As SX-AP-4800AN supports Multi SSID, up to 4 virtual network groups can be established.
SX-AP-4800AN User's Guide VLAN Configuration The following explains how to install SX-AP-4800AN to where network groups have already been established using a VLAN HUB. How to check the VLAN information on network: Check the information below of the existing network. For details on the VLAN HUB specifications, please see the operation manual that came with your VLAN HUB.
5. Other Features How to configure the VLAN setting on SX-AP-4800AN: 1. Log in to the Web page of SX-AP-4800AN using your Web browser. TIP - When using a VLAN HUB during the configuration, please make sure that you connect SX-AP-4800AN to the port that can communicate with your PC. - The Web page of SX-AP-4800AN can be opened using SX-Finder or SX Virtual Link. Note 2. From the left menu in the Web page, click VLAN.
SX-AP-4800AN User's Guide 3. If VLAN is set to ENABLE, the VLAN ID settings will become active. Configure the VLAN ID appropriate for virtual network you wish to establish according to the existing network settings you have checked in advance. When finished, click Submit.
5. Other Features 4. When finished, restart SX-AP-4800AN. Note - For how to restart SX-AP-4800AN, refer to Chapter 5-7 Maintenance Feature - Restarting. - If you continue to configure the other settings, you do not have to restart. Please restart when you completed all other settings. - The VLAN setting will not take effect unless you restart SX-AP-4800AN.
SX-AP-4800AN User's Guide The VLAN configuration is completed. The virtual network groups will be active based on the VLAN ID setting you configured. SSID:GUEST SSID:MARKETING SSID:SALES SX-AP-4800AN VLAN HUB VLAN ID:100 VLAN ID:1 Group A VLAN ID:200 Group B Group C Establish the Virtual Network Groups TIP - After the VLAN feature is enabled, you will not be able to configure SX-AP-4800AN via the network with a different VLAN ID from management VLAN ID.
5. Other Features 5-10. Fast Roaming Feature When using two or more units of SX-AP-4800AN in Access Point mode, information of the connected stations can be shared among them. As information of the connected stations is shared among several Access Points, roaming is performed. During roaming, the wireless communication will become more stable. The necessary condition and configuration method to use fast roaming feature are explained.
SX-AP-4800AN User's Guide Conditions to Use Fast Roaming Feature To use fast roaming feature, the following conditions must be met when you connect SXAP-4800AN to network: - Connect two or more SX-AP-4800AN Access Points to the same wired network. - Select Wireless Interface 1 as wireless LAN for fast roaming. - Use WPA2 as network authentication mode for Wireless Interface 1.
5. Other Features Configuring Fast Roaming How to check the MAC Address of SX-AP-4800AN: Check the MAC Address of all SX-AP-4800AN Access Points you wish to use the fast roaming feature with.
SX-AP-4800AN User's Guide How to configure AP to share information of the connected stations: Enable fast roaming feature on SX-AP-4800AN and configure other APs to share information of the connected stations. 1. Log in to the Web page of SX-AP-4800AN using your Web browser. - The Web page of SX-AP-4800AN can be opened using SX-Finder or SX Virtual Link. Note 2. From the left menu in the Web page, click Wireless LAN - General Configuration.
5. Other Features 3. Select Wireless LAN 1 at Wireless Interface and select ENABLE for sub-authentication mode (FT-PSK or FT-Enterprise) under Network Authentication. Note 4. - For details on each configuration item, refer to A. Appendix - A-1. List of All Settings. - Be sure to use WPA2 as network authentication when using fast roaming. The sub-authentication modes, FT-PSK and FT-Enterprise can be used only when Network Authentication mode is WPA2 (WPA2-PSK, WPA2-Enterprise). In the 802.
SX-AP-4800AN User's Guide 5. When finished, restart SX-AP-4800AN. Note - For how to restart SX-AP-4800AN, refer to Chapter 5-7 Maintenance Feature - Restarting. - If you continue to configure the other settings, you do not have to restart. Please restart when you completed all other settings. - The fast roaming feature will not take effect unless you restart SX-AP-4800AN. The fast roaming setting has been completed.
A. Appendix A. Appendix A-1. List of All Settings This chapter explains each configuration item available on SX-AP-4800AN. Some items can be configured only from the Detail Configuration page. For details, see explanation of each configuration item below. Device - Device Configuration Host Name Details Range Default Value General Configuration Detail Configuration Set the host name. Be sure to use a unique name that is not used by other devices.
SX-AP-4800AN User's Guide Device - DNS Configuration DNS Server (Primary) General Configuration Detail Configuration Details Set a primary DNS server address. Range Default Value When DHCP is enabled, the DNS server address obtained from it will be given higher priority. 0.0.0.0 - 255.255.255.255 0.0.0.0 DNS Server (Secondary) General Configuration Detail Configuration Details Set a secondary DNS server address.
A. Appendix Wired LAN Configuration - MAC Address Filter Configuration General Configuration Filter Type Details Range Default Value Detail Configuration * Set a security type for MAC Address filter used over a wired LAN. DISABLE/DENY/ALLOW DISABLE MAC Address General Configuration Detail Configuration Details Set the MAC Address filter for a wired LAN. Range Default Value By registering the MAC Address filter, access via a wired LAN can be controlled.
SX-AP-4800AN User's Guide Wireless LAN - Wireless LAN Common Configuration General Configuration Wireless Mode Details Range Default Value Note Detail Configuration * * Select the IEEE 802.11wireless mode. 802.11b, 802.11b/g, 802.11n/b/g, 802.11a, 802.11n/a 802.11n/b/g 802.11b/g : Uses IEEE802.11b or IEEE802.11g. 802.11a : Uses IEEE802.11a. 802.11n/b/g : Uses IEEE802.11n, IEEE802.11b or IEEE802.11g. 802.11n/a : Uses IEEE802.11n or IEEE802.11a.
A. Appendix Wireless LAN - Wireless LAN Common Configuration DFS Primary Channel Details General Configuration Detail Configuration Set the alternative channel used when radar signals are detected during DFS channels are used. * If the alternative channel is not specified or radar signal is detected even for that channel, the channel is Range switched in a certain regulated order.
SX-AP-4800AN User's Guide Wireless LAN - Wireless LAN Basic Configuration General Configuration Interface Details Range Default Value Detail Configuration Enable/Disable the wireless LAN interface 1-4. ENABLE/DISABLE Wireless LAN1: ENABLE, Wireless LAN2-4: DISABLE General Configuration SSID Details * * Detail Configuration * * Set the SSID of the wireless network. The SSID is an ID that distinguishes a wireless LAN network from others.
A. Appendix Wireless LAN - Wireless LAN Basic Configuration Network Authentication * * General Configuration Details Detail Configuration Select the network authentication mode that will be used to connect to your wireless devices. To ensure Range a secure network, it is recommended to use WPA/WPA2. For IEEE 802.11n, only AES can be used Open, Shared, WPA-PSK, WPA2-PSK, WPA/WPA2-PSK, 802.
SX-AP-4800AN User's Guide Wireless LAN - Wireless LAN Basic Configuration General Configuration FT-PSK Details Detail Configuration * Enable/Disable the fast roaming feature. This performs network authentication and encryption equivalent to WPA2-PSK. Range Default Value Note The fast roaming feature can be used only when the Wireless Interface 1 is selected. ENABLE/DISABLE DISABLE This setting can be used only when network authentication is WPA2-PSK.
A. Appendix Wireless LAN - WEP Configuration Details * * General Configuration WEP Detail Configuration Enable/Disable WEP encryption. If WEP encryption is used, wireless communication will be encrypted using the settings for "WEP Key Range Default Value Note 1-4" and "Key Index". ON/OFF OFF If encryption is not enabled, data is not encrypted and is sent as is. To ensure higher security, enabling encryption is recommended.
SX-AP-4800AN User's Guide Wireless LAN - WPA/WPA2 Configuration Encryption Mode General Configuration Details Detail Configuration Select the encryption mode to use for WPA-PSK, WPA2-PSK, WPA/WPA2-PSK, WPA-Enterprise, Range Default Value Note WPA2-Enterprise, WPA/WPA2-Enterprise authentication. TKIP/AES/AUTO AES When the network authentication mode is WPA2-PSK, WPA/WPA2-PSK, WPA2-Enterprise, WPA/ * * WPA2-Enterprise, TKIP and AUTO cannot be used.
A. Appendix Wireless LAN - RADIUS Server Configuration Details * * General Configuration Server IP Detail Configuration Set the IP Address of RADIUS server. This needs to be set only when the network authentication is 802.1X, WPA-Enterprise, WPA2-Enterprise Range Default Value or WPA/WPA2-Enterprise. 0.0.0.0 - 255.255.255.255 0.0.0.0 Port Number Details Range Default Value Detail Configuration Set the port number used to communicate with RADIUS server.
SX-AP-4800AN User's Guide Wireless LAN - WDS Configuration WDS Mode General Configuration Details Detail Configuration Set the WDS operation mode to make communication between the Access Points. Range Default Value Note The WDS network consists of one Root AP (host) and plural Repeater APs (client). DISABLE/Root AP/Repeater DISABLE DISABLE: * * Does not use WDS. Root AP: Runs as Root AP for WDS. This exchanges traffic among Repeater, wired LAN and wireless client device.
A. Appendix Wireless LAN - MAC Address Filter Configuration * General Configuration Filter Type Detail Configuration Details Range Default Value Set a security type for MAC Address filtering used over a wireless LAN. DISABLE/DENY/ALLOW DISABLE Note When the Smart Wireless Setup is set to ENABLE, MAC Address filtering will not function. To use MAC Address filtering, disable the Smart Wireless Setup or use the wireless interface which does not use MAC Address filtering for the Smart Wireless Setup.
SX-AP-4800AN User's Guide Short Preamble Details Range Default Value Note General Configuration Detail Configuration * Enable/Disable the Short Preamble (ON/OFF). ON/OFF ON This can be set only when the Wireless Mode is 802.11b or 802.11b/g. General Configuration A-MPDU Detail Configuration Details Enable/Disable the A-MPDU (ON/OFF). Range Default Value Note If this is enabled (ON), higher throughput could be achieved. ON/OFF ON This can be set only when the Wireless Mode is 802.11n/b/g or 802.
A. Appendix Wireless LAN - QoS(WMM) Configuration (for AP) General Configuration BE Details Range Detail Configuration * Change the QoS setting for BE(Best Effort) of WMM-EDCA. ECWmin: 1 - 15 ECWmax:1 - 15 AIFSN:1 - 15 Default Value TxOPLimit: 0 - 8192 ECWmin: 4 ECWmax: 6 AIFSN: 3 Note TxOPLimit: 0 TxOPLimit must be a hexadecimal value. General Configuration BK Details Range Detail Configuration * Change the QoS setting for (BK: Back Ground) of WMM-EDCA.
SX-AP-4800AN User's Guide Wireless LAN - QoS(WMM) Configuration (for AP) General Configuration VO Details Range Detail Configuration * Change the QoS setting for (VO: Voice) of WMM-EDCA. ECWmin: 1 - 15 ECWmax: 1 - 15 AIFSN: 1 - 15 Default Value TxOPLimit: 0 - 8192 ECWmin: 2 ECWmax: 3 AIFSN: 1 Note TxOPLimit: 1504 TxOPLimit must be a hexadecimal value.
A. Appendix Wireless LAN - QoS(WMM) Configuration (for Station) General Configuration BK Details Range Detail Configuration * Change the QoS setting for (BK: Back Ground) of WMM-EDCA. ECWmin: 1 - 15 ECWmax: 1 - 15 AIFSN: 1 - 15 TxOPLimit: 0 - 8192 Default Value ACM: ON/OFF ECWmin: 4 ECWmax: 10 AIFSN: 7 TxOPLimit: 0 Note ACM: OFF TxOPLimit must be a hexadecimal value. General Configuration VI Details Range Detail Configuration * Change the QoS setting for (VI: Video) of WMM-EDCA.
SX-AP-4800AN User's Guide Wireless LAN - 802.11n Transmit Rate Configuration 20MHz Details Range General Configuration Detail Configuration Select the transmission rate for IEEE 802.11n HT20.
A. Appendix Wireless LAN - 802.11a/b/g Transmit Rate Configuration General Configuration 802.11b Details Range Default Value Note Detail Configuration * Select the transmission rate for IEEE 802.11b. Auto/Default /1000/2000/5500/11000 Auto/Default This can be set only when the wireless Mode is set to 802.11b. Auto can be selected at Unicast only. Default can be selected at Multicast only. General Configuration 802.
SX-AP-4800AN User's Guide VLAN Configuration - IEEE 802.1Q VLAN Configuration General Configuration VLAN Details Detail Configuration * Enable/Disable the VLAN feature. When set to ENABLE, connect a wired LAN port of SX-AP-4800AN and trunk port of the VLAN HUB via a Range Default Value Note network cable. ENABLE/DISABLE DISABLE When this setting is enabled, packets of tagged frames are sent to a wired LAN using the wired LAN port as a trunk port.
A. Appendix DHCP Server Configuration DHCP Server Function Details * General Configuration Detail Configuration Enable/Disable the DHCP server function. Select ENABLE to run SX-AP-4800AN as a DHCP server to automatically assign an IP address to the PC. Range Default Value Select DISABLE if you already have a DHCP server on the network. ENABLE/DISABLE DISABLE Start IP Address Details Detail Configuration Set the start IP address used for DHCP server function to assign the address.
SX-AP-4800AN User's Guide NTP Configuration General Configuration NTP Details Range Default Value Detail Configuration Enable/Disable the NTP protocol. ENABLE/DISABLE DISABLE General Configuration NTP Server Details Range Default Value Detail Configuration * Set the domain name or IP Address for NTP server. In case of the domain name; Alphanumeric character string (0-128 characters) In case of the IP Address; 0.0.0.0 - 255.255.255.
A. Appendix Access Control General Configuration TELNET Details Detail Configuration * Allow/Deny access using TELNET via a wired/wireless LAN. When set to ENABLE, access to SX-AP-4800AN is allowed. Range Default Value When set to DISABLE, access to SX-AP-4800AN is denied. ENABLE/DISABLE Wired LAN : ENABLE / Wireless LAN : DISABLE General Configuration SSH Details Detail Configuration * Allow/Deny access using SSH via a wired/wireless LAN. When set to ENABLE, access to SX-AP-4800AN is allowed.
SX-AP-4800AN User's Guide Log Output - USB USB Log Output Details General Configuration Detail Configuration * Enable/Disable the USB log output. When set to ENABLE, the USB storage device cannot be used over a network using the Device Server feature of SX-AP-4800AN. ENABLE/DISABLE DISABLE Range Default Value General Configuration File Size Detail Configuration Details Range Default Value Specify the log file size (Mbyte).
A. Appendix Log Output - Syslog Server Syslog Server Log Output Details Range Default Value Detail Configuration * Enable/Disable the log output to Syslog server. ENABLE/DISABLE DISABLE Syslog Server Details Range General Configuration General Configuration Detail Configuration * Set the domain name or IP Address of Syslog server. When using domain name: Alphanumeric characters(0-128 characters) When using IP Address: Default Value 0.0.0.0 - 255.255.255.