
User Manual
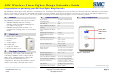
Table Of Contents
- 1 Models
- 2 Parts List
- 3 Package Contents
- 4 Specifications
- 5 Key Components
- 6 Precautionary Statements
- 7 Selecting a Location
- 8 Preparing the Siren
- 9 Adding the Siren
- 10 Installation Instructions
- 11 Testing
- 12 Deleting the Range Extender
- 13 Modifying the Details of the Range Extender
- 14 LED Operating Conditions
- 15 Maintenance Procedures
- 16 Troubleshooting
- 17 Compliance Statements

SMC Wireless Siren Zigbee Range Extender Guide
D. Remove the cover and connect the battery to
the battery connector. Insert the battery
plug into the pins so that the wire colors are
arranged as shown in the picture below.
Copyright
©
2011 SMC Networks Page 4
All Rights Reserved
I/M SMCSRXX-Z rev. 1.0
7/6/11
E. The Status LED flashes green when the
battery is connected. This means that the
device is ready to be added to a
TouchScreen.
Note: If the Status LED does not flash green, the
device may not be defaulted. To default the
sensor, remove the battery from the connector.
Then press the tamper switch button while
inserting the battery plug into the pins as show in
the above diagram. Confirm that the Status LED is
flashing green to indicate the siren is ready to be
added to a TouchScreen.
F. Replace the battery.
G. Replace the battery cover and the battery
cover screw.
9 Adding the Siren
A. At the TouchScreen Home screen, tap the
Settings app.
B. On the Settings screen, use the keypad to
enter the Installer Code.
C. On the Technician Code/Id screen, enter
your Technician ID and tap Done.
D. On the Settings menu, select Home Devices
> Sirens > Add Siren. The Locating Sirens
screen appears.
E. Tap Next. The system scans the premises for
sirens that can be added. Sirens must be
defaulted and not currently paired with
another TouchScreen.
F. When the TouchScreen finds a siren, tap the
tamper switch to pair it.
G. Follow the system prompts to complete the
add process and to configure the device. The
device is ready to be installed.
10 Installation Instructions
A. CA version: Plug the Range Extender into a
wall. The outlet must be connected to AC
mains power at all times and must not be
controlled by a light switch.
B. NA version: Remove the existing electrical
outlet cover screw and use the supplied
electrical outlet cover screw. This screw is
longer than the one securing the battery
cover. Plug the device into the BOTTOM plug
of the wall outlet. Replace the center screw
through the hole in the electrical outlet
mounting tab. Tighten the screw. Use the
supplied leveling washers and/or rubber pads
to confirm the tamper switch is pressed
properly against wall.
continued on next pag
e