
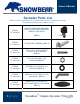
Use and Care Manual


9
9
| Pa
g
INSTALL
5
AND WAS
H
ASSEMBL
Y
NUT ON V
Once you
r
Receiver A
s
there is no
The spread
Hold the s
p
receiver as
s
2” from an
o
assembly’s
supplied r-
c
INST
A
REC
E
REC
E
DEP
T
HITCH P
I
4
5
2
g
e
5
/8-11x3.50” H
E
H
ER ON REC
E
Y
SIDE. WAS
H
ERTICAL PO
S
r
desired hei
g
s
sembly bra
c
movement o
f
er is ready t
o
p
reader asse
m
s
embly to all
o
o
ther. When t
h
holes aligns
c
lip in the hit
c
A
LL SPREAD
E
E
IVER INTO V
E
E
IVER. ALIGN
T
H ADJUSTM
E
R-CLIP
I
N
6
Sn
o
E
X BOLT
E
IVER
H
ER AND
S
T SIDE.
g
ht is determi
n
c
ket side, and
f
the spreade
r
o
install into y
o
m
bly up to th
e
o
w for horizo
n
h
e spreader
a
with the hitc
h
c
h pin hole to
E
R ASSEMBL
Y
E
HICLE'S 2” H
ONE HORIZ
O
E
NT HOLE.
3
o
wBea
r
n
ed, install t
h
install wash
e
r
assembly o
n
o
ur vehicle's
e
2” hitch rec
e
n
tal depth adj
a
ssembly is s
h
receiver, an
secure the a
s
Y
2”
ITCH
O
NTAL
r
®
Tail
g
h
e two 5/8-11
x
e
r and 5/8-11
n
the receive
r
hitch receive
r
e
iver, and sli
d
ustment in th
lid into the hi
t
d install the
s
s
sembly.
g
ate S
p
x
3.50” hex b
o
lock nut on
v
r
assembly.
r
.
d
e in. There a
e vehicle’s hi
t
ch receiver,
l
s
upplied hitch
ONCE DE
S
INSTALL
S
R-CLIP T
O
O
p
reade
r
o
lts and wash
v
ertical post
s
re three hole
s
tch receiver.
l
ook to see
w
pin. Insert fu
S
IRED HOLE
I
S
UPPLIED HI
T
O
SECURE AS
O
wner’s
r
(TGS
R
e
ers on the 2”
s
ide. Tighten
u
s
in the spre
a
Each hole is
w
hen one of t
h
lly, and insta
l
I
S ALIGNED,
T
CH PIN AND
SEMBLY.
Manual
-325)
e
vision 2
u
ntil
a
der’s 2”
spaced
h
e
l
l the