3-869-357-11 (1) Network Camera Recorder User’s Guide Software Version 1.
Copyright Notice ©2004 Sony Corporation. All rights reserved. This manual may not be reproduced, translated or reduced to any machine readable form in whole or in part, without prior written approval from Sony Corporation. SONY CORPORATION PROVIDES NO WARRANTY WITH REGARD TO THIS MANUAL OR INFORMATION CONTAINED HEREIN AND HEREBY EXPRESSLY DISCLAIMS ANY IMPLIED WARRANTIES OF MERCHANTABILITY OR FITNESS FOR ANY PARTICULAR PURPOSE WITH REGARD TO THIS MANUAL OR SUCH INFORMATION.
Table of Contents Introduction Features .................................................................. 4 System Configuration ............................................ 4 System Requirements ............................................ 5 Installing Network Camera Recorder ................. 5 Let’s Use Network Camera Recorder .................. 7 1.Start the Program ............................................. 7 2.Register the Camera ........................................ 8 3.
Introduction System Configuration Cameras are connected to a network and controlled by a computer with Network Camera Recorder installed. Introduction Features Network Camera Recorder is software exclusively designed for use with Sony SNC-M1/M1W/M3/M3W Network Cameras. Network Camera Recorder allows you to monitor images of the cameras, record them and play back the recorded data.
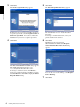
System Requirements Processor Intel Pentium III, 1 GHz or higher To install Network Camera Recorder, open the software package and perform the following procedure. For installation, you should log in the computer as the Power User or Administrator. 1 Double-click NCR_Setup.exe of the package. The installation wizard appears on the screen. 2 Click Next. The User Interface Languages dialog appears.
3 Click Next. The License Agreement dialog appears. 5 Click Next. The Select Program Folder dialog appears. Introduction Read the License Agreement carefully, and if you accept the agreement, select I accept the terms of the license agreement. You cannot continue the installation if you do not accept the agreement. 4 Click Next. The default folder is set to “Network Camera Recorder.” To change to another folder name, enter your preferred name in the text box.
The InstallShield Wizard Complete dialog appears. Let’s Use Network Camera Recorder Click Finish to complete installation. If the message requiring restarting appears, restart the computer. To uninstall Network Camera Recorder To uninstall Network Camera Recorder, follow the normal uninstall procedure for Windows. Even if Network Camera Recorder has been uninstalled, the setup and recorded data are not deleted.
Network Camera Recorder starts and the main window appears. 2 Click (Add Camera). Add Camera Introduction If the icon is not green, click Cameras. The (Add Camera) icon turns green and is enabled. Cameras The Add Camera dialog appears. To exit the program Click in the upper right corner of the main window. 3 Select or enter the parameters in the Add Camera dialog. Click Select a camera type. Camera name 2.
4 Click OK, The camera is now registered. Registered camera name 2 Click Select Camera... in the pop-up menu. The Select Camera dialog appears. 3 Click on the name of the camera you want to monitor. Properties of the registered camera Introduction 5 Click in the upper right corner to close the Camera Manager window. Tip For registration of two or more cameras and the setting of camera properties, see “Setting a Camera” in the “Setups” chapter (page 24). Click on the camera name. 3.
4 Click OK. The image of the camera appears in the monitor window. Image of the camera 5. Record the Camera Image You can record the image of the camera you are monitoring. For recording, use the buttons on the Recorder toolbar. Introduction To start recording To stop recording Tips Tip You can simultaneously display the images of two or more cameras in the monitor window. For details, see “Assigning a Camera to the Monitor Window” in the “Setups” chapter (page 28). 4.
2 Click on the camera name on the camera tree. The properties of the recordings are displayed in the list view. Camera name 4 Properties of the recording Click N (Play) on the Playback toolbar. Playback starts. By clicking x (Cue to Begin), the display goes back to the image at the beginning of the recording and playback stops. Introduction To stop playback To start playback Tip If the properties of the recording you want to play back do not appear in the list, search for it using the and buttons.
Toggle Pan & Tilt Presets Toolbar (page 15) Operations Audio Mute (page 14) Main Window of Network Camera Recorder Operations When you launch Network Camera Recorder for the first time, the following main window is displayed. This section explains the configuration of the main window. 1 3 Functional Toolbars Allows control of the camera. The display of each functional toolbar is enabled or disabled by the specific toggle button on the main toolbar.
Monitoring This section explains the procedure of monitoring from the selected camera. Before monitoring, you need to register the camera(s) in the Network Camera Recorder application and assign the camera(s) to the monitor window. For registration of cameras and assignment to the monitor window, see the “Setups” chapter on page 24. Right-clicking in the monitor window with a camera image displays a pop-up menu.
To turn off the image of the camera from the monitor window Select Remove Camera(s) from the pop-up menu. The image of the selected camera disappears from the monitor window and the message “NO CONNECTION” appears. Display in the monitor window Camera name To return to monitoring the camera image Operations To change the display in the monitor window from playback of the recorded image to camera monitoring, select Return to Camera(s) from the pop-up menu.
Controlling the Camera You can control pan, tilt and digital zoom of the camera during monitoring, or move the camera to the preset position. Panning, Tilting and Digital Zooming (SNC-M3/M3W only) To display or hide the Pan & Tilt toolbar, click the (Toggle Pan & Tilt Toolbar) button on the main toolbar. 1 During digital zooming, the pan & tilt function of the camera does not operate properly. The camera only pans and tilts within the ×1 image area using the pan and tilt direction buttons.
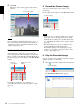
To store new preset positions To edit or delete a preset position You can store up to 8 preset positions. 1 1 Click the (Customize Presets) button on the Pan & Tilt Presets toolbar. The Pan & Tilt Presets dialog appears. Click the (Customize Presets) button on the Pan & Tilt Presets toolbar. The Pan & Tilt Presets dialog appears. 3 4 2 5 2 4-a 4-c 3 4-b 6 Operations 5 3 2 7 Select the camera from the drop-down list of the Select Camera box.
Recording the Camera Image (Manual Recording) Recording Using the Recorder Toolbar You can search for recorded data and view playback either in the preview window of the Search Recording window or in the monitor window of the main window. Searching for Recordings Operations You can record the current images during monitoring or take a snapshot. This section explains how to record manually using the buttons on the Recorder toolbar. For a scheduled recording, see “Scheduling Recordings” on page 30.
View Recording List To search by date and time Previous Date To search for a recording made on a specified date and time, select the date and time with the calendar or date picker. The data recorded on the specified date and time are shown on the list view or timeline in the Search Recording window. Date Picker box Next Date Zoom In Date & Time Zoom Out Date & Time Refresh Recordings To specify the date and time with the calendar Click on the date picker box, and the calendar appears.
To select the previous or next timeline To search for a recording using the timeline 1 2-a 2-b Indicator (red line) To search for a recording from the list view 1 2 3 1 Click the (View Recording List) button on the Search Recording toolbar. The recordings made by the selected camera(s) or within the selected searching range are displayed in the list. 2 Show the recording you want to play back in the list. To sort the recordings, click on the header item. 3 Double-click on the recording.
Displaying a Preview Image You can display a preview image of the selected recording in the preview window of the Search Recording window. You can also view the playback in the preview window. 3 4 Playing Back the Located Recording You can play back the located recording using the Playback toolbar. For searching for the recording, see “Searching for Recordings” on page 17. Playback toolbar Operations To display the Playback toolbar, click the (Toggle Playback Toolbar) button on the main toolbar.
Normal playback, reverse playback, pause and cue Use the following buttons. Cue to Begin: Play from the beginning X Pause: Pause of play n Reverse: Reverse play at normal speed N Play: Normal play at normal speed Note The . and > buttons are disabled on the Playback toolbar in the Search Recording window. Use these buttons on the Playback toolbar in the main window.
Cleanup all recording older than/until: Set the storage duration of recordings (days). The recordings older than the set days will be deleted automatically. 3 Click OK. To close the dialog without deleting, click Cancel. Exporting to an AVI File File conversion starts. Watch the progress bar to monitor the conversion. 8 When the conversion is completed, click Close. Note Audio data cannot be converted into an AVI file.
Export Set the parameters relating to export execution. Video Codec: Enter the video codec used for export. If necessary, click the Settings… button to modify the properties of video codec. Show all available codecs: By selecting this checkbox, a wide choice of video codecs among from all the ones available for your computer is possible. Output File: Enter the path of the destination of export. Click the Browse… button to browse and select the destination folder.
Registering a Camera Setups When you connect a new camera to the network, register the camera using the following procedure. Up to four cameras can be registered. Setting a Camera 1 To set up a camera, display the Camera Manager window by clicking the (Camera Manager) button. Click the (Add Camera) button on the Camera Manager toolbar. The Add New Camera dialog appears. Note Camera Manager Window 1 If the button is grayed out, click on Cameras in the camera tree.
Setting the Camera Properties Network Settings – General tab Displays the port name in the Name box. After registration of the camera in the Camera Manager window, set the properties of the camera. To start the setting, select the camera from the camera tree or the camera list. Then set the parameters on the Camera Properties dialog. The Camera Properties dialog has four tabs. Note It will take about 30 seconds maximum to apply the modified settings on the Camera Properties dialog to the camera.
Camera tab Perform the settings relating to communication, etc. Video Codec Select the video codec, MPEG4 or JPEG. Frame Rate Select the frame rate. 1, 2, 3, 4, 5, 6, 8, 10, 15, 20, 25 and 30 fps are available. Notes Setups Mount Angle Select the angle at which the camera is mounted. 0, 90, 180 and 270 degrees are available. Administrator Enter the user name and the password of the Administrator of the registered camera. Note Be sure to enter the Administrator's user name and password.
Audio tab Perform the settings relating to the microphone connected to the camera. Deleting a Camera To delete the registered camera, proceed as follows: 1 Select the camera you want to delete from the camera tree or the camera list in the Camera Manager window. 2 Click the (Delete Camera(s)) button on the Camera Manager toolbar. A confirmation dialog appears. 3 Click Yes. The selected camera is deleted. Note Setups The recordings associated with the camera will remain, but cannot be displayed.
Layout C: 2 cameras Assigning a Camera to the Monitor Window Network Camera Recorder provides eight types of monitor window layouts. Select one of the layouts according to the number of cameras you want to monitor and assign the camera(s) to the monitor window. Layout D: 3 cameras Selecting a Layout Select Layout box Setups Layout F: 3 cameras Layout G: 4 cameras Click on the Select Layout box on the main toolbar and select a layout from the drop-down list.
Assigning a Camera to the Monitor Window Assign a camera to each monitor window of the selected layout as follows. 1 Right-click on the monitor window to which you want to assign a camera. The pop-up menu appears. Assigning a Storage Location You can specify the storage location for recorded video files and for snapshots. 1 Click the (Storage Locations) button on the main toolbar. The Storage Location dialog appears. 2 Set the parameters in the Storage Location dialog.
Setups Old file overwriting: This function automatically overwrites and deletes old files to secure a recording capacity. By selecting this checkbox, an old file is automatically overwritten by a new file when the remaining capacity becomes lower than the set value. If the checkbox is cleared, recording stops and an error message appears when the remaining capacity reaches the set value. A recording is stored in multiple files.
2 Camera tree Displays the cameras registered in Network Camera Recorder in a tree configuration. 3 Week view or list view Displays the created schedules on a weekly calendar along the timeline or in the list of information. 4 Schedule Properties dialog Set the properties of a schedule. 4 Set the parameters of the schedule in the Schedule Properties dialog. For details of the setting, see “To set the schedule parameters” on page 31.
To create a date/time event using the list view 2 3 1 Duration: Displays the recording duration (day, hours, minutes or seconds) Weekdays: Displays the abbreviations of the days of the week for a recurrent event. M Monday T Tuesday W Wednesday T Thursday F Friday S Saturday S Sunday To save the schedule Setups 4 1 Select the camera for which you want to create a schedule from the camera tree.
Others Troubleshooting If Network Camera Recorder does not function correctly, check the following: Symptom Cause and solution The image of the Confirm that the image of the Network Camera cannot camera is displayed using the Web be displayed. browser. Then, set up Network Camera Recorder using the data registered for the Web browser (page 25). For monitoring via the Web browser, refer to the User's Guide of the Network Camera.
Glossary AVI (Audio Video Interleave) The format developed by Microsoft Corporation to store a moving image and audio in a file. The data in the AVI file can easily be managed using Microsoft Windows. Various CODECs can be applied to the AVI data. Bit rate The rate at which data bits are transmitted. CODEC (COmpressor DECompressor) Software/hardware for coding/decoding video and audio data. fps (frame per second) The unit of frame rate, indicating the number of frames transmitted from the camera per second.
Index A Add Camera dialog .......................... 8 Add New Camera dialog................ 24 Administrator ................................. 26 Assigning a Camera ..............9, 28, 29 Assigning a Storage Location ........ 29 Audio Mute .................................... 14 Audio tab........................................ 27 AVI File.......................................... 22 B Bandwidth Control......................... 26 Bit Rate .................................... 26, 27 C P Fast-forward .
Start Available ................................19 Start the Program..............................7 Status bar ........................................12 Storage Location ............................29 System Configuration.......................4 System Requirements.......................5 T TCP/IP tab ......................................25 The Search Recording window ......10 Thumbnails.....................................18 Tilting .............................................15 Timeline...............
Sony Corporation