3-043-521-12 (1) Dictator/Transcriber BM-87DST Operating Instructions Before operating the unit, please read this manual thoroughly and retain it for future reference. Owner’s Record The model and serial numbers are located on the bottom. Record the serial number in the space provided below. Refer to them whenever you call upon your Sony dealer regarding this product. Model No. BM-87DST Serial No.
WARNING To prevent fire or shock hazard, do not expose the unit to rain or moisture. To avoid electrical shock, do not open the cabinet. Refer servicing to qualified personnel only. For the customers in the United States INFORMATION This equipment has been tested and found to comply with the limits for a Class B digital device, pursuant to Part 15 of the FCC Rules. These limits are designed to provide reasonable protection against harmful interference in a residential installation.
Table of Contents Features ...................................................................................................................................................................................... Precautions ................................................................................................................................................................................ Operation Flow Chart ............................................................................................
Features The Sony BM-87DST dictator/transcriber is designed to be used for both dictating and transcribing. As a dictator • The Sony HU-80 hand control unit (not supplied) remotely controls the BM-87DST dictator/transcriber. • Electronic index signal — “LTR” (letter=end of document) signal — can be recorded on a tape while the unit is set in the recording (dictating), telephone recording, stop or playback mode. • Alarm sound informs a recording error.
Precautions • Operate the unit only on 9 V DC. For the AC operation, use the AC power adaptor supplied with the unit. Do not use any other AC power adaptor as it may cause a malfunction of the unit. • Unplug the AC power adaptor from the wall outlet when it will not be used for an extended period of time. To disconnect the adaptor, pull it out by grasping the adaptor itself. Never pull it by the cord.
Operation Flow Chart For details, refer to the pages in z. : Necessary step : Optional step Dictating qd Connect the AC power adaptor to the unit and to a wall outlet. 0 Connect the optional HU-80 hand control unit. q; Set the POWER switch to ON. HU-80 (not supplied) Insert a cassette. qa Set the TAPE SPEED selector to 2.4 or 4.8. qg Press the RESET button to set the TAPE COUNTER to zero. Set the function selector of the HU-80 to DICT. Speak into the microphone.
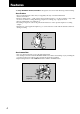
Transcribing qj Disconnect the HU-80 hand control unit (if it is connected). Connect the supplied foot control unit. 0 Set the POWER switch to ON. Foot control unit (supplied) Insert the dictated cassette. qa Set the TAPE SPEED selector to 2.4 or 4.8. qg Set the SPEAKER selector to BUILT-IN w; or connect headphones. w; Set the AUTO STOP selector to OFF. qk Press the j REW button. When the beginning of the dictated cassette is reached, a beep tone is heard and the unit automatically shuts off.
Location and Function of Controls For details, refer to the pages indicated in z. Cassette holder Eject button Press to eject the cassette. TAPE COUNTER qd RESET button qd Press to set the TAPE COUNTER to zero Built-in speaker POWER lamp Lights up when the POWER switch is set to ON. REC (record)/ERASE lamp qdwa Lights up while recording or erasing. Flickers when the microphone picks up sound. LTR(letter)INDEX lamp qf Lights up when the LTR signal is recorded.
VOLUME control TONE control REVERSE TIME control ql SPEED control qk SPEAKER (BUILT-IN/HAND) selector w; STEREO PLAYBACK/AUTO STOP (OFF/ ON) selector qk SPEED CONTROL (OFF/ON) selector qk TAPE SPEED (2.4/4.
Preparation Connecting the Power Source Note on the AC power adaptor to a wall outlet Rear to the DC IN 9V jack Use only the AC power adaptor (supplied). Do not use any other AC power adaptor. AC power adaptor (supplied) Polarity of the plug Connecting the HU-80 Hand Control Unit (not supplied) For operation, refer to “Dictating” on page 13.
Inserting a Cassette 1 5 Cassette 4 3 POWER 2 1 2 Take up any slack in the tape. 3 4 Press the eject button to open the cassette holder. 5 Close the cassette holder. Set the POWER switch to ON. The POWER lamp lights up. Insert a cassette into the cassette holder with the side to be recorded or played back facing upward.
Preparation xNotes on cassettes • Any standard cassette can be used, but the optional Sony leaderless cassette DC-60 or DC-90 is recommended. The use of a TYPE II (High position) or TYPE IV (metal) cassette is not advisable. • Choose a cassette of suitable length. The recording time on each side of these cassettes is as follows: Sony DC-60 approx. 30 minutes (4.8 cm/s) Sony DC-90 approx. 45 minutes (4.8 cm/s) • The use of cassettes whose running time is longer than 90 minutes (total time) are not advisable.
Dictating To use the unit as a dictating machine, connect the HU-80 hand control unit (not supplied). For the connection instructions, see page 10. Operation * The SEC button does not function with the BM-87DST. Microphone DICT lamp 2 POWER (SEC button)* FWD SPACE button 5 Function 4 selector •DICT (dictating) •STOP •LISTEN •B.SPACE LTR button Hand speaker HU-80 (not supplied) 1 Set the POWER switch to ON. The POWER lamp lights up. 2 3 4 5 Insert a cassette. (See page 11.
Dictating Useful Functions xLTR (letter) signal You can record electronic index signals on the tape with the HU-80 while the unit is set in the recording (dictating), telephone recording, stop or playback mode. LTR (letter=end of document) signal: Record at the end of each dictated material. When the Auto stop function (page 18) is activated (AUTO STOP:ON), the tape automatically stops at each index signal when it is rewound or fast forwarded.