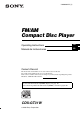
2-698-302-11 (1) FM/AM Compact Disc Player Operating Instructions US Manual de instrucciones ES Owner’s Record The model and serial numbers are located on the bottom of the unit. Record the serial number in the space provided below. Refer to these numbers whenever you call upon your Sony dealer regarding this product. Model No. CDX-GT31W Serial No. To cancel the demonstration (DEMO) display, see page 10. Para cancelar la pantalla de demostración (DEMO), consulte la página 10.
For installation and connections, see the supplied installation/connections manual. Warning This equipment has been tested and found to comply with the limits for a Class B digital device, pursuant to Part 15 of the FCC Rules. These limits are designed to provide reasonable protection against harmful interference in a residential installation.
Table of Contents Welcome ! . . . . . . . . . . . . . . . . . . . . . . . . . . . . . 4 Other functions Getting Started Changing the sound settings . . . . . . . . . . . . . . . 9 Adjusting the sound characteristics — BAL/FAD/SUB. . . . . . . . . . . . . . . . . . . . 9 Customizing the equalizer curve — EQ3 . . . . . . . . . . . . . . . . . . . . . . . . . . . . . 9 Adjusting setup items — SET . . . . . . . . . . . . 10 Using optional equipment . . . . . . . . . . . . . . . .
Welcome ! Getting Started Thank you for purchasing this Sony Compact Disc Player. You can enjoy your drive with the following functions. • CD playback You can play CD-DA (also containing CD TEXT*) and CD-R/CD-RW (MP3/WMA files also containing Multi Session (page 12)). Type of discs Label on the disc Resetting the unit Before operating the unit for the first time, or after replacing the car battery or changing the connections, you must reset the unit.
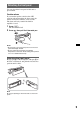
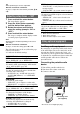
Detaching the front panel You can detach the front panel of this unit to prevent theft. Caution alarm If you turn the ignition switch to the OFF position without detaching the front panel, the caution alarm will sound for a few seconds. The alarm will only sound if the built-in amplifier is used. 1 Press (OFF). The unit is turned off. 2 Press , then pull it off towards you. Notes • Do not drop or put excessive pressure on the front panel and display window.
Location of controls and basic operations Main unit 12 3 4 5 6 7 8 OFF PUSH SELECT EQ3 SOURCE AUX SEEK SEEK CAT MODE BTM DIM ALBM 1 DSPL 2 REP SHUF 3 4 PAUSE 5 6 SCRL CDX-GT31W 9q; qa qs qdqfqg Card remote commander RM-X151 1 4 qk OFF SOURCE ATT SEL MODE w; wa qd + ws – qf ql SCRL DSPL 1 2 3 4 5 6 + VOL – qj wd qh qj Refer to the pages listed for details.
K SEEK –/+ buttons CD: To skip tracks (press); skip tracks continuously (press, then press again within about 1 second and hold); reverse/fastforward a track (press and hold). Radio: To tune in stations automatically (press); find a station manually (press and hold). L Receptor for the card remote commander M MODE button 8, 11 To select the radio band (FM/AM); select the SAT tuner band (mode)*2; select the unit*3.
CD Radio For details on selecting a CD/MD changer, see page 11. Storing and receiving stations Caution Display items When tuning in stations while driving, use Best Tuning Memory (BTM) to prevent an accident. Storing automatically — BTM A WMA/MP3 indication B Source C Track number/Elapsed playing time, Disc/ artist name, Album number*1, Album name, Track name, Text information*2, Clock 1 Press (SOURCE) repeatedly until “TUNER” appears. To change the band, press (MODE) repeatedly.
Tuning automatically Other functions 1 Changing the sound settings Select the band, then press (SEEK) –/+ to search for the station. Scanning stops when the unit receives a station. Repeat this procedure until the desired station is received. Tip If you know the frequency of the station you want to listen to, press and hold (SEEK) –/+ to locate the approximate frequency, then press (SEEK) –/+ repeatedly to fine adjust to the desired frequency (manual tuning).
Tip Other equalizer types are also adjustable. With the card remote commander In step 3, to adjust the selected item, press <, M, , or m. Adjusting setup items — SET 1 Press and hold the select button. The setup display appears. 2 Press the select button repeatedly until the desired item appears. 3 Rotate the volume control dial to select the setting (example “ON” or “OFF”). 4 Press and hold the select button. The setup is complete and the display returns to normal play/reception mode.
Adjust the volume level Repeat and shuffle play Be sure to adjust the volume for each connected audio device before playback. 1 During playback, press (3) (REP) or (4) (SHUF) repeatedly until the desired setting appears. 1 Turn down the volume on the unit. 2 Press (SOURCE) repeatedly until “AUX” appears. “AUX FRONT IN” appears. 3 Start playback of the portable audio device at a moderate volume. 4 Set your usual listening volume on the unit.
Additional Information Precautions • If your car has been parked in direct sunlight, allow the unit to cool off before operating it. • Power antenna (aerial) will extend automatically while the unit is operating. Moisture condensation On a rainy day or in a very damp area, moisture condensation may occur inside the lenses and display of the unit. Should this occur, the unit will not operate properly. In such a case, remove the disc and wait for about an hour until the moisture has evaporated.
Playback order of MP3/WMA files MP3/WMA Folder (album) MP3/WMA file (track) Maintenance Replacing the lithium battery of the card remote commander Under normal conditions, the battery will last approximately 1 year. (The service life may be shorter, depending on the conditions of use.) When the battery becomes weak, the range of the card remote commander becomes shorter. Replace the battery with a new CR2025 lithium battery. Use of any other battery may present a risk of fire or explosion.
Cleaning the connectors The unit may not function properly if the connectors between the unit and the front panel are not clean. In order to prevent this, detach the front panel (page 5) and clean the connectors with a cotton swab. Do not apply too much force. Otherwise, the connectors may be damaged. 2 Remove the unit. 1 Insert both release keys simultaneously until they click. Hook facing inwards. 2 Pull the release keys to unseat the unit.
Separation: 35 dB at 1 kHz Frequency response: 30 – 15,000 Hz Troubleshooting AM Tuning range: 530 – 1,710 kHz Antenna (aerial) terminal: External antenna (aerial) connector Intermediate frequency: 10.
CD/MD playback The disc cannot be loaded. • Another disc is already loaded. • The disc has been forcibly inserted upside down or in the wrong way. The disc does not playback. • Defective or dirty disc. • The CD-Rs/CD-RWs are not for audio use (page 12). MP3/WMA files cannot be played back. The disc is incompatible with the MP3/WMA format and version (page 12). MP3/WMA files take longer to play back than others. The following discs take a longer time to start playback.
OFFSET There may be an internal malfunction. t Check the connection. If the error indication remains on in the display, consult your nearest Sony dealer. READ The unit is reading all track and album information on the disc. t Wait until reading is complete and playback starts automatically. Depending on the disc structure, it may take more than a minute. RESET The CD unit and CD/MD changer cannot be operated due to a problem. t Press the RESET button (page 4).
Para obtener información sobre la instalación y las conexiones, consulte el manual de instalación/conexiones suministrado. ertencia Advertencia: si el encendido del automóvil no disponga de una posición ACC Asegúrese de ajustar la función de desconexión automática (página 10). La unidad se apagará completa y automáticamente en el tiempo establecido después de apagarla la unidad, lo cual evita que se agote la batería.
Tabla de contenido Bienvenido. . . . . . . . . . . . . . . . . . . . . . . . . . . . . 4 Otras funciones Procedimientos iniciales Cambio de los ajustes de sonido . . . . . . . . . . . . 9 Ajuste de las características del sonido — BAL/FAD/SUB. . . . . . . . . . . . . . . . . . . . 9 Personalización de la curva de ecualizador — EQ3 . . . . . . . . . . . . . . . . . . . . . . . . . . . . . 9 Definición de los elementos de configuración — SET . . . . . . . . . . . . . . . . . . . . . . . . . . . . . .
Bienvenido Procedimientos iniciales Gracias por adquirir este reproductor de discos compactos Sony. Mientras maneja puede disfrutar de las funciones siguientes: • Reproducción de CD Puede reproducir discos CD-DA (incluidos CD TEXT*) y CD-R/CD-RW (archivos MP3/ WMA incluidos también Multi Session (página 12)). Tipo de discos Etiqueta del disco CD-DA MP3 WMA • Recepción de radio – Puede almacenar hasta 6 emisoras de radio por banda (FM1, FM2, FM3, AM1 y AM2).
Ajuste del reloj El reloj emplea una indicación digital de 12 horas. 1 Mantenga presionado el botón de selección. Aparece la pantalla de ajustes. 2 Presione el botón de selección varias veces hasta que aparezca “CLOCKADJ”. 3 Presione (SEEK) +. La indicación de la hora parpadea. 4 Gire el selector de control de volumen para ajustar la hora y los minutos. Para mover la indicación digital, presione (SEEK) –/+.
Ubicación de los controles y operaciones básicas Unidad principal 12 3 4 5 6 7 8 OFF PUSH SELECT EQ3 SOURCE AUX SEEK SEEK CAT MODE BTM DIM ALBM 1 DSPL 2 REP SHUF 3 4 PAUSE 5 6 SCRL CDX-GT31W 9q; qa qs qdqfqg Control remoto de tarjeta RM-X151 1 4 qk OFF SOURCE ATT SEL MODE w; wa qd + ws – qf ql SCRL DSPL 1 2 3 4 5 6 + VOL – qj wd qh qj Consulte las páginas indicadas para obtener información detallada.
J Botón 5 (liberación del panel frontal) K Botones SEEK –/+ CD: Para saltar pistas (presionar); para saltar pistas en forma continua (presionar y volver a presionar antes de que transcurra 1 segundo y mantener presionado); para avanzar o retroceder una pista rápidamente (mantener presionado). Radio: Para sintonizar emisoras automáticamente (presionar); para localizar una emisora manualmente (mantener presionado).
CD Radio Para obtener más detalles sobre cómo seleccionar un cambiador de CD/MD, consulte la página 11. Elementos de la pantalla Almacenamiento y recepción de emisoras Precaución Para sintonizar emisoras mientras maneja, utilice la función Memoria de la mejor sintonía (BTM) para evitar accidentes.
Recepción de las emisoras almacenadas 1 Seleccione la banda y, a continuación, presione un botón numérico (de (1) a (6)). Otras funciones Cambio de los ajustes de sonido Sintonización automática Ajuste de las características del sonido — BAL/FAD/SUB 1 Puede ajustar el balance, el equilibrio y el volumen del altavoz potenciador de graves. Seleccione la banda y, a continuación, presione (SEEK) –/+ para buscar la emisora. La búsqueda se detiene cuando la unidad recibe una emisora.
3 Gire el selector de control de volumen para ajustar el elemento seleccionado. El nivel de volumen puede ajustarse en intervalos de 1 dB, entre –10 dB y +10 dB. Repita los pasos 2 y 3 para ajustar la curva de ecualizador. Para restaurar la curva de ecualizador ajustada en fábrica, mantenga presionado el botón de selección antes de que finalice el ajuste. Después de 3 segundos, se completa el ajuste y la pantalla vuelve al modo de reproducción/ recepción normal.
Uso de un equipo opcional Cambiador de CD/MD Selección del cambiador Equipo de audio auxiliar Si conecta un dispositivo de audio portátil opcional a la toma de entrada AUX (minitoma estéreo) de la unidad y simplemente selecciona la fuente, podrá escuchar por las bocinas del automóvil. Puede ajustar cualquier diferencia en el nivel de volumen entre la unidad y el dispositivo de audio portátil. Siga este procedimiento: Conexión del dispositivo de audio portátil 1 Apague el dispositivo de audio portátil.
• Si estaciona el automóvil bajo la luz directa del sol, deje que la unidad se enfríe antes de usarla. • La antena motorizada se extenderá automáticamente mientras la unidad se encuentre en funcionamiento. • Antes de reproducir los discos, límpielos con un paño de limpieza disponible en el mercado. Hágalo desde el centro hacia los bordes. No utilice disolventes como bencina, diluyentes, productos de limpieza comerciales ni aerosoles antiestáticos para discos analógicos.
– archivos MP3/WMA (pistas) y carpetas contenidas en un disco: 300 (si un nombre de archivo o carpeta contiene muchos caracteres, este número puede ser inferior a 300). – caracteres que se pueden visualizar en el nombre de un archivo o carpeta : 32 (Joliet) o 64 (Romeo). • Las versiones 1.0, 1.1, 2.2, 2.3 y 2.4 del indicador ID3 se aplican solamente al formato MP3. El indicador ID3 puede tener de 15/30 caracteres (versiones 1.0 y 1.1) o de 63/126 caracteres (2.2, 2.3 y 2.4).
Limpieza de los conectores Es posible que la unidad no funcione correctamente si los conectores entre ésta y el panel frontal están sucios. Para evitar esta situación, extraiga el panel frontal (página 5) y limpie los conectores con un hisopo de algodón. No aplique demasiada fuerza, ya que podría dañar los conectores. Unidad principal Parte posterior del panel frontal 2 Extraiga la unidad. 1 Inserte las dos llaves de liberación simultáneamente hasta escuchar un clic. El gancho debe mirar hacia adentro.
Generales Salidas: Terminal de salidas de audio (intercambiable entre posterior y sub) Terminal de control del relé de la antena motorizada Terminal de control del amplificador de potencia Entradas: Terminal de entrada de control BUS Terminal de entrada de audio BUS Terminal de entrada de la antena Toma de entrada AUX (minitoma estéreo) Controles de tono: Graves: ±10 dB a 60 Hz (XPLOD) Medios: ±10 dB a 1 kHz (XPLOD) Agudos: ±10 dB a 10 kHz (XPLOD) Requisitos de alimentación: batería de automóvil de cc de 12
No es posible utilizar el control remoto de tarjeta. Asegúrese de que se retiró la película de aislamiento (página 4). Reproducción de CD/MD No es posible insertar el disco. • Ya hay un disco insertado. • El disco se insertó a la fuerza al revés o en forma incorrecta. No se inicia la reproducción. • El disco es defectuoso o está sucio. • Los discos CD-R/CD-RW no son para audio (página 12). No es posible reproducir archivos MP3/WMA.
NO MAG El cargador de discos no está insertado en el cambiador de CD. t Inserte el cargador en el cambiador. NO MUSIC El disco no es un archivo de música. t Inserte un CD de música en esta unidad o en un cambiador con capacidad para reproducir MP3. NO NAME No se grabó un nombre de pista/álbum/disco en la pista. NOT READ La unidad no puede leer la información del disco. t Cargue el disco y, a continuación, selecciónelo en la lista.
If you have any questions/problems regarding this product, try the following: 1 Read Troubleshooting in these Operating Instructions. 2 Reset the unit. Note: Stored data may be erased. 3 Please contact (U.S.A. only); Call 1-800-222-7669 URL http://www.SONY.com http://www.sony.