masterpage:Cover F:\M.Nakamura\4080225\2188002121\2188002121_DRU-710A\GB00COV.
masterpage:Left F:\M.Nakamura\4080225\2188002121\2188002121_DRU-710A\GB01REG.fm Safety Regulations WARNING You are cautioned that any changes or modifications not expressly approved in this manual could void your authority to operate this equipment. To prevent fire or shock hazard, do not expose the unit to rain or moisture. To avoid electrical shock, do not open the cabinet. Refer servicing to qualified personnel only.
masterpage:Right F:\M.Nakamura\4080225\2188002121\2188002121_DRU-710A\GB01REG.fm Bei diesem DRU-710A handelt es sich um ein Laser-Produkt der Klasse 1. Das Etikett mit der Aufschrift LASER KLASSE 1 PRODUKT befindet sich auf der Oberseite des Gehäses.
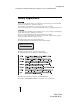
masterpage:Left F:\M.Nakamura\4080225\2188002121\2188002121_DRU-710A\GB02COV1TOC.fm Table of Contents Safety Regulations .......................... 2 Introduction User Support Web Site ...............29 Updating the Firmware ...............29 Using 48x Reading Speed (Turbo Boost Function) ..............29 Unpacking the Package Contents ... 6 Features ........................................... 6 System Requirements ..................... 7 Part Names and Functions ..............
masterpage:Right F:\M.Nakamura\4080225\2188002121\2188002121_DRU-710A\GB03REG.fm • is a trademark of Sony Corporation. • Pentium is a registrated trademark of Intel Corporation. • Microsoft, MS, MS-DOS and Windows are registered trademarks of Microsoft Corporation. • Other system and product names used herein are registered trademarks or trademarks of their respective manufacturers, although the ™ and ® marks are not used in the text.
masterpage:Left F:\M.Nakamura\4080225\2188002121\2188002121_DRU-710A\GB04STA.fm B Introduction Unpacking the Package Contents Features Please verify that the package contains the following when unpacking. If any of these items appear to be missing and/or damaged, please contact your dealer. ❑ An internal DVD/CD rewritable drive with ATAPI (EIDE) interface for computers. ❑ Can be used horizontally or vertically. ❑ The drive can write to DVD+R Double Layer discs.
masterpage:Right F:\M.Nakamura\4080225\2188002121\2188002121_DRU-710A\GB04STA.fm The above requirements are the minimum necessary requirements to write to disc normally. Under actual operating conditions, the requirements imposed by your software must also be met. For details, refer to your software documentation. 2) The drive does not support ATAPI, therefore do not connect it to the IDE (ATAPI) interface connector of your computer's motherboard.
masterpage:Left F:\M.Nakamura\4080225\2188002121\2188002121_DRU-710A\GB04STA.
masterpage:Right F:\M.Nakamura\4080225\2188002121\2188002121_DRU-710A\GB04STA.fm A Disk tray E Do not use. Insert discs here, label side up. Hint B Eject button Press to open and close the disc tray. C Busy indicator Indicates the drive status. Lit : The drive is reading data, playing back an audio CD, or writing packets. Blinking: The drive is writing data (disc-at-once, track-at-once), formatting a disc, or deleting1) data from a disc. Off : The drive is in a state other than those outlined above.
masterpage:Left F:\M.Nakamura\4080225\2188002121\2188002121_DRU-710A\GB05SET.fm B Setup Setting up the Drive The installation and setup procedures outlined below assume that you are using a standard computer. For details about how to install peripheral devices into your computer, refer to the instructions supplied with your computer. Before installing the drive Referring to “Unpacking the Package Contents” on page 6, verify that the contents of the drive package are complete.
masterpage:Right F:\M.Nakamura\4080225\2188002121\2188002121_DRU-710A\GB05SET.fm 2 Determine which connection method you want to use, and then adjust the jumper. Depending on whether you want to connect the drive as MASTER or SLAVE, place the jumper on the pins, as illustrated below. If you are unsure of the appropriate jumper setting, see “Appropriate Jumper Settings” on page 15.
masterpage:Left F:\M.Nakamura\4080225\2188002121\2188002121_DRU-710A\GB05SET.fm 3 Connect the cables. • Connect an unused power connector from the computer’s power supply to the DC input (power input) connector of the drive. • Connect the supplied IDE flat cable to the IDE connector of the drive. Hint If your computer supports digital playback, you do not need to connect the audio cable to the analog audio connector. Most computers support digital playback at this time.
masterpage:Right F:\M.Nakamura\4080225\2188002121\2188002121_DRU-710A\GB05SET.fm Install the drive into a 5-inch drive bay with the supplied screws. 5 Replace the computer cover, and then reconnect the power cable to the outlet. 6 Start your computer, and make sure that the drive is detected. Setup 4 On the Windows desktop, open [My Computer], and verify that a new drive icon is displayed.
masterpage:Left F:\M.Nakamura\4080225\2188002121\2188002121_DRU-710A\GB05SET.fm 7 Insert the supplied software disc into the drive, and then install the software on the disc. Follow the instructions on the screen to complete the installation. For details about the software on the supplied software disc, see “Supplied Software” on page 19. Hints You do not need serial numbers when you install the software on the supplied software disc.
masterpage:Right F:\M.Nakamura\4080225\2188002121\2188002121_DRU-710A\GB05SET.fm Appropriate Jumper Settings Depending on the settings of your computer, use one of the following configurations. Hint Replacing your current optical drive with the DVD/CD rewritable drive Connect the drive as follows. DVD/CD rewritable drive 1st drive Hard disk drive (usually) MASTER Use the same setting as the current drive’s jumper setting.
masterpage:Left F:\M.Nakamura\4080225\2188002121\2188002121_DRU-710A\GB05SET.fm Installing the DVD/CD rewritable drive as a second drive Connect the drive as follows. 2nd drive DVD/CD rewritable drive 1st drive Hard disk drive (usually) MASTER Place the jumper in the MASTER position. Primary IDE connector Secondary IDE connector The following configuration is also possible. 2nd drive DVD/CD rewritable drive Place the jumper in the SLAVE position.
masterpage:Right F:\M.Nakamura\4080225\2188002121\2188002121_DRU-710A\GB05SET.fm Installing the DVD/CD rewritable drive as a third drive Connect the drive as follows. 3 rd drive DVD/CD rewritable drive 2nd drive Hard disk drive (usually) MASTER Hard disk drive, or DVD/CD drive, etc. MASTER Setup 1st drive Place the jumper in the SLAVE position. Primary IDE connector Secondary IDE connector The following configuration is also possible.
masterpage:Left F:\M.Nakamura\4080225\2188002121\2188002121_DRU-710A\GB05SET.fm Installing the DVD/CD rewritable drive as a fourth drive Connect the drive as follows. 4th drive 1st drive Hard disk drive (usually) MASTER DVD/CD rewritable drive 3 nd drive Hard disk drive, or DVD/CD drive, etc. MASTER 2nd drive Hard disk drive, or DVD/CD drive, etc. SLAVE Place the jumper in the SLAVE position.
masterpage:Right F:\M.Nakamura\4080225\2188002121\2188002121_DRU-710A\GB06BAS.fm B Operation Using the Drive Use the supplied software to create discs and play back DVDs. Refer to the documentation of each software for details about their operation. Supplied Software The supplied software disc contains the following software. Nero Burning ROM 6 SE Nero Burning ROM is the CD and DVD writing software. Nero Express A light version of the Nero Burning ROM software.
masterpage:Left F:\M.Nakamura\4080225\2188002121\2188002121_DRU-710A\GB06BAS.fm Using Generic Software with the Drive Using software other than the supplied software (such as generic software, shareware, or freeware) to write data to disc with this drive is not under warranty and Sony offers no customer service if problems arise from using such software. Make sure that the supplied writing software and generic writing software do not coexist on your computer.
masterpage:Right F:\M.Nakamura\4080225\2188002121\2188002121_DRU-710A\GB06BAS.fm Compatible Discs The following discs are compatible with the drive. DVD Disc types Logo Read Write speed1) Write 1× to 16× DVD+R DL (Double Layer) 1× to 2.4× DVD+RW 1× to 4× DVD-R 1× to 8× DVD-RW 1× to 4× Operation DVD+R DVD-ROM — — DVD-Video — — 1) Writing speed supported by the drive. Depending on your software and media, this speed may vary.
masterpage:Left F:\M.Nakamura\4080225\2188002121\2188002121_DRU-710A\GB06BAS.fm CD Disc types Logo Read Write Write speed CD-R Speed supported by the disc (max. 48×) CD-RW Speed supported by the disc (max. 4×) CD-RW (High Speed) Speed supported by the disc (max. 10×) CD-RW (Ultra Speed) Speed supported by the disc (max.
masterpage:Right F:\M.Nakamura\4080225\2188002121\2188002121_DRU-710A\GB06BAS.fm Recommended Writable Discs We recommend that you only use discs for which operation has been guaranteed. You can obtain the latest list of writable discs for which operation with this drive has been guaranteed at the user support Web site address (see page 32 for details). User support Web site Insert the supplied software disc into the drive, and in the [Menu Selection] screen, click [User Support Web Page].
masterpage:Left F:\M.Nakamura\4080225\2188002121\2188002121_DRU-710A\GB06BAS.fm Writable Disc Features You can use a variety of discs with the drive to write data. Refer to the table below to find the type of disc that matches what you want to do. DVD+R DVD+R DL DVD+RW DVD-R DVD-RW CD-R CD-RW Want to create DVDVideo that can be played back by most drives and/or players Want to create DVDs that you can modify Want to create DVDs to which you can add to later.
masterpage:Right F:\M.Nakamura\4080225\2188002121\2188002121_DRU-710A\GB06BAS.fm CD-R and CD-RW Discs The DVD/CD RW drive can write to CD-R and CD-RW discs, when used with writing software. The ability of another model of CD-ROM drive to play (or read data) written by the DVD/CD RW drive depends on having the appropriate software settings when writing to the disc. CD-R Discs Data can be written to this type of disc only once, and once it has been written, it cannot be erased.
masterpage:Left F:\M.Nakamura\4080225\2188002121\2188002121_DRU-710A\GB06BAS.fm Also, depending on the particular drive-disc combination, some CD-R and CD-RW discs may not be readable in some drives due to variations in disc quality and drive characteristics from one manufacturer to another. Writable DVD Discs The DVD/CD RW drive can write to DVD+R DL, DVD+R and DVD-R discs, as well as to DVD+RW and DVD-RW discs, when used with writing software.
masterpage:Right F:\M.Nakamura\4080225\2188002121\2188002121_DRU-710A\GB06BAS.fm Precautions when Writing Data to Disc Write speed and compatible discs • When writing data to disc at high speeds, you must use the appropriate type of disc. • Configure the writing speed through your writing software. For details about the setting procedures, refer to your writing software documentation. • When writing data to disc, the drive may adjust the writing speed to the quality of the disc in the drive.
masterpage:Left F:\M.Nakamura\4080225\2188002121\2188002121_DRU-710A\GB06BAS.fm Copy controlled CDs This product is designed to play back discs conforming to the compact disc (CD) standard. Audio CDs encoded with copyright protection technology are now marketed by various record companies. Be aware that some of these discs do not conform to the CD standard and you may not be able to play them back with the drive. When using the drive as an audio CD player, only use audio CDs with the following mark.
masterpage:Right F:\M.Nakamura\4080225\2188002121\2188002121_DRU-710A\GB06BAS.fm Maximizing Performance User Support Web Site Make sure that you use High Speed discs for which this operation has been certified by Sony. For the latest information about these discs, visit the user support Web site. When using discs other than those mentioned above, the drive may limit writing speed to preserve a good reading quality.
masterpage:Left F:\M.Nakamura\4080225\2188002121\2188002121_DRU-710A\GB07ADD.fm B Miscellaneous Precautions for Use Operation and storage conditions Avoid using or storing the drive in a hot or humid location, or where it might be subject to severe vibration or direct sunlight. On transportation • Please repack the drive in its original carton when shipping by itself. • If the drive is to be shipped while installed in a PC, remove any disc beforehand.
masterpage:Right F:\M.Nakamura\4080225\2188002121\2188002121_DRU-710A\GB07ADD.fm Drive Specifications Compatible discs Disc diameters DVD 12 cm 8 cm2) CD 12 cm 8 cm2) 1) 2) Write (max.) 8×-CAV 8×-CAV 8×-CAV 8×-CAV 6×-CAV 8×-CAV 8×-CAV 8×-CAV 8×-CAV 8×-CAV 8×-CAV 8×-CAV 8×-CAV 16×-CAV 6×-CAV 48×-CAV1) 32×-CAV 32×-CAV 32×-CAV 48×-CAV1) 10×-CAV 48×-CAV 2.4× 4× 8× -PCAV 16× -CAV 2.4× 2.4× 4× 1× 4× 8× -ZCLV 1× 2× 4× — — 48×-CAV1) 4× 10× 24×-ZCLV — — — — The default setting is 40x.
masterpage:Left F:\M.Nakamura\4080225\2188002121\2188002121_DRU-710A\GB07ADD.fm Support Overview If you have problems with the drive, or are unsure of a procedure or some other details, please contact your Sony customer support center. User Support Web Site You can find the following information on this Web site. The information is periodically updated, so we recommend that you visit regularly.
masterpage:Right F:\M.Nakamura\4080225\2188002121\2188002121_DRU-710A\GB07ADD.fm Technical Support Please consult the above sources before calling with questions about using this product, or with technical questions about the drive or the supplied software.
masterpage:Right F:\M.Nakamura\4080225\2188002121\2188002121_DRU-710A\GB07ADD.
masterpage:Right F:\M.Nakamura\4080225\2188002121\2188002121_DRU-710A\GB07ADD.
masterpage:Left F:\M.Nakamura\4080225\2188002121\2188002121_DRU-710A\GB08BCO.