4-111-863-11(1) Digital HD Video Camera Recorder Operating Guide HDR-FX1000E Enjoying pictures with high definition quality 9 Getting Started 13 Recording/ 25 Playback Using the Menu 59 Dubbing/Editing 81 Using a Computer 88 Troubleshooting 91 GB Additional Information 104 Quick Reference 118 Additional information on this product and answers to frequently asked questions can be found at our Customer Support Website. http://www.sony.
Read this first Before operating the unit, please read this manual thoroughly, and retain it for future reference. WARNING To reduce fire or shock hazard, do not expose the unit to rain or moisture. Excessive sound pressure from earphones and headphones can cause hearing loss. Do not expose the batteries to excessive heat such as sunshine, fire or the like. CAUTION Replace the battery with the specified type only. Otherwise, fire or injury may result.
Disposal of waste batteries (applicable in the European Union and other European countries with separate collection systems) This symbol on the battery or on the packaging indicates that the battery provided with this product shall not be treated as household waste. By ensuring these batteries are disposed of correctly, you will help prevent potentially negative consequences for the environment and human health which could otherwise be caused by inappropriate waste handling of the battery.
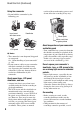
Read this first (Continued) Using the camcorder • Do not hold the camcorder by the following part. Lens hood with lens cover results of the manufacturing process and do not affect the recording in any way. Viewfinder Black point White, red, blue or green points LCD panel Microphone b Notes • The camcorder is not dustproof, dripproof or waterproof. See “About handling of your camcorder” (p. 110). • Do not connect cables to your camcorder with their terminals placed the wrong way.
recording or playback is not possible due to a malfunction of the camcorder, storage media, etc. • TV color systems differ depending on the countries/regions. To view your recordings on a TV, you need a PAL system-based TV. • Television programs, films, video tapes, and other materials may be copyrighted. Unauthorized recording of such materials may be contrary to the copyright laws.
Table of Contents Read this first ........................................................................................... 2 Enjoying pictures with high definition quality Trying out the new HDV format! ............................................................... 9 Features of this camcorder .................................................................... 10 Handy Functions for Recording ............................................................. 11 Viewing video recorded in the HDV format! ...
Displaying the settings in your camcorder (Status check) ................. 50 Checking the remaining battery (Battery Info) .................................... 50 Locating a scene on a tape ....................................................................51 Searching quickly for a desired scene (Zero set memory)................. 51 Searching for a scene by date of recording (Date search) ................ 52 Searching for a recording start point (Index search)..........................
Table of Contents (Continued) Additional Information Using your camcorder abroad .............................................................. 104 Maintenance and precautions .............................................................. 105 HDV format and recording/playback ................................................ 105 About the “Memory Stick” ................................................................. 106 About the “InfoLITHIUM” battery packv ............................................
Enjoying pictures with high definition quality Trying out the new HDV format! High image quality Being HDV format compliant, your camcorder is ready to shoot crystal clear, high-definition images. Enjoying pictures with high definition quality What is the HDV format? The HDV format is a video format for shooting and playing back high definition images on popular DV standard cassette tapes.
Features of this camcorder The HDV1080i specification digital HD video camera recorder has the following features to enable you to record beautiful scenery while traveling, etc., in high definition quality. 1 3-ClearVid CMOS sensor system installed This camcorder is fitted with the 3-ClearVid CMOS sensor system.
Handy Functions for Recording Still image Dual Rec (p. 27) You can record 1.2M still images on the “Memory Stick Duo” during recording movie. Smooth slow recording (p. 66) Saving Camera profile (p. 78) Two settings profiles, including brightness, color, etc., can be saved in your camcorder. This enables you to use saved settings data to quickly reproduce suitable shooting settings. Iris ring (p. 30) You can adjust the brightness using the iris ring.
Viewing video recorded in the HDV format! Viewing on a high definition TV (p. 54) Pictures recorded in the HDV format can be played back as crisp HD (high definition) picture on a high definition TV. • For details on HDV1080i specification compliant TVs, see page 55. Viewing on a 16:9 TV/4:3 TV (p. 56) Your camcorder can down convert video recorded in the HDV format to SD (standard definition) quality for playback on a conventional TV. Dubbing to other video equipment (p.
Getting Started Step 1: Checking supplied items Make sure that you have following items supplied with your camcorder. The number in the parentheses indicates the number of that item supplied. • The cassette tape and “Memory Stick Duo” are not included. See p. 3, p. 105 and p. 106 for types of cassette tapes and “Memory Stick Duo” that you can use on your camcorder. Rechargeable battery pack NP-F570 (1) (p. 15, 107) Lens hood with lens cover (1) (p. 14) Getting Started AC Adaptor (1) (p.
Step 2: Attaching the lens hood with lens cover To open or close the shutter of the Lens hood with lens cover Move the lens cover lever up or down to open or close the lens cover. Move the lens cover lever to OPEN to open the lens cover, and move the lever to CLOSE to close the lens cover. PUSH (lens hood release) button Align the marks on the lens hood to those on the camcorder, and turn the lens hood in the direction of the arrow 2.
Step 3: Charging the battery pack You can charge the “InfoLITHIUM” battery pack (L series) with the supplied AC Adaptor. b Notes 2 With the B mark on the DC plug facing outwards, connect the DC plug to the DC IN jack on your camcorder. • You cannot use batteries other than the “InfoLITHIUM” battery pack (L series) (p. 107).
Step 3: Charging the battery pack (Continued) After charging the battery Recording time The CHG lamp turns off when the battery is fully charged. Disconnect the AC Adaptor from the DC IN jack. Approximate time (min.) available when you use a fully charged battery pack. z Tips • You cannot use the NP-F330 battery pack with this camcorder. • You can check the remaining battery life with the battery info function (p.
Playing time Approximate time (min.) available when you use a fully charged battery pack. HDV format pictures Battery pack LCD panel opened* LCD panel closed 200 210 NP-F770 415 435 NP-F970 630 660 DV format pictures Battery pack LCD panel opened* LCD panel closed NP-F570 (supplied) 220 230 NP-F770 445 470 NP-F970 675 705 * When the LCD backlight turns on. On the battery pack • Before changing the battery pack, set the POWER switch to OFF (CHG).
Step 4: Turning the power on and holding your camcorder properly To record or play back, set the POWER switch to the respective direction. When you use your camcorder for the first time, the [CLOCK SET] screen appears (p. 21). POWER switch 1 While pressing the green button, 2 Hold the camcorder properly. 3 Ensure a good grip, then fasten the grip belt. slide the POWER switch. Press and hold the green button when you slide the POWER switch from OFF (CHG). CAMERA: To record pictures.
Step 5: Adjusting the LCD panel and viewfinder The LCD panel Open the LCD panel 180 degrees (1), then rotate it to the best angle to record or play back (2). 1Open 180 degrees. The viewfinder You can view pictures using the viewfinder to save the battery, or when the picture on the LCD screen is not clear. Getting Started Viewfinder lens adjustment lever Move it until the picture becomes clear. 290 degrees (max.) 2180 degrees (max.
Step 5: Adjusting the LCD panel and viewfinder (Continued) When the picture in the viewfinder is hard to see If you cannot see the picture in the viewfinder clearly under bright circumstances, use the supplied large eyecup. To attach the large eyecup, stretch it slightly and align it with the eyecup groove in the viewfinder. You can attach the large eyecup facing either the right or left side. b Notes • Do not remove the pre-attached eyecup.
Step 6: Setting the date and time Set the date and time when using this camcorder for the first time. If you do not set the date and time, [CLOCK SET] screen appears every time you turn on your camcorder or change the POWER switch positions. z Tips (OTHERS) by turning the SEL/PUSH EXEC dial, then press the dial. OTHERS RETURN CAMERA PROF. ASSIGN BTN PHOTO/EXP.
Step 6: Setting the date and time (Continued) z Tips • The date and time are automatically recorded on the tape, and can be displayed during playback (DATA CODE button, p. 49). Changing the language setting You can change the on-screen displays to show messages in a specified language. Press the MENU button to select the (OTHERS) with the SEL/PUSH EXEC dial. Select the screen language in [LANGUAGE] (p. 79).
Step 7: Inserting a tape or a “Memory Stick Duo” The cassette compartment automatically slides back in. Cassette tape You can use mini DV (p. 105). cassettes only 1 Slide and hold the • Do not push the portion marked {DO NOT PUSH} while the cassette compartment is sliding in. Doing so may cause a malfunction. Getting Started OPEN/ EJECT lever in the direction of the arrow and open the lid. b Notes 3 Close the lid. OPEN/EJECT lever z Tips • The recordable time varies depending on [DV REC MODE] (p.
Step 7: Inserting a tape or a “Memory Stick Duo” (Continued) 2 Insert the “Memory Stick Duo” into the “Memory Stick Duo” slot in the right direction until it clicks. Access lamp b Notes • If you insert the “Memory Stick Duo” into the slot in the wrong direction, the “Memory Stick Duo,” the “Memory Stick Duo” slot, or image data may be damaged. To eject a “Memory Stick Duo” Lightly push the “Memory Stick Duo” once. b Notes • When the access lamp is lit or flashing, your camcorder is reading/writing data.
Recording/Playback Recording REC START/STOP button B PHOTO/EXPANDED FOCUS button Recording lamp Lens hood with lens cover Recording lamp POWER switch REC START/STOP button A z Tips • This camcorder can record movies in HDV or DV format. The factory setting is HDV format ([REC FORMAT] p. 74). 1 Open the shutter of the lens hood. Recording/Playback Your camcorder records movies on tape and still images on “Memory Stick Duo.” Do the following steps to record movies.
Recording (Continued) 3 Press the REC START/STOP button A (or B). 60min REC 60min [STBY] t [REC] The recording lamp lights up during recording. To stop the movie recording, press the REC START/STOP button again. z Tips • When recording in HDV format, the aspect ratio is fixed to 16:9. When recording in DV format, you can switch the aspect ratio to 4:3 ([DV WIDE REC] p. 75). • You can change the screen display during recording (p. 49).
To capture still images Press the PHOTO/EXPANDED FOCUS button or the PHOTO button on the Remote Commander. A still image will be recorded on the disappears when “Memory Stick Duo.” the recording is completed. You can capture still images during movie recording. b Notes z Tips • When you take a still image while not recording a movie, you will hear the shutter click. • Image sizes of still images are as follows: – Recording in HDV format/DV format (16:9): 1.2 M – Recording in DV format (4:3): 0.
Changing the settings of your camcorder recordings Using the handle zoom Adjusting the zoom A C 1 Set the handle zoom switch B to VAR or FIX. z Tips B D • When you set the handle zoom switch B to VAR, you can zoom in or out at variable speed. • When you set the handle zoom switch B to FIX, you can zoom in or out at fixed speed set in [HANDLE ZOOM] (p. 66). 2 Press the handle zoom lever A to zoom in or out. b Notes Move the power zoom lever C slightly for a slower zoom.
Adjusting the focus manually 2 Rotate the focus ring A and adjust the focus. 9 changes to when the focus cannot be adjusted any farther. 9 when the focus cannot be changes to adjusted any closer. z Tips For focusing manually You can adjust the focus manually for different recording conditions. Use this function in the following cases. – To record a subject behind a window covered with raindrops. – To record horizontal stripes.
Changing the settings of your camcorder recordings (Continued) Using the expanded focus (Expanded focus) Adjusting the image brightness Assign [EXP.FOCUS] to the PHOTO/ EXPANDED FOCUS button D beforehand ([PHOTO/EXP.FOCUS], p. 79). During standby, press the PHOTO/ EXPANDED FOCUS button D. [EXPANDED FOCUS] appears and the center of the screen is magnified by about 2.0 times. It will be easier to confirm the focus setting during manual focusing.
value). The current F value appears on the screen. 1 Select [IRIS] from (CAMERA SET) menu t [IRIS/EXPOSURE] t [RING ASSIGN] (p. 63). 2 During recording or standby, set the AUTO/MANUAL switch F to MANUAL. 4 Adjust the iris by turning the iris ring A. z Tips • The F value becomes close to F3.4 as the zoom position changes from W to T even when you open the aperture by setting the F value lower than F3.4, such as F1.6. • The range of focus, an important effect of the aperture, is called the depth of field.
Changing the settings of your camcorder recordings (Continued) z Tips b Notes • When you press the GAIN button C while is displayed on the screen next to the gain value, disappears and you can adjust the gain manually. When you press the GAIN button C again, appears and you can adjust the gain with the iris ring. See step 3 in “Adjusting the gain” on page 32 for details on how to adjust the gain.
To adjust the shutter speed automatically Press the SHUTTER SPEED button D twice, or set the AUTO/MANUAL switch F to AUTO. The shutter speed value disappears, or appears next to the shutter speed value. Adjusting to Natural Color (White balance) b Notes • When you set the AUTO/MANUAL switch F to AUTO, other manually adjusted items (iris, gain, white balance) also become automatic. You can record the subject clearly by using the ND filter B when the recording environment is too bright.
Changing the settings of your camcorder recordings (Continued) Indicator Shooting conditions A (Memory A) B (Memory B) • White balance values adjusted for light sources can be stored in memory A and memory B. Follow the steps in “To save the adjusted white balance value in memory A or B” (p. 34).
Recording condition PP1 :USER You can assign your own setting PP2 :USER You can assign your own setting. PP3 :PORTRAIT Appropriate setting to record people PP4 :CINEMA Appropriate setting to record film-like pictures PP5 :SUNSET Appropriate setting to record sunset PP6 :MONOTONE Appropriate setting to record monotone pictures 1 Press the PICTURE PROFILE button B. 2 Select the PICTURE PROFILE number with the SEL/PUSH EXEC dial A. 3 Select [SETTING] with the SEL/PUSH EXEC dial A.
Changing the settings of your camcorder recordings (Continued) GAMMA To select a gamma curve. Item Description and settings [STANDARD] Standard gamma curve [CINEMATONE1] Gamma curve 1 for producing tone of film camera images [CINEMATONE2] Gamma curve 2 for producing tone of film camera images BLK COMPNSTN To select a gamma curve characteristic for dark areas. Item Description and settings [OFF] Normal setting [STRETCH] Improves gamma curve characteristics and enhances gradation in dark areas.
COLOR PHASE To set the color phase. Item Description and settings -7 (greenish) to +7 (reddish) COLOR DEPTH To set the color depth. This function is more effective for chromatic colors and less effective for achromatic colors. The color looks deeper as you increase the setting value to more positive side, and lighter as you decrease the value to more negative side. This function is effective even if you set [COLOR LEVEL] to [-8] (monotone).
Changing the settings of your camcorder recordings (Continued) SKINTONE DTL To adjust the detail of skintone areas to reduce wrinkles. Item Description and settings [ON/OFF] Suppresses details in skin-tone areas to reduce wrinkles. Select [ON] when you want to use this function. You can also select other areas. [LEVEL] Sets the adjustment level. 1 (less adjust the detail) to 8 (more adjust the detail) [COLOR SEL] Sets color items for the detail adjustment. [RANGE] : Sets the color range.
To name the picture profile settings You can name picture profile1 through 6. 1 Press the PICTURE PROFILE button B. 2 Select the picture profile that you want to name with the SEL/PUSH EXEC dial A. 3 Select [SETTING] t [PROFILE NAME] with the SEL/PUSH EXEC dial A. PICT. PROFILE 6 Select [ RETURN] t [OK] with the SEL/PUSH EXEC dial A. To reset the picture profile settings You can reset the picture profile settings by each picture profile number. You cannot reset all picture profile settings at once.
Changing the settings of your camcorder recordings (Continued) 1 Set the AUDIO LEVEL switch A of the channel to be adjusted to MAN. appears on the screen. 2 Turn the AUDIO LEVEL dial B to adjust the volume during recording or standby. To restore automatic adjustment Set the AUDIO LEVEL switch A to AUTO. z Tips • To check other audio settings, press the STATUS CHECK button C. You can also check microphone audio levels. • For other settings, see the (AUDIO SET) menu (p. 70).
Assigning the functions to the ASSIGN buttons Some functions need to be assigned to the ASSIGN buttons for use. You can assign a single function to any one of the ASSIGN 1 to 6 buttons. ASSIGN 4-6 buttons Functions you can assign to the ASSIGN buttons The buttons in parentheses indicate that the functions are assigned to the buttons by default. EXP.FOCUS (p. 79) D.EXTENDER (p. 66) RING ROTATE (p. 63) AE SHIFT (p. 64) (ASSIGN 2 button) INDEX MARK (p. 42) STEADYSHOT (p. 65) BACK LIGHT (p. 65) SPOTLIGHT (p.
Assigning the functions to the ASSIGN buttons (Continued) 5 Select [OK] with the SEL/PUSH EXEC dial A. 6 Press the MENU button B to hide the menu screen. z Tips • Shot transition is assigned to the ASSIGN 4, 5 and 6 buttons (p. 43). Cancel the shot transition assignment to return to the pre-setting assignment. • To cancel the shot transition, select [SHOT TRANSITION] t [YES] in step 3.
2 Press the ASSIGN button to which [END SEARCH] is assigned. The last scene of the most recent recording will be played back for about 5 seconds, and the camcorder goes the standby at the point where the last recording has finished. b Notes You can store settings of focus, zoom, iris, gain, shutter speed and white balance, and smoothly shift from the current settings to the stored settings (shot transition).
Assigning the functions to the ASSIGN buttons (Continued) 2 Store the settings (shot) 4 Record using the shot transition 1 Press the ASSIGN 4 button repeatedly to bring up the SHOT TRANSITION STORE screen. 6 0 min STBY SHOT TRANSITION 0:00:05 STORE SHOT-A SHOT-B function 1 Press the ASSIGN 4 button repeatedly to bring up the SHOT TRANSITION EXEC screen. STORE 6 0 min STBY SHOT TRANSITION 0:00:05 EXEC SHOT-A SHOT-B S 2 Adjust the desired items manually. See pages 28 to 34 for details on adjustment.
– The ASSIGN button to which [SMTH SLW REC] is assigned. z Tips To cancel the operation Press the ASSIGN 4 button repeatedly to exit the shot transition screen. Recording/Playback • You can also make a transition from the SHOTA to saved SHOT-B or from the SHOT-B to the SHOT-A. For example, to make a transition from the SHOT-A to the SHOT-B, display the shot transition check screen, press the ASSIGN 5 button to bring up the SHOT-A and press the REC START/STOP button.
Playback VOLUME/ MEMORY button PLAY button POWER switch SEL/PUSH EXEC dial MEMORY/PLAY button MEMORY/INDEX button MEMORY/DELETE button You can play back movies as follows. 1 Slide the POWER switch to VCR while pressing the green button. 2 Start playing back. Press m (rewind) to go to the point you want to view, then press N (play) to start playback.
z Tips • See page 125 for indicators displayed on the screen during playback. • See page 49 for how to switch displays during playback. • To play back the tape recorded using a monaural microphone connected, see [MULTI-SOUND] (p. 70). • To reset the tape counter, press the ZERO SET MEM button. You can also use the ZERO SET MEMORY button on the Remote Commander (p. 51). To search for a scene while viewing a movie Press and hold m/M during playback (Picture Search).
Playback (Continued) b Notes • Still images cannot be restored once you delete them. • You cannot delete still images when the “Memory Stick Duo” is write-protected (p. 106) or the still image is protected (p. 93). z Tips • To delete a still image in the index, move B to the still image using the VOLUME/MEMORY button, then do steps 2 and 3. • To delete all still images, do [ ALL ERASE] of the (MEMORY SET) menu (p. 77).
Changing/checking the settings in your camcorder Displaying recording data (Data code) You can display information, including date, time and camera data, automatically stored during recording on the screen during playback. 1 Set the POWER switch B to VCR. during playback or pause. The screen changes (date and time display t camera data display t no display) as you press the button.
Changing/checking the settings in your camcorder (Continued) E Shutter speed F White balance appears during playback of the movie recorded with the shot transition. AUDIO t OUTPUT t ASSIGN t CAMERA When the POWER switch B is set to VCR, the display changes in the following sequence: AUDIO t OUTPUT t ASSIGN b Notes • The exposure correction value (0EV), shutter speed and iris will be displayed during viewing of still images on “Memory Stick Duo.
Locating a scene on a tape Commander at the scene where you want to create a cue point. The tape counter is reset to “0:00:00” appears on the screen. and A 60min 0:00:00 B C E F D G If the tape counter is not displayed, press the DISPLAY button G. H you want to stop playback. 3 Press the mREW button C. Recording/Playback 2 Press the STOP button F when The tape stops automatically when the tape counter reaches “0:00:00.” The tape counter returns to the time disappears.
Locating a scene on a tape (Continued) Searching for a scene by date of recording (Date search) You can search scenes by recording dates. 1 Set the POWER switch to VCR. 2 Press the SEARCH M. button A on the Remote Commander repeatedly to select [DATE SEARCH]. 3 Press the . (previous)/> (next) button B on the Remote Commander to select a recording date. You can select a date previous or next to the date of the current tape position.
Playing the picture on a TV Connection methods and image quality differ depending on what type of TV is connected and connectors used. Use the supplied AC Adaptor to obtain AC power (p. 15). Refer also to the instruction manuals supplied with the device to be connected. Jacks on your camcorder Open the jack cover and connect the cable. 1 A/V R Recording/Playback 2 HDMI OUT 3 b Notes • Make all menu settings on your camcorder before connecting.
Playing the picture on a TV (Continued) Connecting to a high definition TV A movie recorded in HD quality is played back in HD quality. A movie recorded in SD quality is played back in SD quality. COMPONENT IN HDMI HDMI i.LINK (for HDV1080i) B C AUDIO A : Signal flow Type A Camcorder 2 Cable TV Component A/V cable (supplied) (Green) Y (Blue) PB/CB Menu Setting (IN/OUT REC) menu t [VCR HDV/DV] t [AUTO] (p. 74) [COMPONENT] t [1080i/576i] (p.
: Signal flow Type Camcorder B 3 Cable HDMI cable (optional) TV HDMI HDMI IN IN Menu Setting (IN/OUT REC) menu t [VCR HDV/DV] t [AUTO] (p. 74) b Notes z Tips • HDMI (High-Definition Multimedia Interface) is an interface to send both video and audio signals. Connecting HDMI OUT jack to an external device supplies high quality images and digital audio to you. C 1 i.LINK cable (optional) Recording/Playback • Use an HDMI cable with the HDMI logo.
Playing the picture on a TV (Continued) Connecting to a 16:9 (wide) or 4:3 TV A movie recorded in HD quality is converted and played back in SD quality. A movie recorded in SD quality is played back in SD quality. COMPONENT IN i.LINK i.LINK VIDEO/AUDIO VIDEO/AUDIO AUDIO D S VIDEO E F G To set the aspect ratio according to the connected TV (16:9/4:3) Change [TV TYPE] setting to match your TV (p. 76).
: Signal flow Type Camcorder D Cable TV Component A/V cable (supplied) 2 (Green) Y (Blue) PB/CB (Red) PR/CR Menu Setting (IN/OUT REC) menu t [VCR HDV/DV] t [AUTO] (p. 74) [COMPONENT] t [576i] (p. 76) [TV TYPE] t [16:9]/[4:3]* (p. 76) (Red) b Notes • If you connect only component video plugs, audio signals are not outputted. Connect the white and red plugs to output audio signals. E 1 i.LINK cable (optional) (IN/OUT REC) menu t [VCR HDV/DV] t [AUTO] (p. 74) [i.LINK CONV] t [ON] (p.
Playing the picture on a TV (Continued) : Signal flow Type Camcorder Cable TV A/V connecting cable with S VIDEO (optional) Menu Setting (IN/OUT REC) menu t [VCR HDV/DV] t [AUTO] (p. 74) [TV TYPE] t [16:9]/[4:3]* (p. 76) 2 (White) (Red) (Yellow) z Tips • When connecting only an S VIDEO plug (S VIDEO channel), audio signals are not output. To output audio signals, connect the white and red plugs of the A/V connecting cable with S VIDEO to the audio input jack of your TV.
Using the Menu Using the menu items You can change various settings or make detailed adjustments using the menu items displayed on the screen. CAMERA SET (p. 63) AUDIO SET (p. 70) DISPLAY SET (p. 71) IN/OUT REC (p. 74) MEMORY SET (p. 77) OTHERS (p. 78) STBY OTHERS RETURN CAMERA PROF. ASSIGN BTN PHOTO/EXP.FOCUS POWER switch MENU button 1 While pressing the green button, set the POWER switch.
Using the menu items (Continued) 6 Press the MENU button to hide the menu screen. To return to the previous screen, select RETURN].
. Menu items Available menu items (z) vary depending on the POWER switch position. Position of POWER switch: CAMERA VCR z z z z z z z z z z z z z z z z z z z z z z z z z – – – – – – – – – – – – – – – – – – – – – – – – – z z z – – – – – z z z z z z z z z z – – – – – – – z (CAMERA SET) menu (p. 63) Using the Menu PROG.
Menu items (Continued) Position of POWER switch: LCD COLOR LCD BL LEVEL VF B.LIGHT VF POWERMODE LETTER SIZE REMAINING DISP OUTPUT CAMERA VCR z z z z z z z z z z z z z z z – z z z z z – z z – z z z – z z z z – z z z z z z z z z z z z – z z z z z z z z z z z – z – z (IN/OUT REC) menu (p. 74) REC FORMAT VCR HDV/DV DV REC MODE DV WIDE REC COMPONENT i.LINK CONV TV TYPE (MEMORY SET) menu (p. 77) ALL ERASE FORMAT FILE NO. NEW FOLDER REC FOLDER PB FOLDER (OTHERS) (p. 78) CAMERA PROF.
(CAMERA SET) menu Settings to adjust your camcorder to the recording conditions (GAIN SETUP/BACK LIGHT/STEADYSHOT, etc.) The default settings are marked with B. The indicators in parentheses appear when the items are selected. See page 59 for details on selecting menu items. Press the MENU button t select the (CAMERA SET) with the SEL/PUSH EXEC dial. PROG.SCAN B OFF 25 ( ) Captures 25 frames per second. b Note • The captured images are converted to 50i format and recorded on tape.
Press the MENU button t select the (CAMERA SET) with the SEL/PUSH EXEC dial. 3 Select [OK] with the SEL/PUSH EXEC dial. 4 Press the MENU button to hide the menu screen. AGC LIMIT You can select the upper limit for the Auto Gain Control (AGC) from [OFF] (21dB, the default setting), [18dB], [15dB], [12dB], [9dB], [6dB], [3dB] and [0dB].
AE RESPONSE You can select the speed at which the automatic exposure adjustment function follows changes in the brightness of the subject. You can select the speed from [FAST], [MIDDLE] and [SLOW]. The default setting is [FAST]. AT IRIS LMT You can select the highest iris value for the automatic adjustment from [F11], [F9.6], [F8], [F6.8], [F5.6], [F4.8] and [F4]. The default setting is [F11]. BACK LIGHT When you set this function to [ON] (.), you can correct backlighting. The default setting is [OFF].
Press the MENU button t select the (CAMERA SET) with the SEL/PUSH EXEC dial. B STANDARD Reduces camera shakes at a standard level. SOFT Reduces camera shakes at a low level. Slight unsteadiness remains in movies, which make the movies look as they are. WIDE CONV. This is for use with wide conversion lenses (optional). It is the optimum setting for use with a Sony VCL-HG0872A wide conversion lens.
After executing [SMTH SLW REC] with an ASSIGN button, you can also cancel [SMTH SLW REC] by pressing the ASSIGN button again. See page 41 for details on how to use the ASSIGN buttons. You can select the [SMTH SLW REC] settings suitable for your recording. x TIMING You can use this to select when recording starts in relation to when the REC START/ STOP button is pressed. • When [ TRIG] is set to [ON], you can also start recording by pressing the REC START/ STOP button.
Press the MENU button t select the (CAMERA SET) with the SEL/PUSH EXEC dial. The operation of your camcorder differs depending on when you press the REC START/STOP button. If you press the button during [INTERVAL REC] recording, the recording temporarily stops. If you press it again, the [INTERVAL REC] recording restarts, If you press the button during [INTERVAL REC] interval, the [INTERVAL REC] recording stops and regular recording starts. If you press it again, regular recording stops.
SOFT TRANS b Notes Make the transition slowly at the beginning and end, and linearly in between. • This function is automatically set to [OFF] when you turn the power off and back on. *1 x TYPE • Selects a type of the color bars. *2 b Notes • You cannot change [TRANS TIME] and [TRANS CURVE] settings during store, check, or execution of [SHOT TRANSITION]. Cancel [SHOT TRANSITION] setting by pressing the ASSIGN 4 button several times before changing [TRANS TIME] or [TRANS CURVE] setting.
(AUDIO SET) menu Settings for the audio recording (DV AU.MODE/DV AUDIO MIX, etc.) MULTI-SOUND The default settings are marked with B. The indicators in parentheses appear when the items are selected. See page 59 for details on selecting menu items. Press the MENU button t select the (AUDIO SET) with the SEL/PUSH EXEC dial. DV AU.MODE (DV Audio mode) You can select whether to play back audio recorded using other devices with dual sound or stereo sound.
(DISPLAY SET) menu Display settings of the display and the viewfinder (MARKER/VF B.LIGHT/DISP OUTPUT, etc.) The default settings are marked with B. The indicators in parentheses appear when the items are selected. See page 59 for details on selecting menu items. B OFF Does not display a histogram. NORMAL Displays a histogram. ADVANCE Displays a histogram, and a bar that indicates an average of the brightness levels around the center of an image (within the marker) on the histogram.
Press the MENU button t select the (DISPLAY SET) with the SEL/PUSH EXEC dial. b Notes • You cannot record an image with enhanced details on a tape or a “Memory Stick Duo.” z Tips • You can focus more easily using this function in combination with the expanded focus function (p. 30). MARKER x ON/OFF When you select [ON], you can display markers. The default setting is [OFF]. Markers will not be recorded on a tape or “Memory Stick Duo.
AU.LVL DISP (Audio level display) When you set this function to [ON], you can display the audio level meter on the screen. The default setting is [ON]. VF B.LIGHT You can adjust the brightness of the viewfinder. B NORMAL Standard brightness. BRIGHT Brightens the viewfinder screen. b Notes Audio level meter LCD BRIGHT z Tips • You can also turn off the LCD backlight (p. 19). LCD COLOR You can adjust the LCD color intensity using the SEL/PUSH EXEC dial.
Press the MENU button t select the (DISPLAY SET) with the SEL/PUSH EXEC dial. rewound to the beginning. It is displayed when you start playback or recording. (IN/OUT REC) menu Recording settings, input and output settings (VCR HDV/DV/DV REC MODE/ DV WIDE REC/ TV TYPE, etc.) DISP OUTPUT You can select outputs to which display information, such as time code, is outputted. B LCD PANEL Outputs the information to the LCD screen and viewfinder.
B AUTO Automatically switches between HDV signals and DV signals during playback. During the i.LINK connection, recognizes HDV signals and DV signals, and automatically inputs or outputs the signals to or from the external device via the HDV/DV (i.LINK) jack for recording or playback. HDV ( ) DV ( ) Plays back only DV format sections of a tape. During the i.LINK connection, inputs or outputs only DV signals to or from an external device via the HDV/DV (i.LINK) jack for recording or playback.
Press the MENU button t select the COMPONENT You can select [576i] or [1080i/576i] depending on your TV when you connect your camcorder to a TV via a component A/V cable. (IN/OUT REC) with the SEL/PUSH EXEC dial. B 16:9 Select to view your pictures on a 16:9 (wide) TV. HDV/DV (16:9) format pictures DV (4:3) format pictures 576i Supports connection between your camcorder and a TV with a component input jack that supports the 576i format.
(MEMORY SET) menu Settings for the “Memory Stick Duo” (ALL ERASE/FORMAT, etc.) The default settings are marked with B. The indicators in parentheses appear when the items are selected. See page 59 for details on selecting menu items. Press the MENU button t select the (MEMORY SET) with the SEL/PUSH EXEC dial. ALL ERASE 1 Select [ALL FILES] or [CURRENT FLDR]. [ALL FILES]: Deletes all the images on the “Memory Stick Duo.” [CURRENT FLDR]: Deletes all the images in the currently selected folder.
Press the MENU button t select the (MEMORY SET) with the SEL/PUSH EXEC dial. (OTHERS) menu Settings while recording on a tape or other basic settings (QUICK REC/BEEP, etc.) REC FOLDER (Recording folder) You can select a folder in which you want to store still images. Select the folder with the SEL/PUSH EXEC dial. z Tips • The still images will be stored in the 101MSDCF folder by default. • Once you store the still images in the current folder, the folder is selected as a playback folder.
x To change the camera profile name You can change the camera profile name. 1 Select [PROFILE NAME] with the SEL/PUSH EXEC dial. 2 Select the camera profile of which you want to change the name with the SEL/ PUSH EXEC dial. [PROFILE NAME] screen appears. 3 Change the profile name with the SEL/ PUSH EXEC dial. z Tips •You can enter the name in the same way as the picture profile (p. 39). 4 Select [OK] with the SEL/PUSH EXEC dial. Profile name is changed. 1 Select [DELETE] with the SEL/PUSH EXEC dial.
Press the MENU button t select the ON ( (OTHERS) with the SEL/PUSH EXEC dial. ) The time shortens slightly until recording restarts from the state that the drum has stopped rotating, but the transition from the last recorded scene may not be smooth. Select this when you do not want to miss a recording chance. z Tips • When this function is set to [ON], the interval between scenes freezes for a moment (editing on your computer is recommended).
Dubbing/Editing Dubbing to VCR, DVD/HDD device, etc. Connect your camcorder to the wall outlet (wall socket) using the supplied AC Adaptor for this operation (p. 15). Refer also to the instruction manuals supplied with the devices to be connected. Connecting to external devices The connection method and the image quality will differ depending on the VCR, DVD/HDD device and the connectors used. Jacks on your camcorder Open the jack cover and connect the cable.
Dubbing to VCR, DVD/HDD device, etc. (Continued) : Signal flow Camcorder Cable External device HDV1080i compatible device t HD quality* i.LINK cable (optional) 1 • i.LINK jack which is compatible with HDV1080i specification is required on the external device. AV device with i.LINK jack t SD quality* i.
b Notes • Disconnect the i.LINK cable before changing these menu settings, otherwise the VCR/DVD device may not correctly identify the video signal. z Tips • This camcorder has a 4-pin i.LINK terminal. Select a cable that fits the terminal on the device to be connected.
Dubbing to VCR, DVD/HDD device, etc. (Continued) Dubbing to another device 1 Prepare your camcorder for playback. Insert the recorded cassette. Slide the POWER switch to VCR. Set [TV TYPE] according to the playback device (TV, etc.) (p. 76). 2 Prepare your VCR/DVD device for recording. When dubbing to the VCR, insert a cassette for recording. When dubbing to the DVD recorder, insert a DVD for recording.
Recording pictures from a VCR You can record pictures from a VCR on a tape. You can record a scene as a still image on a “Memory Stick Duo.” You can record pictures in the HDV format by connecting an HDV1080i specification compatible device. Be sure to insert a cassette or a “Memory Stick Duo” for recording in your camcorder beforehand. You can connect your camcorder to a VCR device using an i.LINK cable.
Recording pictures from a VCR (Continued) Recording movies 1 Set the POWER switch to VCR. 2 Set the input signal of your camcorder. Set [VCR HDV/DV] to [AUTO] when recording from an HDV format compatible device. Set [VCR HDV/DV] to [DV] or [AUTO] when recording from a DV format compatible device (p. 74). 3 Connect your VCR as a player to your camcorder. When an i.
Recording still images Be sure to insert a “Memory Stick Duo” for recording in your camcorder beforehand, and set [PHOTO/EXP.FOCUS] to [PHOTO] (the default setting) (p. 79). 1 Perform steps 1 to 4 in “Recording movies.” 2 Start playing the cassette. The pictures on the VCR appear on the screen of your camcorder. 3 Press the PHOTO/EXPANDED Dubbing/Editing FOCUS button on your camcorder or the PHOTO button on the Remote Commander at the scene you want to record.
Using a Computer Copying movies on a tape to a computer Connect your camcorder to the computer with an i.LINK cable. The computer needs to have an i.LINK connector and be installed with editing software that can copy video signals. The software required depends on the format of the recorded pictures and the format for copying to the computer (HDV or DV) as shown in the table below.
Notes on connecting to the computer z Tips • Connect the i.LINK cable to the computer first, then to your camcorder. Connecting in the opposite order may cause static electricity to build up, resulting in a malfunction of your camcorder. • The computer may freeze or may not recognize the signal from your camcorder in the following situations. – Connecting your camcorder to a computer that does not support the video signal formats appearing on the LCD screen of your camcorder display (HDV or DV).
Copying still images to a computer System requirements • For details on precautions and compatible application software, refer also to the operating instructions of the device to be connected. • Required hardware: “Memory Stick Duo” slot, “Memory Stick” Reader/Writer compatible with “Memory Stick Duo.” Copying the pictures For Windows users You can copy still images stored on a “Memory Stick Duo” to your computer via the “Memory Stick Duo” slot of your computer. 1 Turn on your computer.
Troubleshooting Troubleshooting If you run into any problems using your camcorder, use the following table to troubleshoot the problem. If the problem persists, disconnect the power source and contact your Sony dealer. • Power sources/LCD screen/Remote Commander···p. 91 • Cassette tapes/“Memory Stick Duo”···p. 92 • Recording···p. 93 • Playback···p. 96 • Connecting to TV···p. 97 • Dubbing/Editing/Connecting to other devices···p. 98 • Connecting to a computer···p.
Troubleshooting (Continued) • The indicated time may not be correct in certain circumstances. For example, when you open or close the LCD panel, it takes about 1 minute to display the correct remaining battery time. The battery pack discharges too quickly. • Ambient temperature is too high or low, or the battery pack has not been charged enough. This is not a malfunction. • Fully charge the battery again. If the problem persists, the battery may be worn-out. Replace it with a new one (p. 15, 107).
The remaining tape indicator is not displayed. • Set [ REMAINING] to [ON] to always display the remaining tape indicator (p. 73). The cassette is noisier during rewinding or fast-forwarding. • When using the AC Adaptor, rewind/fast forward speed increases (compared with battery operation) and therefore increases noise. This is not a malfunction. You cannot delete pictures of the “Memory Stick Duo.” • The pictures are protected. Release the protect function on your computer, etc.
Troubleshooting (Continued) • Do not record pictures in SP mode and LP mode on the same tape. • Avoid stopping then recording a movie in the LP mode. • When [QUICK REC] is set to [ON], you cannot record a smooth transition (p. 79). The shutter sound is not heard when you record a still image. • Set [BEEP] to [ON] (p. 80). • There is no shutter sound while during movie shooting. End search does not work. • Do not eject the cassette after recording (p. 42). • There is nothing recorded on the cassette.
Cannot use Situation [LCD BL LEVEL], [VF B.LIGHT] AC power source is being used. [WORLD TIME] Date and time are not set. [x.v.Color] [REC FORMAT] is set to [DV]. [INTERVAL REC] [PROG.SCAN] is set to [25]. [DV FRAME REC] [REC FORMAT] is set to [HDV1080i]. Shutter speed, gain, white balance or iris cannot be adjusted manually. • Set the AUTO/MANUAL switch to MANUAL. Tiny spots in white, red, blue, or green appear on the screen. • This phenomenon appears when using a slow shutter speed (p. 32).
Troubleshooting (Continued) Playback If you are playing back pictures stored on a “Memory Stick Duo,” see also the Cassette tapes/ “Memory Stick Duo” section (p. 92). You cannot play back tape. • Slide the POWER switch to VCR. • Rewind the tape (p. 46). Image data stored on a “Memory Stick Duo” cannot be played back correctly. • Image data cannot be played back if you have modified file names or folders, or have edited the data on a computer (In this case, the file name flashes).
The movies freeze for a while, or the sound breaks off. • This occurs if the tape or video head is dirty (p. 111). • Use the Sony mini DV cassette tape. “---” is displayed on the screen. • • • • The tape you are playing back was recorded without setting the date and time. A blank section on the tape is being played back. The data code on a tape with a scratch or noise cannot be read. The tape you are playing was recorded with the gain set to -6dB. Noises appear and or is displayed on the screen.
Troubleshooting (Continued) You cannot hear the sound on the TV connected with the S VIDEO plug (S VIDEO channel) or component video plugs. • If you are using an S VIDEO plug or component video plugs, make sure the red and white plugs are also connected (p. 53). You cannot view the picture or hear the sound on the TV connected with the component A/V cable. • Set [COMPONENT] according to the requirements of the connected device (p. 76).
When connected using an i.LINK cable, no picture appears on the monitor screen during dubbing. • Set [VCR HDV/DV] according to the requirements of the connected device (p. 74). You cannot add sound to the recorded tape. • You cannot add sound to the recorded tape on this unit. You cannot dub correctly using the HDMI cable. • You cannot dub pictures using the HDMI cable. Still pictures cannot be dubbed from a tape to a “Memory Stick Duo.
Troubleshooting (Continued) Connecting to a computer The computer does not recognize your camcorder. • Disconnect the cable from the computer and camcorder, then connect it again securely. • Disconnect the cable from the computer, restart the computer, then connect the computer to your camcorder correctly. You cannot view or copy a movie recorded on a tape to a computer. • Disconnect the cable from the computer, then connect it again.
Warning indicators and messages Self-diagnosis display/Warning indicators When an error occurs, a warning indicator appears on the LCD screen or in the viewfinder. Some symptoms you can fix by yourself. If the problem persists even after you have tried a couple of times, contact your Sony dealer or local authorized Sony service facility. C: (or E:) ss:ss (Self-diagnosis display) C:04:ss • The battery pack is not an “InfoLITHIUM” battery pack. Use an “InfoLITHIUM” battery pack (p. 107).
Warning indicators and messages (Continued) (Warning indicator pertaining to battery pack temperature) • The battery pack is too hot. Replace the battery pack, or remove it and put it in a cool place. (Warning indicator pertaining to battery pack temperature) • The battery pack is too cold. Replace the battery pack, or remove it and put it in a warm place. Q (Warning indicators pertaining to the tape) Slow flashing: • There is less than 5 minutes remaining on the tape. • No cassette is inserted.
Memory Stick folders are full. • You cannot create folders exceeding 999MSDCF. You cannot delete created folders using your camcorder. • You will have to format the “Memory Stick Duo” (p. 77), or delete them using your computer. Cannot record still images on Memory Stick.
Additional Information Using your camcorder abroad Power supply You can use your camcorder in any country/region using the AC Adaptor supplied with your camcorder within the AC 100 V to 240 V, 50/60 Hz range. On TV color systems Your camcorder is PAL system, so its picture can only be viewed on a PAL system TV with an AUDIO/VIDEO input jack.
Maintenance and precautions HDV format and recording/ playback Your camcorder is capable of recording in both HDV and DV formats. You can use mini DV format cassettes only. Use a cassette with the mark. Your camcorder is not compatible with the Cassette Memory function. What is the HDV format? The HDV format is a video format developed to record and play back digital high definition (HD) video signals on a DV cassette.
Maintenance and precautions (Continued) x When labeling the cassette Be sure to place the label only on the locations shown in the following illustration so as not to cause a malfunction of your camcorder. Do not put a label along this border. Labeling position x After using the cassette Rewind the tape to the beginning to avoid distortion of the picture or the sound. The cassette should then be put in its case, and stored in an upright position.
• Do not touch, or allow metallic objects to come into contact with the terminals. • Do not bend, drop or apply strong force to the “Memory Stick Duo.” • Do not disassemble or modify the “Memory Stick Duo.” • Do not let the “Memory Stick Duo” get wet. • Be careful to keep “Memory Stick Duo” media out of the reach of small children. There is danger that a child might swallow it. • Do not insert anything other than a “Memory Stick Duo” into the “Memory Stick Duo” slot. Doing so may cause a malfunction.
Maintenance and precautions (Continued) according to the operating conditions of your camcorder, and displays the remaining battery time in minutes. With an AC Adaptor/Charger, the remaining battery time and charging time appear. To charge the battery pack • Be sure to charge the battery pack before you start using your camcorder. • We recommend charging the battery pack in an ambient temperature of between 10 °C to 30 °C (50 °F to 86 °F) until the CHG lamp turns off.
devices. You can also control other devices using the i.LINK. i.LINK-compatible devices can be connected using an i.LINK cable. Possible applications are operations and data transactions with various digital AV devices. When two or more i.LINK-compatible devices are daisy-chained with the unit, operation becomes possible from any device in the chain. Note that operation method may vary, or data transactions may not be possible, depending on specifications and characteristics of the connected devices.
Maintenance and precautions (Continued) About handling of your camcorder On use and care • Do not use or store the camcorder and accessories in the following locations. – Anywhere extremely hot or cold. Never leave them exposed to temperatures above 60 °C (140 °F), such as under direct sunlight, near heaters or in a car parked in the sun. They may malfunction or become deformed. – Near strong magnetic fields or mechanical vibration. The camcorder may malfunction. – Near strong radio waves or radiation.
condensation. If this happens, the cassette is sometimes not ejected for 10 seconds after the cassette lid is opened. This is not a malfunction. Do not close the cassette lid until the cassette is ejected. x Note on moisture condensation Moisture may condense when you bring your camcorder from a cold place into a warm place (or vice versa) or when you use your camcorder in a humid place as shown below. • When you bring your camcorder from a ski slope into a place warmed up by a heating device.
Maintenance and precautions (Continued) x To clean the LCD screen If fingerprints or dust make the LCD screen dirty, it is recommended you use a soft cloth to clean it. When you use the LCD Cleaning Kit (optional), do not apply the cleaning liquid directly to the LCD screen. Use cleaning paper moistened with the liquid. On handling the casing • If the casing is soiled, clean the camcorder body with a soft cloth lightly moistened with water, and then wipe the casing with a dry soft cloth.
Removing dust from inside the viewfinder 1 Remove the eye piece of the viewfinder. Slide down the viewfinder release lever and hold it at the position (1), then lift the eye piece of the viewfinder as indicated with the arrow in the illustration (2). 2 1 2 Remove dust inside the eye piece and viewfinder with a blower. Additional Information 3 Attach the viewfinder following the reverse procedure of step 1.
Specifications System Video recording system (HDV) 2 rotary heads, Helical scanning system Video recording system (DV) 2 rotary heads, Helical scanning system Still image recording system Exif Ver. 2.
**The unique pixel array of Sony’s ClearVid CMOS sensor and image processing system (Enhanced Imaging Processor) allows for still image resolution equivalent to the sizes described. Output connectors Input/Output connectors LANC jack Stereo mini-minijack (Ø 2.5 mm) HDV/DV jack i.LINK interface (IEEE 1394, 4-pin connector S100) MIC jack Stereo-minijack (Ø 3.5 mm) Power requirements DC 7.2 V (battery pack) DC 8.
Specifications (Continued) AC Adaptor AC-L100 CAUTION Power requirements AC 100 V - 240 V, 50 Hz/60 Hz Current consumption 0.35 A - 0.18 A Power consumption 18 W Output voltage DC 8.4 V* Operating temperature 0 °C to 40 °C (32 °F to 104 °F) Storage temperature -20 °C to +60 °C (-4 °F to +140 °F) Dimensions (approx.) 48 × 29 × 81 mm (1 15/16 × 1 3/16 × 3 1/4 in.) (w/h/d) excluding the projecting parts Mass (approx.) 170 g (6.
On trademarks Notes on the License • “Handycam” and ANY USE OF THIS PRODUCT OTHER THAN CONSUMER PERSONAL USE IN ANY MANNER THAT COMPLIES WITH THE MPEG-2 STANDARD FOR ENCODING VIDEO INFORMATION FOR PACKAGED MEDIA IS EXPRESSLY PROHIBITED WITHOUT A LICENSE UNDER APPLICABLE PATENTS IN THE MPEG-2 PATENT PORTFOLIO, WHICH LICENSE IS AVAILABLE FROM MPEG LA, L.L.C., 250 STEELE STREET, SUITE 300, DENVER, COLORADO 80206. • • • • • are registered trademarks of Sony Corporation.
Quick Reference Identifying parts and controls The numbers in ( ) are reference pages. 6 78 9 q; 1 2 3 4 5 A HDV/DV jack (53) B A/V Remote Connector (53) C HDMI OUT jack (53) D i (headphones) jack When you use headphones, the speaker on your camcorder is silent. E DC IN jack (15) F Remote sensor (back) (122) G Recording lamp (back) (25) The recording lamp flashes if the remaining tape or battery is low.
1 5 2 qs 3 qd 4 qf 6 qa w; 09 87 ql qk qj qhqg A LCD screen (19) T Lens cover lever (14) B Hook for the shoulder strap (120) * Each of the PLAY button, VOLUME/ MEMORY button and MEMORY/INDEX button has a raised tactile dot. (The VOLUME/ MEMORY button has it on the + side.) Use it to identify the location of the buttons.
Identifying parts and controls (Continued) 9 1 2 3 4 5 6 q; qa qs qd qf 7 8 A Hook for the shoulder strap (120) To attach the shoulder strap B Zoom lever (28) Attach the shoulder strap (optional) to the hooks for the shoulder strap. C PHOTO/EXPANDED FOCUS button (27, 30) D Access lamp (24) E “Memory Stick Duo” slot (23) F Grip belt (18) G Iris ring (30) H Zoom ring (28) I MIC jack When a microphone is connected, it is dominantly used for sound recording over the internal microphone.
56 7 8 9 0 1 2 3 4 qd qs qa qk qj qh qg qf A Remote sensor (front) (122) B FOCUS switch (29) C PUSH AUTO button (29) * ASSIGN 2 button/AE SHIFT button, WHT BAL button, IRIS/EXPOSURE button have raised tactile dots for your convenience in locating the buttons.
Identifying parts and controls (Continued) b Notes Remote Commander Remove the insulation sheet before using the Remote Commander. Insulation sheet 7 1 8 2 3 9 4 5 6 • Aim the Remote Commander towards the remote sensor to operate your camcorder. • Point the remote sensor away from strong light sources such as direct sunlight or overhead lighting. Otherwise, the Remote Commander may not function properly.
Indicators for the LCD screen and viewfinder The numbers in ( ) are reference pages. The indicators will not be recorded on the tape during recording. Recording movies 1 Recording still images 2 3 4 6 0 min HDV1080i REC 0:08:13 12min 5 2 7 6 0 min 8 9 1.2M 101 6 A Recording format ( (74) or ) Recording mode (SP or LP) is also displayed in the DV format. G Recording folder (78) H Image size (27) I Recording indicator (27) B Remaining battery (approx.
Indicators for the LCD screen and viewfinder (Continued) Viewing movies 1 2 60 min HDV1080i Viewing still images 4 0 2 5 0:08:12:17 12min J Tape transport indicator Recording mode (SP or LP) appears when a tape recorded in the DV format is played back. qa 6 0 min 8 1.
Bottom Indicators when you made changes Upper left Indicator Meaning HISTOGRAM (71) Upper right DV AU.MODE (70)* 6 0min Manual volume control (39) +2 Bottom ~ Picture profile (34) SPOTLIGHT (65) Upper left Indicator Manual focus (29) 9 Center BACK LIGHT (65) . SteadyShot off (65) Meaning PEAKING (71) Recording format (74) SP LP DV REC MODE (75)* D.
Index Numeric 1080i/576i.............................76 12BIT....................................70 BATT RELEASE (battery release) button...................... 16 Battery 576i.......................................76 6sec AFTER .........................66 6sec BEFORE.......................66 Deleting still images.............47 Battery pack.................. 15 DISP OUTPUT ....................74 BEEP.................................... 80 DISPLAY SET menu ...........71 BLACK FADER..................
folder) ............................78 INTERVAL.......................... 67 MEMORY/INDEX button ...46 REC FOLDER (Recording folder) ............................78 INTERVAL REC ........... 67, 95 MEMORY/PLAY button .....46 IN/OUT REC menu ............. 74 Menu FORMAT......................77, 106 Iris ring ................................. 30 AUDIO SET menu ........70 IRIS/EXPOSURE .......... 30, 63 CAMERA SET menu....63 IRIS/EXPOSURE button ..... 30 DISPLAY SET menu ....71 G Lens.............
Index (Continued) PEAKING ......................71, 94 PHOTO.................................79 PHOTO/EXPANDED FOCUS button....................................25 PHOTO/EXP.FOCUS ..........79 Picture profile .......................34 PICTURE PROFILE button ..............................................34 S S VIDEO cable .................... 58 S VIDEO jack ................ 56, 82 Self-diagnosis display ........ 101 SEL/PUSH EXEC dial......... 21 SHOT TRANSITION .... 43, 68 Shot transition .................
Z ZEBRA ...........................71, 94 ZERO SET MEM button ......51 Zero set memory ...................51 ZERO SET MEMORY button ....................................51 Zoom.....................................28 Zoom lever............................28 Zoom ring .............................