2-581-681-24 (1) Multi Disc Player Multi Disc Player Operating Instructions GB Manual de instrucciones ES CT For installation and connections, see the supplied installation/connections manual. Para obtener información sobre la instalación y las conexiones, consulte el manual de instalación/conexiones suministrado.
Warning To prevent fire or shock hazard, do not expose the unit to rain or moisture. To avoid electrical shock, do not open the cabinet. Refer servicing to qualified personnel only. CAUTION The use of optical instruments with this product will increase eye hazard. As the laser beam used in this CD/DVD player is harmful to eyes, do not attempt to disassemble the cabinet. Refer servicing to qualified personnel only. This label is located on the bottom of the chassis.
Table of Contents Welcome! . . . . . . . . . . . . . . . . . . . . . . . . . . . 4 Precautions . . . . . . . . . . . . . . . . . . . . . . . . . . 5 Playable discs . . . . . . . . . . . . . . . . . . . . . . . . 5 Getting Started Resetting the unit . . . . . . . . . . . . . . . . . . . . . . 8 Setting the clock . . . . . . . . . . . . . . . . . . . . . . 8 DEMO mode . . . . . . . . . . . . . . . . . . . . . . . . . 8 Detaching the front panel . . . . . . . . . . . . . . . 8 Inserting the disc in the unit .
Welcome! Thank you for purchasing this Sony Multi Disc Player. Before operating this unit, read this manual thoroughly and retain it for future reference. FEATURING: • DVD, CD, VCD playback compatibility – Compatible with various disc formats, such as DVD-R/-RW, DVD+R/DVD+RW, etc.
Precautions • Do not use the custom functions while driving, or perform any other function which could divert your attention from the road. • If your car has been parked in direct sunlight, allow the unit to cool off before operating it. • Power aerial will extend automatically while the unit is operating. Playable discs Format of discs DVD VIDEO DVD-R* (MP3/JPEG) On safety • Comply with the Traffic Laws in your country.
Video CD (VCD) A Video CD can contain both audio and visual data on a disc the same size as a regular Audio CD. The playing time is 74 minutes for a standard 12 cm CD. Note on transparent discs Audio CD An Audio CD containing audio data. The playing time is 74 minutes for a standard 12 cm CD. Music discs encoded with copyright protection CD-Recordable (CD-R) With a CD-R, you can edit audio data. You can write information on a CD-R only once. CD-Rewritable (CD-RW) With a CD-RW, you can edit audio data.
Region code Copyrights This system is used to protect software copyrights. The region code is located on the bottom of the unit, and only DVDs labelled with an identical region code can be played on this unit. This product incorporates copyright protection technology that is protected by U.S. patents and other intellectual property rights.
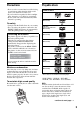
DEMO mode Getting Started When the unit is turned off, the clock is displayed first, then demonstration (DEMO) mode starts the demonstration display. Resetting the unit Before operating the unit for the first time, or after replacing the car battery or changing the connections, you must reset the unit. Detach the front panel and press the RESET button with a pointed object, such as a ballpoint pen. To cancel the DEMO mode, set “DEMO-OFF” in setup (page 36) while the unit is turned off.
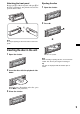
Attaching the front panel Ejecting the disc Engage part A of the front panel with part B of the unit, as illustrated, and push the left side into position until it clicks. 1 Open the shutter. 2 Press Z. A B Note Do not put anything on the inner surface of the front panel. x Inserting the disc in the unit 1 Open the shutter. The disc is ejected. Note While inserting or ejecting the disc, do not close the shutter. The disc may be caught and damaged.
Location of controls and basic operations Main unit 1 2 34 5 6 ATT OPEN/CLOSE Z×Z DSO SOUND EQ7 SOURCE 0 7 8 9 MODE REP SHUF 1 2 qa qs qd - ALBM + 3 4 OFF SEEK DVD 5 6 qf DSPL SCRL qg qh qj MEX-R1 MEX-R5 qk OPEN/CLOSE shutter opened ql w; ATT OFF OPEN/CLOSE Z×Z DSO SOUND SOURCE EQ7 MODE REP SHUF - 1 2 3 ALBM Refer to the pages listed for details.
Card remote commander RM-X702 1 2 3 4 0 ATT DVD OFF SRC MODE TOP MENU + MENU SOUND 5 6 7 8 9 qa qs qd SETUP ENTER SYSTEM MENU LIST qj qk ql w; wa qf – SYSTEM MENU LIST Z×Z PICTURE EQ DSO AUDIO SUBTITLE ANGLE 1 2 3 4 5 6 + 7 8 9 VOL CLEAR Z×Z PICTURE EQ DSO AUDIO SUBTITLE ANGLE 1 2 3 4 5 6 qg qh ws EQ7 DSPL 0 EQ7 – wd wf wg wh – wj + a OFF button 15, 17, 19 To power off/stop the source.
v CLEAR button 21 To cancel entered numbers. w DSO button 4 To select the DSO mode (1, 2, 3 or OFF). The larger the number, the more enhanced the effect. x EQ7 (equalizer) button To select an equalizer type (XPLOD, VOCAL, CLUB, JAZZ, NEW AGE, ROCK, CUSTOM or OFF). y ANGLE button 23 To change the viewing angle. z VOL (volume) +/– button To adjust the volume. wj DSPL button 15, 17, 18, 35 To change display items. *1 When a CD/MD changer is connected. *2 When an MD changer is connected.
Menu displays Use the menus of this unit to adjust the various functions and settings for playback. The displaying menu differs depending on the status of the unit. Appears when pressing (SETUP) during playback. To select the item Press
Operation message Menu operations differ depending on the item selected, and the buttons to be used appear on the bottom of the menu display to assist your operations. To set, press , then SETUP . To quit, pressSETUP ENTER . ENTER Selected item name and/or operation massages appear. Tip “Operation not possible” appears when the function is not available. Setup items SUBTITLE (page 24) Displays the subtitles. Changes the subtitle language. ANGLE (page 23) Changes the angle.
Notes • If a large-size image is rotated, it may take longer to display. • A JPEG file is designed to be optimally displayed at 640 x 480 pixels. A file in another size may not be displayed correctly, or picture shift (to the left or right) may occur. • Progressive JPEG files cannot be displayed. Player Playing discs When the disc is inserted Press DVD u to start playback. Depending on the disc, some operations may be different or restricted. Refer to the operating instructions supplied with your disc.
Playback order of MP3 files MP3 Additional operations Folder (album) MP3 file (track) ATT DVD + MENU DVD u OFF SRC ./> MODE TOP MENU SOUND M/m SETUP ENTER SYSTEM MENU Notes • The playback order may differ depending on the writing software. • The unit can play up to 1,000 tracks and 256 albums. Tracks beyond the first 1,000 and albums beyond the first 256 cannot be recognized. Tips • If you add numbers (01, 02, 03, etc.
Resuming playback Viewing the disc information — Resume play — Time/text information The unit stores the point where you stopped playback for up to 20 discs, and starts resuming playback even after the unit is turned off, or the disc being played is ejected. ATT OFF AUDIO SUBTITLE ANGLE 1 2 3 4 5 6 + 7 8 9 VOL DVD DVD u OFF SRC You can check the playing time and remaining time of the current title, chapter, or track.
2 Press (DSPL) repeatedly to switch the time information. Time information differs depending on the disc as follows: DVD: “T : : ” - Elapsed playing time of the current title “T: : ” - Remaining time of the current title “C : : ” - Elapsed playing time of the current chapter “C: : ” - Remaining time of the current chapter ** ** ** ** ** ** ** ** ** ** ** ** Searching a specific point on a disc — Scan You can quickly locate a specific point on a disc by monitoring the picture.
Using the menus on DVDs Using PBC functions — PBC (Playback control) With some DVDs, you can use their original menu(s), such as the Top menu or DVD menu. If the DVD contains several titles of tracks and scenes, you can use the Top menu to select the desired title, and start playing. If the DVD contains more comprehensive menu items, such as the audio and subtitle languages, titles, chapters, etc., you can use the DVD menu to select the desired item, and start playing.
Tips • The repeat options differ depending on the disc. • You can also set Repeat play by pressing (1) (REP) on the main unit repeatedly. Playing in various modes — Repeat play/Shuffle play/Search play You can set the following play modes: • Repeat play (page 20) • Shuffle play (page 20) • Search play (page 21) Playing in random order — Shuffle play Notes • The selected play mode is cancelled when the disc being played is ejected or the unit is turned off.
Starting playback from a selected point — Search play You can quickly locate a desired point by specifying the title, chapter, elapsed time of the title (using the time code), or track. The following search options are available depending on the disc: SRC • ENTER Number buttons SYSTEM MENU LIST M/m – Z×Z PICTURE EQ DSO AUDIO SUBTITLE ANGLE 1 2 3 4 5 6 + 7 8 9 VOL EQ7 DSPL 0 – TIME/TEXT starts playing from the point according to the input time code.
VCD: STEREO*: Standard stereo sound 1/L: Left channel sound (monaural) 2/R: Right channel sound (monaural) Various DVD operations * The default setting Changing the audio channels When playing a DVD recorded in multiple audio formats (PCM, Dolby Digital, or DTS), you can change the audio format. If the DVD is recorded with multilingual tracks, you can also change the language.
When “DOLBY DIGITAL” is applied, the program format name and channel numbers appear as follows: Example: Dolby Digital 5.1 ch Rear component × 2 Changing the angles You can change the viewing angle if various angles (multi-angles) for a scene are recorded on a DVD. DOLBY DIGITAL 3 / 2 . 1 Front component × 2 + Center component × 1 LFE component × 1 SRC To turn off the Play mode menu Press (SETUP).
Displaying the subtitles Magnifying pictures You can turn the subtitles on or off, or change the subtitle language if more are recorded on the DVD. You can magnify pictures.
Changing the picture quality — Picture EQ You can select picture quality suitable for the interior brightness of the car. You can set “PICTURE EQ” to “LIGHT OFF,” “LIGHT ON,” or “AUTO” in “CUSTOM SETUP” (page 31). The options (below) for each setting differ. If you set “PICTURE EQ” to “AUTO,” the available options switch automatically depending on whether the light is on or off. The following setting options are available. • NORMAL - normal picture quality. • Daytime*1 - suitable in a bright place.
4 Locking discs Press M/m to select “ON t,” then press (ENTER). The password setting display appears. — Parental control You can lock a disc, or set playback restrictions according to a predetermined level such as viewer age. Restricted playback scenes are blocked or replaced with different scenes when a parental control compatible DVD is played. PARENTAL CONTROL Enter a new 4–digit password, then press ENTER .
Changing the area and its movie rating level 7 You can set the restriction levels depending on the area and its movie ratings. 1 2 3 4 Press (SETUP) while playback is stopped. The set up menu appears. Press M/m to select “PARENTAL CONTROL,” then press (ENTER). The parental control options appear. Press M/m to select “PLAYER t,” then press (ENTER). When the parental control is already set to on, the display to enter your password appears.
Standard Code number Mexico 2362 Netherlands 2376 New Zealand 2390 Norway 2379 Pakistan 2427 Philippines 2424 Portugal 2436 Russia 2489 Singapore 2501 Spain 2149 Sweden 2499 Switzerland 2086 Thailand 2528 United Kingdom 2184 Settings and Adjustments Using the Setup menu By using the Setup menu, you can make various adjustments to items, such as picture and sound. You can also set a language for the subtitle and the on-screen display, among other things.
2 Press M/m to select (SCREEN SETUP), then press (ENTER). The setup display appears. SCPEEN SETUP MONITOR TYPE : SCREEN SAVER : 16:9 ON Setting the display language or sound track — Language setup “LANGUAGE SETUP” allows you to set the desired language for the on-screen display or sound track accordingly. 3 Press M/m to select “MONITOR TYPE,” then press (ENTER). The monitor type options appear.
Setting the screen — Screen setup “SCREEN SETUP” allows you to adjust the setting for the connected monitor. Select (SCREEN SETUP) in the Setup menu, then select the desired setting item. For details on the setup procedures, see “Using the Setup menu” on page 28. Setting items with “*” in the tables below are the default settings. MONITOR TYPE Selects the aspect ratio of the connected monitor (4:3 standard or wide). 16:9* Displays the wide picture.
Custom settings SLIDE SHOW TIME Sets the time for displaying images on the disc. — Custom setup 5sec Switches the images every 5 seconds. “CUSTOM SETUP” allows you to set the playback conditions of this unit. 10sec* Switches the images every 10 seconds. 20sec Switches the images every 20 seconds. 40sec Switches the images every 40 seconds. 60sec Switches the images every 60 seconds. FIXED Cancels switching images. Select (CUSTOM SETUP) in the Setup menu, then select the desired setting item.
Audio settings — Audio setup “AUDIO SETUP” allows you to adjust the sound according to playback conditions and connected equipment. Select (AUDIO SETUP) in the Setup menu, then select the desired setting item. For details on the setup procedures, see “Using the Setup menu” on page 28. The setting items with “*” in the tables below are the default settings. DOLBY DIGITAL Selects the type of Dolby Digital signal.
Storing manually Radio While receiving the station that you want to store, press and hold a number button ((1) to (6)) until “MEM” appears. The number button indication appears in the display. Caution When tuning in stations while driving, use Best Tuning Memory (BTM) to prevent an accident. MODE SRC SRC LIST SYSTEM MENU Number buttons DVD + MENU .
Adjusting the equalizer curve Other functions — EQ7 Tune You can adjust and store the equalizer settings for different tone ranges. Adjusting the sound characteristics ATT DVD + MENU OFF You can adjust the bass, treble, balance, fader and subwoofer volume.
4 Press and hold (ENTER). The name is deleted. Repeat step 3 and 4 if you want to delete other names. When you receive a station, or play a disc in a CD changer with the CUSTOM FILE function, you can label each station/disc with a custom name up to 8 characters (Station Memo/Disc Memo). If you label a station/disc, the name appears on the list (page 33 or 37). 5 Press (SYSTEM MENU) twice. The unit returns to normal reception/play mode.
The following items can be set (follow the page reference for details): “z” indicates the default settings. SET (Setup) CLOCK-ADJ (Clock Adjust) (page 8) BEEP To set “ON” (z) or “OFF.” RM (Rotary Commander) To change the operative direction of the rotary commander controls. – “NORM” (z): to use the rotary commander in the factory-set position. – “REV”: when you mount the rotary commander on the right side of the steering column.
Repeat and shuffle play Using optional equipment MODE SRC DVD + MENU During playback, press (1) (REP) or (2) (SHUF) repeatedly until the desired setting appears. OFF SRC MODE TOP MENU ENTER ATT (With the main unit) SOUND M/m SETUP ENTER SYSTEM MENU SYSTEM MENU – LIST
Rotary commander RM-X4S Changing the operative direction The operative direction of the controls is factoryset as shown below. Attaching the label To increase Attach the indication label depending on how you mount the rotary commander. To decrease SOUND MODE DSPL If you need to mount the rotary commander on the right hand side of the steering column, you can reverse the operative direction.
Switching the front/rear output Additional Information — Zone × Zone You can set to have DVD audio/video output to the rear monitor, and output another source to the front. This function is convenient when you want to enjoy radio, music playback, etc, in the front, and DVD playback in the rear. ATT DVD + MENU OFF SRC MODE TOP MENU Maintenance Replacing the lithium battery of the card remote commander Under normal conditions, the battery will last approximately 1 year.
Cleaning the connectors The unit may not function properly if the connectors between the unit and the front panel are not clean. In order to prevent this, detach the front panel (page 8) and clean the connectors with a cotton swab dipped in alcohol. Do not apply too much force. Otherwise, the connectors may be damaged. Main unit Removing the unit 1 Remove the protection collar. 1 Detach the front panel (page 8). 2 Engage the release keys together with the protection collar.
Notes on discs About MP3 files • To keep a disc clean, do not touch its surface. Handle the disc by its edge. • Keep your discs in their cases or disc magazines when not in use. • Do not subject discs to heat/high temperature. Avoid leaving them in a parked car or on a dashboard/rear tray. • Do not attach labels, or use discs with sticky ink/residue. Such discs may stop spinning when used, causing a malfunction, or may ruin the disc.
Specifications System Laser Signal format system General Semiconductor laser PAL/NTSC switchable Outputs DVD/CD Player section* Signal-to-noise ratio 120 dB Frequency response 10 – 20,000 Hz Wow and flutter Below measurable limit Harmonic distortion (DVD) 0.01% Wow and flutter Less than detected value (±0.001 % W PEAK) * Measured from the AUDIO OUT jacks.
Optional accessories Overhead Monitor XVM-R70 Headrest Monitor XVM-H65 Mobile Monitor XVM-F65 (for MEX-R1) Mobile Monitor XVM-F65WL (for MEX-R5) CD changer (10 discs) CDX-757MX, CDX-656X MD changer (6 discs) MDX-66XLP Source selector XA-C30 AUX-IN selector XA-300 Optical audio cable RC-104 US and foreign patents licensed from Dolby Laboratories. MPEG Layer-3 audio coding technology and patents licensed from Fraunhofer IIS and Thomson.
Image interference or audio noise occurs during wireless transmission. (MEX-R5 only) • The unit transmits audio/video at FM 2.4 GHz. Simultaneous use with other 2.4 GHz equipment may cause image interference or audio noise. t Change the channel (page 36). If there is no improvement, stop using the other equipment. Wireless transmission of the unit can also be turned off if necessary (page 36). • The transmitter is not positioned correctly. t Position the optional monitor XVMF65WL closer to the unit.
Operation The remote does not function. • There are obstacles between the remote and the unit, or the remote receptor. • The distance between the card remote commander and the unit is too far. • The card remote commander is not pointed at the remote sensor, or the receptor on the unit properly. • The batteries in the card remote commander are weak. The operation buttons do not function. The disc will not eject. Press the RESET button (page 8). No beep sound. The beep sound is cancelled (page 36).
The subtitle language cannot be changed or turned off. • Use the DVD menu instead of the direct selection button on the card remote commander (page 19). • Multilingual subtitles are not recorded on the DVD being played. • The DVD prohibits the changing of the subtitles. The angles cannot be changed. • Use the DVD menu instead of the direct selection button on the card remote commander (page 19). • Multi-angles are not recorded on the DVD being played. • The DVD prohibits changing of the angles.
NOTREADY The lid of the MD changer is open or the MDs are not inserted properly. t Close the lid or insert the MDs properly. OFFSET There may be an internal malfunction. t Check the connection. If the error indication remains on in the display, consult your nearest Sony dealer. READ The unit is reading all track and album information on the disc. t Wait until reading is complete and playback starts automatically. Depending on the disc structure, it may take more than a minute.
DVD VIDEO A disc that contains up to 8 hours of moving pictures even though its diameter is the same as a CD. The data capacity of a single-layer and singlesided DVD is 4.7 GB (Giga Byte), which is 7 times that of a CD. The data capacity of a double-layer and single-sided DVD is 8.5 GB, a single-layer and double-sided DVD is 9.4 GB, and double-layer and double-sided DVD is 17 GB. The picture data uses the MPEG 2 format, one of the worldwide standards of digital compression technology.
Language code list The language spellings conform to the ISO 639: 1988 (E/F) standard.
Index Numeric E R 16:9 30 4:3 LETTER BOX 30 4:3 PAN SCAN 30 Equalizer (EQ7) 12, 34 JPEG (MP3/JPEG) 31 Radio 33 Region code 7 Repeat play (REPEAT) Album 20 Chapter 20 Disc 37 Title 20 Track 20 Reset (RESET) 29 RESET button 8 Resume play (MULTI-DISC RESUME) 17, 31 Rotary commander (RM) 36, 38 L S Language code list 49 Language setup (LANGUAGE SETUP) 29 List-up 33, 37 Lithium battery 39 Local seek mode (LOCAL) 36 Locating Fast forward 16 Fast reverse 16 Scan 18 Loudness (LOUD) 36 Low Pass Filter (LPF)
Advertencia Para evitar el riesgo de incendio o electrocución, no exponga la unidad a la lluvia ni a la humedad. Para evitar recibir descargas eléctricas, no abra el aparato. Solicite asistencia técnica únicamente a personal especializado. PRECAUCIÓN El uso de instrumentos ópticos con este producto aumenta el riesgo de sufrir daños oculares. No intente desmontar la carcasa, puesto que el haz láser utilizado en este reproductor de CD/DVD es perjudicial para los ojos.
Tabla de contenido Bienvenido. . . . . . . . . . . . . . . . . . . . . . . . . . . 4 Precauciones . . . . . . . . . . . . . . . . . . . . . . . . . 5 Discos que se pueden reproducir . . . . . . . . . . 6 Procedimientos iniciales Restauración de la unidad . . . . . . . . . . . . . . . 8 Ajuste del reloj . . . . . . . . . . . . . . . . . . . . . . . 8 Modo DEMO. . . . . . . . . . . . . . . . . . . . . . . . . 8 Extracción del panel frontal. . . . . . . . . . . . . . 8 Inserción del disco en la unidad . . . .
Bienvenido Gracias por adquirir este reproductor múltiple de discos Sony. Antes de poner en funcionamiento esta unidad, lea este manual detenidamente y guárdelo para consultarlo en el futuro. CARACTERÍSTICAS: • Compatibilidad para reproducir discos DVD, CD y VCD – Compatibilidad con diversos formatos de discos, como DVD-R/-RW, DVD+R/ DVD+RW, etc.
Precauciones • No utilice las funciones personalizadas mientras maneja, ni realice ninguna otra función que pudiese distraer su atención de la carretera. • Si estaciona el automóvil bajo la luz directa del sol, deje que la unidad se enfríe antes de usarla. • La antena aérea motorizada se extenderá automáticamente mientras la unidad se encuentre en funcionamiento.
Discos que se pueden reproducir Formato de discos DVD VIDEO DVD-R* (MP3/JPEG) DVD-RW* modo Video/modo VR (MP3/JPEG) DVD+R* (MP3/JPEG) DVD+RW* (MP3/JPEG) Video CD CD de audio CD-R* (MP3/JPEG) CD-RW* (MP3/JPEG) * No es posible reproducir discos que no estén finalizados. “DVD VIDEO”, “DVD-R”, “DVD-RW”, “DVD+R” y “DVD+RW” son marcas comerciales. 6 DVD Los discos DVD contienen tanto datos de audio como visuales.
• No es posible reproducir en esta unidad los siguientes discos: – Discos de 8 cm – CD-ROM (datos que no sean los de archivos MP3 o JPEG) – CD-G – Photo-CD – VSD (disco simple de video) – DVD-ROM (datos que no sean los de archivos MP3 o JPEG) – DVD-RAM – DVD-Audio – DVD+R DL (Doble capa) – Active-Audio (Datos) – CD-Extra (Datos) – Mixed CD – SVCD (Super video CD) – CDV – SACD (Super Audio CD) Nota sobre discos transparentes No es posible reproducir en esta unidad discos de 12 cm que contengan sólo una porc
Procedimientos iniciales Restauración de la unidad Antes de utilizar la unidad por primera vez, o después de reemplazar la batería del automóvil o de cambiar las conexiones, debe restaurarla. Extraiga el panel frontal y presione el botón RESET con un objeto puntiagudo, como un bolígrafo. Modo DEMO Cuando la unidad está apagada, primero se muestra el reloj y, a continuación, el modo de demostración (DEMO) inicia la pantalla respectiva.
Colocación del panel frontal 3 Cierre la bandeja. Fije la parte A del panel frontal con la parte B de la unidad, como se muestra en la ilustración y presione el lado izquierdo en su posición hasta escuchar un clic. Expulsión del disco 1 Abra la bandeja. 2 Presione Z. A B Nota No coloque nada sobre la superficie interior del panel frontal. Inserción del disco en la unidad 1 x Abra la bandeja. El disco se expulsa. 2 Inserte el disco con la cara de reproducción hacia abajo.
Ubicación de los controles y operaciones básicas Unidad principal 1 2 34 5 6 ATT OPEN/CLOSE Z×Z DSO SOUND EQ7 SOURCE 0 7 8 9 MODE REP SHUF 1 2 qa qs qd - ALBM + 3 4 OFF SEEK DVD 5 6 qf DSPL SCRL qg qh qj MEX-R1 MEX-R5 qk Bandeja OPEN/CLOSE abierta ql w; ATT OFF OPEN/CLOSE Z×Z DSO SOUND SOURCE EQ7 MODE REP SHUF - 1 2 3 ALBM Consulte las páginas indicadas para obtener información detallada.
Control remoto de tarjeta RM-X702 1 2 3 4 0 ATT DVD OFF SRC MODE TOP MENU + MENU SOUND 5 6 7 8 9 qa qs qd SETUP ENTER SYSTEM MENU LIST qj qk ql w; wa qf – SYSTEM MENU LIST Z×Z PICTURE EQ DSO AUDIO SUBTITLE ANGLE 1 2 3 4 5 6 + 7 8 9 VOL CLEAR Z×Z PICTURE EQ DSO AUDIO SUBTITLE ANGLE 1 2 3 4 5 6 qg qh ws EQ7 DSPL 0 EQ7 – wd wf wg wh – wj + a Botón OFF 15, 17, 20 Para apagar o detener la fuente.
v Botón CLEAR 23 Para cancelar los números ingresados. w Botón DSO 4 Para seleccionar el modo DSO (1, 2, 3 u OFF). Cuanto mayor sea el número, mejor será el efecto. x Botón EQ7 (ecualizador) Para seleccionar un tipo de ecualizador (XPLOD, VOCAL, CLUB, JAZZ, NEW AGE, ROCK, CUSTOM u OFF). y Botón ANGLE 25 Para cambiar el ángulo de visualización. z Botón VOL (volumen) +/– Para ajustar el volumen. wj Botón DSPL 16, 18, 38 Para cambiar los elementos en pantalla. *1 Si se conecta un cambiador de CD/MD.
Pantallas de menú Utilice los menús de esta unidad para ajustar las diversas funciones y ajustes de reproducción. El menú que se muestra difiere según el estado de la unidad. Menú Modo de reproducción Menú Configuración Aparecerá cuando presione (SETUP) mientras se detiene la reproducción. Para seleccionar un elemento Presione
Mensaje de operación Las operaciones del menú varían según el elemento seleccionado y los botones que se utilizarán aparecen en la parte inferior de la pantalla de menú para asistirlo con las operaciones. To set, press , then SETUP . To quit, pressSETUP ENTER . ENTER Aparecerá el nombre del elemento seleccionado y/o los mensajes de operación. Sugerencia Aparecerá el mensaje “Operation not possible” (Operación imposible) si la función no está disponible.
Si la opción “MP3/JPEG” de “CUSTOM SETUP” está ajustada en “JPEG”, la presentación de diapositivas se iniciará automáticamente cuando el disco contenga archivos JPEG (página 33). Cada vez que presione
Para desplazarse por la información del texto Presione (DSPL). Operaciones adicionales Nota “ ” aparece en lugar de los caracteres que no pertenezcan al alfabeto ni sean números. ATT DVD + MENU DVD u OFF SRC Notas sobre discos DVD con pista de sonido DTS La señal de audio DTS se emite en todo momento, y es posible que se emita un ruido fuerte desde los altavoces si conecta la unidad al equipo de audio sin un decodificador DTS. Esto podría dañar los altavoces o sus oídos. .
Reanudación de la reproducción — Reanudación de la reproducción La unidad memoriza el punto en el que se detuvo la reproducción hasta un máximo de 20 discos y reanuda la reproducción aún después de apagar la unidad o de expulsar el disco que se está reproduciendo. ATT OFF DVD DVD u OFF SRC MODE TOP MENU + MENU SOUND SETUP ENTER SYSTEM MENU LIST – Z×Z PICTURE EQ DSO AUDIO SUBTITLE ANGLE Notas • La reproducción de archivos MP3 se iniciará desde el principio de la última pista reproducida.
2 Visualización de la información del disco — Información de tiempo/texto Puede comprobar el tiempo de reproducción y el tiempo restante del título, capítulo o pista actuales. Asimismo, puede comprobar la información de texto, como el nombre del título, capítulo, archivo, etc. AUDIO SUBTITLE ANGLE 1 2 3 4 7 5 8 CLEAR 6 + 9 VOL DSPL 0 – DSPL 1 Durante la reproducción, presione (DSPL). Aparecerá la información de reproducción actual.
Búsqueda de un punto determinado de un disco — Exploración Puede localizar con rapidez un punto determinado de un disco mediante la supervisión de las imágenes. ATT DVD + MENU OFF SRC ./> MODE TOP MENU SOUND SETUP ENTER SYSTEM MENU LIST Uso de los menús del DVD Con algunos DVD se pueden utilizar los menús originales, como el menú superior o el menú del DVD.
Uso de las funciones PBC — PBC (control de reproducción) El menú PBC lo asiste con las operaciones en forma interactiva cuando se reproduce un VCD con funciones PBC. OFF ATT DVD + MENU OFF SRC MODE TOP MENU SOUND ENTER SETUP ENTER LIST – Z×Z PICTURE EQ DSO AUDIO SUBTITLE ANGLE 1 2 3 4 5 6 + 7 8 9 VOL SYSTEM MENU Botones numéricos O CLEAR EQ7 DSPL 0 – 1 Inicie la reproducción de un VCD compatible con las funciones PBC. Aparecerá el menú PBC.
2 — Reproducción repetida/reproducción aleatoria/reproducción con búsqueda Presione M/m para seleccionar (REPEAT) y, a continuación, presione (ENTER). Aparecerán las opciones del Modo de reproducción. 3 Puede establecer los siguientes modos de reproducción: • Reproducción repetida (página 21) • Reproducción aleatoria (página 21) • Reproducción con búsqueda (página 22) Presione M/m para seleccionar la opción que desea y, a continuación, presione (ENTER). Se inicia la reproducción repetida.
1 Durante la reproducción, presione (SETUP). 2 Presione M/m para seleccionar (SHUFFLE) y, a continuación, presione (ENTER). Aparecerán las opciones del Modo de reproducción. 3 Presione M/m para seleccionar la opción que desea y, a continuación, presione (ENTER). Se inicia la reproducción aleatoria. Para volver a la reproducción normal Seleccione “OFF” en el paso 3. Para cerrar el menú Modo de reproducción Presione (SETUP).
3 4 Presione los botones numéricos para introducir el número del título, número del capítulo, número de pista o tiempo transcurrido del título. Por ejemplo, para buscar el punto deseado a las 2 horas, 10 minutos y 20 segundos desde el principio, basta con ingresar “2:10:20”. Para borrar los números ya introducidos, presione (CLEAR). Presione (ENTER). Comenzará la reproducción desde el punto seleccionado. Para cerrar el menú Modo de reproducción Presione (SETUP).
Si el mismo idioma aparece dos o más veces, significa que el DVD está grabado en varios formatos de audio. Si se aplica “DOLBY DIGITAL”, el nombre del formato de programa y los números de canal aparecen como se indica a continuación: Ejemplo: Dolby Digital (5.1 canales) VCD: STEREO*: sonido estéreo estándar 1/L: sonido del canal izquierdo (monoaural) 2/R: sonido del canal derecho (monoaural) Componente posterior × 2 DOLBY DIGITAL 3 / 2 .
Cambio de los ángulos Si el DVD contiene distintos ángulos (multiángulos) para una escena, podrá cambiar el ángulo de visualización. ATT DVD + MENU Visualización de los subtítulos Puede activar o desactivar los subtítulos o cambiar el idioma de los subtítulos si el DVD tiene grabados los subtítulos en varios idiomas.
Ampliación de imágenes Cambio de la calidad de imagen Puede aumentar el tamaño de las imágenes. ATT DVD + MENU OFF SRC MODE TOP MENU ENTER SETUP SOUND M/m SETUP ENTER SYSTEM MENU LIST – Z×Z PICTURE EQ DSO AUDIO SUBTITLE ANGLE
Durante la reproducción, presione (PICTURE EQ) varias veces para seleccionar el ajuste que desea. Bloqueo de discos — Control de bloqueo Daytime Sugerencia También puede cambiar la calidad de imagen seleccionando “PICTURE EQ” en el menú Modo de reproducción (página 13). Puede bloquear un disco o establecer restricciones de reproducción según niveles predeterminados como, por ejemplo, la edad de los usuarios.
4 Presione M/m para seleccionar “ON t” y, a continuación, presione (ENTER). Aparecerá la pantalla de ajuste de contraseña. 5 Presione los botones numéricos para ingresar la contraseña y, a continuación, presione (ENTER). Aparecerá el mensaje “Parental control is canceled” (El control de bloqueo se canceló). Si introduce un número incorrecto, presione < para mover el cursor y vuelva a introducir el número. PARENTAL CONTROL Enter a new 4–digit password, then press ENTER .
6 7 Presione M/m para seleccionar el área que desea a fin de aplicar su clasificación de película y, a continuación, presione (ENTER). El área queda seleccionada. Si desea seleccionar la opción estándar en la “Lista de código de área” (página 29), seleccione “OTHERS t” y luego introduzca el número de código mediante los botones numéricos. Lista de códigos de área Presione M/m para seleccionar “LEVEL” y luego presione (ENTER). Aparecerán las opciones de clasificación.
Cambio de la contraseña 1 Presione (SETUP) con la reproducción detenida. Aparecerá el menú Configuración. 2 Presione M/m para seleccionar (CUSTOM SETUP) y, a continuación, presione (ENTER). Aparecen los elementos de ajuste. 3 Presione M/m para seleccionar “PARENTAL CONTROL” y, a continuación, presione (ENTER). Aparecerán las opciones de control de bloqueo. 4 Presione M/m para seleccionar “PASSWORD t” y, a continuación, presione (ENTER). Aparecerá la pantalla para que introduzca la contraseña.
2 Presione M/m para seleccionar (SCREEN SETUP) y, a continuación, presione (ENTER). Aparecerá la pantalla de ajustes. — Configuración de idioma SCPEEN SETUP MONITOR TYPE : SCREEN SAVER : 3 4 16:9 ON Presione M/m para seleccionar “MONITOR TYPE” y, a continuación, presione (ENTER). Aparecerán las opciones del tipo de monitor.
Ajuste de la pantalla 16:9 — Configuración de pantalla “SCREEN SETUP” (ajuste pantalla) permite ajustar los valores del monitor conectado. Seleccione (SCREEN SETUP) del menú Configuración y, a continuación, seleccione el elemento de ajuste que desea. Si desea obtener más información acerca de los procedimientos de ajuste, consulte “Uso del menú Configuración” en la página 30. Los elementos de ajuste marcados con “*” de las tablas siguientes constituyen los ajustes predeterminados.
Ajustes personalizados — Configuración personalizada “CUSTOM SETUP” permite ajustar las condiciones de reproducción de esta unidad. Seleccione (CUSTOM SETUP) en el menú Configuración y, a continuación, seleccione el elemento que desee ajustar. Si desea obtener más información acerca de los procedimientos de ajuste, consulte “Uso del menú Configuración” en la página 30. Los elementos de ajuste marcados con “*” de las tablas siguientes constituyen los ajustes predeterminados.
PICTURE EQ Selecciona la visualización de las opciones de calidad de imagen. AUTO* Cambia las opciones en función de si la luz está encendida o apagada. (Disponible sólo si está conectado el cable de control de la iluminación.) LIGHT OFF Muestra las opciones que se pueden utilizar con la luz del día. LIGHT ON Muestra las opciones que se pueden utilizar de noche.
DOLBY DIGITAL Selecciona el tipo de señal Dolby Digital. DOLBY DIGITAL* Seleccione esta opción cuando la unidad esté conectada a un componente de audio con decodificador Dolby Digital integrado. DOWNMIX PCM Seleccione esta opción cuando la unidad esté conectada a un componente de audio sin decodificador Dolby Digital integrado. Puede seleccionar si las señales con compatibles con Dolby Surround (Pro Logic) o no; para ello, ajuste el elemento “DOWNMIX” de “AUDIO SETUP” (página 34).
Almacenamiento manual Mientras recibe la emisora que desea almacenar, mantenga presionado un botón numérico (del (1) al (6)) hasta que aparezca “MEM”. La indicación de botón numérico aparece en pantalla. Nota Si intenta almacenar otra emisora en el mismo botón numérico, se reemplazará la que estaba almacenada previamente. Recepción de las emisoras almacenadas Seleccione la banda y, a continuación, presione un botón numérico (del (1) al (6)) o M/m.
Ajuste de la curva del ecualizador Otras funciones — EQ7 Tune Ajuste de las características de sonido Puede definir y almacenar los ajustes del ecualizador para distintos rangos de tono. Puede ajustar los graves, agudos, el balance, el equilibrio y el volumen del altavoz potenciador de graves.
Etiquetado de una emisora o un disco Cuando sintoniza una emisora o reproduce un disco en un cambiador de CD con la función CUSTOM FILE, puede etiquetar cada emisora/ disco con un nombre personalizado de hasta 8 caracteres (Memorando de emisoras/Memorando del disco). Si etiqueta una emisora o un disco, el nombre aparece en la lista (página 36 o 40). 1 Mientras escucha una emisora o reproduce un disco que desea etiquetar, presione (SYSTEM MENU).
Se pueden ajustar los elementos siguientes (consulte la referencia de página para obtener más información): “z” indica el ajuste predeterminado. SET (Configuración) CLOCK-ADJ (Ajuste del reloj) (página 8) BEEP Para ajustar “ON” (z) u “OFF”. RM (Mando rotatorio) Para cambiar la dirección de funcionamiento de los controles del mando rotatorio. – “NORM” (z): para usar el mando rotatorio en la posición ajustada en fábrica. – “REV”: cuando monte el mando rotatorio del lado derecho de la columna de dirección.
EDIT NAMEEDIT (página 38) NAME DEL (página 38) BTM (página 35) Omisión de álbumes y discos Para omitir Presione M/m *1 Cuando la unidad está apagada. *2 El ajuste predeterminado variará en función del modelo: PAL: modelo asiático NTSC: modelo latinoamericano *3 MEX-R5 solamente *4 Cuando está conectado el cable de control de la iluminación. *5 Cuando la unidad está encendida. *6 Cuando se reproduce un disco. *7 Cuando se conecta y ejecuta un equipo auxiliar.
Mando rotatorio RM-X4S Cambio del sentido de funcionamiento El sentido de funcionamiento de los controles está ajustado de fábrica como se muestra a continuación. Colocación de la etiqueta Coloque la etiqueta de indicación según el modo en que instale el mando rotatorio. Para aumentar Para disminuir SOUND MODE DSPL Si necesita instalar el mando rotatorio en el lado derecho de la columna de la dirección, puede invertir el sentido de funcionamiento.
Cambio entre las salidas frontal y posterior — Zone × Zone Puede ajustar que se emita audio/video de un DVD en el monitor posterior y otra fuente distinta en la parte frontal. Esta función resulta de utilidad si desea escuchar la radio, reproducir música, etc. en la parte frontal y reproducir un DVD en la posterior.
Limpieza de los conectores Es posible que la unidad no funcione correctamente si los conectores entre ésta y el panel frontal están sucios. Para prevenir esta situación, extraiga el panel frontal (página 8) y limpie los conectores con un hisopo de algodón humedecido en alcohol. No aplique demasiada fuerza, ya que podría dañar los conectores.
• No use discos con etiquetas o autoadhesivos. Su uso puede producir las siguientes fallas de funcionamiento: – Imposibilidad de expulsar el disco (dado que se despegó la etiqueta o el autoadhesivo y se obstruye el mecanismo de expulsión). – Imposibilidad de leer los datos de audio correctamente (por ejemplo, se interrumpe la reproducción o simplemente no la hay) debido a que el calor contrae el autoadhesivo o la etiqueta y hace que el disco se deforme.
Especificaciones Sistema Láser Láser semiconductor Sistema de formato de señal Intercambiable entre PAL y NTSC Sección del reproductor de DVD/CD* Relación señal-ruido 120 dB Respuesta de frecuencia de 10 a 20 000 Hz Fluctuación y trémolo Inferior al límite medible Distorsión armónica (DVD) 0,01 % Fluctuación y trémolo Inferior al valor detectado (±0,001 % W PEAK) Sección AV inalámbrica (MEX-R5 solamente) Frecuencias de transmisión Método de modulación Potencia de salida de RF Generales Salidas * Medido
Accesorios opcionales Monitor suspendido XVM-R70 Monitor para reposacabezas XVM-H65 Monitor móvil XVM-F65 (para MEX-R1) Monitor móvil XVM-F65WL (para MEX-R5) Cambiador de CD (10 discos) CDX-757MX, CDX-656X Cambiador de MD (6 discos) MDX-66XLP Selector de fuente XA-C30 Selector AUX-IN XA-300 Cable de audio óptico RC-104 Patentes de los EE.UU. y otros países usados con licencia de Dolby Laboratories. Tecnología de codificación de audio MPEG Layer-3 y patentes bajo licencia de Fraunhofer IIS y Thomson.
Se producen interferencias en la imagen o ruido en el sonido durante la transmisión inalámbrica (MEX-R5 solamente). • La unidad transmite audio o video con una frecuencia FM de 2,4 GHz. La utilización simultánea con otro equipo de 2,4 GHz puede causar interferencias en la imagen o ruidos en el sonido. t Cambie de canal (página 39). Si no se experimenta mejoría, deje de utilizar el otro equipo. Asimismo, es posible desactivar la transmisión inalámbrica de la unidad si fuera necesario (página 39).
Funcionamiento El control remoto no funciona. • Hay obstáculos entre el control remoto y la unidad o el receptor remoto. • El control remoto de tarjeta y la unidad están demasiado separados. • No se orienta correctamente el control remoto de tarjeta hacia el sensor remoto o hacia el receptor de la unidad. • Las pilas del control remoto de tarjeta disponen de poca energía. Los botones de operación no funcionan. El disco no se expulsa. Presione el botón RESET (página 8). No se escuchan pitidos.
No es posible cambiar el idioma de la pista de sonido. • Utilice el menú DVD en lugar del botón de selección directa del control remoto de tarjeta (página 19). • El DVD en reproducción no dispone de pistas grabadas en varios idiomas. • El DVD prohibe el cambio del idioma para la pista de sonido. El idioma de subtítulos no se puede cambiar ni desactivar. • Utilice el menú DVD en lugar del botón de selección directa del control remoto de tarjeta (página 19).
Mensajes/indicaciones de error Las siguientes indicaciones aparecen cuando se produce una falla en la unidad. NOT READ La unidad no puede leer la información del disco. t Cargue el disco y, a continuación, selecciónelo en la lista. NOTREADY La tapa del cambiador de MD está abierta o los MD no están insertados correctamente. t Cierre la tapa o inserte los MD correctamente. En la unidad principal BLANK*1 No hay pistas grabadas en el MD.*2 t Reproduzca un MD que tenga pistas grabadas.
En el monitor Cannot play this disc. • El disco no es compatible con esta unidad. • No es posible reproducir el DVD debido a que el código de región es diferente. No MP3 or JPEG file El disco no contiene archivos MP3/JPEG. Read error • La unidad no puede leer los datos debido a algún problema. • Se dañaron o perdieron los datos. Please Press RESET. La unidad no puede operar debido a algún problema. t Presione el botón RESET.
DVD VIDEO Disco que contiene hasta 8 horas de imágenes en movimiento, aunque su diámetro es igual que el de un CD. La capacidad para almacenar datos de un DVD de una sola capa de una sola cara es de 4,7 GB (Giga Byte), 7 veces la capacidad de un CD. La capacidad para almacenar datos de un DVD de doble capa de una sola cara es de 8,5 GB, la de un DVD de una sola capa de dos caras es de 9,4 GB, y la de un DVD de doble capa y de dos caras es de 17 GB.
Lista de códigos de idiomas La ortografía de los idiomas cumple la norma ISO 639: 1988 (E/F).
Índice Numérico E N 16:9 32 4:3 LETTER BOX (tipo buzón) 32 4:3 PAN SCAN (exploración PAN) 32 Ecualizador (EQ7) 12, 37 Ecualizador de imagen (PICTURE EQ) 26, 34 Elemento de la pantalla Menú Configuración 13, 30 Menú Modo de reproducción 13 Reproducción de CD/MP3 15 Equilibrio (FAD) 37 Nivel auxiliar (AUX LVL) 39 Nivel de DVD (DVD LVL) 24, 39 Nombre de la emisora Editar (NAMEEDIT) 38 Eliminar (NAME DEL) 38 Nombre del disco Editar (NAMEEDIT) 38 Eliminar (NAME DEL) 38 F O Filtro de paso alto (HPF) 39 Fi
S Sonoridad (LOUD) 39 Subtítulo (SUBTITLE) 25, 31 T Tiempo de presentación de diapositivas (SLIDE SHOW TIME) 33 Tipo de monitor (MONITOR TYPE) 32 Título (TITLE) 22 Z Zone × Zone (Z×Z) 42 Zoom (CENTER ZOOM) 26 55
警告 為防止火災或電擊,請勿將本機放在雨水所 及或潮濕的地方。 切勿打開機殼,以免觸電。 維修只可由合格 的專業技術人員進行。 小心 使用 本 機 中 的 光學 儀 器 將 增 加 對 眼 睛 的 傷 害。 該 CD/DVD 播放機使用的雷射光束對眼睛 有害,因此不要試圖拆開機殼。 維修只可由合格的專業技術人員進行。 關 於 無線 傳 輸的 注 意事 項 (僅限於 MEX-R5) 本裝置可以用 FM 2.4 GHz 傳輸音頻 / 視頻。 本裝置與其他 2.4 GHz 的設備同時使用可能會 引起影像的干擾或音頻的雜訊。這不是故障, 而是設備共用同一個工作頻率而引起的結 果。 • 短距離低功率射頻電機之主要技術指標 – 工作頻率範圍:2400 - 2483.5 MHz – 有效發射功率 (EIRP):≤ 10 mW – 雜散發射功率:≤ -36 dBm/100 kHz (30 MHz - 1 GHz) ≤ -30 dBm/100 kHz (1 GHz - 12.
目錄 鳴謝惠顧! ..........................4 使用前注意事項 ......................5 可播放光碟 ..........................5 開始使用之前 復原本機 ............................8 設定時鐘 ............................8 DEMO 模式 ...........................8 拆卸前面板 ..........................8 將光碟插入本機 ......................9 控制器位置和基本操作 ...............10 選單顯示 ...........................13 播放機 播放光碟 ...........................15 重續播放 — 重續播放 ......................17 查看光碟資訊 — 時間 / 文字資訊 ................17 搜尋光碟上的指定點 — 掃描 ..........................
鳴謝惠顧! 感謝您惠購 Sony 多光碟播放機。在操作本機 之前,請詳細閲讀本說明書並妥善保管以備 將來參考。 特色: • DVD,CD,VCD 播放相容 – 與多種光碟格式相容,如 DVD-R/-RW、 DVD+R/DVD+RW 等 DVD-RW:與視頻模式和 VR 模式相容(可進 行多種編輯) DVD+RW:與 +VR 模式相容 (可進行多種編 輯) – 播放以 MP3 檔案格式錄製在 DVD-R/-RW、 DVD+R/+RW 或 CD-R/-RW 上的多達 1000 個曲 目 *1 • 提供 2 路視頻輸出 (正面和背面) *2,1 路 Zone × Zone 音頻輸出 *3 和 1 路數位輸出 • 無線傳輸*4:音頻/視頻訊號可傳輸到選購的 監視器 XVM-F65WL,且無需複雜的連接。 • Zone × Zone:您可以聽收音機或來自前面 的 CD/MD 換碟機 (如果連接)的音樂,並同 時將 DVD 輸出至背面。 • 影像 EQ :根據汽車内部 / 周圍亮度而定,您 可以從預設設定中選擇想要的影像色調。 • DVD 電平調整 :平衡 PCM、Dolby Digital 和 DTS 之間的輸出電平差
使用前注意事項 • 在駕駛中切勿使用自訂功能,或操作其他可 能分散您對路況注意力的功能。 • 倘若您的汽車停在直射陽光下,則在操作前 必須先使本機充分冷卻。 • 本機工作時,電動天線將自動伸出。 關於安全 • 請遵守貴國或地區的交通法規。 • 爲了您的安全,如果未實施停車煞車,則連 接在 FRONT VIDEO OUT 的監視器將自動關 閉。 可播放光碟 光碟格式 DVD VIDEO DVD-R* (MP3/JPEG) DVD-RW* 視頻模式 /VR 模式 (MP3/JPEG) 防止意外事故 本影像只有當您停車後並設定了停車煞車才 會出現。 當汽車開始起動時,在顯示下列警告後,來 自 FRONT VIDEO OUT 的影像將自動消失。 當汽車處於運動狀態時,連接到 REAR VIDEO OUT 的監視器有效。 螢幕上的影像關閉,但可以聽到 CD/MP3 聲 音。 DVD+R* (MP3/JPEG) DVD+RW* (MP3/JPEG) 視頻 CD For your safety, the video is blocked.
視頻 CD (VCD) 視頻 CD 可以在與常規音頻 CD 相同大小的光碟 上同時含有音頻和影像資料。標準 12 cm CD 的播放時間為 74 分鐘。 有關透明光碟的注意事項 音頻 CD 含有音頻資料的音頻 CD。標準 12 cm CD 的播 放時間為 74 分鐘。 採用版權保護編碼的音樂光碟 可錄 CD (CD-R) 使用 CD-R,您可以編輯音頻資料。您可以在 CD-R 上寫入一次資訊。 可重寫 CD (CD-RW) 使用 CD-RW,您可以編輯音頻資料。您僅能在 CD-RW 上反覆寫入資訊。 CD-Extra CD-Extra 分別有音頻和資料兩個部分 (話 路)。您只能在本機上播放音頻部分。 註 • 致地區代碼 3 區域的客戶 本機符合 PAL 彩色制式。無法播放以非 PAL 彩色制式 錄製的光碟,如 NTSC 或 SECAM。 • 致地區代碼 4 區域的客戶 本機符合 NTSC 彩色制式。無法播放以非 NTSC 彩色制 式錄製的光碟,如 PAL 或 SECAM。 • 您可以用本機播放設計用於音頻的 DVD-R/DVD-RW、 DVD+R/DVD+RW 和 CD-R/CD-RW。但是,視錄製
地區代碼 版權 本系統用於軟體版權保護。 地區代碼位於本機的底部,只有標有相同地 區代碼的 DVD 才能在本機上播放。 本產品含有版權保護技術,該技術受美國專 利和其他知識產權保護。使用此版權保護技 術時,必須獲得 Macrovision 公司的許可, 且僅供家庭和其他限制性觀看,除非獲得 Macrovision 公司的允許。禁止逆向設計或 拆卸。 地區代碼 標有 ALL 的 DVD 也可以在本機上播放。 由 Dolby Laboratories 授權製造。 「杜比」、「Dolby」與雙 D 記號是 Dolby Laboratories 的商標。 “DTS”和 “DTS 2.0 + Digital Out”均 為 Digital Theater Systems, Inc. 的商標。 如果您試圖播放任何其他 DVD,則監視器螢幕 上將出現“Cannot play this disc.
DEMO 模式 開始使用之前 關機時,首先顯示時鐘,然後示範(DEMO)模 式開始示範顯示。 復原本機 若要取消 DEMO 模式,則當關機時在設置中設 定 “DEMO-OFF”(第 35 頁)。 在第一次使用本機前,或更換汽車電池或改 變連接後,必須使本機復原。 卸下前面板,並用帶尖頭的物体,如原子筆 等,按下 RESET 按鈕。 拆卸前面板 您可以拆下本機的前面板以防止本機被盜。 RESET 按鈕 註 按 RESET 按鈕,將消除時鐘設定和某些已儲存的內容。 設定時鐘 時鐘採用 12 小時制數字顯示。 報警 若您未拆除前面板即把點火開關旋轉至 OFF 檔,報警器將發出數秒鐘的報警聲。 如果使用內建放大器,報警器將只發出一聲 報警聲。 1 按 (OFF)。 本機關閉。 2 按 ,然後將前面板朝自己方向拉出。 (OFF) ATT DVD + MENU OFF SRC MODE TOP MENU ENTER SOUND M/m SETUP ENTER SYSTEM MENU LIST – Z×Z PICTURE EQ DSO AUDIO SUBTI
安裝前面板 退出光碟 如圖所示將前面板的 A 部分與本機的 B 部分 嚙合,然後推進左端直至聽到喀嗒聲。 1 打開百葉艙門。 2 按 Z。 A B 註 切勿在前面板內表面放任何東西。 x 將光碟插入本機 1 打開百葉艙門。 光碟退出。 註 插入或退出光碟時,切勿關閉百葉艙門。光碟可能被卡 住並損壞。 提示 光碟可以在百葉艙門打開或關閉時播放。 2 將光碟播放面朝下插入。 播放開始。 (視光碟而定,按 DVD u 開始 播放。) 3 關閉百葉艙門。 9
控制器位置和基本操作 主機 1 2 34 5 6 ATT OPEN/CLOSE Z×Z DSO SOUND EQ7 SOURCE 0 7 8 9 MODE REP SHUF 1 2 qa qs qd - ALBM + 3 4 OFF SEEK DVD 5 6 qf DSPL SCRL qg qh qj MEX-R1 MEX-R5 qk OPEN/CLOSE 百葉艙門打開時 ql w; ATT OFF OPEN/CLOSE Z×Z DSO SOUND SOURCE EQ7 MODE REP SHUF - 1 2 3 ALBM 詳細說明,請參見列出頁。 a b c d e f g h i j k l m 10 SEEK 音量 +/- 按鈕 33 ATT (降低)按鈕 Z×Z (Zone × Zone)按鈕 SOUND 按鈕 顯示窗 EQ7 (均衡器)按鈕 DSO 按鈕 OFF 按鈕 8 SEEK +/- 按鈕 收音機: 自動調入電臺(按);手動搜台(按住)。 DVD/CD: 跳過章 / 軌跡 (按);快進
卡片式遙控器 RM-X702 1 2 3 4 0 ATT DVD OFF SRC MODE TOP MENU + MENU SOUND 5 6 7 8 9 qa qs qd SETUP ENTER SYSTEM MENU LIST qj qk ql w; wa qf – SYSTEM MENU LIST Z×Z PICTURE EQ DSO AUDIO SUBTITLE ANGLE 1 2 3 4 5 6 + 7 8 9 VOL CLEAR Z×Z PICTURE EQ DSO AUDIO SUBTITLE ANGLE 1 2 3 4 5 6 qg qh ws EQ7 DSPL 0 EQ7 – wd wf wg wh – wj + a OFF 按鈕 15, 17, 19 關閉電源 / 停止音源。 b MODE 按鈕 32, 36 選擇無線電波段(FM/AM)/ 選擇裝置 *1。 c SRC (SOURCE)按鈕 打開電源 / 改變音源 (收音機 /DVD/CD/ MD*2/AUX*3)。 d
v CLEAR 按鈕 21 取消輸入的數字。 w DSO 按鈕 4 選擇 DSO 模式(1,2,3 或 OFF)。數字越 大,增強的效果越大。 x EQ7 (均衡器)按鈕 選擇均衡器類型 (XPLOD,VOCAL,CLUB, JAZZ,NEW AGE,ROCK,CUSTOM 或 OFF)。 y ANGLE 按鈕 23 改變視角。 z VOL (音量)+/- 按鈕 調節音量。 wj DSPL 按鈕 15, 17, 18, 34 改變顯示項目。 *1 連接了 CD/MD 換碟機時。 *2 連接了 MD 換碟機時。 *3 連接了選購的 Sony 便攜式設備時。 註 如果本機關閉且顯示消失,除非先按主機上的 (SOURCE) 或裝入光碟激活本機,否則無法用卡片式遙 控器操作。 提示 有關如何更換電池的詳細資訊,請參見第 38 頁 “更換 卡片式遙控器的鋰電池”。 12
選單顯示 使 用 本 機 的 選 單 可調 節 各 種 功能 和 播 放 設 定。 顯示的選單將視本機的狀態而各不相同。 在播放過程中按 (SETUP) 時出現。 若要選擇項目 按
操作信息 選單操作將視所選擇的項目而各有不同,在 選單顯示的底部出現要使用的按鈕,可以幫 助您進行操作。 To set, press , then SETUP . To quit, pressSETUP ENTER .
播放機 註 • 如果旋轉大尺寸影像,則可能花更長時間顯示。 • JPEG 檔案設計用於以 640 x 480 像素最佳顯示。其他 尺寸的檔案可能無法正確顯示,或者產生影像移動 (向左或右)。 • 無法顯示 JPEG 檔案。 播放光碟 當光碟已經插入時 按 DVD u 開始播放。 視光碟而定,有些操作可能不相同或受到限 制。 請參閱光碟附帶的使用說明書。 若要停止播放 / 關機 按 (OFF)。 提示 在本機關閉時您無法插入光碟。 在 CD/MP3 播放中顯示項目 ATT OFF DVD DVD u OFF SRC A MODE TOP MENU + 1 MENU SOUND – Z×Z PICTURE EQ DSO AUDIO SUBTITLE ANGLE 1 2 3 4 5 6 0:42 160k PLAY MP3 : ALBUM NAME 001 : T R AC K N A M E 0 0 1 : I D 3 I N F O R M AT I O N ENTER LIST 1 REP
MP3 檔案的播放順序 MP3 附加操作 資料夾 (文件夾) MP3 檔案 (軌跡) ATT DVD + MENU DVD u OFF SRC ./> MODE TOP MENU SOUND M/m SETUP ENTER SYSTEM MENU 註 • 播放順序可能視寫入軟體而異。 • 本機最多能播放 1000 個軌跡和 256 個文件夾。無法識 別最初的 1000 以外的軌跡和最初的 256 個以外的文件 夾。 提示 • 如果您在軌跡名稱前增加數字 (01、02、03 等),每 個資料夾中的軌跡將以該數字順序播放。 • 由於包含多樹級光碟的開始播放時間較長,建議您製 作的文件夾不要超過兩個樹級。 • 關於 MP3 檔案的詳細資訊,請參見第 40頁“關於 MP3 檔 案”。 LIST – Z×Z PICTURE EQ DSO AUDIO SUBTITLE ANGLE (,) 到下一章、下一個軌 跡或場面 在連續播放模式中回 按 .
重續播放 查看光碟資訊 — 重續播放 — 時間 / 文字資訊 本機最多能儲存 20 盤光碟的停播點,即使關 機後或者退出正在播放的光碟後,也能開始 重續播放。 您可以查看當前標題、章、或軌跡的播放時間 和剩餘時間。您也可以查看文字資訊,如標題 名稱、章、檔案等。 ATT OFF DVD DVD u OFF SRC AUDIO SUBTITLE ANGLE 1 2 3 4 5 6 + 7 8 9 VOL MODE TOP MENU + MENU SOUND CLEAR SETUP DSPL 0 – ENTER SYSTEM MENU 1 2 LIST DSPL – Z×Z PICTURE EQ DSO AUDIO SUBTITLE ANGLE EQ7 在播放過程中按 (OFF) 停止播放。 按 DVD u 重續播放。 播放從步驟 1 中的停止點開始。 若要從頭播放 將 “CUSTOM SETUP”中的 “MULTI-DISC RESUME”設定為 “OFF”之後 (第 31 頁),按 Z 退出光碟,然後重新插入光碟。
2 反覆按 (DSPL) 切換時間資訊。 如下所示,時間資訊視光碟而異: DVD: “T 間 “T時間 “C “C間 **:**:**”- 當前標題的已播放時 **:**:**”- 當前標題的剩餘播放 當前章的已播放時間 **::**::**””- 當前章的剩餘播放時 ** ** ** 搜尋光碟上的指定點 — 掃描 通過監視影像您可以快速查找光碟上的指定 點。 SRC VCD (沒有 PBC 功能): “T : ” - 當前軌跡的已播放時間 “T: ” - 當前軌跡的剩餘播放時間 “D : ” - 當前光碟的已播放時間 “D: ” - 當前光碟的剩餘播放時間 ** ** ** ** ** ** ** ** JPEG: 文件夾號 影像號 ATT DVD + MENU OFF ./> MODE TOP MENU SOUND SETUP ENTER SYSTEM MENU LIST – Z×Z PICTURE EQ DSO AUDIO SUBTITLE ANGLE EQ7 播放過程中,按住 .
使用 DVD 中的選單 使用 PBC 功能 對於有些 DVD,您可以使用原來的選單,如頂 部選單和 DVD 選單。 如果 DVD 含有若干軌跡和場面的標題,則您可 以使用頂部選單來選擇想要的標題,然後開 始播放。 如果 DVD 含有更詳盡的選單項目,如音頻和字 幕語言、標題、章等,您可以使用 DVD 選單來 選擇想要的項目,然後開始播放。 — PBC (播放控制) 在播放 PBC 相容 VCD 時,PBC 選單可以幫助您 進行交互式操作。 OFF ATT DVD + MENU OFF SRC MODE TOP MENU SOUND ENTER SETUP ATT DVD ENTER OFF TOP MENU ENTER SRC – Z×Z PICTURE EQ DSO AUDIO SUBTITLE ANGLE 1 2 3 4 5 6 + 7 8 9 VOL MODE TOP MENU + MENU MENU M/m SOUND SETUP ENTER SYSTEM MENU LIST SYSTEM MENU LIST
提示 • 重複選項視光碟而異。 • 反覆按主機上的 (1)(REP),您也可以設定重複播放。 以不同的模式播放 — 重複播放 / 隨機播放 / 搜尋播放 以隨機順序播放 您可以設定以下播放模式: • 重複播放 (第 20 頁) • 隨機播放 (第 20 頁) • 搜尋播放 (第 21 頁) — 隨機播放 註 • 退出正在播放的光碟或關機時,所選擇的播放模式就 將取消。 • PBC 功能開啓時播放 VCD,則重複播放或隨機播放無 效。 反覆播放 — 重複播放 當正在播放的項目到達結尾時,本機可以重 複標題、章或軌跡。 可以使用以下重複選項: • TITLE (標題重複) - 重複當前標題。 • CHAPTER (章重複) - 重複當前章。 • TRACK(軌跡重複) - 重複當前軌跡 / 影像。 • ALBUM(文件夾重複)- 重複當前文件夾中的 軌跡 / 影像。 註 設定 CD/MP3 重複播放時,反覆按 (1)(REP) 通過主機操 作。 ATT MODE TOP MENU ENTER + LIST – Z×Z PICTURE EQ DSO AUDIO SUBTITLE
從所選擇的點開始播放 — 搜尋播放 通過指定標題、章、標題已播放時間 (使用 時間代碼)或軌跡,您可以快速查找想要的 點。 視光碟而定,可以使用以下搜尋選項: SRC DVD: • + MENU SOUND M/m SETUP ENTER SETUP TITLE 從所選擇的標題開始播放。 CHAPTER 從所選擇的章開始播放。 • DVD MODE TOP MENU ENTER • ATT OFF TIME/TEXT 根據輸入的時間代碼,從 此點開始播放。 數字按鈕 VCD: SYSTEM MENU LIST Z×Z PICTURE EQ DSO AUDIO SUBTITLE ANGLE 1 2 3 4 5 6 + 7 8 9 VOL CLEAR CLEAR – EQ7 DSPL 0 – 從所選擇的軌跡開始 TRACK 播放。 • CD: 1 在播放過程中按 (SETUP)。 出現播放模式選單。 • 從所選擇的軌跡開始 TRACK 播放。 2 按 M/m 選擇想要的搜尋項目,然後按 (ENTER)。 搜尋
查看節目格式 您可以查看正在播放的 DVD中的聲道數量和分 量位置。 多種 DVD 操作 更改聲道 當播放以多種音頻格式(PCM、Dolby Digital 或 DTS)錄製的 DVD 時,您可以改變音頻格式。 如果 DVD 以多語言軌跡錄製,您也可以改變語 言。 對於 VCD,您可以選擇左聲道或右聲道的聲 音,並通過左右揚聲器收聽所選擇聲道的聲 音。例如,當播放的光碟上歌曲為右聲道錄製 了歌唱聲,左聲道錄製了樂器聲,您可以選擇 左聲道從兩個揚聲器中收聽樂器聲。 1 在播放過程中按 (SETUP)。 出現播放模式選單。 2 按 M/m 選擇 (ENTER)。 出現節目格式。 (AUDIO),然後按 當前音頻格式 *1 PLAY DVDVIDEO 12(67) 018(034) T 01:35:55 1: ENGLISH PROGRAMFORMAT DOLBY DIGITAL 3 / 2.
調節音頻輸出電平 - DVD 電平調節 改變角度 DVD 視頻的音頻輸出電平視錄製的音頻格式 (PCM,Dolby Digital 或 DTS)而異。您可以 分開調節 PCM、Dolby Digital 或 DTS 的輸出 電平,減小光碟和音源間的音量電平差異。 如果 DVD 上的場面錄製了多種角度 (多角 度),則您可以改變視角。 1 2 3 4 5 按 (SYSTEM MENU)。 反覆按 M/m 選擇 “DVD LVL”,然後按 (ENTER)。 按 , 設定“ADJ-ON”,然後按 (ENTER)。 按
顯示字幕 放大影像 您可以開啓或關閉字幕,如果 DVD 中錄製了多 種語言的字幕,則可以改變字幕語言。 您可以放大影像。 ATT ATT DVD + MENU OFF DVD OFF SRC SRC TOP MENU + MENU SOUND SETUP ENTER SETUP – Z×Z PICTURE EQ DSO AUDIO SUBTITLE ANGLE SOUND M/m SETUP ENTER SYSTEM MENU ENTER LIST SYSTEM MENU MODE TOP MENU MODE EQ7 LIST – Z×Z PICTURE EQ DSO AUDIO SUBTITLE ANGLE
調節個人設定 改變影像品質 您可以儲存您自己的使用者 - 不同影像色調的 可調節設定。 — 影像 EQ 您可以選擇適合汽車內部亮度的影像品質。 您可以將 “CUSTOM SETUP”中的 “PICTURE EQ”設定為 “LIGHT OFF”、“LIGHT ON”或 “AUTO”(第 31 頁)。各個設定選項 (以 下)不同。如果您將 “PICTURE EQ”設定為 “AUTO”,則可使用的選項根據汽車照明打開 或關閉而自動切換。 可以使用以下設定選項。 • NORMAL - 正常影像品質。 • Daytime*1 - 適合於明亮的地方。 • Sunset*1 - 適合光線有點暗時。 • Shine*1 - 適合於非常明亮的地方(如,光線 反射在監視器上時)。 • Night*2 - 監視器變暗,而不是在夜晚分散您 駕車的注意力。 • Midnight*2 - 使監視器比 “Night”設定更 暗。 • Theater*2 - 使監視器變亮;適合於您想在 夜晚觀看明亮的監視器。 • CUSTOM - 使用者可調節的設定。 1 在播放過程中按 (SETUP)。 出現播放模式選單。 2 按 M/m
鎖定光碟 — 視聽者控制 您可以鎖定光碟,或根據預先確定的等級(如 觀看者的年齡)來設定播放限制。當播放視聽 者控制功能相容 DVD 時,受到播放限制的場面 被阻擋,或被其它場面所替換。 設定視聽者控制功能為開啓 ATT DVD + MENU 5 按數字按鈕輸入您的密碼,然後按 (ENTER)。 出現確認顯示。 6 若要確認,按數字按鈕再次輸入您的密 碼,然後按 (ENTER)。 視聽者控制設定完成。 若要關閉設定選單 按 (SETUP)。 設定視聽者控制功能為關閉 1 在播放停止時按 (SETUP)。 出現設定選單。 2 按 M/m 選擇 (CUSTOM SETUP),然後按 (ENTER)。 出現設定項目。 3 按 M/m 選擇“PARENTAL CONTROL”,然後 按 (ENTER)。 出現視聽者控制選項。 4 按 M/m 選擇 “OFF t”,然後按 (ENTER)。 出現輸入密碼顯示。 OFF SRC MODE TOP MENU ENTER SETUP SOUND 數字按鈕 M/m SETUP ENTER SYSTEM MENU – LIS
4 按 M/m 選擇 “PLAYER t”,然後按 (ENTER)。 當視聽者控制已經設定為開啓時,出現要 求您輸入密碼的顯示畫面。 若要更改設定,則輸入您的密碼,然後按 (ENTER)。 如果輸入了錯誤的數字,按 < 移動指針並 重新輸入數字。 5 按 M/m 選擇 “STANDARD”,然後按 (ENTER)。 出現標準選項。 CUSTOM SETUP LEVEL : STANDARD : 6 7 8: USA USA OTHER 按 M/m 選擇想要的地區,以套用該地區電 影收視率,然後按 (ENTER)。 區域選擇完畢。 如果您想要在“地區代碼列表” (第 27 頁) 中選擇該標準,則選擇 “OTHERS t”,然 後使 用數字按 鈕 輸 入該 地 區 標準 的 代 碼 號。 按 M/m 選擇“LEVEL”,然後按 (ENTER)。 出現收視率選項。 CUSTOM SETUP LEVEL : STANDARD : 8: 8: 7: 6: 5: 4: NC17 R PG13 數字越小,限制等級越嚴格。 8 按 M/m 選擇想要的收視率,然後按 (ENTER)。 視聽者控制設
更改密碼 1 在播放停止時按 (SETUP)。 出現設定選單。 2 按 M/m 選擇 (CUSTOM SETUP),然後按 (ENTER)。 出現設定項目。 3 按 M/m 選擇“PARENTAL CONTROL”,然後 按 (ENTER)。 出現視聽者控制選項。 4 按 M/m 選擇 “PASSWORD t”,然後按 (ENTER)。 出現輸入密碼顯示畫面。 5 6 7 按數字按鈕輸入您的 4 位數密碼,然後按 (ENTER)。 如果輸入了錯誤的數字,按 < 移動指針並 重新輸入數字。 設定和調整 使用設定選單 使用設定選單,可對影像和聲音等項目進行 多種調整。除了其它設定,您也可以設定字幕 和畫面顯示語言。關於每個設定項目的詳細 說明,參見第 29 頁至第 32 頁。 註 光碟內存儲的播放設置優先級比設定選單設置更高,且 並非描述的所有功能都有效。 按數字按鈕輸入新的 4 位數密碼,然後按 (ENTER)。 若要確認,按數字按鈕再次輸入您的4位數 密碼,然後按 (ENTER)。 ATT DVD + MENU OFF SRC MODE TOP MENU ENTER S
3 按 M/m 選擇 “MONITOR TYPE”,然後按 (ENTER)。 出現監視器類型選項。 設定顯示語言或聲音軌跡 — 語言設定 SCPEEN SETUP MONITOR TYPE : SCREEN SAVER : 16:9 16:9 4:3 LETTER BOX 4:3 PAN SCAN “LANGUAGE SETUP”可以為畫面顯示或聲音軌 跡設定所需要的語言。 在設定選單中選擇 (LANGUAGE SETUP),然 後選擇所需要的設定項目。 有關設定步驟的詳細說明,請參見第 28頁“使 用設定選單”。 4 按 M/m 選擇 “4:3 PAN SCAN”,然後按 (ENTER)。 套用設定後,設定即完成。 OSD (畫面顯示語言) 切換畫面上顯示的語言。 MENU 切換光碟上的選單語言。 要返回至先前的顯示 按 O。 AUDIO 切換聲音軌跡語言。 當選擇 “ORIGINAL”時,將選擇光碟優先設 定的語言。 若要關閉設定選單 按 (SETUP)。 若要復原全部設定項目 — 復原 1 在步驟 2 中選擇 (ENTER)。 2 按 M 選擇 “YES”,然後按 (EN
設定螢幕 — 螢幕設定 “SCREEN SETUP”用於調節所連接監視器的設 定。 在設定選單中選擇 (SCREEN SETUP),然後 選擇所需要的設定項目。 有關設定步驟的詳細說明,請參見第 28 頁“使 用設定選單”。 下表中有 “*”的設定項目為預設設定。 MONITOR TYPE 選擇所連接監視器的縱橫比 (標準 4:3 或寬 螢幕)。 16:9* 顯示寬螢幕影像。 當您連接寬螢幕監視器或帶寬 螢幕模式功能的監視器時,請 選擇此項。 4:3 顯示寬螢幕影像時,螢幕頂部 LETTER BOX 和底部有黑帶。 與 4:3 螢幕監視器連接時選擇 此項。 4:3 PAN SCAN 在整個螢幕上顯示一個寬影 像,並自動切除超出螢幕部 分。 與 4:3 螢幕監視器連接時選擇 此項。 16:9 4:3 LETTER BOX 4:3 PAN SCAN 註 視 DVD 而定,有些 DVD 可能自動選擇“4:3 LETTER BOX” 以代替 “4:3 PAN SCAN”,反之亦然。 30 SCREEN SAVER 打開並關閉螢幕節能。如果本系統處於停止 模式 5 分鐘,則出現螢幕節能影像。螢幕節能
SLIDE SHOW TIME 設定光碟上影像顯示的時間。 個人設定 — 個人設定 5sec 每 5 秒鐘切換影像。 “CUSTOM SETUP”用於設定本機的播放狀況。 10sec* 每 10 秒鐘切換影像。 20sec 每 20 秒鐘切換影像。 40sec 每 40 秒鐘切換影像。 60sec 每 60 秒鐘切換影像。 FIXED 取消切換影像。 在設定選單中選擇 (CUSTOM SETUP),然後 選擇所需要的設定項目。 有關設定步驟的詳細說明,請參見第28 頁“使 用設定選單”。 下表中有 “*”的設定項目為預設設定。 PARENTAL CONTROL 設定播放限制,使本機不播放不適合的光碟 或場面 (第 26 頁)。 ON t 設定視聽者控制功能為開啓。 OFF t* 設定視聽者控制功能為關閉。 PLAYER t PASSWORD t ORIGINAL* 最初錄製的標題優先於編 輯的播放目錄。 設定限制標準和限制等級。 PLAY LIST 優先於最初錄製的標題。 設定新的 4 位數密碼。 註 • 播放目錄播放僅適用於 VR 模式的 DVD-RW。
音頻設定 — 音頻設定 “AUDIO SETUP”使您可以根據播放條件和所 連接的裝置調節聲音。 在設定選單中選擇 (AUDIO SETUP),然後 選擇所需要的設定項目。 有關設定步驟的詳細說明,請參見第 28 頁“使 用設定選單”。 下表中有 “*”的設定項目為預設設定。 收音機 警告 當在駕車過程中要調諧電臺時,須使用最佳 調諧記憶功能 (BTM),以免發生事故。 MODE SRC SRC STANDARD* 通常選擇此位置。 WIDE RANGE 給您帶來身臨其境的感覺。 ENTER LIST SYSTEM MENU MENU .
接收已儲存的電臺 其他功能 選擇波段,然後按一個數字按鈕 ((1) 至 (6))或 M/m。 調節聲音特性 自動調諧 您可以調節低音,高音,平衡,音量衰減和超 低音揚聲器音量。 選擇波段,然後按 ./> 搜尋電臺。 當本機接收到一個電臺時,掃描即停止。 如此反覆操作直至接收到所要的電臺。 提示 若您知道所要收聽的電臺頻率,請按住 ./> 不放 找到近似頻率,然後反覆按 .
調節均衡曲線 標註電臺 / 光碟 — EQ7 調諧 您可以調節和儲存不同音調範圍的均衡器設 定。 ATT DVD + MENU 當您接收電臺或播放具有 CUSTOM FILE 功能的 CD 換碟機中的光碟時,您可以對每個電臺 / 光 碟標註最多 8 個字元的自訂名稱(電臺記憶 / 光碟記憶)。 如果您標註電臺 / 光碟,則該名稱將出現在列 表中 (第 33 頁或第 37 頁)。 OFF SRC MODE TOP MENU ENTER SOUND M/m SETUP 1 當正在接收或播放您要標註的電臺或光碟 時,按 (SYSTEM MENU)。 2 反覆按 M/m,直至出現 “NAMEEDIT”,然 後按 (ENTER)。 3 ENTER SYSTEM MENU SYSTEM MENU LIST – Z×Z PICTURE EQ DSO AUDIO SUBTITLE ANGLE
調節裝置選單項目 — SYSTEM MENU ATT DVD + MENU OFF SRC MODE TOP MENU ENTER SOUND M/m SETUP ENTER SYSTEM MENU SYSTEM MENU LIST – Z×Z PICTURE EQ DSO AUDIO SUBTITLE ANGLE
AUX LVL*7 (輔助電平) 調節每個連接的輔助設備的音量電平。此設 定無需調節音源間的音量電平。 EDIT NAMEEDIT (第 34 頁) NAME DEL (第 34 頁) BTM (第 32 頁) *1 本機關閉時。 *2 預設設定視機型而異: PAL:亞洲機型 NTSC:拉丁美洲機型 *3 僅限於 MEX-R5 *4 連接了照明控制導線時。 *5 本機打開時。 *6 光碟播放時。 *7 連接並播放輔助設備時。 使用選購設備 SRC SRC DVD + MENU MODE TOP MENU ENTER ATT OFF MODE SOUND M/m SETUP ENTER SYSTEM MENU SYSTEM MENU LIST –
重複並隨機播放 (用主機操作) 播放過程中,反覆按 (1)(REP) 或 (2)(SHUF),直至出現想要的設定。 選擇 播放 REP-DISC* 重複播放光碟。 SHUF-CHGR* 以隨機順序播放換碟機中的 軌跡。 * 連接了一台或多台 CD/MD 換碟機時。 若要返回正常播放模式,則選擇 “REP-OFF” 或 “SHUF-OFF”。 通過名稱找出光碟 — 列表 當連接了有 CUSTOM FILE 功能的 CD 換碟機或 MD 換碟機時,您可以從列表中選擇一盤光碟。 如果您為光碟標註了名稱,則名稱出現在列 表上。 1 在播放過程中按 (LIST)。 出現光碟號和光碟名稱。 2 3 反覆按 M/m,直至出現想要的光碟。 • PRESET/DISC 控制器 選擇預設電臺;控制 CD,與主機上的 (3)/ (4)(ALBM -/+) 或卡片式遙控器上的 M/m 相 同 (推入並旋轉)。 • VOL (音量)控制器 與音量 +/- 按鈕相同 (旋轉)。 • SEEK/AMS 控制器 與主機上的 (SEEK) +/- 或卡片式遙控器上 的 .
切換前面 / 背面輸出 — Zone × Zone 您可以設定將 DVD 音頻 / 視頻輸出至背面監視 器,並將另一個音源輸出至前面監視器。 此功能便於您想在前面收聽收音機、音樂播 放等,在背面進行 DVD 播放。 ATT DVD + MENU OFF SRC MODE TOP MENU SOUND SETUP ENTER LIST – Z×Z PICTURE EQ DSO AUDIO SUBTITLE ANGLE SYSTEM MENU Z×Z 附加資訊 保養 更換卡片式遙控器的鋰電池 一般情況下,電池能維持大約 1 年的時間。 (使用壽命可能會變短,這取決於電池的使用 狀況。) 當電池的電力變弱時,卡片式遙控器的操作 距離將變短。此時,請更換一個新的 CR2025 鋰電池。使用其他電池可能有引起火災或爆 炸的危險。 + 極面朝上 EQ7 2 1 2 按 (ZxZ)。 按主機上的(SOURCE),切換前面的音源。 用主機操作前面,用卡片式遙控器操作背 面 (DVD)。 恢復正常狀態 按 (ZxZ)。 註 • 當啓動了 Zone × Zone 時,以下卡片式遙控器
清潔連接器 若本機與前面板之間的連接器不乾淨,則本 機可能不能正常工作。為防止這種情況發生, 請卸下前面板(第 8 頁),然後用蘸有酒精的 棉籤清潔連接器。切勿施加太大的力量。否 則,可能損壞連接器。 2 取出裝置。 1 將兩把開鎖鑰匙同時插入,直至聽到喀 嗒聲。 掛鉤朝裡。 主機 前面板的背部 2 拉出開鎖鑰匙,使裝置脫離原位。 註 • 為了安全起見,在清潔連接器之前,應關閉點火裝置 並從點火開關上取出鑰匙。 • 千万不要用手指或任何金屬工具直接觸摸連接器。 3 將本機從安裝位置滑出。 拆卸本機 1 拆卸保護環。 1 拆卸前面板 (第 8 頁)。 2 將開鎖鑰匙與保護環嚙合。 光碟注意事項 如圖所示定位開鎖 鑰匙。 3 拉出開鎖鑰匙以拆下保護環。 • 為保持光碟清潔,切勿接觸表面。拿光碟時 請持其邊緣。 • 不使用時請將光碟裝入光碟盒或光碟匣內。 • 切勿使光碟受到熱源 / 高溫的影響。避免將 光碟遺留在停泊的車廂內或儀表盤 / 後托架 上。 • 切勿貼標籤,或使用帶有黏性墨水 / 殘留物 的光碟。這類光碟在使用時會停止轉動,從 而造成故障或毀壞光碟。 • 切勿使用任何貼有標籤或
• 本機不能播放 8 cm 光碟。 • 在播放之前,請使用商用清 潔布清潔光碟。從光碟的中 心 向 外 擦 拭。切 勿 使 用 酒 精、稀釋劑、市售的清潔劑 或用於留聲機唱片的抗靜電 噴霧劑等溶劑。 有關 DualDisc 的注意事項 DualDisc 為雙面光碟產品,一面錄製 DVD 資 料,另一面錄製數位音訊資料。然而,由於 DualDisc 的音訊資料錄製面不符合 Compact Disc (CD) 標準,因此不保證能在本產品上播 放。 關於 MP3 檔案 MP3 表示 MPEG-1 Audio Layer-3,是一項音樂 檔案壓縮格式標準。此格式將音頻 CD 資料壓 縮到原大小的 1/10 左右。 • 本機與以下標準相容。 對於 CD – ISO 9660 level 1/level 2 格式,Joliet/ Romeo 擴展格式 – Multi Session 對於 DVD – UDF Bridge 格式(結合了 UDF 和 ISO 9660) 對於 CD/DVD – ID3 標記 1.0,1.1,2.2,2.3 和 2.
規格 系統 一般 雷射 訊號格式系統 半導體雷射 PAL/NTSC 可切換 輸出 DVD/CD 播放機部分 * 信噪比 頻率響應 抖晃率 諧波失真 (DVD) 抖晃率 120 dB 10 - 20000 Hz 低於可測限制 0.01 % 低於檢測值(± 0.001 % W PEAK) 輸入 * 從 AUDIO OUT 插孔測量。 當播放採樣頻率為 96 kHz 的 PCM 音軌時,DIGITAL OUT 插孔的輸出訊號被轉換為 96 kHz 採樣頻率。 調諧器部分 音調控制 FM 調諧範圍 天線端子 中頻 可用靈敏度 選擇度 信噪比 1 kHz 時諧波失真 分離度 頻率響應 亞洲機型: 87.5 - 108.0 MHz (以 50 kHz 為一級) 拉丁美洲機型: 87.5 - 107.9 MHz (以 200 kHz 為一級) 外接天線連接器 10.7 MHz/450 kHz 9 dBf 400 kHz 時為 75 dB 67 dB (立體聲), 69 dB (單聲道) 0.5 % (立體聲), 0.
故障排除 MPEG Layer-3 音頻編碼技術和專利由 Fraunhofer IIS 和 Thomson 授權。 註 本機不能連接至數位前置放大器或與 Sony BUS 系統相 容的均衡器。 設計和規格若有變更,恕不另行通知。 下列檢查表有助於解決您使用本機時可能遇 到的問題。 在使用下面的檢查表之前,請檢查連接和操 作步驟是否正確。 一般 裝置無供電。 某些部件的焊接使用無鉛焊料。(80% 以上) 某些電路板没有使用鹵化阻燃劑。 機身沒有使用鹵化阻燃劑。 紙板箱印刷採用非 VOC(揮發性有機混合物)蔬菜油 油墨。 • 包裝襯墊不使用聚苯乙烯保麗龍。 • • • • • 未進行正確的電源連接。 t 檢查連接。若一切正常,則請檢查保 險絲。 • 汽車不具有 ACC 位置。 t 插入光碟開機。 • 如果本機關閉且顯示消失,則本機無法用 遙控器操作。 t 打開本機。 電動天線未伸出。 電動天線未裝繼電器。 儲存的電臺及正確走時被消除。 保險絲已熔斷。 開關發動器鑰匙時產生噪音。 導線與汽車附件電源連接器未正確匹配。 顯示從顯示視窗消失或不出現在顯示視窗中。 • 調光器設定為 “DIM-ON”(第 3
無線傳輸過程中發生的影像干擾和音頻雜訊。 (僅限於 MEX-R5) • 本裝置可以用 FM 2.4 GHz 傳輸音頻 / 視 頻。本裝置與其他 2.
無法裝入光碟。 • 已裝入另外的光碟。 • 汽車點火鑰匙開關設定在 OFF 位置。 本機沒有開始播放。 • 光碟插反了。 t 將光碟播放面朝下插入。 • 插入的光碟無法使用。 • 由於地區代碼的原因,插入的 DVD 不能使 用。 • 本機內部有濕氣凝結。 • 插入的 DVD-R,DVD-RW,DVD+R,DVD+RW, CD-R 或 CD-RW 沒有最終化。 您無法選擇音源。 啓動了 Zone × Zone。 t 按 (ZxZ) 關閉 Zone × Zone。 無法播放 MP3 檔案。 • 未依照 ISO 9660 level 1 或 level 2 格 式,或擴展格式中的 Joliet 或 Romeo 進 行錄製。 • MP3 檔案沒有 “.
出錯顯示 / 資訊 READ 本機正在讀取光碟上所有軌跡和文件夾資 訊。 t 請等待至讀取完成並自動開始播放。視 光碟的結構而定,可能要花一分多鐘。 當本機發生故障時出現以下指示。 RESET 用主機操作 因某些原因本機和 CD/MD 換碟機不能工 作。 t 按 RESET 按鈕 (第 8 頁)。 BLANK*1 MD 上沒有錄製軌跡。 * t 播放錄製有軌跡的 MD。 2 ERROR*1 • 光碟髒了或上下裝反了。 *2 t 將光碟擦拭乾淨或正確地裝入光碟。 • 由於某些原因,光碟無法播放。 t 插入另一盤光碟。 • 光碟與本機不相容。 t 插入相容的光碟。 FAILURE 揚聲器 / 放大器連接不正確。 t 請參見提供的安裝 / 連接手冊進行連接 檢查。 LOAD 換碟機正在裝入光碟。 t 請等至裝載完成。 L.
術語 標題 視頻軟體中 DVD、電影等最長的影像或音樂部 分,或音頻軟體的整個文件夾。 Dolby Digital 由 Dolby Laboratories 開發的數位音頻壓縮 技術。此技術適用於 5.1 聲道環繞聲。在此格 式中,後置聲道為立體聲,並有獨立的超低音 揚聲器 聲道。Dolby Digital 提 供 與 Dolby Digital 影院音頻系統相同的高品質數位音頻 5.1 獨立聲道。因為全部聲道資料獨立錄製, 並以數位形式處理,所以能實現良好的聲道 分離,失真較少。 DTS 數位音頻壓縮技術為 Digital Theater Systems,Inc. 開發。該技術符合 5.1 聲道環 繞聲。在此格式中,後置聲道為立體聲,並有 獨立的超低音揚聲器聲道。DTS 提供相同的高 品質數位音頻 5.1 獨立聲道。 因為全部聲道資料獨立錄製,並以數位形式 處理,所以能實現良好的聲道分離,失真較 少。 DVD VIDEO 雖然與普通 CD 直徑相同,但能包含最長 8 小 時動畫的光碟。 單層單面 DVD 的資料容量為 4.7 GB (千兆字 節),是 CD 的 7 倍。雙層單面 DVD 的資料容 量為 8.
語言代碼列表 語言拼寫符合 ISO 639:1988 (E/F)標準。 代碼 語言 代碼 語言 代碼 語言 代碼 語言 1027 1028 1032 1039 1044 1045 1051 1052 1053 1057 1059 1060 1061 1066 Afar Abkhazian Afrikaans Amharic Arabic Assamese Aymara Azerbaijani Bashkir Byelorussian Bulgarian Bihari Bislama Bengali; Bangla Tibetan Breton Catalan Corsican Czech Welsh Danish German Bhutani Greek English Esperanto Spanish Estonian Basque Persian Finnish Fiji Faroese French Frisian 1183 1186 1194 1196 1203 1209 1217 1226 1229 1233 1235 1239 1245 1248 1253 1254 1257
索引 數字 F S 16:9 30 4:3 LETTER BOX 30 4:3 PAN SCAN 30 放大 (CENTER ZOOM)24 復原 (RESET)29 輔助電平 (AUX LVL)36 輔助音頻 (AUX-A)35, 37 設定選單 13, 28 聲道合併 (DOWNMIX)32 示範 (DEMO)8, 35 時間 / 文字資訊 (TIME/ TEXT)17 視聽者控制 (PARENTAL CONTROL)26, 31 時鐘調節 (CLOCK-ADJ)8 時鐘資訊 (CLOCK)35 搜尋播放 21 收音機 32 隨機播放 (SHUFFLE) 標題 20 光碟 20 換碟機 37 文件夾 20 B 保險絲 38 本地搜尋模式 (LOCAL)35 標題 (TITLE)21 播放模式選單 13 播放目錄播放 (PLAY LIST PLAY)31 C 查找 快進 16 快退 16 掃描 18 CD/MD 換碟機 36 超低音揚聲器 (SUB)33 重複播放 (REPEAT) 標題 20 光碟 37 軌跡 20 文件夾 20 章 20 重續播放 (MULTI-DISC RESURE)17