
User Manual
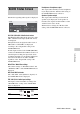
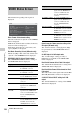
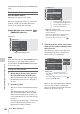
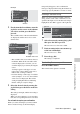
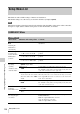
Table Of Contents
- Table of Contents
- Overview
- Preparations
- Recording
- Basic Operation Procedure
- Selecting the Video Format
- Switching the ND Filters
- Using the 5600K CC Filter
- Adjusting the White Balance
- Adjusting the Black Balance
- Displaying the Markers and Zebra Patterns
- Setting the Gain
- Setting the Electronic Shutter
- Adjusting the Iris
- Adjusting the Zoom
- Adjusting the Focus
- Reducing Flickers
- Setting the Time Data
- Recording Audio Signals
- Outputting the Color Bars and Reference Tone
- Recording Shot Marks
- Adding the OK Mark
- Rec Review
- Changing Functions of the Assignable Buttons
- Interval Recording
- Frame Recording
- Picture Cache Recording
- Slow & Quick Motion Recording
- Freeze Mix: Image Alignment
- Picture Profiles
- Deleting Clips
- Operating Planning Metadata
- Playback
- Thumbnail Screens
- Playing Back Clips
- Clip Operations
- Clip Operation Menus
- Basic Operations of the Clip Operation Menus
- Displaying the Detailed Information of a Clip
- Adding/Deleting the OK Mark to/from a Clip (HD Mode Only)
- Copying Clips
- Deleting Clips
- Displaying the EXPAND CLIP Screen
- Displaying the SHOT MARK Screen (HD Mode Only)
- Adding/Deleting Shot Marks (HD Mode Only)
- Changing the Index Frame (HD Mode Only)
- Dividing a Clip (HD Mode Only)
- Status Displays
- Menu Configuration and Detailed Settings
- Storing/Retrieving the Setting Data
- Connecting External Devices
- Appendixes
Basic Menu Operations
109
Menu Configuration and Detailed Settings
4 For the item that has subitems, turn the
jog dial to set the cursor to the subitem
you wish to set then press the dial to
proceed.
The available values of the selected subitems
are displayed, and the cursor moves to the
current value.
• The available value area can show 7 lines at
maximum. When all the selectable values
cannot be displayed at one time, you can
scroll the display up or down by moving the
cursor.
A triangle appears at the upper or lower
right corner of the available value area to
indicate that scrolling is enabled.
• For items having a wide range of available
values (example: –99 to +99), the available
value area is not displayed. The current
setting is highlighted instead, indicating
that the setting is ready for change.
5 Select the desired value by turning the
jog dial then press the dial to make the
setting.
The setting is changed, and the new setting is
displayed.
When you select “Execute” for an execution
item, the corresponding function is executed.
For an item that requires your confirmation
When you select an item that you must confirm
before execution in step
3, the menu display
temporarily disappears, and a confirmation
message is displayed. Following the instructions
of message, specify whether to execute or cancel.
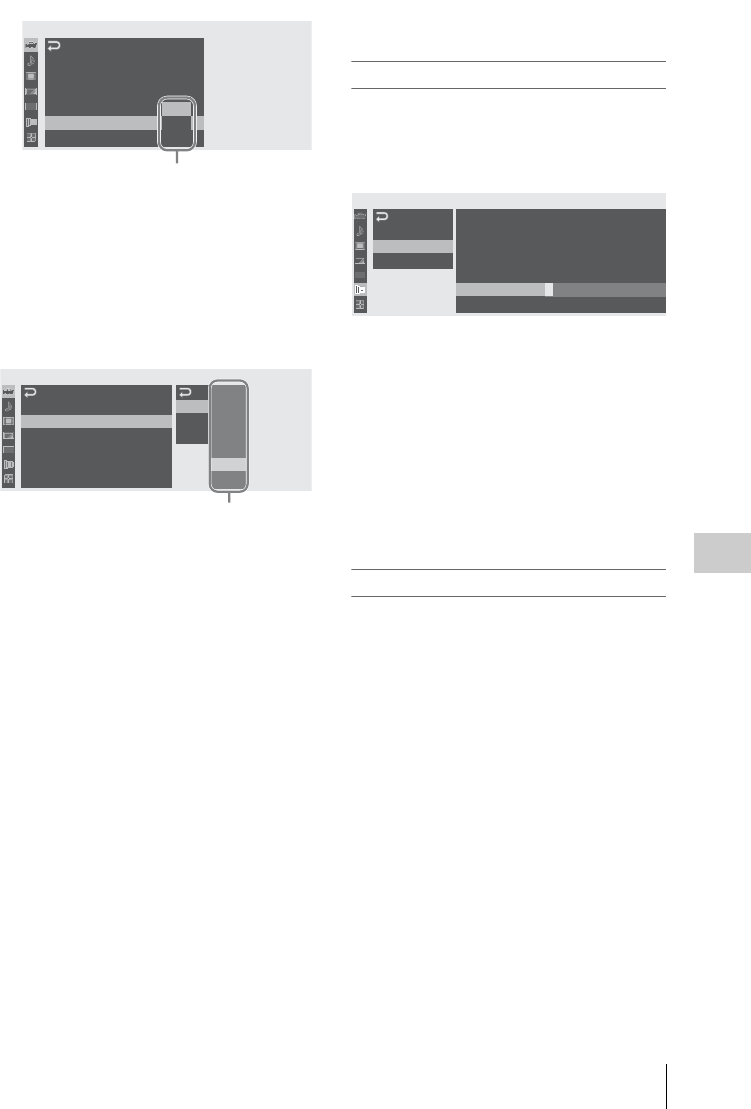
Entering a character string
When you select an item for which a character
string, such as a time value or filename, is to be
specified, the input area for the character string is
highlighted, and “SET” appears at the right end.
1 Select characters by turning the jog dial
then press the dial to proceed.
The cursor moves to the next column.
2 Perform setting in the same manner up
to the last column/digit.
The cursor moves to “SET.”
3 Press the jog dial.
The setting is completed.
Terminating the menu operation
Press the MENU button.
The normal camera picture is resumed.
00:00
C
A
M
E
R
A
SET
A
uto
B
lack
B
al.
Gain
Setup
Shutter
S
lo
w
S
hutter
Color
B
ar
T
ype
Flicker
Reduce
B
B
B
:
B
Multi
75%
100%
Choices
Example
Available value area
00:00
C
A
M
E
R
A
SET
Low
Mid
High
: 0dB
: 6dB
: 18dB
A
uto
B
lack
B
al.
Gain
Setup
Shutter
S
lo
w
S
hutter
Color
B
ar
T
ype
Flicker
Reduce
Multi
B
B
B
:
B
18dB
12dB
9dB
6dB
3dB
0dB
-
3dB
00:00
Informati on
O
perat ion
Setting
LENS FILE
Display
M
ode
R
eca l l
M
e
m
ory
S
tore
M
e
m
ory
R
eca l l
S
x
S
S
tore
S
x
S
F
ile
N
a
m
e
F
ile
S
ource
:
D
ate
&T
i
m
e
:
0123456789abcdef
SET
:
M
e
m
ory
1
B
B
B