
User Manual

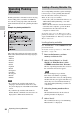
Table Of Contents
- Table of Contents
- Overview
- Preparations
- Recording
- Basic Operation Procedure
- Selecting the Video Format
- Switching the ND Filters
- Using the 5600K CC Filter
- Adjusting the White Balance
- Adjusting the Black Balance
- Displaying the Markers and Zebra Patterns
- Setting the Gain
- Setting the Electronic Shutter
- Adjusting the Iris
- Adjusting the Zoom
- Adjusting the Focus
- Reducing Flickers
- Setting the Time Data
- Recording Audio Signals
- Outputting the Color Bars and Reference Tone
- Recording Shot Marks
- Adding the OK Mark
- Rec Review
- Changing Functions of the Assignable Buttons
- Interval Recording
- Frame Recording
- Picture Cache Recording
- Slow & Quick Motion Recording
- Freeze Mix: Image Alignment
- Picture Profiles
- Deleting Clips
- Operating Planning Metadata
- Playback
- Thumbnail Screens
- Playing Back Clips
- Clip Operations
- Clip Operation Menus
- Basic Operations of the Clip Operation Menus
- Displaying the Detailed Information of a Clip
- Adding/Deleting the OK Mark to/from a Clip (HD Mode Only)
- Copying Clips
- Deleting Clips
- Displaying the EXPAND CLIP Screen
- Displaying the SHOT MARK Screen (HD Mode Only)
- Adding/Deleting Shot Marks (HD Mode Only)
- Changing the Index Frame (HD Mode Only)
- Dividing a Clip (HD Mode Only)
- Status Displays
- Menu Configuration and Detailed Settings
- Storing/Retrieving the Setting Data
- Connecting External Devices
- Appendixes

Picture Profiles
75
Recording
SD Detail
Adjusting the details to be
applied to the picture in SD
mode
Setting
On / Off
Set to “On” to apply the details to the video signal.
Level
–99 to +99 (±0)
Adjust the detail level.
Frequency
–99 to +99 (±0)
Set the center frequency of the details.
Setting the center frequency higher decreases the
details, and setting it lower increases the details.
Crispening
–99 to +99 (±0)
Adjust the noise-suppression level.
When you set it to a higher level, less noise may be
seen, as fine elements of details are deleted leaving
only high-level elements.
When you set it to a lower level, fine elements are
applied while increasing noise.
H/V Ratio
–99 to +99 (±0)
Adjust the horizontal-to-vertical ratio of detail
elements.
A higher value makes the vertical elements
increased with respect to the horizontal elements.
White Limiter
–99 to +99 (±0)
Limit the white details.
Black Limiter
–99 to +99 (±0)
Limit the black details.
V DTL Creation
NAM / Y / G / G+R
Select the source signal to generate vertical details
from among NAM (G or R whichever is higher), Y,
G, and G+R.
Knee APT Level
–99 to +99 (±0)
Adjust the knee aperture level (level of details to be
applied to the sections above the knee point).
P. PROFILE SET
Items Subitems and setting values Contents