ES US Manual de instrucciones Instruction manual PSP-1010 Antes de utilizar este producto, lea detenidamente este manual y consérvelo para consultarlo en el futuro. Before using this product, carefully read this manual and retain it for future reference.
ADVERTENCIAS Para evitar descargas eléctricas, no abra la unidad. Solamente use el adaptador ca suministrado. Si usa otros tipos de adaptadores, puede causar incendios, descargas eléctricas o un funcionamiento incorrecto. Registro del propietario Los números de modelo y de serie se encuentran dentro del compartimiento de la batería de la unidad. Registre los números de serie en el espacio señalado abajo. Menciónelos siempre que se ponga en contacto con nuestro servicio de asistencia técnica.
Ondas radiofónicas Las ondas radiofónicas podrían afectar a los equipos electrónicos o los equipos electrónicos médicos (por ejemplo los marcapasos), los cuales podrían funcionar incorrectamente causando posibles daños. • Si usted usa un marcapasos o cualquier otro dispositivo médico, consulte con su médico o con el fabricante del dispositivo antes de usar la función de red inalámbrica.
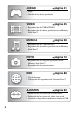
JUEGO página 41 • Jugar • Gestión de los datos guardados VÍDEO página 45 • Reproducción de UMD®VIDEO • Reproducción de vídeos guardados en un Memory Stick Duo™ MÚSICA página 58 • Reproducción de UMD®MUSIC • Reproducción de música guardada en un Memory Stick Duo™ FOTO página 72 • Reproducción de imágenes guardadas en un Memory Stick Duo™ • Reproducción de presentaciones RED página 88 • Uso de Internet • Utilización del reproductor de Location Free™ AJUSTES página 92 • Definición de los ajust
Uso del menú principal El funcionamiento básico del sistema PSP® comienza a partir de este menú. Pulse el botón HOME (menú principal) para mostrar el menu principal y use los botones de dirección para navegar por los íconos de las barras horizontal y vertical.
Índice ADVERTENCIAS . . . . . . . . . . . . . . . . . . . . . . . . . . . . . . . . . 2 Precauciones . . . . . . . . . . . . . . . . . . . . . . . . . . . . . . . . . . . . 9 Precauciones para la batería . . . . . . . . . . . . . . . . . . . . . . . 15 x Preparación Comprobación del contenido de la caja . . . . . . . . . . . . . . . 17 Nombre y funciones de las piezas . . . . . . . . . . . . . . . . . . . 18 Preparación del sistema PSP® para el uso . . . . . . . . . . . .
Almacenamiento de vídeos en un Memory Stick Duo™ . . . . . . . . . . . . . . . . . . . . . . . . . . 56 x Música Cómo escuchar música . . . . . . . . . . . . . . . . . . . . . . . . . . . Uso del panel de control . . . . . . . . . . . . . . . . . . . . . . . . . . Uso de los botones del sistema PSP® o el mando a distancia . . . . . . . . . . . . . . . . . . . . . . . . . Menú de opciones de música . . . . . . . . . . . . . . . . . . . . . . Transferencia y almacenamiento de música en un Memory Stick Duo™ .
Conexión USB . . . . . . . . . . . . . . . . . . . . . . . . . . . . . . . . . 108 Ajustes de la red . . . . . . . . . . . . . . . . . . . . . . . . . . . . . . . 110 Actualización de red . . . . . . . . . . . . . . . . . . . . . . . . . . . . 118 Cómo usar el teclado . . . . . . . . . . . . . . . . . . . . . . . . . . . . 121 x Información adicional Actualizaciones de PSP® . . . . . . . . . . . . . . . . . . . . . . . . . 124 Soportes compatibles . . . . . . . . . . . . . . . . . . . . . . . . . . . .
Precauciones Antes de utilizar este producto, lea detenidamente este manual y consérvelo para consultarlo en el futuro. Seguridad Este producto ha sido diseñado prestando la máxima atención a las medidas de seguridad. Sin embargo, cualquier dispositivo eléctrico, si se utiliza de forma inadecuada, puede causar un incendio, descargas eléctricas o daños personales.
• • • • • • • • • • • • • • • • • los cables/las tiras, lo que podría causarles daños o provocar un accidente o un mal funcionamiento del sistema. No utilice el sistema mientras conduce o monta en bicicleta. Mirar la pantalla o utilizar el sistema mientras se conduce un automóvil o se monta en bicicleta podría provocar un accidente de tráfico. Tenga especial cuidado si utiliza el sistema mientras camina. Procure no engancharse los dedos al cerrar la cubierta del disco.
Uso del adaptador ca y el cable de alimentación ca • No toque el enchufe del cable de alimentación ca con las manos mojadas. • No toque el cable de alimentación ca, el adaptador ca ni el sistema, si éste está conectado a una toma de corriente eléctrica durante una tormenta eléctrica. • No utilice una fuente de corriente distinta de la batería, el adaptador ca y el cable de alimentación ca suministrados.
tras apagar el sistema, permanezca en la pantalla una imagen distorsionada durante algunos segundos. • La exposición directa a la luz solar podría dañar la pantalla LCD del sistema. Tenga cuidado cuando utilice el sistema al aire libre o cerca de una ventana. • Si utiliza el sistema en lugares fríos, es posible que perciba sombras en los gráficos o que la pantalla parezca más oscura de lo habitual.
x Datos grabados No utilice el Memory Stick Duo™ de las formas que se indican a continuación, ya que podría provocar la pérdida o la corrupción de los datos: • Retirando el Memory Stick Duo™ o apagando el sistema mientras está cargando o guardando datos o se está formateando. • Utilizándolo en un lugar expuesto a la electricidad estática o a interferencias eléctricas. Si, por cualquier motivo, se produce la pérdida o la corrupción de los datos o del software, generalmente no es posible recuperarlos.
Uso del punto de acceso Si utiliza la opción "Escanear" del sistema PSP® para seleccionar el punto de acceso LAN inalámbrico, ciertos punto de accesos que no son destinados para el uso público podrían aparecer. Conecte solamente con un punto de acceso personal que le autorice a utilizar, o uno que esté disponible con un servicio público LAN inalámbrico o un servicio hotspot. Uso en el extranjero Según el país en el que se encuentre, existen limitaciones en el uso de cierto tipo de ondas radiofónicas.
x Limpieza de la pantalla LCD Límpiela cuidadosamente con un paño suave. x Limpieza de los conectores • No utilice los conectores del sistema, del adaptador ca ni del cable de alimentación ca cuando no estén limpios. Retire la suciedad con un paño seco o con un bastoncillo de algodón. Si los utiliza cuando están sucios, se podría obstruir el flujo de la corriente eléctrica. • Si los conectores de los auriculares o del mando a distancia se ensucian, puede producirse ruido o interrupciones en el sonido.
• No exponga la batería a golpes fuertes como, por ejemplo, dejándola caer o lanzándola. • No coloque objetos pesados encima o aplique presión sobre la batería. • Evite que la batería se moje. No la utilice cuando esté mojada. Si se moja, deje de usarla hasta que esté totalmente seca. • Mantenga la batería fuera del alcance de los niños pequeños.
Preparación Comprobación del contenido de la caja Compruebe que dispone de los siguientes elementos. Si le falta algún elemento, póngase en contacto con la línea de asistencia técnica en los números de teléfono siguientes: En la Ciudad de México: Tel: 5002 9819 Del interior de la República: 01 800 759 SONY o 01 800 759 7669.
Nombre y funciones de las piezas Parte frontal del sistema POWER HOLD HOME VOL A Botón L (izquierdo) B Botones de dirección C Indicador de acceso Memory Stick Duo™ SELECT START F Sujección de correa Ajústela como se muestra en el diagrama. L VO HO ME Se ilumina cuando se guardan y cargan datos D Indicador de acceso WLAN Se ilumina cuando se utiliza la función de red inalámbrica E Pad analógico Se puede utilizar con juegos compatibles con la operación analógica.
K Pantalla LCD Q Botón L Botón de pantalla R Botón Ajusta el brillo de la pantalla ( página 37) M Botón de sonido Ajusta el tono ( página 35) N Botón SELECT (selección) P Botón R (derecho) T Botón U Indicador POWER (alimentación) Se ilumina, parpadea o cambia de color para indicar el estado del sistema ( página 28) V Indicador HOLD (bloqueo) Se vuelve amarillo en el modo de espera ( página 34) ES Preparación O Botón START (inicio) S Botón W Altavoz derecho Parte posterior del sistema PUSH U
Parte superior del sistema L A Puerto IR R OPEN C Botón OPEN (abrir) B Conector USB Parte inferior del sistema 5V DC IN A Conector para auriculares B Terminales de recarga 20 Nombre y funciones de las piezas C Conector DC IN 5V (Conector de Entrada cc 5 V)
Parte izquierda del sistema R:WLAN encendida r:WLAN apagada B Interruptor WLAN Enciende la función de red inalámbrica Preparación A Ranura para Memory Stick Duo™* ES Parte derecha del sistema R:Interruptor POWER (alimentación) r:Interruptor HOLD (bloqueo) A Interruptor POWER/HOLD (alimentación/bloqueo) Enciende y apaga el sistema, lo pone en modo de suspensión ( páginas 28, 30) y bloquea los botones del sistema ( página 34) * A menos que se indique lo contrario, las referencias en este manual al "Me
Auriculares con mando a distancia Parte lateral del mando a distancia VOL Parte frontal del mando a distancia A Botón . A Interruptor HOLD (bloqueo) B Botón > Bloquea el funcionamiento del mando a distancia. Tenga en cuenta que este botón no bloquea los botones del sistema PSP®.
Preparación del sistema PSP® para el uso Antes de empezar a utilizar el sistema por primera vez después de adquirirlo, siga los pasos siguientes para cargar la batería. Antes de insertar la batería, encuentre los números de modelo y de serie listados dentro del compartimiento de la batería y registre los números en los espacios que se proporcionan debajo del Registro del propietario en la página 2. Preparación Introducción 1: Inserción de la batería Retire la tapa del compartimento de la batería.
3 Coloque de nuevo la tapa del compartimento de la batería. 2 Deslice la tapa del compartimento de la batería en la dirección de la flecha hasta que quede firmemente colocada. PUSH UMD 1 Alinee las lengüetas. Introducción 2: Carga Precaución • La toma de corriente debe estar instalada cerca de los aparatos y debe ser accesible. • No enchufe el cable de alimentación ca del sistema en una toma de corriente eléctrica hasta que haya realizado el resto de las conexiones.
2 Conecte el adaptador ca en el conector DC IN 5V (conector de Entrada cc 5V) de la parte inferior del sistema. 5V POWER DC IN HOLD SELECT ES START Preparación Adaptador ca 3 Enchufe el cable de alimentación ca a la toma de corriente eléctrica. POWER HOLD SELECT Cable de alimentación ca START A la toma de corriente eléctrica El indicador POWER (alimentación) se iluminará de color naranja, indicando que ha empezado la carga.
Introducción 3: Configuración inicial 1 Encienda el sistema PSP® ( página 28). El indicador POWER (alimentación) se ilumina en verde y se muestra la pantalla de configuración inicial. 2 Siga las instrucciones que aparecen en la pantalla para realizar la configuración del idioma del sistema, la zona horaria, la fecha y hora y el apodo. Cuando haya completado la configuración inicial, se mostrará el menú principal ( página 5).
Conexión de los auriculares con mando a distancia 1 Conecte los auriculares al sistema. Auriculares ES VOL Preparación HOME Mando a distancia 1 Conecte los auriculares al mando a distancia. 2 Conecte los auriculares al conector para auriculares de la parte inferior del sistema. Sugerencia El mando a distancia es para uso exclusivo con el sistema PSP® y accesorios fabricados exclusivamente para el mismo. No se puede utilizar con otros dispositivos.
Operaciones básicas Encendido y apagado del sistema Encendido del sistema 1 Deslice el interruptor POWER/HOLD (alimentación/ bloqueo) hacia arriba. POW ER SE LE CT ST AR T HOLD El indicador POWER (alimentación) se ilumina de color verde y se muestra el menú principal. Sugerencias • Si el sistema se enciende con un UMD® insertado, el UMD® comenzará a reproducirse inmediatamente. • El sistema PSP® puede utilizarse con el adaptador ca conectado. En este caso, la carga se iniciará automáticamente.
Apagado del sistema 1 Mantenga pulsado el interruptor POWER/HOLD (alimentación/bloqueo) hacia arriba durante más de tres segundos. El indicador POWER (alimentación) parpadea y luego se apaga, lo que indica que el sistema está apagado.
Uso del modo de suspensión Si el sistema PSP® se cambia al modo de suspensión, el software que se está reproduciendo quedará en pausa. Cuando se desactiva el modo de suspensión, puede empezar a reproducir desde el punto en el que el sistema pasó a dicho modo. Avisos • No coloque el sistema en el modo de suspensión mientras el indicador de acceso Memory Stick Duo™ esté encendido. Esto podría provocar la pérdida o corrupción de datos.
Desactivación del modo de suspensión 1 Vuelva a deslizar el interruptor POWER/HOLD (alimentación/bloqueo) hacia arriba. El modo de suspensión se desactiva. Sugerencias Vídeo Con el icono de vídeo seleccionado, realice una de las siguientes acciones: - Pulse el botón START (inicio) o el botón . - Pulse el botón u en el mando a distancia. - Seleccione "Reproducir" del menú de opciones ( página 55).
Inserción de un UMD® Aviso No expulse un UMD® mientras la reproducción esta en proceso. 1 Deslice el botón OPEN (abrir) situado en la parte superior del sistema PSP®. Se abrirá la cubierta del disco. 2 Inserte un UMD®. Con la etiqueta del disco mirando hacia la parte posterior del sistema, deslice el UMD® en la dirección que indica la flecha hasta que quede completamente insertado. No toque la superficie grabada. Botón OPEN (abrir) L OPEN R 3 Cierre la cubierta del disco.
Inserción de un Memory Stick Duo™ Advertencia Conserve el soporte Memory Stick Duo™ lejos del alcance de niños pequeños, ya que podrían tragarse el soporte accidentalmente. ES Abra la tapa de la ranura e inserte el Memory Stick Duo™. Parte frontal Abra la tapa de la ranura en la dirección que indica la flecha. Presione hasta que quede completamente insertada.
Cómo evitar una operación no intencionada del sistema 1 Deslice el interruptor POWER/HOLD (alimentación/ bloqueo) hacia abajo. POW ER SE LE CT ST AR T HOLD El interruptor queda bloqueado. El indicador HOLD (bloqueo) se vuelve de color amarillo, lo que indica que los botones del sistema están bloqueados. Desactivación del modo de espera Deslice el interruptor POWER/HOLD (alimentación/bloqueo) hasta su posición original.
Uso del botón de sonido El botón de sonido se utiliza para ajustar el tono y para silenciar el sonido en la reproducción de audio y el tono de las teclas. Ajuste del tono ES 1 Pulse el botón de sonido. POWER HOLD SELECT Operaciones básicas El tono sólo se puede ajustar cuando se utilizan los auriculares.
Apagado del sonido (silenciar) 1 Mantenga pulsado el botón de sonido durante más de un segundo. Se silenciará el sonido.
Uso del botón de pantalla El botón de pantalla se utiliza para ajustar el brillo de la pantalla. Ajuste del brillo de la pantalla ES Pulse el botón de pantalla. POWER HOLD SELECT START Cada vez que se pulsa el botón, la pantalla cambia de la forma siguiente: Nivel 1 Operaciones básicas 1 Más oscuro Nivel 2 Nivel 3 (Nivel 4) Más brillante Sugerencia El nivel 4 únicamente puede seleccionarse mientras el sistema PSP® esté conectado utilizando el adaptador ca.
Batería Nivel de carga de la batería El nivel de carga de la batería se muestra en la pantalla. Nivel de carga de la batería Estimación de la energía restante en la batería Hay mucha energía restante. La batería se está agotando. La batería está casi agotada. No queda energía en la batería. El indicador POWER (alimentación) parpadea en verde. Recargue la batería. Sugerencias • Si el indicador POWER (alimentación) parpadea en verde, guarde el juego en curso y recargue la batería.
– si no se utiliza durante un período prolongado de tiempo después de cargarlasi ya se ha cargado muchas veces, es posible que la información de la pantalla no sea exacta • El nivel de carga de la batería también puede comprobarse en "Información de la batería" en "Ajustes del sistema" ( página 97). • Si no se utiliza el sistema después de haberse agotado la batería, la configuración de la fecha y la hora puede restablecerse.
Duración de la batería La batería tiene una duración limitada. Se reducirá con el tiempo y el uso continuado. Si la duración de la batería se vuelve extremadamente corta, es posible que sea el momento de sustituirla. Sugerencia La duración de la batería varía dependiendo de cómo se almacena, de las condiciones de uso y de factores medioambientales, como por ejemplo la temperatura.
Juego Cómo jugar a un juego 1 2 Seleccione del menú principal. Inserte un UMD® ( página 32). ES Se muestra el icono UMD®. Juego 3 Con el icono de juego seleccionado, pulse el botón . Se iniciará el juego. Iconos que se muestran en Juego Además de jugar a juegos, en Juego también están disponibles las funciones siguientes. Compartir juego Puede utilizar el modo ad hoc ( página 110) para recibir datos del juego desde otro sistema PSP®.
Actualización de PSP® Puede actualizar el software del sistema del sistema PSP®. Este icono sólo se muestra cuando se inserta un UMD® que contiene datos de actualización ( página 124). Memory Stick™ Puede realizar una actualización accediendo a los datos actualizados guardados en un Memory Stick Duo™ ( página 124). Sugerencias • Si se muestra (Contenido restringido) cuando selecciona el icono (UMD®), indica que las restricciones de control paterno se han ajustado en el sistema.
Menú de opciones de juego Es posible visualizar la información del juego o copiar o eliminar los datos guardados con el menú de opciones. 1 Seleccione un icono y, a continuación, pulse el botón . Aparece el menú de opciones. ES Juego Iconos 2 Menú de opciones Seleccione un elemento del menú y pulse el botón . Cómo cerrar el menú de opciones Pulse el botón o el botón . Lista de opciones Los elementos disponibles en el menú de opciones varían dependiendo del icono seleccionado.
Copia y eliminación de los datos guardados Es posible copiar o eliminar los datos del juego guardados en un Memory Stick Duo™ con la utilidad de datos guardados. Copia de los datos guardados Es posible copiar los datos guardados a otro Memory Stick Duo™. Se recomienda copiar los datos importantes como copia de seguridad. 1 2 Seleccione y, a continuación, pulse el botón . Seleccione los datos guardados que desea copiar y, a continuación, pulse el botón . Aparece el menú de opciones.
Vídeo Visualización de un vídeo Es posible visualizar UMD®VIDEO y vídeos guardados en un Memory Stick Duo™. Seleccione ES del menú principal. Vídeo 1 2 Inserte un disco UMD® o un Memory Stick Duo™ ( páginas 32, 33). Se muestra el icono del soporte insertado. 3 Seleccione el icono y, a continuación, pulse el botón . Se inicia la reproducción del UMD®VIDEO. Si selecciona , se mostrarán los iconos para cada elemento de datos de vídeo.
Sugerencias • Si se muestra (Contenido restringido) cuando selecciona el icono (UMD®), indica que las restricciones de control paterno se han ajustado en el sistema. Escriba la contraseña, tal y como se describe a continuación, para obtener acceso al vídeo. Consulte el apartado "Nivel de control paterno" ( página 105) para obtener información detallada acerca de la función de control paterno. 1 Seleccione (Contenido restringido) y pulse el botón .
Uso del panel de control Es posible realizar las operaciones siguientes con el panel de control que aparece en la pantalla. Aviso ES 1 Pulse el botón Vídeo Según el UMD®VIDEO, es posible que las condiciones de reproducción hayan sido ajustadas con antelación por el programador del software. En ese caso, aunque siga las instrucciones que se describen en este manual, es posible que algunas opciones no estén disponibles. durante la reproducción de vídeo. Aparece el panel de control.
Icono Descripción Menú Muestra el menú del UMD®VIDEO Ir a Reproduce desde un capítulo* o tiempo especificado ( página 51) Cambia entre las opciones de sonido disponibles para los UMD®VIDEO grabados con varias pistas de audio Opciones de sonido / 48 Permite alternar entre las salidas de audio izquierda, derecha e izquierda + derecha en vídeos guardados en un Memory Stick Duo™ Opciones de ángulo Cambia entre los ángulos de visión disponibles para UMD®VIDEO grabados con varios ángulos Opciones de su
Icono Descripción Avanzar fotograma Reproduce una escena con un fotograma a la vez Reproducir Inicia la reproducción Pausa Introduce una pausa en la reproducción Detener Detiene la reproducción Repetición A-B Reproduce repetidamente una sección especificada ( página 53) Repetición Reproduce el vídeo repetidamente ( Limpiar Desactiva la configuración del modo de repetición/ repetición A-B ES Vídeo página 53) * Esta función no se puede realizar mientras la reproducción de vídeo guardado en un
Desactivación de la pantalla Seleccione del panel de control y, a continuación, pulse el botón . Sugerencia Los elementos que se muestran al reproducir un UMD®VIDEO son distintos a los que se visualizan al reproducir un vídeo guardado en un Memory Stick Duo™. Cambio del Modo de pantalla Cambia el tamaño de las imágenes visualizadas en la pantalla. 1 Seleccione el botón .
Reproducción a partir de una escena seleccionada Puede reproducir a partir de un capítulo o tiempo especificado. 1 Seleccione el botón . 2 Seleccione el elemento que desea definir, y luego pulse el botón . del panel de control y, a continuación, pulse ES Especifica el número del capítulo* XX:XX:XX/XX:XX:XX Especifica el tiempo transcurrido Vídeo Capítulo X * No puede utilizar esta función si reproduce vídeo guardado en un Memory Stick Duo™.
Sugerencia Es posible ajustar el volumen a un nivel más alto de forma permanente en "Volumen de UMD®Video" bajo "Ajustes de vídeo" ( página 94). Retroceso rápido/Avance rápido 1 Durante la reproducción, seleccione o de control y, a continuación, pulse el botón en el panel . Volver a la reproducción normal Seleccione del panel de control y, a continuación, pulse el botón .
Reproducción repetida Es posible reproducir un disco o un capítulo entero de forma repetida. 1 Seleccione pulse el botón del panel de control y, a continuación, .
Uso de los botones del sistema PSP® o el mando a distancia Es posible utilizar el sistema PSP® sin hacer uso del panel de control, utilizando los botones del sistema o el mando a distancia. Uso de los botones del sistema Uso del mando a distancia Reproducir Pulse el botón o el botón START (inicio). Pulse el botón u. Pausa Pulse el botón START (inicio). Pulse el botón u. Visualizar el menú UMD® VIDEO Pulse el botón .*1 – Detener Pulse el botón .
Menú de opciones de vídeo Es posible utilizar el menú de opciones de vídeo para reproducir un UMD®VIDEO o para visualizar información o eliminar vídeos guardados en un Memory Stick Duo™. 1 Seleccione el icono y, a continuación, pulse el botón Aparece el menú de opciones. . ES Vídeo Iconos 2 Menú de opciones Seleccione un elemento y pulse el botón . Desactivación del menú de opciones Pulse el botón o el botón .
Almacenamiento de vídeos en un Memory Stick Duo™ Se puede guardar un vídeo en un Memory Stick Duo™ con cualquiera de los dos métodos siguientes. Imágenes o vídeo grabados con un dispositivo que es compatible con Memory Stick™ Si tiene un dispositivo que graba vídeo en un formato* que puede reproducirse en el sistema PSP®, puede reproducir el vídeo insertando el Memory Stick Duo™ del dispositivo compatible en el sistema PSP®.
Transferencia de un archivo de vídeo de un PC a un Memory Stick Duo™ Es posible convertir imágenes de vídeo animadas tomadas o grabadas en otro dispositivo a un formato que se pueda reproducir en el sistema PSP® y transferirlas a un Memory Stick Duo™ con software compatible*. * Para obtener todos los detalles, visite http://www.sony.com.
Música Cómo escuchar música Puede escuchar UMD®MUSIC y música guardada en un Memory Stick Duo™. 1 2 Seleccione del menú principal. Inserte un UMD® o un Memory Stick Duo™ ( páginas 32, 33). Se muestra el icono del soporte insertado. 3 Seleccione el icono y, a continuación, pulse el botón . Se inicia la reproducción. Cuando se muestra una lista de grupos o pistas, seleccione el elemento que desea escuchar y pulse el botón .
Sugerencias • Si se pulsa el botón START (inicio) o el botón u del mando a distancia en el paso 3, empezará a reproducirse la primera pista del primer grupo. • Si pulsa el botón HOME (menú principal) o el botón SELECT (selección) durante la reproducción, la pantalla volverá al menú principal. Si vuelve a pulsar el botón, se mostrará la pantalla de reproducción de música. • Para ajustar el tono o silenciar el sonido, utilice el botón de sonido ( página 35).
Cómo detener la reproducción 1 Pulse el botón durante la reproducción. La reproducción se detiene. Lectura de la pantalla Número de pista/número total de pistas Nombre del álbum Nombre de la pista Nombre del artista Icono de estado Compresor-descompresor (codec) Tiempo transcurrido de la pista/tiempo total Panel de control Sugerencias • El "Nombre del álbum" y el "Número de pista/número total de pistas" sólo se muestran en la pantalla cuando (Visualizar) está activado ( página 62).
Uso del panel de control Es posible realizar las operaciones siguientes con el panel de control que aparece en la pantalla. 1 Pulse el botón durante la reproducción. Aparece el panel de control. ES Música Panel de control 2 Seleccione un icono y, a continuación, pulse el botón . Sugerencia UMD®MUSIC que contiene vídeo (como vídeos de música) se reproduce de la misma forma que UMD®VIDEO. Si desea obtener instrucciones detalladas, consulte "Uso del panel de control" en "Vídeo" ( página 47).
Icono / Descripción Pista anterior Vuelve al principio de la pista que se está reproduciendo o al principio de la pista anterior Pista siguiente Pasa al principio de la pista siguiente Retroceso rápido/ Avance rápido Reproduce en Retroceso rápido/Avance rápido* Reproducir Reproduce una pista Pausa Introduce una pausa en la reproducción Detener Detiene la reproducción Modo grupo Cambia a Modo grupo ( Repetición A-B Especifica una parte de una pista y la reproduce repetidamente ( página 64)
1 Durante la reproducción, seleccione en el panel de control y, a continuación, pulse el botón . Se activará el Modo grupo y se visualizará en la pantalla. Desactivación del Modo grupo Seleccione botón . o en el panel de control y, a continuación, pulse el ES 1 Durante la reproducción, seleccione control y, a continuación, pulse el botón Cada vez que pulse el botón siguientes: Modo de reproducción Música Uso de los modos de reproducción (Repetida/Aleatoria) en el panel de .
Reproducción de parte de una pista repetidamente Especifique y reproduzca la parte que desea reproducir repetidamente. 1 Seleccione en el panel de control durante la reproducción y, a continuación, pulse el botón en el punto en el que desea que comience la reproducción repetida. Se establece el punto de partida (punto A). 2 Pulse el botón en el punto en el que desea que finalice la reproducción repetida.
Uso de los botones del sistema PSP® o el mando a distancia Es posible utilizar el sistema PSP® sin hacer uso del panel de control, utilizando los botones del sistema o el mando a distancia. Uso del mando a distancia Reproducir Pulse el botón o el botón START (inicio). Pulse el botón u. Pausa Pulse el botón START (inicio). Pulse el botón u. Detener Pulse el botón – Pasar al principio de la pista actual o de la pista anterior Pulse el botón L. Pulse el botón .. O bien, pulse el botón .
Menú de opciones de música Es posible utilizar el menú de opciones de música para visualizar información de los datos de música guardados en un Memory Stick Duo™ o eliminarlos. 1 Seleccione un icono y, a continuación, pulse el botón . Aparece el menú de opciones. Menú de opciones Iconos 2 Seleccione un elemento del menú y pulse el botón . Desactivación del menú de opciones Pulse el botón o el botón .
Información Muestra la información acerca del icono seleccionado Reproducción con el compresor-descompresor (codec) seleccionado 1 Seleccione el grupo que desea escuchar y, a continuación, pulse el botón . 2 Seleccione "Seleccionar codec" y, a continuación, pulse el botón . ES Música Con UMD®MUSIC en el que se hayan grabado varios formatos de archivo y velocidades de bits, es posible seleccionar una de las opciones para la reproducción.
Transferencia y almacenamiento de música en un Memory Stick Duo™ Se puede usar el sistema PSP® para reproducir datos de música que se hayan obtenido de cualquiera de las formas siguientes: 1) Música importada de un CD de audio 2) Música comprada en un sitio Web de descarga de música Consulte más abajo para obtener información acerca del elemento 1). Visite el sitio http://www.sony.com.mx/playstation para obtener información acerca de los elementos 2).
3 Utilizar un lector/grabador de Memory Stick USB disponible en el mercado.*1*3 *1 Si la ranura del dispositivo sólo acepta soportes de Memory Stick™ de tamaño estándar, será necesario utilizar un adaptador de Memory Stick Duo (número de modelo MSACM2: producto Sony que se vende por separado). *2 Es necesario disponer de un ordenador con Windows® XP y la versión 3.1 o posterior del software SonicStage™.
* Si la ranura del dispositivo sólo acepta soportes de Memory Stick™ de tamaño estándar, será necesario utilizar un adaptador de Memory Stick Duo (número de modelo MSACM2: producto Sony que se vende por separado). Sugerencia El método de importación de pistas varía en función del software. Si desea obtener información detallada, consulte las instrucciones suministradas con el software.
• Si el archivo de música guardado en la carpeta "MUSIC" no tiene un formato compatible, el sistema no lo reconocerá. • Los archivos de música con formato MP4 (AAC) y WAV (Linear PCM) se pueden importar y reproducir del mismo modo que los archivos con formato MP3.
Foto Visualización de imágenes Es posible visualizar imágenes guardadas en un Memory Stick Duo™. 1 2 Seleccione Inserte un Memory Stick Duo™ ( Se muestra 3 del menú principal. página 33). . Pulse el botón mientras está seleccionado . Se muestran los iconos de Imágenes de cámara digital, carpetas e imágenes guardadas en el Memory Stick Duo™. Seleccione el icono que desea mostrar y, a continuación, pulse el botón .
Uso del panel de control Es posible realizar las operaciones siguientes con el panel de control que aparece en la pantalla. 1 Pulse el botón mientras se visualiza una imagen. Aparece el panel de control. ES Foto Panel de control 2 Seleccione un icono y, a continuación, pulse el botón . Desactivación del panel de control Pulse el botón o el botón .
Icono / / / 74 Descripción Ayuda Muestra las funciones que se pueden realizar con los botones del sistema PSP® Cancelar zoom Devuelve a su tamaño original una imagen a la que se ha aplicado el zoom Alejar zoom Aleja la imagen Acercar zoom Acerca la imagen Rotar a la izquierda Gira la imagen 90 grados en el sentido contrario a las agujas del reloj Rotar a la derecha Gira la imagen 90 grados en el sentido de las agujas del reloj Arriba/Abajo/ Izquierda/Derecha Mueve la imagen para mostrar par
Visualización de la información de la imagen 1 Mientras se muestra la imagen, seleccione panel de control, y entonces pulse el botón desde el . Se muestra el estado de la imagen. Nombre de imagen Número de imagen/ número total de imágenes Actualizado ES Foto Estado de la pantalla Desactivación de la pantalla Seleccione desde el panel de control, y entonces pulse el botón .
Ajuste del tamaño de imagen Es posible cambiar el tamaño de la imagen visualizada en la pantalla. 1 Mientras se muestra la imagen, seleccione de control y, a continuación, pulse el botón en el panel . Cada vez que se pulsa el botón, la opción cambia de la forma siguiente: Normal Muestra la imagen para que encaje en el tamaño de la pantalla sin cambiar las proporciones. Zoom Muestra la imagen a tamaño completo de pantalla sin cambiar las proporciones.
Uso de los botones del sistema PSP® o el mando a distancia Es posible utilizar el sistema PSP® sin hacer uso del panel de control, utilizando los botones del sistema o el mando a distancia. Uso del mando a distancia Reproducir una presentación Pulse el botón START (inicio). Pulse el botón u. Cancelar acercar/alejar zoom Pulse el botón cuando se haya aplicado el zoom a la imagen. – Volver Pulse el botón – . Mostrar la imagen anterior Pulse el botón L. Pulse el botón ..
Sugerencia Algunos botones no están activos cuando se muestra el panel de control en la pantalla. En este caso, pulse el botón para desactivar el panel de control.
Menú de opciones de foto Cuando se visualiza el menú de opciones de foto, puede visualizar información acerca de las imágenes guardadas en el Memory Stick Duo™ o eliminarlas. 1 Seleccione un icono y, a continuación, pulse el botón . Aparece el menú de opciones. ES Foto Iconos 2 Menú de opciones Seleccione un elemento del menú y pulse el botón . Desactivación del menú de opciones Pulse el botón o el botón .
Envío y recepción de imágenes Puede transferir imágenes con otro sistema PSP® utilizando un modo ad hoc ( página 110). Los pasos que deben realizar el remitente y el destinatario son diferentes. Remitente 1 Destinatario Establecer configuración para modo ad hoc (tanto remitente como destinatario). 1 Encienda el interruptor WLAN de la parte izquierda del sistema PSP® ( página 21). 2 Prepararse para recibir la imagen (destinatario).
Sugerencias • La ubicación donde se guarda la imagen depende de la selección realizada en el paso 2-1. Tenga en cuenta que no puede guardar imágenes en la carpeta Imágenes de cámara digital. • También puede transferir imágenes mediante el panel de control en pantalla ( página 73).
Reproducción de presentaciones Es posible ajustar las imágenes disponibles para que se muestren en orden. 1 Seleccione el icono de una carpeta o soporte que contenga imágenes y, a continuación, pulse el botón START (inicio). Comienza la presentación. El contenido mostrado varía dependiendo del icono seleccionado. Icono Descripción Memory Stick™ Se muestran por orden todas las imágenes guardadas en un Memory Stick Duo™.
Uso del panel de control 1 Pulse el botón durante la presentación. Aparece el panel de control. ES 2 Seleccione un icono y, a continuación, pulse el botón Foto Panel de control . Desactivación del panel de control Pulse el botón o el botón .
Icono Descripción Reproducir Inicia la presentación Pausa Hace una pausa en la presentación Detener Detiene la presentación Repetición Reproduce la presentación repetidamente Visualización del modo de presentación 1 Durante una presentación, seleccione desde el panel de control y, a continuación, pulse el botón . Cada vez que se pulsa el botón , la opción cambia de la manera siguiente: Se muestran el nombre de imagen y la fecha de la última actualización.
Uso del mando a distancia Detener una presentación Pulse el botón - Visualizar la imagen anterior Pulse el botón L. Pulse el botón .. Visualizar la imagen siguiente Pulse el botón R. Pulse el botón >. Visualizar las opciones de presentación Pulse el botón . . - ES Foto Uso de los botones del sistema Sugerencia Algunos botones no están activos cuando se muestra el panel de control en la pantalla. En este caso, pulse el botón para desactivar el panel de control.
Almacenamiento de imágenes en un Memory Stick Duo™ Se pueden guardar imágenes en un Memory Stick Duo™ con cualquiera de los dos métodos siguientes. Cómo tomar fotografías utilizando una cámara digital de imágenes fijas Cuando utilice una cámara digital de imágenes fijas que sea compatible con el Memory Stick Duo™, las fotos podrán visualizarse si se inserta el Memory Stick Duo™ de la cámara directamente en el sistema PSP®.
1 Utilizar un PC con una ranura para Memory Stick™.* 2 Utilizar un cable USB ( página 108). 3 Utilizar un lector/grabador de Memory Stick USB disponible en el mercado.* * Es necesario un adaptador de Memory Stick Duo (número de modelo MSAC-M2: producto Sony que se vende por separado) si la ranura del dispositivo que utiliza sólo acepta un Memory Stick™ de tamaño estándar.
Red Uso de Internet 1 Seleccione 2 Seleccione un icono, y luego pulse el botón del menú principal. . Iconos que se encuentran bajo Red 88 Reproductor LocationFree™ Puede ver televisión y vídeos usando la función de red inalámbrica conectando a la estación base LocationFree™ (un producto de Sony que se vende por separado). Para obtener detalles, visite http://www.sony.com.mx/playstation Advierta que según el sitio donde viva, es posible que la estación base no esté disponible para la compra o uso.
Conexión a Internet Puede conectarse a Internet para ver páginas Web con el navegador de Internet. Advierta que deberá encontrarse dentro de los límites de un punto de acceso inalámbrico (o hotspot) que permite establecer una conexión a Internet. El siguiente acuerdo se aplica a la función de navegador de Internet en el sistema PSP® (PlayStation®Portable): ES Red Acuerdo de licencia de usuario del navegador de Internet El uso del navegador de Internet del sistema PSP® requiere un acceso inalámbrico.
1 Compruebe que ha completado los ajustes de red. Para conectarse a Internet, primero debe introducir los ajustes y guardar una conexión para el modo de infraestructura ( página 110). 2 Seleccione situado debajo de y, a continuación, pulse el botón en el menú principal . Se inicia el navegador de Internet y aparece el menú. 3 Utilice el botón direccional de flecha hacia arriba para seleccionar la barra de dirección y, a continuación, pulse el botón . Se muestra el teclado en pantalla.
4 Introduzca la dirección de la página Web mediante el teclado que aparece en pantalla ( página 121). Una vez introducida la dirección, el sistema PSP® se conectará a Internet. Mientras se carga la página, se muestra el icono de ocupado en la esquina inferior derecha de la pantalla. Cuando se establece una conexión de manera satisfactoria, se muestra la página Web. ES Red Icono de ocupado 5 Una vez que se haya mostrado la página Web, pulse el botón para ocultar el menú.
Ajustes Ajustes del sistema PSP® Es posible realizar los ajustes del sistema, así como los de funciones como vídeo, foto y red. 1 Seleccione del menú principal. Se mostrarán los iconos de varios ajustes. 2 Seleccione un icono y, a continuación, pulse el botón . Aparece una pantalla de configuración para el icono seleccionado. Si desea obtener más información, consulte las instrucciones para cada ajuste ( páginas 93-120).
Iconos que se muestran en Configuración Ofrece acceso a las actualizaciones del software de sistema ( página 118) Conexión USB Permite la conexión a un PC mediante un cable USB ( página 108) Ajustes de vídeo Incluye los ajustes de Idioma del menú, Idioma de audio e Idioma de subtítulos de página 94) UMD®VIDEO ( Ajustes de foto Incluye los ajustes para definir la velocidad de las presentaciones ( página 95) Ajustes del sistema Incluye los ajustes de Idioma del sistema y Apodo, y ofrece una opción par
Ajustes de vídeo Es posible establecer el idioma del UMD®VIDEO o aumentar el volumen del UMD®VIDEO. Aviso Según el UMD®VIDEO, es posible que las condiciones de reproducción hayan sido ajustadas con antelación por el desarrollador del software. En ese caso, aunque siga las instrucciones que se describen en este manual, es posible que algunas opciones no estén disponibles. Idioma del menú Selecciona un idioma para el menú de UMD®VIDEO. Idioma de audio Selecciona un idioma para el audio.
Ajustes de foto Es posible ajustar la velocidad del cambio de diapositivas. Rápida Muestra las imágenes a mayor velocidad Normal Muestra las imágenes a velocidad normal Lenta Muestra las imágenes a menor velocidad ES Ajustes El ajuste predeterminado del menú aparece subrayado.
Ajustes del sistema Es posible realizar los ajustes y visualizar información sobre el sistema PSP®, o formatear un Memory Stick Duo™. Apodo Es posible cambiar el apodo seleccionado en la configuración inicial. Utilice el teclado que aparece en la pantalla para indicar un apodo nuevo. Para obtener información sobre cómo introducir texto, consulte "Cómo usar el teclado" ( página 121). Idioma del sistema Establece el idioma para los menús del sistema PSP® como, por ejemplo, el menú principal.
Juego de caracteres Puede establecer el código de carácter que se aplicará a la música y a otros tipos de archivos. Generalmente, no es necesario ajustar esta configuración. Para nombres de archivo Establece el código de carácter que se va a utilizar en nombres de archivos de música y otros Para texto en archivos Establece el código de carácter para texto en m3u y otros tipos de archivo ES Ajustes Sugerencia El ajuste predeterminado es "Multilingual Latin 1 (850)".
Formatear Memory Stick™ Es posible formatear el soporte Memory Stick Duo™ con el sistema PSP®. Siga las instrucciones de la pantalla para realizar esta operación. Avisos Al formatear, se elimina todo el software y todos los datos almacenados en el Memory Stick Duo™, y no es posible su recuperación. Preste atención para no borrar los datos importantes por error. Restablecer ajustes predeterminados Puede restablecer la configuración a los valores que estaban ajustados en el momento de la compra.
Ajustes de tema Puede cambiar el tema para la pantalla del sistema PSP® o mostrar una imagen como imagen de fondo. Tema ES Original Cambia automáticamente a un color predefinido cada mes Muestras de color Se establece en el color seleccionado Ajustes Puede cambiar el color de fondo de la pantalla. Utilice los botones de dirección para seleccionar un color de fondo y pulse el botón para completar el ajuste. El ajuste predeterminado para el elemento del menú aparece subrayado.
Ajustes de fecha y hora Puede ajustar la fecha y la hora, una zona horaria y el horario de verano para el sistema PSP®. Utilice los botones de dirección para ajustar cada elemento y luego pulse el botón para terminar de realizar la configuración.
Ajustes de ahorro de energía Puede conservar la energía del sistema PSP® estableciendo que el sistema desactive automáticamente la luz de fondo o entre en el modo de suspensión. Apagar automáticamente la luz de fondo ES Off La luz de fondo no se apaga automáticamente.
Suspender automáticamente Es posible ajustar el sistema PSP® para que ahorre energía entrando automáticamente en el modo de suspensión cuando permanece sin uso durante cierto período de tiempo. Para obtener más información sobre la desactivación del modo de suspensión, consulte "Desactivación del modo de suspensión" ( página 31). Off El sistema no entra automáticamente en el modo de suspensión.
Ajustes de sonido Es posible apagar el Tono de la tecla y limitar el nivel del volumen. AVLS (Automatic Volume Limiter System) Off No establece ningún límite; permite que el volumen se ajuste de forma manual On Establece un límite para el volumen ES Ajustes Es posible limitar el volumen máximo.
Ajustes de seguridad Es posible ajustar la configuración de las funciones de seguridad del sistema. Cambiar contraseña Cambia la contraseña de 4 dígitos.
Nivel de control paterno Algunos productos de software UMD® disponen de un nivel de control paterno predeterminado basado en el contenido. Es posible configurar el nivel de control paterno del sistema para restringir la reproducción de un UMD® con un nivel superior al nivel establecido en el sistema. ES Nivel de control paterno Off Apaga el control paterno 11-1 Establece el nivel del contenido a restringir.
Nivel de control paterno UMD® 1 2 3 4 5 6 7 8 9 10 11 11 Nivel de control paterno del sistema 10 9 8 7 6 5 4 3 2 1 :Se puede visualizar el UMD® :No se puede visualizar el UMD® Niveles de control paterno en juegos La mayoría de juegos llevan un símbolo en la caja que indica las edades para las cuales es adecuado el juego. Los símbolos corresponden al nivel de control paterno UMD® como se indica a continuación: Edad Nivel de control paterno UMD® 2 3 4 5 9 10 Desde Octubre 2005.
Control de inicio del navegador de Internet Puede restringir la capacidad para iniciar el navegador de Internet. Off Permite que se inicie el navegador de Internet On Muestra la pantalla para la entrada de contraseña antes de iniciar el navegador de Internet El ajuste predeterminado para el elemento del menú aparece subrayado.
Conexión USB Es posible transferir archivos desde un PC a un Memory Stick Duo™ insertado en el sistema PSP® usando un cable USB disponible en el mercado. Observa que los archivos que pueden reproducirse se limitan a los formatos de archivo compatibles con el sistema. Sugerencias • Es posible realizar la conexión a un PC que disponga de un sistema operativo que soporte el almacenamiento masivo USB como, por ejemplo, los sistemas Windows® XP y Mac OS X.
2 Seleccione (Conexión USB) en del menú principal y, a continuación, pulse el botón . El PC detectará el Memory Stick Duo™ insertado en el sistema PSP®. Aviso No formatee un Memory Stick Duo™ en un PC, ya que es posible que el sistema PSP® no pueda volver a reconocerlo.
Ajustes de la red Es posible ajustar la configuración de red para permitir la conexión a una red de área local inalámbrica (WLAN). Existen dos modos de WLAN. Advertencia Se debe desactivar el interruptor WLAN en sitios concurridos, por ejemplo en un tren. Si hubiera una persona cerca que usara marcapasos, es posible que éste se viera afectado por las ondas radiofónicas. Modo Ad hoc En este modo, es posible comunicarse directamente con otros sistemas PSP®.
Elementos requeridos Generalmente, se requieren los elementos siguientes para configurar el sistema para la conexión a la red y para realizar una actualización de la misma. • • • • • Sugerencias • Un punto de acceso es un dispositivo que se utiliza para realizar la conexión a una red inalámbrica. • Las claves SSID, WEP y WPA son tipos de información de red inalámbrica. Es posible que se requieran al realizar la conexión a un punto de acceso o un enrutador.
Creación de una nueva conexión de red Es posible ajustar la configuración de red para realizar la conexión a un punto de acceso y guardar los datos de la conexión a la red en el sistema. Se pueden guardar hasta 10 conexiones. 1 Seleccione (Ajustes de la red) en del menú principal y, a continuación, pulse el botón . 2 Seleccione "Modo infraestructura" y, a continuación, pulse el botón . 3 Seleccione "Nueva conexión" y, a continuación, pulse el botón . 4 Escriba un nombre para la conexión de red.
5 Ajuste el SSID para el punto de acceso. ES Ajustes Esta pantalla se utiliza para indicar la información de los ajustes enumerados más abajo. Consulte las instrucciones suministradas con el punto de acceso o router para obtener información detallada. Escanear Busca los puntos de acceso cercanos y muestra los SSID Introducir manualmente Permite al usuario introducir el SSID con el teclado. Seleccione esta opción si conoce el SSID del punto de acceso.
Ninguno No ajusta información de seguridad. WEP WPA-PSK (TKIP) Ajusta información de seguridad. Pulse el botón derecho para mover la pantalla e introducir las claves WEP o WPA.* WPA-PSK (AES) * Los campos de clave WEP y WPA mostrarán ocho asteriscos independientemente de los caracteres que introduzca como clave. Cuando haya finalizado la configuración, pulse el botón hacia la derecha para pasar a la pantalla siguiente. 7 Seleccione el método de configuración de dirección.
8 Compruebe la configuración. Esta pantalla muestra los detalles de configuración. Si fuera necesario, pulse el botón hacia la izquierda para volver a las pantallas anteriores y corregir cualquier ajuste. ES Ajustes Cuando haya seleccionado los ajustes, pulse el botón hacia la derecha para pasar a la siguiente pantalla. 9 Guarde la conexión. Pulse el botón para guardar la conexión del sistema. 10 Pruebe la conexión.
• Si la información de dirección IP y DNS se obtiene mediante un servidor DHCP, seleccione "Personalizados" en el paso 7. Todas las opciones se ajustarán en "Automático". • Si desea que el navegador se inicie automáticamente cuando establezca una conexión a un punto de acceso, seleccione "Personalizados" en el paso 7 y luego ajuste la opción "Navegador de Internet" en "Iniciar". Utilice este ajuste para conectarse a un hotspot que necesite un nombre de usuario y una contraseña.
Editar Cambia la configuración de una conexión de red guardada en el sistema* Probar conexión Prueba la conexión con un punto de acceso Eliminar Elimina una conexión de red Información Visualiza información acerca de la conexión de red * Si desea obtener instrucciones detalladas, consulte el apartado "Creación de una nueva conexión de red" ( página 112).
Actualización de red Es posible actualizar el software del sistema para el sistema PSP® con la función Actualización de red. Para obtener más información sobre actualizaciones, consulte "Actualizaciones de PSP®" ( página 124). Proceso de actualizaciones de red Conexión a la red La conexión se realiza con un punto de acceso LAN inalámbrico. Encienda el interruptor WLAN de la parte izquierda del sistema PSP®. Descarga (recepción de datos) Se descargan los datos de actualización de la red.
Cómo iniciar una actualización de red Es posible conectarse a la red con un punto de acceso para descargar los datos de actualización. Primeramente, compruebe que la batería esté cargada. No será posible iniciar la actualización si el nivel de carga de la batería está agotado. 1 2 3 Inserte un Memory Stick Duo™ en el sistema PSP®. 4 Seleccione una conexión y, a continuación, pulse el botón .
Menú de opciones Actualización de red Cuando se muestra el menú de opciones, se pueden editar o eliminar las conexiones guardadas en el sistema. 1 Seleccione (Actualización de red) en principal y, a continuación, pulse el botón 2 Seleccione la conexión y, a continuación, pulse el botón . del menú . Aparecerán los elementos siguientes. Seleccione la operación que desea realizar y, a continuación, pulse el botón .
Cómo usar el teclado Usted puede usar el teclado en la pantalla para ingresar texto, como por ejemplo indicar un apodo para el sistema PSP® o introducir información de conexión a la red.
Teclas del teclado Función Mueve el cursor Borra el caracter a la izquierda del cursor Despliega un diagrama que muestra los botones del sistema y su uso Cambia entre mayúsculas y minúsculas Ingresa una separación en la línea Cambio del modo de ingreso El número de modos de ingreso disponibles, varía dependiendo del idioma seleccionado.
Introducción de los caracteres Esta sección le demostrará cómo ingresar el texto usando la palabra "PLAY" como ejemplo. 1 Seleccione PQRS7, y pulse el botón que aparezca la letra "P". varias veces hasta 2 Seleccione JKL5, y pulse el botón que aparezca la letra "L". varias veces hasta 3 Seleccione ABC2, y pulse el botón que aparezca la letra "A". varias veces hasta 4 Seleccione WXYZ9, y pulse el botón que aparezca la letra "Y".
Información adicional Actualizaciones de PSP® Al actualizar el software del sistema PSP®, puede cambiar o añadir funciones. 1 Obtener datos de actualización. 2 Utilice los datos de actualización para sobrescribir el software del sistema PSP®. 3 El software del sistema se actualiza y se añaden nuevas funciones.
Actualización mediante un UMD® Puede realizar las actualizaciones mediante un UMD® que contenga datos de actualización. Primeramente, compruebe que la batería esté cargada. No será posible iniciar la actualización si el nivel de carga de la batería está agotado. ES Aviso 1 2 Conecte el adaptador ca al sistema PSP®. Inserte un UMD® que contenga datos de actualización. El icono de datos de actualización y el número de versión se muestran en en el menú principal.
Compruebe que la actualización se ha realizado correctamente Si se muestra el número de versión de la actualización en el campo "Software del sistema" en "Información del sistema" ( página 98), indica que la actualización se ha realizado correctamente.
Soportes compatibles El sistema PSP® permite utilizar los tipos de soportes que se enumeran a continuación. En este manual se utiliza el término "Memory Stick Duo™" para hacer referencia a todos los tipos de Memory Stick™ de la tabla siguiente.
UMD® El UMD® contiene un código de región que se asigna a cada región de venta. El sistema puede reproducir el software UMD® con la marca de código de región "ALL" o "4". Memory Stick™ Existen dos tamaños de Memory Stick™: el estándar y otro más pequeño. El sistema PSP® es compatible con el Memory Stick Duo™ más pequeño. No podrá utilizar un Memory Stick™ de tamaño estándar con el sistema.
MagicGate es un término de tecnología de protección de los derechos de autor, desarrollada por la Sony Corporation. no garantiza la compatibilidad con otros productos que lleven la marca comercial "MagicGate". Archivos que pueden reproducirse ES Información adicional Es posible reproducir los siguientes tipos de archivos en el sistema PSP®.
Especificaciones El diseño y las especificaciones están sujetos a cambios sin previo aviso. Sistema PSP® (PlayStation®Portable) Pantalla LCD Tipo transparente de 4,3 pulgadas (16:9), unidad TFT Visualización aproximada de 16.770.
Consumo máximo de energía Aprox. 6 W (durante la carga) Dimensiones externas Aprox. 170 × 74 × 23 mm / 6 ¾ × 3 × 1 pulgadas (anchura × altura × profundidad) (sin incluir la mayor proyección) Peso Aprox. 280 g / 10 oz (incluida la batería) Temperatura del entorno en funcionamiento De 5 °C a 35 °C / 41 °F a 95 °F ES Longitud de onda 655 - 665 nm Alimentación Máx. 0,28 mW Tipo semiconductor, continuo Información adicional Láser UMD® Conexión a red inalámbrica Estándar IEEE 802.
Contenido Consulte la página 17. x Memory Stick Duo™ • Compatible con MagicGate™ • Capaz de realizar la transferencia de datos paralela (transferencia de datos de alta velocidad). Este tipo de transferencia de datos de alta velocidad sólo se puede utilizar con dispositivos compatibles. La velocidad de la transferencia variará en función del dispositivo que se utilice. • Incluye la capacidad real que puede utilizarse (espacio total) y el espacio reservado para los archivos del sistema.
Es necesario realizar los siguientes avisos en relación con algunas partes del software del sistema PSP® (estas declaraciones no afectan a la garantía limitada proporcionada con el sistema PSP® o el software UMD®): Parte de este software se basa el trabajo de Independent JPEG Group. Copyright © 1988-1997 Sam Leffler Copyright © 1991-1997 Silicon Graphics, Inc.
Marcas comerciales " ", "PlayStation", " " y "UMD" son marcas comerciales registradas de Sony Computer Entertainment Inc. " " y "XMB" son marcas comerciales de Sony Corporation y Sony Computer Entertainment Inc. "SONY" y " " son marcas comerciales registradas de Sony Corporation. Asimismo, "Memory Stick Duo", "Memory Stick PRO Duo", "Memory Stick", " ", "SonicStage", "MagicGate", "ATRAC3plus", "ATRAC3" y "LocationFree" son marcas comerciales de la misma empresa.
Solución de problemas Revise esta sección si tiene problemas a la hora de utilizar el sistema PSP®. Si un problema persiste, póngase en contacto con el servicio de asistencia técnica en los numeros de teléfono siguientes: En la Ciudad de México: Tel: 5002 9819 Del interior de la República: 01 800 759 SONY o 01 800 759 7669. La alimentación no se activa. , Compruebe que la batería está cargada ( página 38). , Compruebe que la batería se ha insertado correctamente ( página 23).
, Es posible que exista un problema con la batería. Pruebe a utilizar una batería de repuesto marcada para usar con el sistema PSP®, si dispone de una. El indicador POWER (alimentación) está activado pero no aparece la pantalla LCD. , Compruebe que la luz de fondo de la pantalla LCD no esté apagada. Si lo está, pulse uno de los botones del sistema para encenderla. La batería pierde energía incluso cuando el sistema está apagado.
El color de la pantalla no se ve bien. , Si "Tema" se ajusta en "Original", el color de fondo cambia automáticamente al principio de cada mes ( página 99). El sistema se ajusta en "Original" en el momento de la compra. Sonido ES Información adicional No hay sonido. , Compruebe que el volumen no está ajustado a cero. Pruebe a aumentar el volumen ( páginas 18, 22). , Compruebe que el ajuste de silenciamiento no esté activado.
UMD® El sistema no reconoce el UMD®. , Compruebe que ha insertado correctamente el UMD® (con la etiqueta de cara a la parte posterior del sistema, etc.). Pruebe a retirar el UMD® y, a continuación, volver a insertarlo. , Compruebe que la superficie grabada del UMD® está limpia. Si no es así, límpiela con un paño suave ( página 14). El UMD® no se reproduce correctamente.
, Compruebe que el conector del Memory Stick Duo™ está limpio. De lo contrario, es posible que los datos no se carguen correctamente. Limpie el conector con un bastoncillo de algodón. El sistema no puede guardar o cargar los datos. , Compruebe que haya suficiente espacio libre en el Memory Stick Duo™ para guardar los datos ( página 44). , Es posible que exista un problema con el Memory Stick Duo™. Pruebe a usar otro Memory Stick Duo™, si dispone de uno. ES El UMD®VIDEO no funciona.
, Cuando reproduzca datos ATRAC3plus™, deberá utilizar un software compatible con funciones de protección de derechos de autor, para transferir los datos a un Memory Stick Duo™ ( página 68). Las pistas de otros grupos no se reproducen. , Compruebe que la función de modo de grupo está desactivada. Si está activada, sólo podrán reproducirse las pistas de un único grupo. El sistema no reconoce los datos de música.
No se puede borrar una carpeta del Memory Stick Duo™. , Si la carpeta contiene datos que no son de imágenes, no se podrá borrar. Red ES Información adicional No se puede establecer una conexión a la red. , Compruebe que el interruptor WLAN de la parte izquierda del sistema ( página 21) está activado. , Ajuste "Ahorro de energía de WLAN" en "Off" ( página 102). De este modo, el sistema podrá establecer la comunicación con la máxima potencia.
El mando a distancia no funciona. , Compruebe que ha conectado completamente los auriculares en el sistema ( página 27). , Compruebe que el mando a distancia no está en modo de espera. Si lo está, desactive el modo de espera ( página 22). Otros problemas El sistema o el adaptador ca están calientes. , Durante el uso, es posible que el sistema o el adaptador ca se calienten. No se trata de un fallo de funcionamiento. El sistema está encendido, pero no funciona.
El PC no reconoce el sistema PSP® cuando está conectado con un cable USB. , Cuando utilice un concentrador USB u otros dispositivos, en función del entorno operativo del PC, es posible que el equipo no reconozca el Memory Stick Duo™ insertado en el sistema PSP®. Intente conectar el sistema PSP® directamente al PC con un cable USB. Solución de problemas ES Información adicional Ha olvidado su contraseña.
GARANTIA EN MÉXICO Para cualquier duda referente con la garantía, favor de consultar la Póliza de Garantía anexa al producto.
Glosario AVLS Sistema Automático Limitador de Volumen PC CD Disco Compacto PUERTO IR Puerto Infrarrojo DNS Sistema de Nombres de Dominio ROUTER Sistema constituido por circuitos electrónicos y programas que sirve para transmitir datos en Internet DSL Línea de subscriptor digital SSID Identificador del equipo de servicio HOME Inicio SOFTWARE Programa o aplicación HOTSPOT Lugar de acceso a la red de información mundial (Internet) con tecnología inalámbrica.
WARNINGS To avoid electrical shock, do not open the cabinet. Refer servicing to qualified personnel only. Use the supplied AC adaptor only. If you use other types, it may cause fire, electrical shocks or a malfunction. Owner's Record The model and serial numbers are located inside the battery compartment of the unit. Record the serial number in the space provided below.
Radio waves Radio waves may affect electronic equipment or medical devices (for example, pacemakers), which may cause malfunctions and possible injuries. • If you use a pacemaker or other medical device, consult your physician or the manufacturer of your medical device before using the wireless networking feature. • Keep the PSP® system at least 9 inches (23 cm) away from a pacemaker or other medical devices when using the wireless networking feature.
GAME page 183 • Playing games • Managing saved data VIDEO page 187 • Playing UMD®VIDEO • Playing videos saved on a Memory Stick Duo™ MUSIC page 200 • Playing UMD®MUSIC • Playing music saved on a Memory Stick Duo™ PHOTO page 213 • Displaying images saved on a Memory Stick Duo™ • Playing slideshows NETWORK page 227 • Using the Internet • Using the LocationFree™ Player SETTINGS page 231 • Adjusting PSP® system settings • Creating video, photo or network settings • Connecting to devices using t
Using the home menu The basic operation of the PSP® system starts from the home menu. Press the home button to display the home menu and use the directional buttons to navigate the horizontal and vertical icon bars.
Table of contents WARNINGS . . . . . . . . . . . . . . . . . . . . . . . . . . . . . . . . . . . 146 Precautions . . . . . . . . . . . . . . . . . . . . . . . . . . . . . . . . . . . . 153 Battery pack precautions . . . . . . . . . . . . . . . . . . . . . . . . . 159 x Preparation Checking the package contents . . . . . . . . . . . . . . . . . . . . 160 Part names and functions . . . . . . . . . . . . . . . . . . . . . . . . . 161 Preparing the PSP® system for use . . . . . . . . . . . . . . . . .
x Music Listening to music . . . . . . . . . . . . . . . . . . . . . . . . . . . . . . Using the control panel . . . . . . . . . . . . . . . . . . . . . . . . . . Operating with PSP® system buttons or the remote control . . . . . . . . . . . . . . . . . . . . . . . . . Music options menu . . . . . . . . . . . . . . . . . . . . . . . . . . . . . Transferring and saving music on a Memory Stick Duo™ . . . . . . . . . . . . . . . . . . . . . . . . . 200 203 207 208 210 US x Photo Viewing images . . . . . . .
How to use the keyboard . . . . . . . . . . . . . . . . . . . . . . . . . 259 x Additional information PSP® updates . . . . . . . . . . . . . . . . . . . . . . . . . . . . . . . . . . 262 Compatible media . . . . . . . . . . . . . . . . . . . . . . . . . . . . . . . 264 Specifications . . . . . . . . . . . . . . . . . . . . . . . . . . . . . . . . . . 267 Troubleshooting . . . . . . . . . . . . . . . . . . . . . . . . . . . . . . . . 272 Warranty in Mexico . . . . . . . . . . . . . . . . . . . . . . . . .
Precautions Before using this product, carefully read this manual and retain it for future reference. Safety This product has been designed with the highest concern for safety. However, any electrical device, if used improperly, has the potential for causing fire, electrical shock or personal injury. To help ensure accident-free operation, follow these guidelines: • Observe all warnings, precautions and instructions.
• • • • • • • • • • • • • • • Be careful not to pinch your fingers when closing the disc cover. Do not use the system or accessories near water. Use only attachments/accessories specified by the manufacturer. Do not use the headphones if they cause discomfort to your skin. If the supplied headphones cause discomfort to your skin, discontinue use immediately. If symptoms do not subside even after discontinuing use, seek medical attention.
• Do not use a power source other than the supplied battery pack, AC adaptor and AC power cord. • Do not allow dust or foreign matter to build up around the system or accessory connectors. If there is dust or foreign matter on the system's connectors or the AC power cord, wipe it off with a dry cloth before connecting. Dust or other matter on the connectors can result in fire or electrical shock.
• When using the system in a cold environment, you may notice shadows on the graphics or the screen may appear darker than usual. This is not a malfunction, and the screen will return to normal when the temperature goes up. • Do not leave still images displayed on the screen for an extended period of time. This may cause a faint image to be left permanently on the screen.
If, for any reason, software or data loss or corruption occurs, it is usually not possible to recover the software or data. It is recommended that you regularly back up software and data. Sony Computer Entertainment Inc. and its subsidiaries and affiliates will not be held liable for any damages or injury in the case of software or data loss or corruption. In accordance with copyright law, no recorded data may be used for purposes other than personal enjoyment without permission from the copyright holder.
Moisture condensation If the PSP® system or UMD® is brought directly from a cold location to a warm one, moisture may condense on the lens inside the system or on the UMD®. Should this occur, the system may not operate properly. In this case, remove the UMD® and turn off and unplug the system. Do not put the UMD® back in until the moisture evaporates (this may take several hours).
Battery pack precautions Warnings Do not handle a damaged or leaking battery pack. Contact with the material can result in injury or burns to the eyes or skin. Even if foreign substances are not immediately visible, chemical changes in the material can result in injuries occurring at a later time. If you come into contact with material from a leaking battery pack, take the following actions: • If the material gets into the eyes, do not rub.
Preparation Checking the package contents Check that you have all of the following items. If any items are missing, contact our technical support line for assistance: From and within the Mexico City area: 5002 9819 Within the Mexican Republic: 01 800 759 SONY or 01 800 759 7669.
Part names and functions System front US Preparation POWER HOLD HOME VOL A L button B Directional buttons SELECT START F Strap holder Attach as shown in the diagram. L VO C Memory Stick Duo™ access indicator HO ME Lights up when saving and loading data D WLAN access indicator Lights up when using the wireless networking feature E Analog stick Can be used with games that support analog operation.
K LCD screen Q button L Display button R button S button T button Adjusts screen brightness ( page 179) M Sound button Adjusts the tone ( page 177) N Select button O Start button P R button U Power indicator Lights up, flashes or changes color to indicate system status ( page 170) V Hold indicator Turns yellow when in hold mode ( page 176) W Right speaker System rear PUSH UMD A Battery cover B Push button 162 Part names and functions C Disc cover
System top L A IR port R OPEN C Open latch B USB connector US 5V DC IN A Headset connector Preparation System bottom C DC IN 5V connector B Charging terminals Part names and functions 163
System left side R:WLAN on r:WLAN off A Memory Stick Duo™ slot* B WLAN switch Turns on the wireless networking feature System right side R:Power switch r:Hold switch A Power/hold switch Turns the system on and off, puts in sleep mode ( pages 170, 172) and locks the system buttons ( page 176) * References in this manual to "Memory Stick Duo™" apply to both Memory Stick Duo™ and Memory Stick PRO Duo™ unless otherwise noted.
Headphones with remote control Remote control side VOL Remote control front US B > button C Volume + button Turns the volume up D Volume - button A Hold switch Locks the operation of the remote control. Note that this button does not lock the buttons of the PSP® system. Preparation A .
Preparing the PSP® system for use Before using the PSP® system for the first time after purchase, you must follow these steps to charge the battery. Before inserting the battery pack, find the serial and model numbers listed within the battery compartment and make a record of the numbers in the spaces provided under Owner's Record on page 146. Getting started 1: Inserting the battery pack Remove the battery cover. 2 UMD PUSH Hold down the push button and slide the battery cover open.
Getting started 2: Charging Caution • The socket-outlet shall be installed near the equipment and shall be easily accessible. • Do not plug the AC power cord for the PSP® system into an electrical outlet until you have made all other connections. 1 Plug the AC power cord into the AC adaptor. US Preparation AC adaptor AC power cord 2 Connect the AC adaptor to the DC IN 5V connector on the system bottom.
3 Plug the AC power cord into an electrical outlet. AC power cord POWER HOLD SELECT START To electrical outlet The power indicator lights up in orange, indicating that charging has begun. The power indicator will turn off when the battery is fully charged. 4 Unplug the AC power cord from the electrical outlet and disconnect the AC adaptor from the system. Hint For information on how to charge the battery, see "Battery" ( page 180).
Connecting the headphones with remote control 1 Connect the headphones to the PSP® system. Headphones US Preparation HOME VOL Remote control 1 Plug the headphones into the remote control. 2 Plug the headphones into the headset connector on the system bottom. Hint The remote control is exclusively for use with the PSP® system and accessories made exclusively for the PSP® system. It cannot be used with other devices.
Basic operations Turning the PSP® system on and off Turning the system on 1 Slide the power/hold switch up. POW ER SE LE CT ST AR T HOLD The power indicator lights up in green, and the home menu is displayed. Hints • If the PSP® system is turned on with a UMD® inserted, the UMD® will begin playback automatically. • The system can be used with the AC adaptor connected. In this case, charging will begin automatically. The power indicator lights up in orange while charging.
Turning the system off 1 Hold the power/hold switch in the up position for more than three seconds. The power indicator flashes and then turns off, indicating that the system is turned off.
Using sleep mode If the PSP® system is switched to sleep mode, the software that is playing will be paused. When sleep mode is cleared, you can begin playback from the point where the system entered sleep mode. Notices • Do not put the system in sleep mode while the Memory Stick Duo™ access indicator is on. This may cause data loss or corruption. • If the battery runs out while in sleep mode, when you clear sleep mode, the system will not return to the screen that was displayed before entering sleep mode.
Clearing sleep mode 1 Slide the power/hold switch up again. Sleep mode is cleared. Hints • You can also clear sleep mode by pressing the u (play/pause) button of the remote control, if the system was put in sleep mode during music or video playback. • After clearing sleep mode with video or music content, you can resume playback from the point where the system entered sleep mode by following the steps below.
Inserting a UMD® Notice Do not eject a UMD® during playback. 1 Slide the open latch on the PSP® system top. The disc cover opens. 2 Insert a UMD®. With the disc label facing the system rear, slide the UMD® in the direction of the arrow until it is fully inserted. Do not touch the recorded surface. Open latch L OPEN R 3 Close the disc cover. Ejecting the UMD® Slide the open latch on the system top to open the disc cover.
Inserting a Memory Stick Duo™ Warning Keep Memory Stick Duo™ media out of the reach of small children, as the media could be swallowed by accident. 1 Open the slot cover and insert the Memory Stick Duo™. US Basic operations Front side Open the slot cover in the direction of the arrow. Press until fully inserted. Ejecting the Memory Stick Duo™ Open the slot cover and press the Memory Stick Duo™ in the direction of the arrow to eject.
Avoiding unintended operation of the PSP® system 1 Slide the power/hold switch down. POW ER SE LE CT ST AR T HOLD The switch locks into place. The hold indicator turns yellow, indicating that the system buttons are locked. Clearing hold mode Slide the power/hold switch to its original position.
Using the sound button The sound button is used to adjust the tone and to mute the sound for audio playback and for key tones. Adjusting the tone Tone can only be adjusted when using the headphones. Basic operations 1 Press the sound button.
Clearing mute You can clear mute by any of the following methods: • Pressing the sound button • Pressing the volume + or volume - button on the system or on the remote control 178 Using the sound button
Using the display button The display button is used to adjust screen brightness. Adjusting screen brightness 1 Press the display button. US Basic operations POWER HOLD SELECT START Each time you press the button, the display changes as follows: Level 1 Darker Level 2 Level 3 (Level 4) Brighter Hint Level 4 can be selected only while the PSP® system is plugged in using the AC adaptor. Turning off the backlight 1 Hold down the display button for more than one second.
Battery Battery charge level The battery charge level is displayed on the screen. Battery charge level Estimating the remaining battery power There is plenty of power left. The battery is getting low. The battery has almost run out. No battery power remains. The power indicator flashes green. Recharge the battery. Hints • If the power indicator flashes green, save game progress and recharge the battery. If the battery runs out before you save, game progress will be lost.
• Battery charge level can also be checked in "Battery Information" under ""System Settings" ( page 236). • If the PSP® system is left unused after the battery runs out, the date and time settings may be reset. If this occurs, the date and time setting screen will be displayed the next time the system is turned on. • The battery cannot be recharged when the WLAN feature is in use.
Hint The battery pack lifespan varies depending on how it is stored, the conditions of use and environmental factors, such as temperature. Replacing the battery pack For safety reasons, turn off the system and remove the power cord from the electrical outlet before replacing the battery pack. Also read "Battery pack precautions" ( page 159) before handling the battery pack. Hint If the system is left unused after the battery pack has been removed, the date and time settings may be reset.
Game Playing a game 1 2 Select from the home menu. Insert a UMD® ( page 174). The UMD® icon is displayed. US Game 3 With the game icon selected, press the button. The game starts. Icons displayed under Game In addition to playing games, the following features are available under Game. Game Sharing You can use ad hoc mode ( page 249) to receive game data from another PSP® system. For details, refer to the software manual supplied with the game.
Hints • If (Restricted Content) is displayed when you select the (UMD®) icon, parental control restrictions have been set on the system. You must enter the password as described below to access the game. See "Parental Control Level" ( page 244) for details. 1 Select (Restricted Content), and then press the button. 2 Enter the 4-digit password using the directional buttons, and then press the button. • If you press the home button during gameplay, you can check the remaining battery power.
Game options menu You can view game information or copy or delete saved data by displaying the options menu. 1 Select an icon, and then press the button. The options menu is displayed. US Game Icons 2 Options menu Select a menu item, and then press the button. Closing the options menu Press the button or the button. List of options The options menu items available vary depending on the icon selected.
Copying and deleting saved data You can copy or delete saved game data that is saved on a Memory Stick Duo™ using the saved data utility. Copying saved data You can copy saved data to another Memory Stick Duo™. It is recommended that important data be copied as a backup. 1 2 Select , and then press the button. Select the saved data that you want to copy, and then press the button. The options menu is displayed. 3 4 Select "Copy", and then press the button. Follow the on-screen instructions.
\ Video Watching a video You can watch UMD®VIDEO and videos saved on a Memory Stick Duo™. 1 2 Select from the home menu. Insert a UMD® or Memory Stick Duo™ ( pages 174, 175). An icon for the inserted media is displayed. US Video 3 Select the icon, and then press the button. UMD®VIDEO playback begins. If you select , icons for each video data item will be displayed. Select the video that you want to play, and then press the button. Icons displayed under Video UMD® You can play UMD®VIDEO.
Hints • If (Restricted Content) is displayed when you select the (UMD®) icon, parental control restrictions have been set on the system. Enter the password as described below to access the video. See "Parental Control Level" ( page 244) for details about the parental control feature. 1 Select (Restricted Content), and then press the button. 2 Enter the 4-digit password using the directional buttons, and then press the button.
Using the control panel You can perform the following operations using the on-screen control panel. Notice Depending on the UMD®VIDEO, playback conditions may be set in advance by the software developer. In such cases, certain options may not be available, even if you follow the instructions in this manual. US Press the button during video playback. Video 1 The control panel is displayed. Control panel 2 Select an icon, and then press the button.
Icon Description Go To Plays from a specified chapter* or time ( page 192) Switches between available audio options for UMD®VIDEO recorded with multiple audio tracks Audio Options Switches between Left, Right, and Left + Right audio output for video saved on a Memory Stick Duo™ / 190 Angle Options Switches between available viewing angles for UMD®VIDEO recorded with multiple angles Subtitle Options Switches between available subtitle options for UMD®VIDEO that include subtitles UMD®Video Volume
Icon Description Stop Stops playback A-B Repeat Plays a specified section repeatedly ( Repeat Plays the video repeatedly ( Clear Clears the Repeat/A-B Repeat setting page 195) page 194) * This operation cannot be performed during playback of video saved on a Memory Stick Duo™. Video Viewing playback status and related information 1 US Select from the control panel during playback, and then press the button. The playback status of the video is displayed.
Hint The items displayed when playing a UMD®VIDEO are different from those displayed when playing a video saved on a Memory Stick Duo™. Changing the Screen Mode Changes the size of the viewable image on the screen. 1 Select button. from the control panel, and then press the Each time the follows: button is pressed, the Screen Mode will change as Normal The image is adjusted to fit the PSP® system's screen size.
Specifies the chapter number* Chapter X XX:XX:XX / XX:XX:XX Specifies the elapsed time * You cannot use this feature when playing video saved on a Memory Stick Duo™. 3 Using the directional buttons, specify the number for the chapter or time, and then press the button. The specified section begins to play. Hint US Setting method may differ when playing video saved on Memory Stick Duo™ media.
Hint While using Fast Reverse or Fast Forward, select or from the control panel, and then press the button to switch between three speed options. Slow playback 1 During playback, select then press the button. from the control panel, and Returning to normal playback Select from the control panel, and then press the button. Hint Selecting or from the control panel while playback is paused, and then pressing the button, will also start slow playback.
Playing a section of video repeatedly You can specify a section of video that you want to play repeatedly. 1 During playback, select from the control panel, and then press the button at the beginning of the section to be repeated. The starting point, point A, is set. 2 Press the repeated. button at the end of the section to be US Video The ending point, point B, is set and the specified section begins to play repeatedly.
Operating with PSP® system buttons or the remote control You can operate the PSP® system without using the control panel by using the system buttons or the remote control. System button operation Remote control operation Play Press the button. Press the u button. Pause Press the start button. Display the UMD®VIDEO menu Press the button.*1 – Stop Press the button. – button or start Press the u button. Play the previous chapter Press the L button.*1 Press the . button.
Video options menu You can use the Video options menu to play a UMD®VIDEO or view information or delete videos saved on a Memory Stick Duo™. 1 Select the icon, and then press the button. The options menu is displayed. US Video Icons 2 Options menu Select a menu item, and then press the button. Clearing the options menu Press the button or the button. Options list The options menu items available vary depending on the icon selected.
Saving videos on a Memory Stick Duo™ The following two methods can be used to save a video on a Memory Stick Duo™. Images or video recorded with a device that is compatible with Memory Stick™ If you have a device that records video in a format* that can be played on the PSP® system, you can play the video simply by inserting the Memory Stick Duo™ from the compatible device into the PSP® system.
Transferring a video file from a PC to a Memory Stick Duo™ You can convert motion video that was taken or recorded on another device into a format that can be played on the PSP® system and transfer it to a Memory Stick Duo™ using compatible software*. * For full details, visit http://www.sony.com.
Music Listening to music You can listen to UMD®MUSIC and music saved on a Memory Stick Duo™. 1 2 Select from the home menu. Insert a UMD® or a Memory Stick Duo™ ( 175). pages 174, An icon for the inserted media is displayed. 3 Select the icon, and then press the button. Playback begins. When a list of groups or tracks is displayed, select the item that you want to listen to and then press the button.
Hints • If the start button or the u button on the remote control is pressed in step 3, the first track of the first group will begin playing. • If the home button or select button is pressed during playback, the screen will return to the home menu. If the button is pressed again, the music playback screen will be displayed. • You can adjust the tone or mute the sound using the sound button ( page 177).
Stopping playback 1 Press the button during playback. Playback stops. How to read the screen Track number/total number of tracks Album name Track name Status icon Artist name Control panel Codec Track elapsed time/total time Hints • "Album name" and "Track number/total number of tracks" are shown on the screen only while (Display) is turned on ( page 204). • The icon or icons displayed in the "Status icon" field will vary depending on the playback mode selected.
Using the control panel You can perform the following operations using the on-screen control panel. 1 Press the button during playback. The control panel is displayed. US Music Control panel 2 Select an icon, and then press the button. Hint UMD®MUSIC containing video content (such as music videos) are played in the same way as UMD®VIDEO. For detailed instructions, see "Using the control panel" under "Video" ( page 189). Clearing the control panel Press the button or the button.
Icon Description / Next Track Skips to the beginning of the next track Fast Reverse/ Fast Forward Plays in fast reverse/fast forward* Play Plays a track Pause Pauses playback Stop Stops playback Group Mode Switches to Group Mode ( A-B Repeat Specifies a part of a track, and then plays that part repeatedly ( page 206) Play Mode Switches to Play Mode ( Clear Clears Group Mode, Play Mode and A-B Repeat settings Display Displays album name, track number and total number of tracks Help Di
Clearing Group Mode Select or from the control panel, and then press the button. Using Play Modes (Repeat/Shuffle) 1 During playback, select then press the button.
Playing part of a track repeatedly Specify and then play the part that you want to play repeatedly. 1 Select from the control panel during playback, and then press the button at the point where you want the repeated playback to begin. The starting point (point A) is set. 2 Press the button at the point where you want the repeated playback to end. The ending point (point B) is set, and repeated playback of the specified section begins.
Operating with PSP® system buttons or the remote control You can operate the PSP® system without using the control panel by using the system buttons or the remote control. Remote control operation Play Press the button. Press the u button. Pause Press the start button. Press the u button. Stop Press the – Skip to the beginning of the current track or the previous track Press the L button. Press the . button. Or, press the . button as many times as the number of tracks you want to go back.
Music options menu You can use the Music options menu to view information about or to delete music data saved on a Memory Stick Duo™. 1 Select an icon, and then press the button. The options menu is displayed. Icons 2 Options menu Select a menu item, and then press the button. Clearing the options menu Press the button or the button. Options list The options menu items available vary depending on the icon selected.
Playing with a selected codec With UMD®MUSIC that has multiple file formats and bit rates recorded, you can select from among the options for playback. 1 Select a group that you want to listen to, and then press the button. 2 Select "Select Codec", and then press the button. 3 Select the type of file format and bit rate that you want to listen to, and then press the button. 4 Press the US Music The types of file formats and bit rates are displayed.
Transferring and saving music on a Memory Stick Duo™ You can use the PSP® system to play music data obtained in the following ways: 1) Music imported from an audio CD 2) Music purchased from a music download Web site See below for instructions regarding item 1). Visit http://www.sony.com.mx/playstation for instructions regarding item 2). Importing tracks from an audio CD in ATRAC3plus™ format A PC and software* that supports ATRAC3plus™ are required to import tracks from an audio CD.
*1 If the slot on the device can handle only standard-size Memory Stick™ media, a Memory Stick Duo Adaptor (model number MSAC-M2: a Sony product sold separately) is required. *2 A PC with Windows® XP and SonicStage™ version 3.1 or later installed is required. *3 A device that supports MagicGate™ such as model number MSAC-US30 (a Sony product sold separately) is required. Hints • For detailed information about importing tracks, visit http://www.sony.com.
Where to save music data Create a folder named "PSP" directly on the Memory Stick Duo™, and then create a folder named "MUSIC" in the "PSP" folder. Save music data in the "MUSIC" folder. The PSP® system will not recognize data items saved anywhere other than in this folder. Memory Stick Duo™ PSP MUSIC Data items Folder 2 Folder 1 Data items Hints • If a folder named "PSP" has already been created on the Memory Stick Duo™, create a "MUSIC" folder within it.
Photo Viewing images You can view images saved on a Memory Stick Duo™. 1 2 Select from the home menu. Insert a Memory Stick Duo™ ( page 175). is displayed. US Photo 3 With selected, press the button. Icons for Digital Camera Images, folders and images saved on the Memory Stick Duo™ are displayed. Select the icon that you want to display, and then press the button. Icons displayed under Photo Memory Stick™ You can view images saved on a Memory Stick Duo™.
Using the control panel You can perform the following operations using the on-screen control panel. 1 Press the button while displaying an image. The control panel is displayed. Control panel 2 Select an icon, and then press the button. Clearing the control panel Press the button or the button.
Icon Description / / Returns an image that has been zoomed in or out to its original size Zoom Out Zooms out from the image Zoom In Zooms in on the image Rotate Left Rotates the image 90-degrees counterclockwise Rotate Right Rotates the image 90-degrees clockwise Up/Down/Left/Right Moves the image to display any obscured parts in cases such as when the image has been zoomed in, or when View Mode is set to Zoom Previous Displays the previous image Next Displays the next image Slideshow Aut
Displaying image information 1 While displaying an image, select from the control panel, and then press the button. The image status is displayed. Image name Image number/total images Updated Display status Clearing the display Select 216 from the control panel, and then press the Using the control panel button.
Adjusting image size You can change the size of the image displayed on the screen. 1 While displaying the image, select from the control panel, and then press the button. Each time you press the button, the option switches as follows: Displays the image to fit the screen size without changing proportions Zoom Displays the image at the full screen size without changing proportions. Portions of the image at the top and bottom or left and right are cut off.
Operating with PSP® system buttons or the remote control You can operate the PSP® system without using the control panel by using the system buttons or the remote control. System button operation Remote control operation Play a slideshow Press the start button. Press the u button. Cancel zoom in/out Press the button when the image has been zoomed in or out. – Back Press the – button. Display the previous image Press the L button. Press the . button. Display the next image Press the R button.
Photo options menu When the Photo options menu is displayed, you can view information about or delete images saved on a Memory Stick Duo™. 1 Select an icon, and then press the button. The options menu is displayed. US Photo Icons 2 Options menu Select a menu item, and then press the button. Clearing the options menu Press the button or the button. Options list The options menu items available vary depending on the icon selected.
Sending and receiving images You can transfer images with another PSP® system using ad hoc mode ( page 249). The steps for the sender and the receiver are different. Sender 1 Receiver Set up for ad hoc mode. (both sender and receiver) 1 Turn on the WLAN switch on the left side of the PSP® system ( page 164). 2 Prepare to receive the image. (receiver) 1 Under , select the icon for the location where you want to save the image, and then press the button. 2 Select "Receive", and then press the button.
Playing slideshows You can set the available images to be displayed in order. 1 Select the icon for a folder or media containing images, and then press the start button. The slideshow begins. The content displayed varies depending on the icon selected. US Description Memory Stick™ All images saved on a Memory Stick Duo™ are displayed in order. Digital Camera Images All images in the Digital Camera Images folder are displayed in order.
Using the control panel 1 Press the button during the slideshow. The control panel is displayed. Control panel 2 Select an icon, and then press the button. Clearing the control panel Press the button or the button.
Icon Description Play Starts the slideshow Pause Pauses the slideshow Stop Stops the slideshow Repeat Plays the slideshow repeatedly US Displaying slideshow options During a slideshow, select then press the button. Each time you press the from the control panel, and Photo 1 button, the option switches as follows: Image name and date of last update are displayed. Image name and date of last update are displayed, together with thumbnails of each image. The display is cleared.
System button operation Remote control operation Display the previous image Press the L button. Press the . button. Display the next image Press the R button. Press the > button. Display slideshow options Press the - button. Hint Some buttons cannot be operated while the control panel is displayed on the screen. In this case, press the button to clear the control panel.
Saving images on a Memory Stick Duo™ The following two methods can be used to save images on a Memory Stick Duo™. Taking photos using a digital still camera Hint US Photo When using a digital still camera that is compatible with the Memory Stick Duo™, photos can be displayed by inserting the Memory Stick Duo™ from the camera directly into the PSP® system. Photos on the Memory Stick Duo™ will be displayed in the system's "Digital Camera Images" folder.
* A Memory Stick Duo Adaptor (model number MSAC-M2: a Sony product sold separately) is required if the slot on the device you are using is able to handle only the standard-size Memory Stick™. Where to save image data Create a folder named "PSP" directly on the Memory Stick Duo™, and then create a folder named "PHOTO" in the "PSP" folder. Save image data in the "PHOTO" folder. The PSP® system will not recognize data items saved anywhere other than in this folder.
Network Using the Internet 1 Select from the home menu. US Network 2 Select an icon, and then press the button. Icons displayed under Network LocationFree™ Player You can watch TV or videos by using the wireless networking feature to connect to a LocationFree™ Base Station (a Sony product sold separately). For details, visit http://www.sony.com.mx/playstation Note that depending on where you live, the Base Station may not be available for purchase or use.
Connecting to the Internet You can connect to the Internet to view Web pages using the Internet browser. Note that you must be within range of a wireless access point (or hotspot) that allows connections to the Internet. The following agreement applies to the Internet Browser feature of the PSP® (PlayStation®Portable) system: Internet Browser User License Agreement Use of the PSP® Internet Browser requires wireless LAN access.
1 Check that you have completed network settings. To connect to the Internet, you must first enter settings and save a connection for infrastructure mode ( page 249). 2 Select under the button. from the home menu, and then press The Internet browser starts, and the menu is displayed. 3 Using the up button, select the address bar, and then press the button. US The on-screen keyboard is displayed.
Busy icon 5 Once the Web page is displayed, press the hide the menu. button to By pressing the button, you can switch between displaying and hiding the menu. From the menu bar, you can access various features and settings such as "Back" and "Close Page". Hints • If you try to open a Web page using the Internet browser when a connection to the Internet has not been established, the system will automatically try to connect to the Internet.
Settings Settings for the PSP® system You can adjust the settings for the PSP® system as well as settings for features, such as video, photo and network. 1 Select from the home menu. Icons for various settings are displayed. US Settings 2 Select an icon, and then press the button. A setting screen for the selected icon is displayed. For details, see the instructions for each setting ( pages 232-258).
Icons displayed under Settings 232 Network Update Provides access to updates for the system software ( page 256) USB Connection Allows for connection to a PC using a USB cable ( page 247) Video Settings Includes settings for UMD®VIDEO Menu Language, Audio Language and Subtitle Language ( page 233) Photo Settings Includes settings for adjusting the slideshow speed ( page 234) System Settings Includes settings for the System Language and Nickname, and provides an option to format Memory Stick Duo™
Video Settings You can set the UMD®VIDEO language or boost UMD®VIDEO volume. Notice Depending on the UMD®VIDEO, playback conditions may be set in advance by the software developer. In such cases, certain options may not be available, even if you follow the instructions in this manual. US Select a language for the UMD®VIDEO menu. Audio Language Select a language for the audio. Subtitle Language Select a language for subtitles. UMD®Video Volume Adjust the volume when UMD®VIDEO output level is low.
Photo Settings You can set the Slideshow Speed. Fast Displays images at a faster rate Normal Displays images at normal speed Slow Displays images at a slower rate The default setting for the menu item is underlined.
System Settings You can adjust the settings for and display information about the PSP® system, or format a Memory Stick Duo™. Nickname System Language US Settings The nickname you selected in the initial setup can be changed. Use the onscreen keyboard to enter a new nickname. For details on entering text, see "How to use the keyboard" ( page 259). Sets the language for system menus, such as the home menu.
Character Set You can set the character code to be applied to music and other types of files. Usually it is not necessary to adjust this setting. For File Names Sets the character code to be used in music and other file names For Text in Files Sets the character code for text in m3u and other types of files Hint The default setting is "Multilingual Latin 1 (850)". Battery Information You can display information about the system battery.
Format Memory Stick™ You can format Memory Stick Duo™ media using the system. Follow the onscreen instructions to perform this operation. Notice When you format, all software and data stored on the Memory Stick Duo™ will be deleted and cannot be recovered. Be careful not to accidentally erase important data. US You can restore settings to the values as set at the time of purchase. Follow the on-screen instructions to perform this operation.
Theme Settings You can change the theme for the PSP® system screen or display an image as wallpaper. Theme You can change the background color of the screen. Use the directional buttons to select a background color, and then press the button to complete the setting. Original Changes automatically to a preset color each month Color swatches Sets to the selected color The default setting for the menu item is underlined. Wallpaper You can select between displaying and not displaying wallpaper.
Date & Time Settings You can set the date and time, time zone and daylight saving time for the PSP® system. Use the directional buttons to select each item, and then press the button to complete the setting.
Power Save Settings You can conserve the power of the PSP® system by setting the system to automatically switch off the backlight or go into sleep mode. Backlight Auto-Off When the system remains idle for a certain period of time, it saves power by automatically turning off the backlight on the LCD screen. When the backlight is turned off, the screen goes blank. Off The backlight does not turn off automatically.
Auto Sleep You can set the system to conserve power by automatically entering sleep mode when it remains idle for a certain period of time. For details on clearing sleep mode, see "Clearing sleep mode" ( page 173). Off The system does not automatically go into sleep mode. 5 minutes Enters sleep mode after five minutes 10 minutes Enters sleep mode after 10 minutes 15 minutes Enters sleep mode after 15 minutes US Settings The default setting for the menu item is underlined.
Sound Settings You can turn off the key tone and limit the volume level. AVLS (Automatic Volume Limiter System) You can limit the maximum volume. This can help prevent sound escaping from the headphones as well as the possible danger resulting from being unable to hear what is going on around you when wearing headphones. Off Does not set a limit; allows for the volume to be adjusted manually On Sets a limit on the volume The default setting for the menu item is underlined.
Security Settings You can adjust settings related to PSP® system security features. Change Password US Settings Changes the 4-digit password.
Parental Control Level Some UMD® software have a preset parental control level based on the content. You can set the parental control level on the system to restrict the playback of a UMD® with a level that is higher than that set on the system. Parental Control Level The parental control level of the system can be either turned off or set to one of 11 different levels. Off Turns off parental control 11-1 Sets the level of content to be restricted.
UMD® parental control level 1 2 3 4 5 6 7 8 9 10 11 11 10 8 7 US 6 5 Settings System parental control level 9 4 3 2 1 :The UMD® can be viewed. :The UMD® cannot be viewed. Parental control levels on games Most game packaging shows a symbol to indicate the age group that is appropriate to play the game. The symbols correspond to the UMD® parental control level as shown below: Age group UMD® parental control level 2 3 4 5 9 10 As of October 2005.
Internet Browser Start Control You can restrict the ability to start the Internet browser. Off Allows the Internet browser to be started On Displays the password entry screen before starting the Internet browser The default setting for the menu item is underlined.
USB Connection You can transfer files from a PC to a Memory Stick Duo™ inserted in the PSP® system using a commercially available USB cable. Note that files that can be played are limited to file formats supported by the system. Hints • You can connect to a PC with an operating system that supports the USB mass storage class, such as Windows® XP or Mac OS X. • A USB cable compatible with the Mini-B (5-pin) type connector can be used with the system.
2 Select (USB Connection) under menu, and then press the button. from the home The Memory Stick Duo™ inserted in the system is detected by the PC. Notice Do not format a Memory Stick Duo™ on a PC, as it may no longer be recognized by the PSP® system.
Network Settings You can adjust the network settings to allow connection to a wireless local area network (WLAN). There are two WLAN modes. Warning Turn off the WLAN switch when in crowded places, such as in a crowded train. If a person nearby is using a pacemaker, it is possible that the radio waves could affect the pacemaker. US In this mode, you can communicate directly with other PSP® systems.
Required items The following items are generally required to set up the system to connect to a network and to perform a network update. • • • • • Subscription to an Internet service provider A network device, such as a DSL or cable modem A WLAN access point or a wireless broadband router A PC Settings for the access point (SSID, WEP key, WPA key, etc. as specified when the access point was configured) Hints • An access point is a device used to connect to a wireless network.
1 Select (Network Settings) under menu, and then press the button. 2 3 4 Select "Infrastructure Mode", and then press the from the home Select "New Connection", and then press the button. button. Enter a name for the network connection. When you press the button, an on-screen keyboard ( page 259) is displayed, allowing you to enter characters for the name. You can choose any name you like for the network connection.
Scan Searches for nearby access points and displays the SSIDs Enter Manually Allows the user to enter the SSID using the keyboard. Select this option if you know the SSID of the access point. When the settings have been completed, press the right button to go to the next screen. 6 Enter security information for the access point. You can set the options listed below. If you have questions about which items are needed for your network, contact the network administrator.
7 Select the address setting method. US Easy The following information is automatically set. - IP address settings: Automatic - DNS settings: Automatic - Proxy server: Do Not Use - Internet browser: Do Not Start Custom You can manually enter detailed setting information, such as is used with a static IP network. For details, refer to the instructions supplied with the network device or the information provided by your Internet service provider.
8 Check the settings. This screen displays the setting details. Press the left button to return to the previous screens to correct any of the settings, if necessary. When you have finished selecting your settings, press the right button to go to the next screen. 9 Save the connection. Press the button to save the connection on your system. 10 Test the connection. Before testing the connection, check that the PSP® system's WLAN switch is turned on. Select "Test Connection", and then press the button.
• If you want the browser to start automatically when a connection to an access point is established, in step 7 select "Custom", and then set the "Internet Browser" option to "Start". Use this setting in cases such as when playing an online game at a hotspot that requires a browser to log in. • Depending on the access point settings, you may need to enter the system's MAC address to connect to the network. The system's MAC address can be checked under "System Information" ( page 237).
Network Update You can update the system software for the PSP® system using the Network Update feature. For details on updates, see "PSP® updates" ( page 262). Network update process Connect to the network Connect using a wireless LAN access point. Turn on the WLAN switch on the left side of the PSP® system. Download (receive data) Download update data from the network. The update data is saved on the Memory Stick Duo™ inserted in the system.
Starting a network update You can connect to a network using an access point to download update data. Before starting, check that the battery is charged. You may not be able to start an update if the battery charge level is low. 1 2 3 Insert a Memory Stick Duo™ in the PSP® system. 4 Select a connection, and then press the Connect the AC adaptor to the system. US from the home button. The system will connect to the network using an access point.
Connect Connects to an access point Edit Changes the settings of a network connection saved on the system* Delete Deletes a network connection Information Displays information about a network connection * For detailed instructions, see "Creating a new network connection" ( 258 Network Update page 250).
How to use the keyboard You can use the on-screen keyboard for text entry such as when entering a nickname for the PSP® system or entering network setting information. Function keys Cursor Text entry field (displays characters as they are entered) US Settings Alphabet/symbol keys Text entry options Input mode display Control panel item list The keys that are displayed vary depending on the state of text entry.
Keyboard keys Function Displays a diagram showing the system buttons and their usage Switches between upper and lower case Enters a line break Switching input mode The number of input modes available varies depending on the language selected.
2 Select JKL5, and then press the until "L" is displayed. button several times 3 Select ABC2, and then press the until "A" is displayed. button several times 4 Select WXYZ9, and then press the until "Y" is displayed. 5 Select Enter, and then press the button several times button. The characters you entered will be confirmed. Select Enter again, and press the button to exit the keyboard.
Additional information PSP® updates By updating the PSP® system software, you can change or add features. 1 Obtain update data. 2 Use the update data to overwrite the PSP® system software. 3 The system software is updated and new features are added. You can perform an update in any of the following ways: • Network Update • Update using a PC • Update using a UMD® Select the update method that works best for you. For the latest information on updates, visit http://www.sony.com.
Update using a UMD® You can update using a UMD® that contains update data. Before starting, check that the battery is charged. You may not be able to start an update if the battery charge level is low. Notice 1 2 Connect the AC adaptor to the PSP® system. Insert a UMD® that contains update data. The update data icon and version number are displayed under home menu. 3 Select , and then press the in the US Additional information During an update: – Do not remove the UMD®. – Do not turn off the system.
Compatible media The media types listed below can be used on the PSP® system. Throughout this manual, the term "Memory Stick Duo™" is used to refer to all types of Memory Stick™ media in the table below. Type Logo UMD® Memory Stick Duo™ (not MagicGate™-compatible) MagicGate™ Memory Stick Duo™ *1 Memory Stick Duo™ (MagicGate™ compatible) *1 *2 Memory Stick PRO Duo™ *1 *2 *1 Compatible with MagicGate™ *2 Compatible with high-speed data transfer over a parallel interface.
Memory Stick™ There are two sizes of Memory Stick™: the standard size and the smaller size. The PSP® system is compatible with Memory Stick Duo™, the smaller sized type. The standard-size Memory Stick™ cannot be used with the system. Memory Stick Duo Adaptor (sold separately) US MagicGate™-compatible Memory Stick Duo™ Additional information The Memory Stick Duo Adaptor (MSAC-M2: a Sony product sold separately) allows a Memory Stick Duo™ to be used with devices that take a standard-size Memory Stick™.
Files that can be played You can play files of the following types on the PSP® system: Content category File types Video MP4 (video codecs for video files that conform to the Memory Stick™ video file format are MPEG-4 or AVC) Music -Memory Stick™ audio file format (ATRAC3™/ATRAC3plus™) -MP3 -MP4 (the audio codec for MP4 format audio files is MPEG-4 AAC) -WAV (Linear PCM) Photo -JPEG (conforms with DCF2.0/Exif2.
Specifications Design and specifications are subject to change without notice. PSP® (PlayStation®Portable) system LCD screen 4.3 inches (16:9) full-transparent type, TFT drive Approximately 16,770,000 colors displayed Stereo speakers Internal disc drive Read-only UMD® drive Interface DC IN 5V connector Charging terminals Headset connector IR port Hi-speed USB DC OUT connector Memory Stick Duo™ slot Wireless LAN (IEEE 802.11b) US Video -UMD®: H.
Battery duration See page 181. Maximum power consumption Approx. 6 W (when charging) External dimensions Approx. 170 × 74 × 23 mm / 6 ¾ × 3 × 1 in (width × height × depth) (excludes largest projection) Weight Approx. 280 g / 10 oz (including battery pack) Operating environment temperature 5°C - 35°C / 41°F - 95°F UMD® laser Wave length 655 - 665 nm Power Max. 0.28 mW Type Semiconductor, continuous Wireless networking Standard IEEE 802.
Battery pack Battery type Lithium-ion rechargeable battery Voltage DC 3.6 V Capacity 1800 mAh Contents See page 160. US x Memory Stick Duo™ Software Software developed by the NetBSD Foundation, Inc. and its contributors is used for the communication functions of this product. For more information, see http://www.scei.co.jp/psp-license/pspnet.txt Additional information • Compatible with MagicGate™ • Supports parallel data transfer (high-speed data transfer).
This product contains Internet browser software of ACCESS Co., Ltd. Copyright © 1996-2005 ACCESS Co., Ltd. is a trademark or registered trademark of ACCESS Co., Ltd. in Japan and other countries. Portions of the PSP® system software require the following notices (these statements do not affect the limited warranty offered on the PSP® system or UMD® software): This software is based in part on the work of the Independent JPEG Group.
Trademarks " ", "PlayStation", " " and "UMD" are registered trademarks of Sony Computer Entertainment Inc. " " and "XMB" are trademarks of Sony Corporation and Sony Computer Entertainment Inc. "SONY" and " " are registered trademarks of Sony Corporation. Also, "Memory Stick Duo", "Memory Stick PRO Duo", "Memory Stick", " ", "SonicStage", "MagicGate", "ATRAC3plus", "ATRAC3" and "LocationFree" are trademarks of the same company. ATOK is a registered trademark of JUSTSYSTEM CORP in Japan and other countries.
Troubleshooting Go through this section if you experience difficulty in operating the PSP® system. Should any problem persist, contact our technical support line: From and within the Mexico City area: 5002 9819 Within the Mexican Republic: 01 800 759 SONY or 01 800 759 7669. Power, battery and charging issues The power does not turn on. , Check that the battery is charged ( page 180). , Check that the battery pack is properly inserted ( page 166). The battery does not charge, or does not fully recharge.
The power indicator is on, but the LCD screen is not displayed. , Check that the LCD screen's backlight is not turned off. If it is, press any of the system buttons to turn on the backlight. The battery loses its charge even when the system is turned off. , Because battery power is used even when the system is turned off, it is recommended that you charge the battery frequently. US Screen The screen is dark and hard to see. , The screen may appear dark, depending on the angle of viewing.
Sound There is no sound. , Check that the volume is not set to zero. Try raising the volume ( pages 161, 165). , Check that the mute setting is not on. Press the sound button on the system front to clear the mute setting ( page 177). , If headphones are inserted, the system will not produce any sound through the speakers. , See also "There is no sound, or the sound quality from the headphones is poor." ( page 278). The volume does not turn up. , Check that the AVLS feature is turned off.
Upon starting a UMD®, a message recommending an update is displayed. , Update the system software ( page 262). Memory Stick Duo™ The Memory Stick Duo™ cannot be inserted. , Set the Memory Stick Duo™ in the proper direction when inserting ( page 175). US Additional information The system does not recognize the Memory Stick Duo™. , If the Memory Stick Duo™ was formatted by a PC, the system may not recognize it. After copying important data to your PC, re-format the Memory Stick Duo™ using the system.
Videos do not play. , Depending on the bit rate, certain videos may not be playable on the system. Check that the video files were converted at a bit rate of 768 kbps or lower. The system does not recognize a video data item. , Video data of types that are not compatible with the system will not be recognized ( page 266). , If the file or folder name on the Memory Stick Duo™ is changed, or if the file or folder is moved to another location using a PC, the system may not recognize it.
Photo Images do not display. , Depending on the image data size, certain images are not viewable. , If images are edited using a PC, they may not be viewable. A folder on a Memory Stick Duo™ cannot be deleted. , If there is non-image data in the folder, the folder cannot be deleted. Network US Additional information The system does not recognize the image data. , Check that the data is saved in the correct folder on the Memory Stick Duo™ ( page 226).
The Web page won't display properly. , Some Web pages may not display properly. Headphones with remote control There is no sound, or the sound quality from the headphones is poor. , Check that the headphones are fully inserted into the system ( page 169). , Check that the headset connector and the headphone plug are clean. If not, wipe them with a dry, soft cloth. See also "There is no sound." ( page 274). The remote control does not work.
The system does not function properly. , Static electricity and other similar occurrences may affect the system's operation. Remove the battery pack and AC adaptor, wait for about 30 seconds and then restart the system. When the buttons are pressed, there are no key tones. , Check that the Key Tone feature is turned on ( page 242). The PSP® system is not recognized by the PC when connected using a USB cable.
Warranty in Mexico In case of questions regarding the warranty, please refer to the warranty policy card included with this product.
http://www.sony.com.mx/playstation © 2005 Sony Computer Entertainment Inc. All rights reserved.