WARNING To reduce the risk of fire or electric shock, do not expose this apparatus to rain or moisture. To reduce the risk of fire, do not cover the ventilation opening of the apparatus with newspapers, tablecloths, curtains, etc. Do not place the naked flame sources such as lighted candles on the apparatus. To reduce the risk of fire or electric shock, do not expose this apparatus to dripping or splashing, and do not place objects filled with liquids, such as vases, on the apparatus.
Owner’s Record The model and serial numbers are located on the rear of the unit. Record these numbers in the space provided below. Refer to them whenever you call upon your Sony dealer regarding this product. Model No. Serial No. Important Safety Instructions 1) Read these instructions. 2) Keep these instructions. 3) Heed all warnings. 4) Follow all instructions. 5) Do not use this apparatus near water. 6) Clean only with dry cloth. 7) Do not block any ventilation openings.
The following FCC statement applies only to the version of this model manufactured for sale in the U.S.A. Other versions may not comply with FCC technical regulations. NOTE: This equipment has been tested and found to comply with the limits for a Class B digital device, pursuant to Part 15 of the FCC Rules. These limits are designed to provide reasonable protection against harmful interference in a residential installation.
About this manual The instructions in this manual are for models MHC-GZR33Di and LBTLCD7Di. Each model consists of the following components. MHC-GZR33Di Main unit: HCD-GZR33D Speaker system: SS-GZR77D (Front speakers) LBT-LCD7Di Main unit: HCD-LCD7Di Speaker system: SS-LCD7Di (Front speakers) Icons, such as , listed at the top of each explanation indicate what kind of media can be used with the function being explained. The Control Menu items may be different depending on the disc.
Table of Contents About this manual................................ 5 Playable discs......................................... 8 Guide to parts and controls............11 iPod Playing the iPod...................................67 Getting Started USB Device Hooking up the system securely...................................................23 Hooking up the TV.............................27 Setting the LCD....................................31 Setting the clock.................................
Additional Information Troubleshooting............................... 107 Precautions......................................... 124 Specifications.................................... 126 Compatible devices with this system.................................................. 130 Compatible iPod models with this system.................................................. 132 Guide to the Control Menu display.................................................. 133 Playback priority of file types......
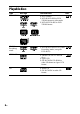
Playable discs Type Disc logo DVD VIDEO GB Characteristics DVD VIDEO DVD-R/DVD-RW in DVD VIDEO format or video mode DVD+R/DVD+RW in DVD VIDEO format VR (Video Recording) mode DVD-R/DVD-RW in VR (Video Recording) mode (except for DVD-R DL) VIDEO CD VIDEO CD (Ver. 1.1 and 2.
Type DATA CD DATA DVD Disc logo Characteristics Icon CD-R/CD-RW/CD-ROM in DATA CD format, containing MP3 files, JPEG image files, DivX video files and MPEG4 video files, and conforming to ISO 9660 Level 1/Level 2, or Joliet (extended format) DVD-ROM/DVD-R/DVD-RW/ DVD+R/DVD+RW in DATA DVD format, containing MP3 files, JPEG image files, DivX video files and MPEG4 video files, and conforming to UDF (Universal Disk Format) MP3 files: MP3 (MPEG 1 Audio Layer 3) is a standard format defined by ISO/MPE
Discs that cannot be played CD-ROMs recorded in PHOTO CD format DATA CDs recorded in MP3 PRO format Data part of CD-Extras1) Data part of Mixed CDs2) Super Audio CDs DVD Audio discs DVD-RAMs CPRM compatible DVD-R/RW recorded in Copy-once programs3) Discs of non-standard shape (for example, heart, square, star) Discs that have adhesive tape, paper, or sticker attached to them Rental or used discs with attached seals where the glue extends beyond the seal Discs that have labels printed
This manual mainly explains operations using the remote, but the same operations can also be performed using the buttons on the unit having the same or similar names.
(on/standby) button (page 76, 80, 84, 98) DVD TOP MENU button (page 37) Press to turn on or off the system. STANDBY indicator (page 107) Lights up when the system is turned off. Display iPod Dock (page 26) Place an iPod into the iPod Dock to listen to audio contents stored in the iPod. LCD DISPLAY ON/OFF button DVD/TUNER MENU button (page 40, 49, 53, 65, 82) Press to turn on or off the menu items on the TV screen. Press to preset the radio station.
Press to delete a pre-programmed track or file. Press to erase files or folders from the connected optional USB device. RETURN button Press to return to the previous menu on the TV screen. * (play) button (page 26, 36, 37, 41, 42, 45, 47, 48, 49, 50, 53, 58, 82, 83, 87) Press to start playback. * (pause) button (page 28, 37, 68, 71) Press to pause playback. / (rewind/fast forward) button (page 37, 68, 71) Press to find a point in a track, file, chapter or video file.
OPERATION DIAL (page 37, 65) Turn to select a track, chapter or video file. Turn to select the preset station. DISC 1 DISC 3* buttons (page 38, 76) Press to select a disc. Press to switch to the “DVD” function from other function. Lights up when a disc is in the disc tray, and flashes when the disc tray is selected. Disc tray MIC 2 jack (page 92) Connect a microphone. MIC 2 LEVEL (page 92) Turn to adjust the microphone volume. ECHO LEVEL (page 93) Turn to adjust the echo level.
iPod/OPR* button (page 68, 69) DISC SKIP/EX-CHANGE button (page 36) Press to select the “iPod” function. Press to switch the operating mode to iPod Display mode or Main Display mode. Press to select a disc. Press to exchange a disc while playing. GROOVE button (page 89) Press to reinforce the bass. PRESET EQ button (page 89) Press to select the sound effect. EQ BAND/MEMORY button (page 90) Press to select the frequency band when adjusting the equalizer.
Remote DISC SKIP button (page 38, 76) Press to select a disc. FUNCTION +/ button (page 28, 29, 33, 36, 64, 67, 68, 69, 76, 78, 80, 81, 92, 106) Press to select the function. PICTURE NAVI button (page 50, 83) Press to display the thumbnail pictures. REPEAT/FM MODE button (page 48) Press to listen to a disc, a USB device, a single track or file repeatedly. Press to select FM reception mode (monaural or stereo).
SUBTITLE button (page 38) VOLUME +/2) button Press to switch the language of the subtitle (DVD VIDEO only). Press to adjust the volume. D. TUNING button (page 64) Press to adjust the TV volume. Press to switch to the direct tuning mode. MEMORY SELECT button (page 87, 88) Press to select the playback source or transferring destination on a Sony Ericsson mobile phone. ANGLE button (page 38) Press to change the angle (DVD VIDEO with multi-angles only).
2) (play) button (page 36, 37, 41, 42, 45, 47, 48, 49, 50, 53, 58, 68, 71, 82, 83, 87) PRESET button (page 65) Press to start playback. / (rewind/fast forward) button (page 37, 68, 71) (go backward) button (page 34, 37, 42, 68, 71, 100) Press to select a track, chapter or video file. Press to find a point in a track, file, chapter or video file. TV CH 1) button (page 30) SLOW/SLOW (page 37) button Press to watch the slow‑motion play.
ENTER button (page 29, 30, 32, 33, 34, 41, 42, 43, 44, 45, 46, 47, 49, 50, 52, 53, 54, 55, 56, 57, 58, 64, 65, 68, 70, 71, 76, 77, 78, 80, 82, 83, 85, 86, 87, 90, 94, 96, 97, 98, 100) Numeric buttons2) (page 30, 37, 41, 42, 43, 44, 56, 57, 58, 64, 65) Press to enter the settings. /// buttons (page 37, 50, 77, 78, 83) Press to select the menu items. Press to select a track, chapter or video file. Press to enter a password. 10/01) button Press to enter a double digit number.
DISPLAY button (page 28, 32, 99, 100) Press to display the disc information or clock in the front panel display. TIME/TEXT button (page 100, 101, 102) Press to change the information appearing in the front panel display or on the TV screen. TV INPUT1) button Press to switch the input sources. SLEEP button (page 35, 97) Press to set the Sleep Timer. TIMER MENU button (page 32, 97, 98) Press to set the clock and the timers.
Indicators TIMER indicator (page 97) USB MEMORY indicator (page 75) Lights up when the Play Timer or Rec Timer is set, and flashes when the Sleep Timer is set. Lights up when the USB device is recognized. Guide to parts and controls Dolby D (Dolby Digital) indicator (page 140) DTS indicator (page 140) Indicates the current surround format.
Display The front panel display for MHC-GZR33Di and LBT-LCD7Di are liquid crystal displays (LCD). You can confirm contents and the Control Menu displayed on the TV screen in the LCD. To set the LCD, see “Setting the LCD” (page 31). Displays the text information. 22GB You can confirm contents and the Control Menu displayed on the TV screen. PICTURE MODE and WIDE MODE menus are displayed when setting the LCD.
Getting Started To front speaker (Right) AM loop antenna FM lead antenna (Extend it horizontally.
FM/AM antennas Find a location and an orientation that provide good reception, and then set up the antenna. Keep the antennas away from the speaker cords, the power cord and the USB cable to avoid picking up noise. Speakers Insert only the stripped portion of the speaker cords. The speaker cords are color-coded with their respective speaker terminals. The type of speakers supplied varies according to the model you purchased (see “About this manual” (page 5)).
Attaching the speaker foot Front speakers (Left (4)/Right (4)) Slide and remove the battery compartment lid, and insert the two supplied R6 (size AA) batteries, side first, matching the polarities shown below. Getting Started Attach the supplied speaker foot at each corner on the bottom of the speakers to prevent them from slipping. Inserting batteries Note If you do not use the remote for a long period of time, remove the batteries to avoid possible damage from battery leakage and corrosion.
When carrying this system Perform the following procedure to protect the DVD mechanism. Use buttons on the unit for the operation. 1 2 3 4 Press / to turn on the system, then press DVD. Using the iPod Insert an iPod Dock Adapter into the Dock before use. The iPod Dock Adapter is not supplied with the system. Use an iPod Dock Adapter supplied with your iPod. For details on the iPod Dock Adapter, refer to the user’s guide of your iPod.
Hooking up the TV Video deck Unit Do not connect directly When connecting to the COMPONENT VIDEO OUT jack For higher quality video images, use the optional component video cords to connect the COMPONENT VIDEO input jacks on your TV to the COMPONENT VIDEO OUT jacks of this unit (page 105). If your TV is compatible with progressive format signals, use this connection and set “PROGRESSIVE (COMPONENT OUT)” to “ON” (page 30).
Changing the color system (Australian model only) Set the color system of the DVD and your iPod to PAL or NTSC depending on the color system of your TV. The default setting for color system is different depending on the area. Each time you perform the procedure below, the color system changes as follows: NTSC PAL 1 Press / to turn on the system. 2 Select the function. For DVD color system: Press FUNCTION +/ repeatedly to select “DVD” (or press DVD on the unit).
Changing the format of the video signal output from COMPONENT VIDEO OUT jacks 1 2 Press FUNCTION +/ repeatedly to select “DVD” (or press DVD on the unit). Press or repeatedly to select “CUSTOM,” then press ENTER. The Setup Menu appears. 5 Press or repeatedly to select “VIDEO SETUP,” then press ENTER. The options for “VIDEO SETUP” appear. 6 Press or repeatedly to select “PROGRESSIVE (COMPONENT OUT),” then press ENTER.
7 Press or repeatedly to select the desired setting, then press ENTER. The default setting is underlined. OFF: Outputs interlace signals. Select this setting when: your TV does not accept progressive signals. your TV is connected to jacks other than the COMPONENT VIDEO OUT jacks. ON: Outputs progressive signals. Select this setting when: your TV accepts progressive signals. your TV is connected to the COMPONENT VIDEO OUT jacks. When you select “ON,” the confirmation display appears.
When using a TV Operating a Sony TV You can use the following buttons to operate a Sony TV. These buttons have been marked in yellow. To Press Turn the TV on or off Switch the TV’s input source between the TV and other input sources Select the TV channels TV / while holding down TV. TV INPUT while holding down TV. TV CH +/ or numeric buttons* while holding down TV. Adjust the TV VOL +/ while volume of the TV holding down TV. speaker(s) You can make adjustments to pictures displayed in the LCD.
Setting the LCD The default setting is underlined. PICTURE MODE Allows you to select options best suited for videos and pictures, respectively. STANDARD: For standard pictures. Recommended for home entertainment. VIVID: Enhances picture contrast and sharpness. CINEMA: For viewing film-based content. PHOTO: For viewing photographs. WIDE MODE FULL: Select this when you view pictures in a 16:9-format. This setting displays pictures in full screen mode.
Performing “QUICK” setup 4 Press ENTER without loading a disc. “LANGUAGE SETUP” appears on the TV screen. Getting Started Before using the system, you can make the minimum basic adjustments in “QUICK” setup. If you do not want to perform “QUICK” setup, press CLEAR in step 3. The guide message will disappear from the TV screen. 1 Turn on your TV and select the video input*. * This step is not required when using the LCD for performing “QUICK” setup.
6 Press or repeatedly to select the setting that matches your TV type. If you have a 4:3 standard TV: Select “4:3 LETTER BOX” or “4:3 PAN SCAN” (page 60) If you have a wide-screen TV or a 4:3 standard TV with wide-screen mode: Select “16:9” (page 60) 7 Press ENTER. The setting is selected and “QUICK SETUP is complete.” appears on the TV screen. The system is ready for playback. If you want to change each setting individually, see “Using the Setup Menu” (page 58).
Operating the “THEATRE SYNC” function Using the “THEATRE SYNC” function Preparing to use the “THEATRE SYNC” function Register the TV’s input source connected to this system. To select the TV’s input Press the following buttons while holding down SLEEP.
Disc 3 Load a disc with the label side facing up on the disc tray. To load additional discs, press DISC SKIP/EX-CHANGE on the unit to rotate the disc tray. Playing a disc Depending on the DVD VIDEO or VIDEO CD, some operations may be different or restricted. Refer to the operating instructions supplied with the disc. DivX and MPEG4 video files can only be played back on MHC-GZR33Di.
Other operations To Stop playback Continued Disc Do this Press . To resume playback where you stopped the disc, press (or on the unit). To play back from the beginning of the disc, press twice, then press (or on the unit). Pause playback Press 1). Press again or press (or on the unit) to resume playback. Select a track, Press or audio file, repeatedly (or turn chapter or OPERATION DIAL video file2) on the unit clockwise or counterclockwise) during playback.
To Replay the previous scene (Instant Replay)10) Briefly fast forward the current scene (Instant Advance)10) Change the angle11) Do this Press REPLAY during playback. Press ADVANCE during playback. Press ANGLE repeatedly during playback. Each time you press ANGLE, the angle changes. Display the Press SUBTITLE subtitle repeatedly during playback. Each time you press SUBTITLE, the subtitle language changes12) or turns off13).
Notes On Multi-disc Resume (DVD VIDEO and VIDEO CD only) This system can store the point where you stopped the playback of the disc for up to 10 discs and resumes playback when you insert the same disc again. If you store a playback resume point for the 11th disc, the playback resume point for the first disc will be deleted. The default setting is “ON.” To turn off this function, set “MULTI-DISC RESUME” in “SYSTEM SETUP” to “OFF” (page 63).
Changing the language/sound Press AUDIO repeatedly during playback to select the desired audio format or mode. The default setting is underlined. When playing a DVD VIDEO: Depending on the DVD VIDEO, the option of language and audio format varies. When a 4-digit number is displayed, the digits represent a language code (see “Language code list” (page 138)). When the same language is displayed two or more times, the DVD VIDEO is recorded in multiple audio formats.
Note Playing VIDEO CDs with PBC functions (PBC Playback) (Version 2.0) You can use the PBC (Playback Control) menus included on the VIDEO CDs (Version 2.0 only) on your TV screen to enjoy the disc’s interactive software. The menu format and structure may differ depending on each disc. 1 While the system is playing a Super VCD on which the audio track 2 is not recorded, no sound will come out when you select “2: STEREO,” “2: 1/L” or “2: 2/R.
4 Continue playback according to the instructions on the menus. Refer to the operating instructions supplied with the VIDEO CD, as the operating procedure may differ depending on the VIDEO CD. Note PBC playback is canceled when Shuffle Play, Program Play or Repeat Play is activated. Selecting “ORIGINAL” or “PLAY LIST” This function is only available for DVDRs/-RWs in VR mode with a playlist created.
Searching for items on a disc by the assigned numbers 1 Press DISPLAY. (If “MEDIA” is set to “MUSIC/PHOTO,” press DISPLAY twice.) 4 Press ENTER. “** (**)” change to “– – (**).” Press or repeatedly or the numeric buttons to select the title, track, folder or file, etc. If you make a mistake, press CLEAR to cancel the number. 5 Press ENTER. Disc You can search by different information recorded on a disc, such as title, track, scene, file, and folder.
To search for a particular point using the time code (Time Search) (DVD VIDEO and DVD-R/-RW in VR mode only) 1 Press DISPLAY. 2 Press or repeatedly to select (TIME). “T **:**:**” (elapsed playing time of the current title) is selected. 3 Press ENTER. “T **:**:**” changes to “T--:--:--.” 4 Input the time code using the numeric buttons, then press ENTER. For example, to find the scene at 2 hours, 10 minutes, and 20 seconds after the beginning, enter “21020.
4 Press . The cursor moves to the track list “T” (in this case, “01”). 7 Press (or on the unit). Program Play starts. When the Program Play ends, you can restart the same program by pressing (or on the unit). 5 Select the track you want to program. For example, select track “02.” Press or repeatedly to select “02” under “T,” then press ENTER. Selected track Disc To change a programmed step: Press or repeatedly to select the programmed step number you want to change.
Notes When Program Play is activated, the “REPEAT” setting is automatically changed to “ON” if the current setting is “ALL DISCS,” “ONE DISC” or “TRACK.” You cannot perform Program Play with VIDEO CDs during PBC playback. Tip The Program Play is canceled and the program list is cleared when you open the disc tray. you change the disc. you turn off the system. you change the function. Playing in random order (Shuffle Play) You can play back the tracks on the current disc in random order.
When playing a DATA CD/DVD (except for video files): ON (MUSIC): all MP3 files in the selected folder on the current disc are played back randomly. When no folder is selected, the first folder is played back randomly. Press ENTER. Press (or on the unit). Shuffle Play starts. To cancel Shuffle Play, press CLEAR or select “OFF” in step 3. Notes You cannot perform Shuffle Play with VIDEO CDs during PBC playback. The same song may be played back repeatedly for MP3 files.
When playing a VIDEO CD or AUDIO CD: OFF: does not play back repeatedly. ALL DISCS: repeats all discs. ONE DISC: repeats all the tracks on the current disc. TRACK: repeats the current track. When playing a DATA CD or DATA DVD: OFF: does not play back repeatedly. ALL DISCS: repeats all discs. ONE DISC: repeats all the folders on the current disc. FOLDER: repeats the current folder. TRACK1): repeats the current audio file. FILE2): repeats the current file. 1) 2) MP3 files only.
Selecting a folder/file using the on-screen display 4 DivX and MPEG4 video files can only be played back on MHC-GZR33Di. 2 3 Load a disc on the disc tray. “FOLDER LIST” appears on the TV screen. Press DISPLAY. The Control Menu appears on the TV screen. Press or repeatedly to select (MEDIA), then press ENTER. The options for “MEDIA” appear on the TV screen.
Playing an image file: Playing a video file: 1 Press PICTURE NAVI. 1 Press ENTER. Thumbnail picture for the first 16 JPEG image files in the selected folder is displayed. “FILE LIST” appears. 2 Press or repeatedly to select If there are more than 16 image files in the selected folder, the scroll bar appears at the right. 2 Press /// to select the image you want to view, then press (or on the unit). The slide show starts from the selected image file. To stop playback, press .
Other operations Return to “FOLDER LIST” when “TRACK LIST,” or “FILE LIST” is displayed. Play back the next folder of JPEG image files Rotate the image by 90 degrees Do this Press or repeatedly. Press repeatedly until the last file of the current folder, then press once. To select the previous folder, select the folder from “FOLDER LIST.” Press RETURN. Press repeatedly until the last file of the current folder, then press once.
The system may not play certain types of JPEG image files (ex. a JPEG image file that is less than 8 (width) × 8 (height)). When you press or to select the next or previous image, the image will return to its original view even if you have rotated the image previously. The slide show stops when you press or . The system may not play back a video file when the file has been combined from two or more video files.
3 Press or repeatedly to select “MUSIC/PHOTO,” then press ENTER. When “MUSIC/PHOTO” has already been selected, press DVD/TUNER MENU. “FOLDER LIST” appears on the TV screen. desired folder, then press (or on the unit). The slide show with sound starts from the selected folder. To stop playback, press . To cancel the slide show with sound, select “MUSIC” or “PHOTO” in step 3. Note If you play back a large data size of MP3 files and JPEG image files at the same time, the sound may skip.
To select a transition effect for image files in the slide show (JPEG image files only) 1 Press DISPLAY. (If “MEDIA” is set to “MUSIC/PHOTO”, press DISPLAY twice.) The Control Menu appears on the TV screen. You can select playback priority when mixed media (MP3 files, JPEG image files or video files) are in the disc. 1 Press DISPLAY. The Control Menu appears on the TV screen.
Adjusting the delay between the picture and sound (“A/V SYNC”) 1 2 Press Depending on the input stream, this function may not be effective. Disc When the sound does not synchronize with the pictures on the screen, you can adjust the delay between the picture and sound. “A/V SYNC” does not work for MP3 files and JPEG image files in DATA CD/DVD. Note DISPLAY. The Control Menu appears on the TV screen. Press or repeatedly to select (A/V SYNC), then press ENTER.
Restricting playback of the disc (PARENTAL CONTROL) You can limit the playback of some DVD VIDEOs according to a predetermined level such as the age of the users. When a limited scene is played back, that scene may be skipped or replaced with different scenes. 1 Press DISPLAY when playback is stopped. The Control Menu appears on the TV screen. 2 Press or repeatedly to select (SETUP), then press ENTER. The options for “SETUP” appear on the TV screen.
6 Enter or re-enter your 4-digit password using the numeric buttons, then press ENTER. The display for setting the playback limitation level appears on the TV screen. 9 Press or repeatedly to select “LEVEL,” then press ENTER. The options for “LEVEL” appear on the TV screen. 10 Press or repeatedly to select “PARENTAL CONTROL” setting is completed. The lower the value, the stricter the limitation.
If you forget your password Remove the disc and repeat steps 1 to 5 of “Restricting playback of the disc (PARENTAL CONTROL)” (page 56). When you are asked to enter your password, enter “199703” using the numeric buttons, then press ENTER. The display will ask you to enter a new 4-digit password. After you enter a new 4-digit password, reload the disc and press (or on the unit). When the display for entering your password appears, enter your new password.
4 Press or repeatedly to select the setup item from the displayed list, then press ENTER. The setup item is selected. 6 Press or repeatedly to select the desired setting, then press ENTER. The setting is selected and setup is completed. Disc Setup items: : LANGUAGE SETUP : VIDEO SETUP : AUDIO SETUP : SYSTEM SETUP : SPEAKER SETUP Selected setting Example: “VIDEO SETUP” Selected item Setting the language “LANGUAGE SETUP” Set various languages for the on-screen display or sound track.
AUDIO* (DVD VIDEO only) Switches the language of the sound track. When you select “ORIGINAL,” the language given priority in the disc is selected. SUBTITLE* (DVD VIDEO only) Switches the language of the subtitle. When you select “AUDIO FOLLOW,” the language for the subtitles changes according to the language you selected for the sound track. Setting the TV screen “VIDEO SETUP” Choose the settings according to the TV you connected. The default setting is underlined.
COLOR SYSTEM (VIDEO CD) (Australian model only) Select the output video signal when you play back a VIDEO CD. AUTO: Outputs the video signal according to the color system of the disc, either PAL or NTSC. PAL: Changes the video signal of an NTSC disc and output it in PAL system. NTSC: Changes the video signal of a PAL disc and output it in NTSC system. BLACK LEVEL (LBT-LCD7Di only) Selects the black level (setup level) for the video signals output from the jacks other than COMPONENT VIDEO OUT.
Setting the audio options “AUDIO SETUP” Configure audio related settings. The default setting is underlined. AUDIO DRC1) (Dynamic Range Compression) (DVD VIDEO only) OFF: No compression of dynamic range. STANDARD: Reproduces the sound track with the kind of dynamic range that the recording engineer intended. Useful for watching movies at low volume late at night. MAX: Narrows the dynamic range fully.
DivX (MHC-GZR33Di only) Displays the registration code for this system. For more information, go to http://www. divx.com on the Internet. RESET* Returns “SETUP” settings to the default settings. For details, see “To return the “SETUP” settings to the default settings*, perform reset as follows:” (page 120). * Except for “PARENTAL CONTROL” settings CONNECTION FRONT: YES SUBWOOFER2): YES: Select this if you have connected the subwoofer. NONE: Select this if the subwoofer is not connected.
Tuner Listening to the radio You can listen to a radio station either by selecting a preset station, or by manually tuning in the station. 1 2 Press FUNCTION +/ (or press TUNER/BAND on the unit) repeatedly to select “FM” or “AM.” Perform tuning. For automatic scanning Press and hold TUNING +/ until the frequency indication changes and then release. “AUTO” appears on the TV screen. Scanning stops automatically when a station is tuned in and “TUNED” appears on the TV screen.
Presetting a radio station 1 2 3 6 You can preset up to 20 FM stations and 10 AM stations. To cancel presetting, press DVD/ TUNER MENU. Tune in the desired station. Press DVD/TUNER MENU. “Memory?” flashes in the display. Press ENTER or . 7 To call up a preset number, press PRESET +/ repeatedly (or turn OPERATION DIAL on the unit clockwise or counterclockwise) to select the desired preset number. Tuner A preset number flashes in the display. The stations are stored from preset number 1.
Using the Radio Data System (RDS) (European model only) Radio Data System (RDS) is a broadcasting service that allows radio stations to send additional information along with the regular program signal. This tuner offers convenient RDS features such as station name. RDS is available only on FM stations*. * Not all FM stations provide RDS service, nor do they provide the same type of services.
iPod Place an iPod into the iPod Dock on the unit. Playing the iPod iPod Display mode (page 68): You can operate the system with buttons on the connected iPod, in addition to buttons on the unit and the remote. In this mode, the iPod display can be viewed on iPod itself. Main Display mode (page 69): You can view the iPod display on the TV screen. In this mode, you cannot use control buttons on the connected iPod. iPod You can listen to music stored in your iPod.
Notes When placing or removing the iPod, handle the iPod in the same angle as that of the iPod connector on the unit and do not twist or sway the iPod to prevent connector damage. Do not carry the unit with an iPod set on the connector. Doing so may cause a malfunction. When placing or removing the iPod, brace the unit with one hand and take care not to press the controls of the iPod by mistake. Before disconnecting the iPod, pause playback. To change the volume level, use VOLUME +/.
Notes Depending on the connected iPod, operations may differ. Before enjoying video, adjust the video settings on the iPod to the appropriate settings according to your situation. It may take time to start playback depending on the contents. The volume cannot be adjusted using the volume control on the iPod. Hold down / to fast-forward (fastrewind) while playing video if / does not function. Using the Main Display mode 1 2 Select the iPod function. Press FUNCTION +/ repeatedly.
To enjoy music and video while browsing information on the TV screen Example: Music playlists 1 Select [Music] from [Main Menu], then press ENTER. The [Music] menu display appears. 2 Select [Playlists] from [Music] menu, then press ENTER. The [Playlists] menu display appears. 3 Select the desired playlist, then press ENTER. Files in the selected playlist appear. 4 Select the desired file, then press ENTER. Playback of the selected file starts.
Basic operations Notes Press . /. /. You can scroll up or down the iPod menus much like the Click Wheel operations of the iPod or the drag up-or-down operations of the iPod touch. Select a track or chapter of audiobook/ podcast /. To fastforward or fast-rewind, hold down the button. Choose the selected item /ENTER. You can choose the selected item much like the center button on the iPod or the touch operation of the iPod touch.
Screen Saver The screen saver image appears on the TV after about 15 minutes of inactivity. Press any button to cancel the screen saver. [ON] [OFF] Turns on the screen saver. Turns off the screen saver. Shuffle Plays the songs/albums in random order. The setting is determined by the iPod settings. [OFF] [Songs] [Albums] Does not play in random order. Plays songs in random order. Plays albums in random order. Note The display does not switch to the screen saver image while playing video.
Audiobooks Changes the Audiobook playback speed. The setting is determined by the iPod settings. [Slower] [Normal] [Faster] Plays Audiobook slowly. Plays Audiobook at normal speed. Plays Audiobook rapidly.
USB Device Before using the USB device with this system See “Compatible devices with this system” (page 130) for a list of USB devices that can be connected to this system. Notes When USB cable connection is necessary, connect the USB cable supplied with the USB device to be connected. See the operating instructions supplied with the USB device to be connected for details on the operation method. It may take about 10 seconds before “Reading.
Transferring music from a disc to a USB device 1 Connect the USB device to the (USB) port. Insert a USB device Note Do not use the USB devices other than those listed in “Compatible devices with this system” (page 130). Operation of models not listed is not guaranteed. Operation may not always be ensured even when using compatible USB devices. Continued USB Device You can connect an optional USB device to the (USB) port on the unit and transfer music from a disc to the USB device.
2 3 Press FUNCTION +/ repeatedly to select “DVD” (or press DVD on the unit), then load the disc you want to transfer. 4 Start transferring. Press ENTER. Transferring starts. When the transfer is completed, access to the USB device and the disc player stops automatically. If you have loaded the disc, press DISC SKIP repeatedly (or DISC 1 DISC 3 on the unit) to select the disc. When the system automatically starts playback, press twice to cancel resume playback.
2 Press or repeatedly to select (USB TRANSFER), then press ENTER. The options for “USB TRANSFER” appear on the TV screen. 3 Press or repeatedly to select the desired option, then press ENTER. 4 Select the tracks you want to transfer. For AUDIO CD: Press or repeatedly to select the track, then press ENTER. The tracks are marked in the order that you select. To cancel the selection, press ENTER again. Remaining space of the USB device For AUDIO CD: TRACK: The tracks on the AUDIO CD appear.
For DATA CD/DVD: Press or repeatedly to select the MP3 files or folders, then press ENTER. The MP3 files or folders are marked. To cancel the selection, press ENTER again. Remaining space of the USB device To return to the previous display Press RETURN. To erase audio files or folders from the USB device You can erase audio files or folders on the USB device. 1 Connect the USB device to the (USB) port. 2 Press FUNCTION +/ repeatedly to select “USB” (or press USB on the unit).
Folder and file generation rules When first transferring music to the USB device, a “MUSIC” folder is created directly below the “ROOT” folder. Folders and files are generated within this “MUSIC” folder as follows. USB TRANSFER1) Music source MP3 CD-DA Folder name File name Same as the music source2) “FLDR001”3) “TRACK001”3) REC1 Folder name MP3 “REC1-MP3”4) Same as the music source2) CD-DA “REC1-CD”4) “TRACK001”3) 1) 2) 3) 4) File name Except when resuming playback.
Recording analog audio to a USB device Start playing the desired source to record, then press ENTER. The (USB) indicator lights up in red and recording starts. You can record the sound from analog audio sources. The sound is recorded as 128 kbps MP3 file. To stop recording 1 Connect the USB device to the (USB) port. To remove the USB device Press FUNCTION +/ repeatedly to select the desired source. 2 Press to turn off the system. 2 TUNER FM/AM: To record from this system’s tuner.
Folder and file generation rules When first recording the analog audio to the USB device, a “MUSIC” folder is created directly below the “ROOT” folder. Folders and files are generated within this “MUSIC” folder as follows. Music source Folder name File name Tuner “FM001”* or “AM001”* “TRACK001”* VIDEO/ SAT AUDIO IN L/R “VIDEO001”* “TRACK001”* or “SAT001”* Note Recording stops automatically when: you change the function. you change the band. you turn off the system.
3 Press DISPLAY when playback is stopped. The Control Menu appears on the TV screen. 4 Press or repeatedly to select (MEDIA), then press ENTER. The options for “MEDIA” appear on the TV screen. MUSIC: for playing audio files VIDEO: for playing DivX video files or MPEG4 video files PHOTO: for playing JPEG image files 5 Press or repeatedly to select the desired option, then press ENTER. When the desired option has already been selected, press DVD/TUNER MENU.
Playing an image file: Playing a video file: 1 Press PICTURE NAVI. 1 Press ENTER. Thumbnail picture for the first 16 JPEG image files in the selected folder is displayed. “FILE LIST” appears. 2 Press or repeatedly to select 2 Press /// to select the the desired video file, then press ENTER. The system starts playing the selected video files. To stop playback, press . image you want to view, then press (or on the unit). The slide show starts from the selected image file.
Other operations To remove the USB device To Display the next or previous page of “TRACK LIST,” “FOLDER LIST” or “FILE LIST” Playback the next folder of audio files or video files 1 Press to stop playback. Return to “FOLDER LIST” when “TRACK LIST,” or “FILE LIST” is displayed. Playback the next folder of JPEG image files Rotate the image by 90 degrees 84GB Do this Press or repeatedly. 2 Press to turn off the system. 3 Remove the USB device.
To specify the slide show speed (JPEG image files only) 1 Press DISPLAY repeatedly until the Control Menu for JPEG image files appears on the TV screen. 2 Press or repeatedly to select (INTERVAL), then press ENTER. The options for “INTERVAL” appear on the TV screen. 3 Press or repeatedly to select the 4 Press ENTER. The selected setting takes effect.
Playing in random order (Shuffle Play) You can play back the files on the USB device in random order. Each time you perform Shuffle Play, the playing order may differ. 1 2 Press 4 86GB Shuffle Play is canceled when: you remove the USB device. you turn off the system. you change the function. you set “MEDIA” to “PHOTO” when playback is stopped. The same song may be played back repeatedly for audio files. DISPLAY. The Control Menu appears on the TV screen.
3 Press or repeatedly to select the desired setting. MEMORY: repeats all the folders on the USB device. FOLDER: repeats the current folder. TRACK*: repeats the current file. Repeat Play starts. To cancel Repeat Play, press CLEAR or select “OFF” in step 3. To select the playback source in the “USB” function When Shuffle Play is activated: ON: repeats the Shuffle Play. Press ENTER. Notes “REP” lights up in the display when Repeat Play is set to “MEMORY,” “FOLDER” or “ON.
To select the transferring destination in the “DVD” function 1 Load a CD, DATA CD or DATA DVD. 2 Press MEMORY SELECT repeatedly. You can select the internal memory or Memory Stick of the mobile phone. Notes You cannot select the playback source or transferring destination during playback or transferring. Stop playback or transferring, and then select the playback source or transferring destination. You can check the selected memory number on the TV screen.
Sound Adjustment Adjusting the sound To Reinforce the sound Select the preset effect 1) The volume switches to power mode and the equalizer curve changes. The last selected preset effect appears when PRESET EQ on the unit is pressed once.
To adjust the graphic equalizer and store the user equalizer setting You can adjust the sound by raising or lowering the level of specific frequency band, then store up to three user equalizer settings, in the memory. 1 Press EQ BAND repeatedly to select a frequency band or surround effect. 2 Press / to adjust the level or select surround effect you want. 5 Press / to select a user equalizer number (1 – 3) for the equalizer setting (“MEMORY EQ-1” through “MEMORY EQ-3”) you want to store.
Selecting the sound field You can take advantage of the surround sound simply by selecting one of the sound fields. They bring the exciting and powerful sound of movie theaters into your home. Press SOUND FIELD. The last selected sound field appears in the display, and then you can select the desired sound field. When the headphones are not connected: VIRTUAL A* Creates 3 sets of virtual surround speakers from the sound of the front speakers.
When the headphones are connected: HP 2CH The normal sound field for headphones. HP SURR The sound field for headphones with surround effect. HP VIRTUAL* The sound field for headphones with virtual surround effect. This sound field is only effective when you play back multi channel sources. * These sound fields cannot be selected when: the system is in stand by or during transfer or recording. the Karaoke mode is turned on.
5 Start singing along with the music and adjust the microphone volume by turning MIC 1/2 LEVEL. To turn off the Karaoke mode Disconnect the microphone or press KARAOKE MODE. “KARAOKE MODE: OFF” appears on the TV screen. To adjust the microphone echo level Turn ECHO LEVEL on the unit. To cancel the echo effect, turn ECHO LEVEL on the unit to “MIN.” Notes You can change the key to suit your vocal range, except when the system is in stop mode.
Playing Karaoke with any stereo disc (“Karaoke Pon”) You can enjoy Karaoke with a stereorecorded disc, even if it is a non-Karaoke disc, by reducing the sound of the vocals. Press KARAOKE PON in Karaoke mode. To cancel “Karaoke Pon” mode, press KARAOKE PON again. Notes This function may not work well when: only a few instruments are playing. a duet is playing. the vocals on the disc deviate from the center. playing monaural-recorded discs (the accompaniment is also reduced).
3 Press or repeatedly to select the desired vocal channel. The output channel changes as follows. The default setting is underlined. When playing a DVD VIDEO OFF: Turns off the guide vocal. 1+2: Guide vocal 1+2 1: Guide vocal 1 2: Guide vocal 2 When playing a VIDEO CD or AUDIO CD OFF: Turns off the guide vocal. L+R: The same sound is output from both speakers. STEREO: The standard stereo sound 4 When playing a DVD VIDEO, the function works only with the “Dolby Digital Karaoke” format.
2 Press or repeatedly to select (SCORE MODE), then press ENTER. 7 The options for “SCORE MODE” appear on the TV screen. 3 Your score is calculated from a scale of 0 to 99. Your score is displayed for 5 seconds, during which time the system enters pause mode. After your score, the ranking is displayed as follows: The ranking is displayed as a list with top 3 scores. Your score and ranking for the last song flash. If you are in the top 10, your ranking is displayed. If not, “10+” is displayed.
Other Operations 1 For Play Timer: Prepare the sound source, and then press VOLUME +/ (or turn MASTER VOLUME on the unit) to adjust the volume. Using the timers The system offers three timer functions. You cannot activate both the Play Timer and the Rec Timer at the same time. If you use either with the Sleep Timer, the Sleep Timer has priority. Use buttons on the remote to use the timer functions. Sleep Timer You can fall asleep to music. This function works even if the clock is not set.
6 Select the sound source when using Play Timer, or prepare the USB device when using Rec Timer. For Play Timer: Press or repeatedly until the desired sound source appears, and then press ENTER. The display shows the timer settings. For Rec Timer: The display shows the timer settings. When recording to a USB device, perform steps 1 and 2 of “Playing a file of the USB device” (page 81). 7 98GB Press to turn off the system.
Notes The Play Timer and Rec Timer will not be activated if the system is turned on or if “STANDBY” flashes in the display. Be sure to turn off the system at least 120 seconds before the preset time. The volume is reduced to minimum during Rec Timer. The track numbers are automatically marked when you record more than 60 minutes. Tips The Play Timer setting remains as long as the setting is not canceled manually. The Rec Timer is canceled automatically after the Rec Timer has been activated.
Changing the power illuminator You can change the illumination pattern around the MASTER VOLUME on the unit. 1 2 Select the illumination setting. Viewing information about the disc in the front panel display Press DISPLAY. Each time you press DISPLAY, the display changes from … Press OPTIONS on the unit repeatedly until “ILLUMINATION” appears in the display.
When playing an AUDIO CD or VIDEO CD without PBC function: Elapsed playing time of the current track Remaining time of the current track Elapsed playing time of the disc3) Remaining time of the disc3) Track name1) Track and index4)5) AUDIO CD or VIDEO CD without PBC playback: Total number of the tracks on the disc and the total playing time of the disc Disc title1) When playing a VIDEO CD with PBC function: Elapsed playing time of the current scene Disc title1) Scene number6) 1) Wh
7) 8) When playing video files, the current folder number and the current file number are displayed for 2 seconds before the display returns to elapsed playing time when you press TIME/TEXT during display of title of the file. If an MP3 file has the ID3 tag, the system will display an album name or title name from the ID3 tag information. The system supports ID3 ver 1.0/1.1/2.2/2.3. ID3 ver 2.2/2.3 tag information display has priority when both ID3 ver 1.0/1.1 and ver 2.2/2.
When playing a VIDEO CD with PBC function: Elapsed playing time of the current scene Disc title When playing an AUDIO CD or VIDEO CD without PBC function: Elapsed playing time of the current track Remaining time of the current track Elapsed playing time of the disc Remaining time of the disc Elapsed playing time of the current track and track name When playing MP3 files or video files on a DATA CD/DVD: Elapsed playing time of the current file and folder/file name* Only alphabet letters, num
When playing a video file: Example: MP3 file Bit rate Checking the date information of JPEG image files Hooking up optional components To enhance your system, you can connect optional components. Refer to the operating instructions provided with each component. Rear panel When “Exif ”* tag is recorded in the JPEG image files, you can check the date information in the Control menu by pressing DISPLAY during playback.
VIDEO/SAT AUDIO IN L/R jacks Connect the audio output jacks of an optional component (such as VCR or satellite tuner). VIDEO/SAT VIDEO IN jack Connect the video output jack of an optional component (such as VCR or satellite tuner). COMPONENT VIDEO OUT jacks Connect the component video input jacks of the TV or projector. If your TV accept progressive format signals, you must use this connection and set “PROGRESSIVE (COMPONENT OUT)” to “ON” (page 29). You can enjoy higher quality video images.
Listening to a connected VCR or satellite tuner 1 2 Enjoying the multi channel sound with the optional amplifier Press FUNCTION +/ repeatedly (or press VIDEO/SAT on the unit) to select “VIDEO” or “SAT.” 1 Start playing the connected component. 2 To switch between the “VIDEO” and “SAT” function Hold down VIDEO/SAT on the unit and press on the unit while the system is on. The system switches the function from “VIDEO” to “SAT” or vice versa.
Additional Information Troubleshooting Should you encounter a problem with your system, do the following: 1 Make sure the power cord and speaker cords are connected correctly and firmly. 2 Find your problem in the troubleshooting checklist below and take the indicated corrective action. If the problem persists after doing all of the above, consult your nearest Sony dealer.
Check the speaker connections (page 23). There is no audio output during Rec Timer. The system is in pause mode, in Slowmotion Play or in Lock Search. Press (or on the unit) to start the playback. No sound is output when transferring music to the USB device. There is no microphone sound. Press VOLUME + repeatedly (or turn MASTER VOLUME on the unit clockwise) or turn MIC LEVEL on the unit clockwise to adjust the microphone volume. Make sure the microphone is connected to MIC jack correctly.
The sound from the component connected to the VIDEO/SAT AUDIO IN L/R jacks is distorted. If “VIDEO” appears in the display when you press VIDEO/SAT on the unit, switch the display to “SAT” (see “To switch between the “VIDEO” and “SAT” function” (page 106)). “THEATRE SYNC” function does not work. If distance between the TV and this unit is too far, this function may not work. Install the unit near the TV. Speakers Sound comes from one channel or unbalanced left and right volume.
Remove the disc and wipe away the moisture on the disc, then leave the system turned on for a few hours until the moisture evaporates. Press (or on the unit) to start playback. The region code on the DVD VIDEO does not match the system. Playback starts automatically. The DVD VIDEO features an auto playback function. The sound skips. Wipe the disc clean (page 124). Reload the disc. Move the unit to a place without vibration (e.g., on top of a stable stand).
The MPEG4 video file does not have the extension “.mp4” or “.m4v.” The DivX video file does not have the extension “.avi” or “.divx.” The video file is larger than 720 (width) × 576 (height). If you cannot change the “MEDIA” setting, re-load the disc or turn the system off, then on. The MP3 files take longer time to play back than others. After the system reads all the MP3 files on the disc, playback may take more time than usual if: the number of folders or MP3 files on the disc is very large.
The DivX video file does not conform to a DivX Certified profile. The MPEG4 video file has the extension “.mp4” or “.m4v,” but does not conform to MPEG4 Simple Profile. The disc title, CD-TEXT and DVD-TEXT characters do not appear properly. The disc is recorded in format other than ISO 9660 Level 1, Level 2 or Joliet (expansion).
The iPod cannot be charged. Make sure the iPod is connected securely. You can use the system as a battery charger for iPod only when the system is on. Video/photo image from the iPod does not appear on the TV screen. Set the operating mode to the iPod Display mode to display photo images (page 67). Check that the TV output setting on the iPod is on. (Refer to the user’s guide of your iPod.) Check that the iPod is compatible with video output. (Refer to the user’s guide of your iPod.
If the transfer, recording and erase operations are repeated multiple times, the file structure within the USB device becomes fragmented. Refer to the operating instructions supplied with the USB device for how to deal with this problem. If the problem persists, contact your nearest Sony dealer. Transferring or recording results in an error. You are using an unsupported USB device. See “Compatible devices with this system” (page 130) for the supported device types.
“OVER CURRENT” appears. A problem has been detected with the level of electrical current from the (USB) port. Turn off the system and remove the USB device from the (USB) port. Make sure there is no problem with the USB device. If this display pattern persists, contact your nearest Sony dealer. There is no sound. The USB device is not connected correctly. Turn off the system and reconnect the USB device, then turn on the system and check if “USB MEMORY” lights up.
The USB device is not recognized. Turn off the system and reconnect the USB device, then turn on the system. Connect the supported USB device (see “Compatible devices with this system” (page 130)). The USB device does not work properly. Refer to the operating instructions supplied with the USB device for how to deal with this problem. If the problem persists, contact your nearest Sony dealer. “Data error” appears on the display when playing a USB device.
The WMA file stored in WMA DRM/ WMA Lossless/WMA PRO format cannot be played back. The AAC file stored in copyrightprotected AAC or AAC Lossless format cannot be played back. AAC files encoded at a sampling frequency of 96 kHz cannot be played back. If you use a partitioned USB device, only audio files on the first partition can be played. The system can play back to a depth of 8 folders only. The number of folders has exceeded 200. The number of files has exceeded 150.
Even if your TV is compatible with progressive format (525p/625p) signals, the image may be affected when you set to progressive format. In this case, set to interlace format (the default setting) (page 28). Picture noise appears. Wipe the disc clean (page 124). If video signal from your system has to go through your VCR to your TV, the copy-protection applied to some DVD VIDEO programs could affect the picture quality.
The angles cannot be changed. Multi-angles are not recorded on the DVD VIDEO being played back. The DVD VIDEO prohibits changing the angles. A stereo FM program cannot be received in stereo. Press REPEAT/FM MODE repeatedly until “MONO” disappears from the display. Tuner Optional components The radio presetting is canceled. The power cord is disconnected or a power failure occurred for longer than a day. Redo “Presetting a radio station” (page 65). There is no sound.
3 Press DISPLAY repeatedly until “Sony DEMO” appears in the display. 4 Press / on the unit while holding down TUNING + on the unit. “AM 9K STEP” or “AM 10K STEP” appears in the display. When you change the interval, all the AM preset stations are erased. If the system still does not operate properly after performing the above measures or other troubles not described above occur, reset the system as follows: 1 Press DISPLAY when playback is stopped. The Control Menu appears on the TV screen.
Self-diagnosis Function (When letters/numbers appear in the display) When the self-diagnosis function is activated to prevent the system from malfunctioning, a 5-character service number (e.g. C 13 50) with a combination of a letter and 4 digits appears on the TV screen or the front panel display. In this case, check the following table. When you turn on the system, the version number [VER.X.XX] (X is a number) may appear on the TV screen.
DATA ERROR You tried to play a file on the USB device that is not playable. DATA ERROR (for DATA CD/DVDs) The MP3 file, JPEG image file, DivX video file and MPEG4 video file you want to play back is damaged. The MP3 file does not conform to MPEG 1 Audio Layer 3 format. The JPEG image file does not conform to DCF format. The MP3 file has the extension “.mp3,” but is not in MP3 format. The JPEG image file has the extension “.jpg” or “.jpeg,” but is not in JPEG format.
NO DATA There is no file or folder to play back. NO USB DEVICE No USB device is connected. NOT IN USE You have pressed a button whose operation is not allowed or invalid at that time. NOT SUPPORT An unsupported USB device is connected. OFF TIME NG! The on time and off time of Play Timer or Rec Timer is the same. OVER CURRENT An over current from the was detected. (USB) port PASSWORD “PARENTAL CONTROL” is set. PLEASE WAIT The system is doing initialization process.
Precautions Notes on discs Before playing, wipe the disc with a cleaning cloth from the center out to the edge. Do not clean discs with solvents, such as benzine, thinner, or commercially available cleaners or anti-static spray intended for vinyl LPs. Do not expose discs to direct sunlight or heat sources such as hot air ducts, nor leave it in a car parked in direct sunlight.
Music discs encoded with copyright protection technologies This product is designed to play back discs that conform to the Compact Disc (CD) standard. Recently, various music discs encoded with copyright protection technologies are marketed by some record companies. Please be aware that among those discs, there are some that do not conform to the CD standard and may not be playable by this product.
On heat buildup Heat buildup on the unit during operation is normal and is not cause for alarm. Do not touch the cabinet if it has been used continuously at a high volume because the cabinet may have become hot. Do not obstruct the ventilation holes. In case color irregularity is observed on a nearby TV screen With the magnetically shielded type of speakers, the speakers can be installed near a TV set.
Inputs VIDEO/SAT VIDEO IN (phono jack): 1 Vp-p, 75 ohms VIDEO/SAT AUDIO IN L/R (phono jacks): voltage 250/450 mV, impedance 47 kilohms MIC 1/MIC 2 (phone jacks): sensitivity 1 mV, impedance 10 kilohms Outputs System: Compact disc and digital audio and video system Laser Diode Properties Emission duration: Continuous Laser Output*: Less than 44.6µW * This output is the value measurement at a distance of 200mm from the objective lens surface on the Optical Pick-up Block with 7mm aperture.
AM tuner section Tuning range: North American and Australian models: 531 1,710 kHz (with 9 kHz tuning interval) 530 1,710 kHz (with 10 kHz tuning interval) European model: 531 1,602 kHz (with 9 kHz tuning interval) Antenna: AM loop antenna Antenna terminals: External antenna terminal Intermediate frequency: 450 kHz Speaker Front speaker (SS-GZR77D) for MHCGZR33Di Front speaker (SS-LCD7Di) for LBTLCD7Di Speaker system: 3-way, Bass reflex, Magnetically shielded Speaker unit Subwoofer: 130 mm, cone type
Supported file format MP3 (MPEG 1 Audio Layer-3) File extension: .mp3 Bitrate: 32 320 kbps, VBR Sampling frequencies: 32/44.1/48 kHz WMA File extension: .wma Bitrate: 48 192 kbps Sampling frequencies: 44.1 kHz AAC File extension: .m4a Bitrate: 48 320 kbps Sampling frequencies: 44.1 kHz MPEG4 File format: MP4 File Format File extension: .mp4/.m4v Video codec: MPEG4 Simple Profile (AVC is not compatible.
Compatible devices with this system You can use the following devices on this system.
Notes on using the Sony Ericsson mobile phone Connect to this system with the power of the mobile phone on. When connecting to this system, set the data transfer mode of your mobile phone to File Transfer (Mass Storage). For details, refer to the operation manual supplied with the mobile phone. Use the USB cable supplied with the mobile phone when connecting to this system. While the mobile phone is connected to this system, do not insert or remove the memory card.
Compatible iPod models with this system You can use the following iPod models on this system. Update your iPod with the latest software before using it.
Guide to the Control Menu display Use the Control Menu to select a function and to view related information. Press DISPLAY repeatedly to turn on, turn off or change the Control Menu display as follows: Control Menu display 1 Control Menu display 2* Control Menu display off Control Menu display 1 … * Control Menu display 2 appears when available. Control Menu display The Control Menu display 1 and 2 will show different items depending on the disc type.
List of Control Menu items Item Item Name, Function, Relevant Disc Type [TITLE] (page 37)/[SCENE]/[TRACK] (page 37) Selects the title, scene or track to be played back. [CHAPTER] (page 37)/[INDEX] Selects the chapter or index to be played back. [TRACK]1) (page 37) Selects the track or audio file to be played back. [ORIGINAL/PLAY LIST] (page 42) Selects the playback sequence either to the originally recorded sequence or to the playlist created on the disc.
Item Item Name, Function, Relevant Disc Type [REPEAT]1) (page 47, 86 ) Plays back all discs repeatedly, the entire disc (all titles/all tracks/all files/all folders) repeatedly or one title/chapter/track/folder/file repeatedly. [A/V SYNC] (page 55) You can adjust the delay between the picture and sound. [SETUP]1) (page 33, 58) QUICK Use “QUICK” Setup to choose the language of the on-screen display and the aspect ratio of the TV screen.
Item Item Name, Function, Relevant Disc Type [EFFECT]1) (page 54, 85) Selects the transition effects to be used for changing slides during a slide show. [MEDIA]1) (page 49, 52, 54, 82) Selects the data type (audio file, JPEG image file, video file, or both MP3 file and JPEG image file) to be played back. [USB TRANSFER] (page 77) Transfers music on an AUDIO CD or DATA CD/DVD to a USB device. [KARAOKE MODE]1) (page 92) Sets Karaoke mode to on or off.
Playback priority of file types The table below describes the playback priority of file types under the “MEDIA” setting.
Language code list The language spellings conform to the ISO 639:1988 (E/F) standard.
Parental Control area code list Code Area Code Area Code Area Code Area 2044 2047 2046 2057 2070 2079 2090 2092 2115 2165 2174 2109 2248 2238 2254 2276 2304 2363 2362 2376 2390 2379 2427 2424 2436 2489 2501 2149 2499 2086 2528 2184 Argentina Australia Austria Belgium Brazil Canada Chile China Denmark Finland France Germany India Indonesia Italy Japan Korea Malaysia Mexico Netherlands New Zealand Norway Pakistan Philippines Portugal Russia Singapore Spain Sweden Switzerland Thailand United Kingdom
Glossary Auto Pause An automatic pause according to the signal encoded on the disc while playing a VIDEO CD. If the CD/DVD player does not resume playback for a long time, perform resume playback manually. Chapter Subdivision of a title on a DVD VIDEO. A title is composed of several chapters. DivX® Digital video technology created by DivX, Inc. Videos encoded with DivX technology are among the highest quality with a relatively small file size.
DVD VIDEO DVD-RW A DVD-RW is a recordable and rewritable disc that is the same size as a DVD VIDEO. The DVD-RW has two different modes: VR mode and Video mode. DVD-RWs created in Video mode have the same format as a DVD VIDEO, while discs created in VR (Video Recording) mode allow the contents to be programmed or edited. DVD+RW A DVD+RW (plus RW) is a recordable and rewritable disc. DVD+RWs use a recording format that is comparable to the DVD VIDEO format.
Interlace format (Interlaced scanning) The Interlace format is the NTSC standard method for displaying TV images at 30 frames per second. Each frame is scanned twice-alternately between the even numbered scanning lines and then odd numbered scanning lines, at 60 times per second. Menu Playback Playback using the menu screens recorded on VIDEO CDs with PBC functions. You can enjoy simple interactive software using the menu playback function.
Region Code This system is used to protect copyrights. A region code is allocated on each DVD system or DVD VIDEO according to the sales region. Each region code is shown on the unit as well as on the disc packaging. The system can play back the discs that match its region code. The system can also play back discs with the “ ” mark. Even when the region code is not shown on the DVD VIDEO, the region limit may still be activated.
Index Numerics D K 16:9 60 4:3 LETTER BOX 60 4:3 PAN SCAN 60 5.
P T PARENTAL CONTROL 56 Parental Control 142 PAUSE MODE 61 PBC Playback 41 Playback Control (PBC) 142 PLAY LIST 42, 134 PROGRAM 44, 134 Program Play 44 PROGRESSIVE (COMPONENT OUT) 29, 61 THEATRE SYNC 35 TIME 44, 134 Timer 97 TITLE 47, 134 Title 37, 143 TRACK 46, 87, 134 TRACK SELECTION 62 Transferring 75 Troubleshooting 107 TV Hookup 27 TV TYPE 60 Q U Quick setup display 33 Usable discs 8 USB 74 USB device 75 USB TRANSFER 76, 77, 136 R Radio 64 Radio Stations 64 Rear panel 104 REC 1 76 Recording 80
License and Trademark Notice This product incorporates copyright protection technology that is protected by U.S. patents and other intellectual property rights. Use of this copyright protection technology must be authorized by Macrovision, and is intended for home and other limited viewing uses only unless otherwise authorized by Macrovision. Reverse engineering or disassembly is prohibited. This system incorporates Dolby1) Digital and DTS2) Digital Surround System.
THIS PRODUCT IS LICENSED UNDER THE MPEG-4 VISUAL PATENT PORTFOLIO LICENSE FOR THE PERSONAL AND NON-COMMERCIAL USE OF A CONSUMER FOR (i) ENCODING VIDEO IN COMPLIANCE WITH THE MPEG-4 VISUAL STANDARD (“MPEG-4 VIDEO”) AND/OR (ii) DECODING MPEG-4 VIDEO THAT WAS ENCODED BY A CONSUMER ENGAGED IN A PERSONAL AND NONCOMMERCIAL ACTIVITY AND/OR WAS OBTAINED FROM A VIDEO PROVIDER LICENSED BY MPEG LA TO PROVIDE MPEG-4 VIDEO. NO LICENSE IS GRANTED OR SHALL BE IMPLIED FOR ANY OTHER USE.