
Projector User Manual
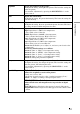


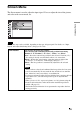

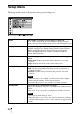


Table Of Contents
- Table of Contents
- Precautions
- Location of Controls
- Connections and Preparations
- Projecting
- Projecting the Picture on the Screen
- Using the Picture Position
- Selecting the Wide Screen Mode
- Watching 3D Video Images
- Selecting the Picture Viewing Mode
- Adjusting the Picture Quality
- Adjusting the Picture Using Real Color Processing
- Using the Supplied Software to Adjust the Picture Quality (ImageDirector3)
- Using the Menus
- Others
- About the Control for HDMI
- About the x.v.Color
- About the simulated 3D feature
- Troubleshooting
- Replacing the Lamp and the Air Filter and Cleaning the Ventilation Holes (intake)
- Cleaning the Air Filter
- Cleaning and the Screen of the Projector
- How to Use the USB Charging AC Power Adaptor
- Specifications
- Ceiling Installation
- Index

55
Using the Menus
Screen Menu
The Screen menu is used to adjust the input signal. You can adjust the size of the picture,
and select wide screen mode, etc.
.
These items may not be available, depending on the type of input signal. For details, see “Input
Signals and Adjustable/Setting Items” (1 pages 85 to 88).
Note
Picture Position You can store up to five lens settings.
After selecting and confirming the desired position from among
“Position 1” to “Position 5,” do “Save,” “Delete,” or “Select.”
“Save”: Stores the current lens position in the selected “Position (1-5).”
If a setting is already stored in that Position, it is overwritten.
“Delete”: Deletes the stored setting. After the setting is deleted, the
“Position 1” to “Position 5” in the display change to “---.”
“Select”: The lens position is automatically adjusted to the selected
setting.
• After you have selected and confirmed the lens position, the lens starts
to move automatically. Do not touch the lens and the area around the
lens, otherwise it may cause injury or a malfunction.
• If you press any button on the projector while the lens is moving, the lens
stops. In this case, select the lens position again or adjust the lens
manually.
• When you use a 2.35:1 aspect ratio picture or a 16:9 picture using the
Picture Position function, make sure that the installation position is
suitable (1 page 33).
• The Picture Position function is not guaranteed to reproduce the lens
settings precisely.
Notes