3-859-578-11 (1) FM/MW/LW Cassette Car Stereo Operating Instructions EN Manual de instrucciones ES Bruksanvisning S Manual de instruções P For installation and connections, see the supplied installation/connections manual. Con respecto a la instalación y las conexiones, consulte el manual de Instalación/ Conexiones suministrado. Vi hänvisar till det medföljande häftet angående montering/anslutningar. Para a instalação e as ligações, consulte o manual de instalação/ligações fornecido.
Welcome! Thank you for purchasing the Sony Cassette Car Stereo. This unit lets you enjoy a variety of features by using a rotary remote.
Table of contents Getting Started Resetting the unit ................................................ 4 Detaching the front panel .................................. 4 Setting the clock .................................................. 5 Cassette Player Listening to a tape ............................................... 5 Radio Additional Information Precautions ........................................................... 9 Maintenance .......................................................
Attaching the front panel Getting Started Attach part A of the front panel to part B of the unit as illustrated and push until it clicks. Resetting the unit Before operating the unit for the first time or after replacing the car battery, you must reset the unit. Press the reset button with a pointed object, such as a ballpoint pen. Reset button EN Note Pressing the reset button will erase all the Memorised programme and memory functions.
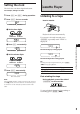
Setting the clock The clock has a 24-hour digital indication. Cassette Player For example, setting it to 10:08 1 Press (OFF) or (DSPL) during operation. 2 Press (DSPL) for two seconds. Listening to a tape Insert a cassette. 100 The hour digit flashes. 1 Set the hour digits. To go backward To go forward 1000 2 Press (SEL) momentarily. 3 Set the minute digits. If a cassette is already inserted, press (SOURCE) repeatedly until “TAPE” is displayed. EN TAPE The side facing up is being played.
Locating the beginning of a track — Automatic Music Sensor (AMS) You can skip up to nine tracks at one time. During playback, press either side of (SEEK/AMS) momentarily. SEEK AMS To locate the preceding tracks To locate the succeeding tracks Radio Memorising stations automatically — Best Tuning Memory (BTM) Note The AMS function may not work when : • the blanks between tracks are shorter than 4 seconds • there is noise between tracks • there are long sections of low volume or quiet sections.
Memorising only the desired stations Up to 6 stations on each band (FM1, FM2, FM3, MW and LW) can be stored on the preset number buttons in the order of your choice. Therefore, 18 FM stations can be Memorised. If you try to store another station on the same preset number button, the previously stored station will be erased. 1 Press (SOURCE) repeatedly to select the tuner. Changing the displayed items Each time you press (DSPL), the display changes between the frequency and the clock.
Adjusting the bass curve Other Functions Turn the D-BASS control to adjust the bass level (1, 2 or 3). “D-BASS” appears in the display. To cancel, turn the control to the OFF position. Adjusting the sound characteristics 1 Select the item you want to adjust by pressing (SEL) repeatedly. VOL (volume) n BAS (bass) n TRE (treble) n BAL (balance) n FAD (fader) 2 Adjust the selected item by pressing either (+) or (–). Adjust within three seconds after selecting.
Additional Information Precautions • If your car was parked in direct sunlight resulting in a considerable rise in temperature inside the car, allow the unit to cool off before operating it. • If no power is being supplied to the unit, check the connections first. If everything is in order, check the fuse. • If no sound comes from the speakers of a 2-speaker system, set the fader control to the center position.
Maintenance Dismounting the unit Fuse Replacement When replacing the fuse, be sure to use one matching the amperage rating stated on the fuse. If the fuse blows, check the power connection and replace the fuse. If the fuse blows again after replacement, there may be an internal malfunction. In such a case, consult your nearest Sony dealer. Fuse (10 A) EN Warning Never use a fuse with an amperage rating exceeding the one supplied with the unit as this could damage the unit.
The rotary remote labels You can control this unit with the optional rotary remote (RM-X2S). Some labels are supplied with the rotary remote. Attach that label which matches the functions of the master unit and the mounting position of the rotary remote. When you mount the rotary remote, attach the label in the illustration below.
Location of controls MODE SOURCE 1 OFF SEEK AMS SEL 2 3 ATA DSPL 4 5 LCL 6 D-BASS OFF 1 2 3 RELEASE EN MUTE Refer to the pages for further details. 1 SEL (control mode select) button 5, 8 2 SOURCE button (TAPE/TUNER) 5, 6, 7 3 MODE (*) button During tuner reception: BAND select 6, 7 During tape playback: Transport direction change 5 4 POWER SELECT switch (located on the top of the unit) See “POWER SELECT Switch” in the Installation/Connections manual.
Specifications Cassette player section General Tape track Wow and flutter Frequency response Signal-to-noise ratio Tone controls 4-track 2-channel stereo 0.08 % (WRMS) 30 – 18,000 Hz 58 dB Power requirements Dimensions Tuner section Mounting dimensions FM Tuning range Antenna terminal Intermediate frequency Usable sensitivity Selectivity Signal-to-noise ratio 87.5 – 108.0 MHz External antenna connector 10.7 MHz 8 dBf 75 dB at 400 kHz 65 dB (stereo), 68 dB (mono) Harmonic distortion at 1 kHz 0.
Troubleshooting guide The following checklist will assist in the correction of most problems you may encounter with your unit. Before going through the checklist below, refer to the operating procedures. General Problem Cause/Solution No sound. • Adjust the volume with (+). • Set the fader control to the center position for 2-speaker systems. Indications do not appear on the display. Remove the front panel and clean the connectors. See “Cleaning the Connectors” in “Maintenance” for details.
Index A Automatic Music Sensor (AMS) 6 Automatic tuning 7 Automatic Tuner Activation (ATA) 6 B Balance 8 Bass 8 Best Tuning Memory (BTM) 6 C Caution alarm Clock 5 4 D, E D-BASS (D-Bass) Display 6 8 EN F, G, H, I, J, K L Local seek mode (LCL) M, N, O Manual tuning Mute 8 7 Additional Information Fader 8 Fast-forward 5 Front panel 4 Fuse 10 7 P, Q Preset search 7 R, S Radio 6 Reset 4 Rewind 5 Rotary remote 11 T, U, V, W, X, Y, Z Tape playback 5 Treble 8 15
¡Bienvenido! Enhorabuena por la adquisición del sistema estéreo de cassettes para automóvil de Sony. Esta unidad permite disfrutar de diversas funciones mediante un control remoto giratorio.
Indice Procedimientos iniciales Restauración de la unidad ................................. 4 Extracción del panel frontal ............................... 4 Puesta en hora del reloj ...................................... 5 Reproductor de cassettes Escucha de cintas ................................................ 5 Radio Información complementaria Precauciones ........................................................ 9 Mantenimiento ..................................................
Procedimientos iniciales Inserción del panel frontal Fije la parte A del panel frontal a la parte B de la unidad tal como muestra la ilustración y ejerza presión hasta oír un chasquido. Restauración de la unidad Antes de emplear la unidad por primera vez, o bien después de sustituir la batería del automóvil, es necesario restaurar dicha unidad. Presione la tecla de restauración con un objeto puntiagudo, como un bolígrafo.
Puesta en hora del reloj El reloj posee una indicación digital de 24 horas. Reproductor de cassettes Por ejemplo, ajuste el reloj en 10:08 1 Presione (OFF) o (DSPL) durante el funcionamiento. 2 Presione (DSPL) durante dos segundos. Escucha de cintas Inserte el cassette. 100 Los dígitos de la hora parpadean. 1 Ajuste los dígitos de la hora. Para retroceder Para avanzar 1000 2 Presione ligeramente (SEL). 3 Ajuste los dígitos de los minutos.
Localización del comienzo de los temas — Sensor de música automático (AMS) Es posible omitir un máximo de nueve temas de una vez. Durante la reproducción, presione momentáneamente cualquier lado de (SEEK/AMS). SEEK AMS Para localizar los temas anteriores Para localizar los temas posteriores Nota La función AMS puede no activarse si: • el espacio en blanco entre temas es inferior a 4 segundos. • hay ruido entre los temas. • existen largas secciones con volumen bajo, o bien secciones sin sonido.
Memorización de las emisoras deseadas Podrá almacenar en la memoria hasta 6 emisoras de cada banda (FM1, FM2, FM3, MW, y LW) en las teclas numéricas de memorización en el orden que desee. De esta forma, pueden memorizarse 18 emisoras en FM. Si intenta almacenar otra emisora en la misma tecla numérica de memorización, la previamente almacenada se borrará. 1 Presione (SOURCE) varias veces para seleccionar el sintonizador. Presione (MODE) varias veces para seleccionar la banda.
Otras funciones Cambio de los ajustes de sonido y tono del pitido Refuerzo de los graves — D-bass Ajuste de las características del sonido 1 Seleccione el elemento que desee ajustar presionando repetidamente (SEL). VOL (volumen) n BAS (graves) n TRE (agudos) n BAL (equilibrio) n FAD (equilibrio entre los altavoces delanteros y traseros) Es posible disfrutar de graves intensos y nítidos. La función D-bass puede reforzar sólo la señal de frecuencias bajas con una curva marcada.
Información complementaria Precauciones •Si aparca el automóvil bajo la luz solar directa y se produce un considerable aumento de temperatura en su interior, deje que la unidad se enfríe antes de utilizarla. •Si la unidad no recibe alimentación, compruebe las conexiones en primer lugar. Si todo está en orden, examine el fusible. •Si los altavoces no emiten sonido con un sistema de dos altavoces, ajuste el control de equilibrio en la posición central.
Mantenimiento Desmontaje de la unidad Sustitución del fusible Al sustiuir el fusible, asegúrese de utilizar uno que coincida con el amperaje indicado en dicho fusible. Si el fusible salta, compruebe la conexión de alimentación y sustitúyalo. Si después de sustituirlo vuelve a saltar, es posible que exista un funcionamiento interno defectuoso. En tal caso, póngase en contacto con el proveedor Sony más próximo.
Etiquetas del mando rotativo Usted podrá controlar esta unidad con un mando rotativo (RM-X2S) opcional. Con el mando rotativo se suministran ciertos tipos de etiquetas. Adhiera la etiqueta que coincida con la función de la unidad principal y la posición de montaje del mando rotativo. Cuando monte el mando rotativo, adhiérale la etiqueta como se muestra en la ilustración siguiente.
Ubicación de los controles SOURCE MODE 1 OFF SEEK AMS DSPL SEL 2 3 ATA 4 5 LCL 6 D-BASS OFF 1 2 3 RELEASE MUTE PRST BTM Para más información, consulte las páginas.
Especificaciones Sección del reproductor de cassettes Pistas de la cinta Fluctuación y trémolo Respuesta en frecuencia Relación señal-ruido 4 pistas, 2 canales, estéreo 0,08 % (ponderación eficaz) 30 – 18.
Guía para la solución de problemas La lista de comprobaciones siguiente le ayudará a solucionar la mayoría de los problemas que pueda encontrar con su unidad. Antes de pasar a la lista de comprobaciones siguiente, repase los procedimientos de operación. Generales Problema Causa/Solución Ausencia de sonido. • Ajuste el volumen con (+). • Con un sistema de dos altavoces, sitúe el control de equilibrio entre los altavoces delanteros y traseros en la posición central. Ausencia de indicaciones en el visor.
Indice alfabético A, B, C Activación automática del sintonizador (ATA) 6 Agudos 8 Alarma de aviso 4 Avance rápido 5 D D-Bass 8 E Equilibrio 8 Equilibrio entre los altavoces y traseros 8 F Función de búsqueda programada 7 Función de memorización de la mejor sintonía (BTM) 6 Fusible 10 Graves 8 M, N, O Mando rotativo 11 Modo de búsqueda local (LCL) 7 P, Q Panel frontal 4 R ES Información complementaria G, H, I, J, K, L Radio 6 Rebobinado 5 Reloj 5 Reproducción de cintas 5 Restauración 4 S, T, U Se
Välkommen Gratulerar till ditt köp av Sonys bilstereo med kassettdel. Via vridkontrollen har du tillgång till en mängd funktioner.
Innehåll Komma igång Återställa enheten ............................................... 4 Ta loss frontpanelen ........................................... 4 Ställa in klockan .................................................. 5 Kassettbandspelare Lyssna på band .................................................... 5 Använda bilradion Ytterligare information Säkerhetsföreskrifter ........................................... 9 Underhåll ...........................................................
Fästa frontpanelen Komma igång Sätt fast del A på frontpanelen på del B på enheten enligt bilden och tryck tills det klickar till. Återställa enheten Du måste återställa enheten innan du börjar använda den för första gången, eller efter att du har bytt bilbatteri. Tryck på återställningsknappen med ett spetsigt föremål, t ex en kulspetspenna. Återställningsknapp Observera När du trycker på återställningsknappen raderas alla lagrade program- och minnesfunktioner.
Ställa in klockan Klockan har en 24-timmars digital tidsangivelse. Kassettbandspelare Om du ska ställa klockan på 10:08 gör du så här. 1 Tryck på (OFF) eller (DSPL) medan radion är på. 2 Tryck på (DSPL) i två sekunder. Lyssna på band Sätt i kassetten. 100 Siffrorna för timmar blinkar. 1 Ställ in siffrorna för timmar. Bakåt Framåt 1000 2 Tryck lätt på (SEL). 1000 Siffrorna för minuter blinkar. Bakåt Framåt 1008 3 Tryok lätt på (DSPL). 1008 Klockan aktiveras.
Hitta början av spåren — Automatisk musiksökning (AMS) Du kan hoppa över upp till nio spår på en gång. Tryck under uppspelning lätt på valfri sida av (SEEK/AMS). SEEK AMS Sökning efter föregående spår Använda bilradion Lagra kanaler automatiskt — BTM-funktionen Sökning efter efterföljande spår Observera Det är inte säkert att AMS-funktionen fungerar om: • mellanrummen mellan spåren är kortare än 4 sekunder • ljudet är brusigt • det finns långa avsnitt med låg volym eller inget ljud alls.
Lagra endast vissa kanaler Du kan lagra upp till 6 kanaler på varje våglängd (FM1, FM2, FM3, MW, och LW) i minnet för valfria förinställda snabbvalsknappar. På det sättet kan du lagra 18 kanaler på FM. Om du lagrar ytterligare en kanal på samma förinställda snabbvalsknapp raderas den tidigare lagrade kanalen. 1 Tryck på (SOURCE) upprepade gånger för att väja inställning. 2 Tryck på (MODE) upprepade gånger för att välja välj våglängd.
Justera baskurvan. Ytterligare funktioner Vrid på D-BASS-ratten när du vill justera basnivån (1, 2 eller 3). “D-BASS” visas i teckenfönstret. Avbryt genom att vrida ratten till OFF-läge. Ljudjustering Dämpa ljudsignalen 1 Välj vilka egenskaper du vill justera genom att upprepade gånger trycka på (SEL) tills ett av följande visas: VOL (volym) n BAS (bas) n TRE (diskant) n BAL (balans) n FAD (nedtoning) 2 Justera den egenskap du valt genom att trycka på knappen (+) eller (–).
Ytterligare information Säkerhetsföreskrifter •Om du har parkerat bilen i direkt solljus så att temperaturen i bilen har stigit markant, bör du låta CD-spelaren svalna innan du använder den. •Om ingen ström tillförs enheten, kontrollerar du först anslutningarna. Kontrollera säkringen om allt i övrigt är i sin ordning.
Underhåll Ta ur bilstereon Byta säkring När du byter säkring är det viktigt att du kontrollerar att den nya säkringen har samma amperetal som den gamla (amperetalet finns angivet på den gamla säkringen). Om säkringen går kontrollerar du nätanslutningen och byter ut säkringen. Om även den nya säkringen går kan det vara något internt fel. Ta i så fall kontakt med närmaste Sonyåterförsäljare.
Etiketter för den roterbara fjärrkontrollen Den roterbara fjärrkontrollen RM-X2S (tillval) kan användas för att fjärrstyra denna bilstereo. Ett antal etikerter levereras med fjärrkontrollen. Välj ut den etikett som överensstämmer med bilstereons funktioner och som passar bäst med tanke på fjärrkontrollens monteringsläge. Fäst etiketten enligt illustrationen nedan efter att den roterbara fjärrkontrollen monterats.
Knappar och deras placering SOURCE MODE 1 OFF SEEK AMS SEL 2 3 ATA DSPL 4 5 LCL 6 D-BASS OFF 1 2 3 RELEASE MUTE PRST BTM Mer information om respektive knapp finns på den sida som anges.
Tekniska data Kassettspelaren Bandspår Svaj och fladder Frekvensgång Signal/brus-förhållande Allmänt 4-spårig 2-kanalig stereo 0,08 % (WRMS) 30 – 18.
Felsökning De flesta problem som uppstår med bilstereon kan du åtgärda med hjälp av informationen i listan nedan. Innan du går igenom listan bör du kontrollera att instruktionerna för hur man använder bilstereon har följts. Allmänt Fel Orsak/Åtgärd Ljudbortfall. • Justera volymen med (+). • Ställ nedtoningsreglaget i mittenläge i 2-högtalarsystemet. Indikatorerna visas inte i teckenfönstret. Ta loss frontpanelen och gör ren anslutningarna.
Register A V, W, X, Y, Z Automatisk musiksökning (AMS) 6 Automatisk sökning 7 Automatisk tuner aktivering (ATA) 6 B, C Varningssignal 4 Å, Ä, Ö Återställning 4 Balans 8 Banduppspelning 5 Bas 8 BTM-funktion 6 D, E D-Bass 8 Diskant 8 F, G, H, I, J Frontpanelen 4 K Klocka 5 L M Manuell inställning 7 N, O, P, Q Nedtoning 8 Ytterligare information Ljudet 8 Lokalsökning (LCL) 7 S R Radio 6 Roterbar fjärrkontroll 11 S Snabbvalssökning 7 Spola bakåt 5 Spola framåt 5 Säkring 10 T, U Teckenfönster
Bem-Vindo! Obrigado por ter adquirido o autorádio estéreo com leitor de cassetes da Sony. Este aparelho permite utilizar diversas funções com o telecomando rotativo.
Índice Como começar Reinicializar o aparelho ...................................... 4 Para retirar o painel frontal ............................... 4 Acerto do relógio ................................................ 5 Leitor de cassetes Ouvir uma cassete ............................................... 5 Rádio Informação adicional Precauções ............................................................ 9 Manutenção ....................................................... 10 Desmontagem do aparelho ........
Para colocar o painel frontal Como começar Encaixe a parte A do painel frontal na parte B do aparelho, como se mostra na figura, fazendo pressão sobre o painel até ouvir um estalido. Reinicializar o aparelho Antes de pôr o aparelho a funcionar pela primeira vez ou depois de ter substituído a bateria do automóvel, tem de voltar a reinicializar o aparelho. Carregue no botão de reinicialização com um objecto bicudo como, por exemplo, uma esferográfica.
Acerto do relógio O relógio tem uma indicação digital de 24 horas. Leitor de cassetes Por exemplo, acerte-o para as 10:08 1 Carregue em (OFF) ou (DSPL) durante o funcionamento. 2 Carregue em (DSPL) durante dois segundos. Ouvir uma cassete Introduza uma cassete 100 O dígito das horas começa a piscar. 1 Acerte o dígito das horas. Sentido regressivo Sentido progressivo 1000 2 Carregue levemente em (SEL). 1000 O dígito dos minutos começa a piscar.
Localizar o início de uma faixa — Sensor automático de música (AMS) Pode saltar um máximo de 9 faixas de uma vez. Durante a reprodução, carregue levemente num dos lados da (SEEK/AMS). SEEK AMS Para localizar as faixas anteriores Para localizar as faixas seguintes Nota A função AMS pode não funcionar: • se os espaços em branco entre as faixas forem inferiores a 4 segundos • se houver ruídos entre as faixas • se houver secções longas com um volume de som baixo ou secções sem som.
Memorização somente de estações pretendidas Pode memorizar, nas teclas numéricas de memória, um máximo de 6 estações em cada banda (FM1, FM2, FM3, MW ou LW) pela ordem pretendida. Pode, por isso, memorizar 18 estações de FM. Se tentar memorizar mais uma estação na mesma tecla numérica de memória, a anterior estação memorizada é apagada. 1 Carregue várias vezes em (SOURCE) para seleccionar o sintonizador. 2 Carregue várias vezes em (MODE) para seleccionar a banda.
Regulação das características de som 1 Seleccione a característica que pretende regular carregando repetidas vezes em (SEL). VOL (volume) n BAS (graves) n TRE (agudos) n BAL (controlo do som das colunas) n FAD (fader) 2 Regule a característica seleccionada carregando em (+) ou (–). Efectue a regulação num período de três segundos após a selecção (passados os três segundos, a tecla vai novamente servir como tecla de controlo do volume).
Cuidados a ter com as cassetes Informação adicional Precauções • Se o automóvel estiver estacionado ao sol a temperatura no seu interior sobe consideravelmente pelo que deve deixar arrefecer o aparelho durante alguns minutos antes de o pôr a funcionar. •Se o aparelho não tiver corrente, verifique primeiro as ligações. Se tudo estiver em ordem, verifique o fusível. •Se não se ouvir o som dos altifalantes num sistema de dois altifalantes, regule o controlo de fader para a posição central.
Manutenção Substituição do fusível Quando substituir o fusível, certifique-se de que está a utilizar um fusível com uma amperagem igual à indicada no fusível. Se o fusível rebentar, verifique a ligação à corrente e substitua o fusível. Se o fusível voltar a rebentar depois de o ter substituído, isso pode ser provocado por um mau funcionamento interno. Nesse caso, consulte o agente da Sony mais próximo.
Etiquetas do telecomando rotativo Pode-se controlar este aparelho com o telecomando rotativo opcional (RM-X2S). Alguns tipos de etiquetas são fornecidos com o telecomando rotativo. Cole a etiqueta que corresponda às funções do aparelho principal e à posição de montagem do telecomando. Ao montar o telecomando rotativo, cole a etiqueta conforme a ilustração abaixo.
Localização das teclas MODE SOURCE 1 OFF SEEK AMS DSPL SEL 2 3 ATA 4 5 LCL 6 D-BASS OFF 1 2 3 RELEASE MUTE PRST BTM Para mais informações, consulte as páginas.
Especificações Secção do leitor de cassetes Generalidades Faixa Oscilação e vibração Resposta de frequência Relação sinal/ruído Controlos de sonoridade Graves ±8 dB a 100 Hz Agudos ±8 dB a 10 kHz Requisitos de energia Bateria do automóvel de 12 V DC (massa negativa) Dimensões Aprox. 188 × 58 × 181 mm (l/a/p) Dimensões de montagem Aprox. 182 × 53 × 164 mm (l/a/p) Peso Aprox.
Manual de resolução de problemas A lista de verificações que se seguem vão ajudá-lo a resolver a maioria dos problemas que possam ocorrer com este aparelho. Antes de consultar a lista de verificação abaixo, leia os procedimentos de funcionamento. Generalidades Problema Causa/Solução Ausência de som. • Regule o volume com (+). • Coloque o controlo fader na posição central para o sistema de 2 altifalantes. Não aparecem indicações no visor. Retire o painel frontal e limpe os conectores.
Índice A, B Activar automaticamente o sintonizador (ATA) 6 Agudos 8 Alarme de advartência 4 Avanço rápido 5 C Controlo do som das colunas 8 D, E D-Bass 8 F Fader 8 Fusível 10 Função de pesquisa pré-programada 7 G, H, I, J, K, L Graves 8 M, N, O Memória da melhor sintonia (BTM) 6 Modo de pesquisa local (LCL) 7 Painel frontal 4 R Rádio 6 Rebobinar 5 Reduzir 8 Reinicializar 4 Relógio 5 Reproduzir uma cassete 5 Informação adicional P, Q P S Sensor automático de música (AMS) 6 Sintonização automática
P 16
P 17
Sony Corporation Printed in Malaysia