
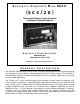
Manual


INSTALLATION INSTRUCTIONS:
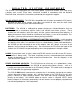
1. MOUNTING CONSIDERATIONS: - The SC3/20 is designed to be mounted flush against a
wall. It can be mounted onto a wall by adding the optional knockout box (4x7 BOX). Flush
mounting or wall mounting require different installation and mounting considerations.
FLUSH MOUNT: The flush mounted unit requires a rectangular cut-out in the mounting
surface with sufficient space (2-3 inches) immediately behind to accommodate the
controller. Electrical connection is made to the back of the controller via wires.
WALL MOUNT: The wall mounted unit (SC3/20 with the 4x7 BOX) is installed onto a wall
surface via four mounting screws. Electrical connections are made through knockouts
in the box to the wires on the back of the controller.
2. ACQUIRE TOOLS AND MATERIALS
TOOLS AND MATERIALS NEEDED:
FLUSH MOUNT:
Slotted screwdriver
Wire cutter/strippers
Drill with 3/32" and 3/8" bits
Keyhole saw or saber saw
Pencil, scratch awl or other marker
Soldering iron and solder (if available)
Electrical tape
Wire of sufficient gauge to run from the panels, to the SC3/20, and to the battery
(See WIRING INSTRUCTIONS: WIRE SIZE)
Mounting fasteners of appropriate type for wall material (3/4 - #6 screws provided)
Included are wire nuts, four 3/4 - #6 screws and washers, a spare fuse and a
spare programming jumper.
External shunt (if needed). Refer to “EXTERNAL SHUNT FOR 2ND CURRENT
READING”
WALL MOUNT (SC3/20 with 4X7 BOX):
Slotted screwdriver
Wire cutter/strippers
Pencil, scratch awl or other marker
Soldering iron, solder (if available)
Electrical tape
Wire of sufficient gauge to run from the panels, to the SC3/20, and to the battery
(See WIRING INSTRUCTIONS: WIRE SIZE)
Mounting fasteners of appropriate type to mount the box to the wall
1/2 inch Romex strain relief clamps
Included are wire nuts, four 3/4 - #6 screws and washers, a spare fuse and a spare
programming jumper.
External shunt (if needed). Refer to “EXTERNAL SHUNT FOR 2ND CURRENT
READING”