
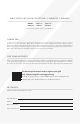
Installation Instructions and Manual


4
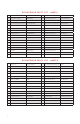
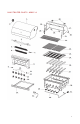
Grill Model A: Width B: Depth C: Height
AMG36” 35" 25" 15"
AMG54” 54" 25" 15"
Grill Model A: Width B: Depth C: Height
AMG36” 37" 33 ¼" 33 "
AMG54” 55" 33 ¼" 33 "
EASY ACCESS
BUILTIN INSTALLATIONS
CUT OUT DIMENSIONS
OVERALL PRODUCT DIMENSIONS
INSTALLATION
A
B
C
A
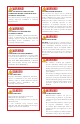
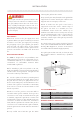
WARNING!
If your grill includes the optional rotisserie kit
and you store the rotisserie rod at the back of
the grill, always remove the rear of the cover
first, carefully avoiding the rotisserie rod so it
doesn’t fall from the grill. The rotisserie rod is
very heavy and sharp and can cause severe
personal injury.
Allow clear access to the gas supply hose and
regulator. When your grill is installed, you should
be able to access the gas supply line, including
the gas piping or hose, gas regulator, gas cylinder
and any shut off valves. Keep all gas supply
lines as short as possible because gas lines lose
pressure over distance and with each elbow and
tee.
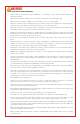
The AMG is designed for easy installation into
built-in masonry enclosures constructed of non-
combustible materials, or in a built-in enclosure
constructed of combustible material when
installed with a grill liner.
Before installing a grill in any island or cut out,
make sure that the opening is not bigger than the
outside frame of the grill unit. The grill should
rest on the entire lip of the frame.
Be sure the planned location’s prevailing wind
doesn’t blow toward the hood gap at the back of
the grill. This can cause poor grill performance as
well as overheating. Pay careful aention to the
location of the gas line. It should be routed away
from sources of heat and should make as few
bends as possible.
Check to see if the gas line connection will be
accessible when grill is installed. If the gas line
connection is not easily accessible when the grill
is installed, support the grill above counter level
and aach the gas line to the grill. When the gas
connection is made and has been checked for
leaks, slide the grill into the cutout. If the gas line
connection is accessible when the grill is installed,
slide the grill into the cutout and then aach the
gas line.
Be very careful not to kink the gas line when
lowering the grill into the cutout.
Keep your fingers away from where the grill will be
supported on counter. Your fingers could become
trapped and serious injury could occur.
Check to make sure the grill is level and is
supported around the entire outside edge. If
the grill is not level or is unstable, use non-
combustible shims under the outside lip to
stabilize it. You will need a second person to help
you avoid damaging the grill or your barbecue
island. You may want to use cardboard strips
under the outside edges of the grill to protect the
finish of the island.
The deck ledges and counter should be flat and
level. (refer to ANSI Z21.58 Standard for Outdoor
Cooking Gas Appliances, Section 1.7 Enclosures
For Self Contained LP-Gas Supply Systems)
This grill requires that a 120 volt, 60 hertz, 15 amp
GFI certified outlet be installed by a qualified
electrician.