
Assembly Manual


Page 4 of 4
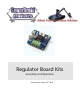
2 Operation
1. Connect power leads to the terminal strip. With polarity matching the silk screen. To ground
terminals are provided to make wiring easier. The input voltage needs to be about 2 VDC
higher than your output. For example, for a 5VDC regulator the input voltage will need to be
at a minimum of 7VDC, for the 6VDC version you will need at least 8VDC.
2. Connect the load to the terminal strip into the terminals marked as output. Pay close
attention to the polarity markings on the silk screen.
3. The center terminal is common ground. The terminal closest to the label is regulated 5, 6,
or 9 VDC up to 1Amp. The regulators are rated to 1.5Amps with a heat sink, but a larger
fuse will likely be required.
3 Notes
1. For the board kits sold with switching regulators, the input capacitor as well as the fuse are
redundant. The regulators themselves have built in circuit protection and come equipped with
their own input and output capacitors. Due to general noise cause by the switching regulator it is
advised to have additional 0.1uF or 1uF ceramic capacitors on the input of what you are powering.
This should help alleviate switching noise.
2. When using the adjustable kits, you may need a higher resistance value for R1 when output
voltages are higher than 12V to help prevent the LED from burning out from having too much
current sent through it.
3. When connecting linear regulator to higher input voltages, or if you may push the 1A or 1.5A
current limits, the heat sink option will be required for proper operation. If the temperature of the
regulator gets too high you will have stability issues in the output voltage levels.