User Manual CPS250 Triple Output Power Supply 070-6740-03
Copyright Tektronix, Inc. 1987. All rights reserved. Tektronix products are covered by U.S. and foreign patents, issued and pending. Information in this publication supercedes that in all previously published material. Specifications and price change privileges reserved. Printed in the U.S.A. Tektronix, Inc., P.O. Box 1000, Wilsonville, OR 97070–1000 TEKTRONIX and TEK are registered trademarks of Tektronix, Inc.
WARRANTY Tektronix warrants that this product will be free from defects in materials and workmanship for a period of one (1) year from the date of shipment. If any such product proves defective during this warranty period, Tektronix, at its option, either will repair the defective product without charge for parts and labor, or will provide a replacement in exchange for the defective product.
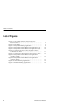
Table of Contents General Safety Summary . . . . . . . . . . . . . . . . . . . . . . . . . . . . iii Getting Started . . . . . . . . . . . . . . . . . . . . . . . . . . . . . . . . . . . . . Preparing the Power Supply for Use . . . . . . . . . . . . . . . . . . . . . Front Panel . . . . . . . . . . . . . . . . . . . . . . . . . . . . . . . . . . . . . . . . . 1 2 4 Reference . . . . . . . . . . . . . . . . . . . . . . . . . . . . . . . . . . . . . . . . . Independent Mode Applications . . . . . . . . .
Table of Contents List of Figures Figure 1: Line Voltage Selectors, Power Input, and Fuse Locations . . . . . . . . . . . . . . . . . . . . . . . . . . . . . . . . . . . Figure 2: Front Panel . . . . . . . . . . . . . . . . . . . . . . . . . . . . . . . . . Figure 3: Independent Floating Application . . . . . . . . . . . . . . . Figure 4: Independent Ground-Referenced Applications (A) . . Figure 5: Independent Ground-Referenced Applications (B) . .
General Safety Summary Review the following safety precautions to avoid injury and prevent damage to this product or any products connected to it. Only qualified personnel should perform service procedures. Injury Precautions Use Proper Power Cord To avoid fire hazard, use only the power cord specified for this product. Avoid Electric Overload To avoid electric shock or fire hazard, do not apply a voltage to a terminal that is outside the range specified for that terminal.
General Safety Summary Do Not Operate in Wet/Damp Conditions To avoid electric shock, do not operate this product in wet or damp conditions. Do Not Operate in Explosive Atmosphere To avoid injury or fire hazard, do not operate this product in an explosive atmosphere. Product Damage Precautions Use Proper Power Source Do not operate this product from a power source that applies more than the voltage specified.
General Safety Summary Safety Terms and Symbols Terms in This Manual These terms may appear in this manual: WARNING. Warning statements identify conditions or practices that could result in injury or loss of life. CAUTION. Caution statements identify conditions or practices that could result in damage to this product or other property. Terms on the Product These terms may appear on the product: DANGER indicates an injury hazard immediately accessible as you read the marking.
General Safety Summary Certifications and Compliances CSA Certified Power Cords CSA Certification includes the products and power cords appropriate for use in the North America power network. All other power cords supplied are approved for the country of use.
Getting Started The Tektronix CPS250 Triple Output Power Supply is a multifunction bench or portable instrument. The fixed 5 volt output is available for use in transistor-transistor-logic (TTL) applications. Two 0 V to 20 volt, 500 mA, variable outputs meet the needs of most semiconductor test or experimental applications. Two or three of the output voltages may be externally wired to produce voltages different than the standard front panel voltages.
Getting Started Preparing the Power Supply for Use Check the following items prior to operating the CPS250 Triple Output Power Supply for the first time (see Figure 1 for locations of items 1 through 3): 1 2 3 Figure 1: Line Voltage Selectors, Power Input, and Fuse Locations CAUTION. To prevent damage to the instrument, set the line voltage selectors to the proper voltage setting and install the correct line voltage fuse before operating the equipment. 1.
Getting Started 2. Check that the correct line fuse is installed. The line fuse provides protection if the equipment malfunctions or an overload occurs. Refer to Appendix C: Replaceable Parts on page 23 for fuse part numbers. WARNING. To prevent electrical shock, connect the power cord to a properly grounded power source. The outside (ground) of this connector is connected through the equipment to the power source ground. Do not remove the ground lug from the power cord for any reason. 3.
Getting Started Front Panel Figure 2 shows the front-panel controls, connectors, and indicators with brief descriptions of the items following the figure. 3 4 5 4 6 7 2 1 8 9 15 14 13 12 11 10 Figure 2: Front Panel 1. POWER Button. Push top of switch to the ON position to turn power supply on. Push bottom of switch to the OFF position to turn equipment off. 2. POWER ON Indicator. When lighted, LED indicates a power-on condition. 3. Voltage Meter.
Getting Started 6. Milliampere Current Meter. This meter indicates the current level of A or B output, depending on the position of the A/B meter switch. The meter may be mechanically set for zero with the slotted mechanical zero adjust disk below the center of the meter. 7. A/B Output Switch. Switches A and B outputs from INDEPENDENT to TRACKING PARALLEL or TRACKING SERIES operation. When the switch is in the TRACKING position, A VOLTAGE and A CURRENT controls set the level of both A and B outputs.
Getting Started 6 CPS250 User Manual
Reference This section of the manual includes examples of how to use the CPS250 Triple Output Power Supply. The number of possible applications is extensive, so only a few examples are given. CAUTION. Heat buildup may occur on the rear-panel heat sink during operation. To prevent equipment damage, ensure that the power supply has adequate air space for heat dissipation. Do not place hands or other objects on the heat sink during or after extended operation.
Reference To configure the power supply for independent floating, do the following: 1. With the CPS250 Triple Output Power Supply on and the outputs disconnected from loads, set the A and B VOLTAGE controls to the values needed (read on the V meter). Set the A and B CURRENT controls to midrange. 2. Turn POWER to OFF, and connect the load(s). 3. Turn POWER to ON, and readjust voltages if necessary. Load 1 5V Zero to 2 A Load 2 Zero to 20 V Zero to 0.5 A Load 3 Zero to 20 V Zero to 0.
Reference CAUTION. To prevent electric shock, do not elevate any power supply output terminals with any external voltage source or power supply.
Reference Load 1 –5 V 2A Load 2 –5 to +15 V Zero to 0.5 A Load 3 –5 to +15 V Zero to 0.5 A Figure 4: Independent Ground-Referenced Applications (A) Figure 5 shows the power supply connected to produce separate outputs of +5 V, 0 V to +20 V from the B supply, and 0 V to –20 V from the A supply. In this configuration the red terminal of output A is the relative negative terminal because it is connected directly to GND.
Reference 2. Set the A and B VOLTAGE controls to MIN and the A and B CURRENT controls to midrange. 3. Turn POWER to ON, and set the desired A and B voltages. 4. Turn POWER to OFF, and connect the load(s). 5. Turn POWER to ON, and readjust voltages if necessary. Figure 6 shows the power supply connected in series to produce a variable output of 0 + 40 V, ground referenced, and –5 V, ground referenced. The VOLTAGE and CURRENT controls are in series.
Reference 5. Turn POWER to ON, and readjust voltages if necessary. Zero to –40 V and fixed +5 V outputs are shown in Figure 7. Follow the procedures outlined above to operate this configuration. Load 1 +5 V Load 2 Zero to –40 V Figure 7: Connections to Provide Fixed +5 V and 0 to –40 V Figure 8 shows the configuration for three, ground referenced, negative supplies.
Reference Figure 9 shows the connections for three ground referenced, positive supplies. Load 1 +5 V Load 2 Zero to +20 V Load 3 Zero to +20 V Figure 9: Independent Ground-Referenced Applications (positive output) Tracking Mode Applications Series Tracking When the A/B OUTPUTS selector is set to SERIES TRACKING, the –output of the A variable supply is connected internally to the +output of the B variable supply. When set to the SERIES TRACKING mode, the output may be floating or ground referenced.
Reference Internal connection Load 1 Zero to +40 V Load 1 Zero to –40 V Internal connection Figure 10: Series-Tracking Applications Parallel Tracking When the A/B OUTPUTS selector is set to PARALLEL TRACKING, the + outputs of the A and B variable supplies are connected and the – outputs of the A and B variable supplies are connected. The resulting combination is a single supply capable of providing 0 V to 20 V and up to 1.2 A. Control is provided by the A VOLTAGE and A CURRENT controls.
Reference Internal connections Load 1 Zero to +20 V 1.0 A Internal connections Load 1 Zero to –20 V 1.
Reference 16 CPS250 User Manual
Appendix A: Specifications The following tables list the physical, environmental, operational, and electrical characteristics of the CPS250 Triple Output Power Supply: Table 2: Certifications and Compliances EC Declaration of Conformity – EMC Meets intent of Directive 89/336/EEC for Electromagnetic Compatibility.
Appendix A: Specifications Table 4: Environmental Characteristics Storage Temperature –10_ C to 60_ C, 80% RH Operating Temperature 10_ C to 40_ C, 75% RH Table 5: Operational Characteristics Outputs 0 to 20 VDC (two), 5 VDC Voltage (5 V) 5.0 ±0.1 VDC at 2.0 A maximum Voltage (0–20 V) 0–20 VDC at 0.5 A maximum Load Regulation (5 V) 0.1% +5 mV Load Regulation (0–20 V) 0.01% +3 mV Ripple/Noise 2 m VRMS, 5 Hz–1 MHz Tracking Error ±0.
Appendix B: Maintenance This appendix provides information for the basic maintenance of the CPS250 Triple Output Power Supply. Cleaning To clean the power supply, use a soft cloth dampened in a solution of mild detergent and water. Do not spray cleaner directly onto the instrument, since it may leak into the cabinet and cause damage. Do not use chemicals containing benzine, benzene, toluene, xylene, acetone, or similar solvents. Do not use abrasive cleaners on any portion of the power supply.
Appendix B: Maintenance Troubleshooting Electronic maintenance on the CPS250 Triple Output Power Supply must be performed by a trained technician. However, an operator can perform some basic and routine maintenance. The power supply will give some indications of problems to aid the operator. Power Switch is On but Power-On LED not Lighted NOTE.
Appendix B: Maintenance POWER Light ON, but No Output from A or B Supplies with Power Supply connected to Circuit 1. Disconnect the CPS250 outputs from the circuit being tested. Check A and B VOLTAGE and CURRENT controls. 2. If the outputs are good, check the circuit under test for a short or low resistance. POWER Light ON, but No Output from Any Supplies with Power Supply Not Connected to Circuit Contact your nearest Tektronix service center for servicing.
Appendix B: Maintenance 22 CPS250 User Manual
Appendix C: Replaceable Parts Replaceable parts may be ordered directly from your authorized Tektronix dealer.
Appendix C: Replaceable Parts The following power cords are available.