
Refrigerator User Manual
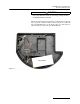


6712FR Refrigerated Sampler
Section 8 Maintenance
8-10
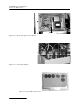
8.5.1 Checklist For
Replacing Pump Tube
1. Disconnect power from the sampler.
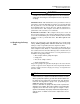
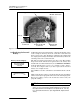
2. Loosen the liquid detector’s cover by unscrewing the black
knob on top of the detector. Unlatch the pump band. (The
band is the rounded metal band that holds the tube in the
pump.)
3. Pull the tube away from the bulkhead fitting. Pull it from
the pump and detector.
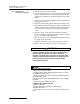
4. Clean the pump rollers and the inside of the pump band.
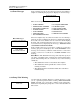
5. Thread the new tubing through the pump so that the tube
follows its natural curve around the pump rollers. You may
need to move the pump rollers to make the installation
easier.
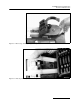
6. The blue collars on the tube help align the tube in the
detector and pump. Align the tube by placing the collars in
the grooves inside the liquid detector.
7. Close the detector’s cover and tighten the black knob. Close
the pump strap and latch it.
8. Reset the pump-tube counter. (See example in table 8-2.)
9. Take a “dry” grab sample to test the tube installation.
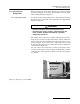
WARNING
The pump’s safety lock prevents the sampler from running
the pump when the pump band is open. DO NOT tamper
with the safety mechanism. The pump is extremely
powerful. The pump rollers can injure you severely if the
sampler activates the pump while you are working on it or
inside it. Disconnect power from the sampler before
replacing the pump tube.
Note
To extend the pump tube life:
• Always use Isco pump tubes.
• Install the tube properly, aligning the blue collars correctly in
the liquid detector’s grooves.
• Follow the natural curve of the tube when wrapping the tube
around the pump rollers.
• Minimize the line rinses and sampling retries in the sampling
programs
• Use the shortest possible suction line.
Conditions that shorten tube life:
• Improper installation.
• Abrasive materials suspended in sample liquid.
• Frequent line rinses.
• Long purge cycles, such as those used with long suction
lines.