
manual
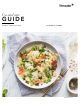

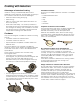
Table Of Contents
- Table of ContentsUse and care manual
- IMPORTANT SAFETY INSTRUCTIONS
- READ AND SAVE THESE INSTRUCTIONS
- WARNING
- Fire Safety
- WARNING
- to reduce the risk of a grease fire:
- a. Never leave surface units unattended at high settings. Boilovers cause smoking and greasy spillovers that may ignite. Heat oils slowly on low or medium settings.
- b. Always turn hood ON when cooking at high heat or when flambeing food (i.e. Crepes Suzette, Cherries Jubilee, Peppercorn Beef Flambé).
- c. Clean ventilating fans frequently. Grease should not be allowed to accumulate on fan or filter.
- d. Use proper pan size. Always use cookware appropriate for the size of the surface element.
- WARNING
- TO REDUCE THE RISK OF INJURY TO PERSONS IN THE EVENT OF A GREASE FIRE, OBSERVE THE FOLLOWING:
- a. SMOTHER FLAMES with a close-fitting lid, cookie sheet, or metal tray, then turn off the burner. BE CAREFUL TO PREVENT BURNS. If the flames do not go out immediately, EVACUATE AND CALL THE FIRE DEPARTMENT.
- b. NEVER PICK UP A FLAMING PAN – You may be burned.
- c. DO NOT USE WATER, including wet dishcloths or towels – a violent steam explosion will result.
- d. Use an extinguisher ONLY if:
- Cooking Safety
- Burn Prevention
- Child Safety
- Cleaning Safety
- Cookware Safety
- Proper Installation and Maintenance
- Electromagnetic interference
- Cooling fan
- State of California Proposition 65 Warnings:
- Causes of damageCauses of damage
- Protecting the Environment
- Cooking with Induction
- Familiarizing yourself with your applianceFamiliarizing yourself with your appliance
- Operating the Appliance
- First-time use
- Switching the cooktop on and off
- Setting a cooking position
- Chef's recommendations
- Timer functionsTimer functions
- Cook Timer
- Setting the Cook Timer
- 1. Select the cooking position and the required power level.
- 2. Touch the selected power level. The + symbol will light up in the cooking position display.
- 3. Touch the + symbol. 00|00 ‹ will light up on the cooking position display.
- 4. Then select the required cooking time in hours and minutes.
- 5. Touch the < symbol to confirm the selected time. The time you have set will appear in the cooking position display.
- Cooking Sensor mode
- Changing or deleting the time
- When the time has elapsed
- Stopwatch Timer
- Activating the Stopwatch Timer
- Pausing the Stopwatch Timer
- Deactivating
- Note:
- Kitchen Timer
- Setting the Kitchen Timer
- 1. Touch the TIMERS touch button.
- 2. Touch the . symbol and confirm your choice by touching the 8 symbol. óóEóó.óóÕ will light up in the display.
- 3. Within the next 10 seconds, scroll up or down with your finger and set the time in minutes, hours and seconds.
- 4. Touch the < symbol to confirm your chosen setting. The . symbol and the selected time will light up in the function bar.
- Changing or deleting the time
- Pausing the Kitchen Timer
- When the time has elapsed
- PowerBoost® Function
- PanBoost™ Function
- Keep Warm
- Transfer function
- Wireless Cooking Sensor
- Preparing and caring for the wireless cooking sensor
- Gluing on the silicone patch
- 1. The part of the cookware to which the patch is to be adhered must be free of grease. Clean the pan, dry it thoroughly and wipe the area where the patch is to be adhered with an all purpose degreasing agent.
- 2. Remove the protective film from the silicone patch. Adhere the silicone patch in the correct place on the outside of the pot using the supplied template as a guide.
- 3. Press down all over the surface of the silicone patch, including in the center.
- Notes
- Attaching the wireless cooking sensor
- Notes
- Connecting the wireless cooking sensor to the control panel
- 1. Touch the " symbol on the main screen.
- 2. Select the Cooking sensor pairing option and then touch the 8 symbol to confirm.
- 3. Briefly touch the ¨ symbol on the wireless cooking sensor within the next 30 seconds.
- 4. To connect a different cooking sensor, touch the 8 symbol. To return to the basic settings, touch the 9 symbol.
- Notes
- Resetting the wireless cooking sensor
- 1. Touch and hold the ¨ symbol on the cooking sensor for 8-10 seconds.
- 1. Remove the silicone cover from the lower section of the cooking sensor casing and remove both screws using a screwdriver.
- 1. this device may not cause interference, and
- Cooking Sensor Mode
- Temperature °F (°C)
- Cookware
- Suitable for
- Advantages
- Notes
- Tips for cooking with cooking sensor mode
- Notes
- Setting the boiling point
- Note:
- Setting procedure
- 1. Attach the wireless cooking sensor to the saucepan; see the section entitled ~ "Preparing and caring for the wireless cooking sensor"
- 2. Fill the cookware with a sufficient amount of liquid, put the lid on and place it on the cooking surface. See the section entitled ~ "Attaching the wireless cooking sensor".
- 3. Tap the cooking position display for the cookware.
- 4. Touch the ¢ symbol.
- 5. Use your finger to scroll up to the n symbol. Then touch the 8 symbol to confirm your choice.
- 6. Touch the ¨ symbol on the wireless cooking sensor as shown on the display.
- 7. Select the temperature level.
- 8. Once the signal tone has sounded, remove the lid and add the food. Leave the lid on while cooking.
- Note:
- Deactivating
- 1. Touch the temperature level.
- 195 (90)
- 10 - 20
- 212 (100)
- 20 - 30
- 212 (100)
- 60 - 90
- 212 (100)
- 60 - 90
- 240 (115)
- 15 - 25
- 240 (115)
- 15 - 25
- 340 (170)
- 10 - 15
- 340 (170)
- 10 - 15
- 195 (90)
- 15 - 20
- 340 (170)
- 10 - 15
- 340 (170)
- 10 - 15
- 212 (100)
- 5 - 10
- 212 (100)
- 10 - 20
- 212 (100)
- 10 - 20
- 212 (100)
- 5 - 10
- 212 (100)
- 30 - 40
- 212 (100)
- 15 - 30
- 212 (100)
- 60 - 90
- 212 (100)
- 15 - 20
- 212 (100)
- 45 - 60
- 240 (115)
- 3 - 6
- 240 (115)
- 25 - 35
- 240 (115)
- 25 - 35
- 240 (115)
- 10 - 20
- 340 (170)
- 4 - 8
- 340 (170)
- 4 - 8
- 340 (170)
- 4 - 8
- 340 (170)
- 4 - 8
- 185 (85)
- 30 - 40
- 212 (100)
- 3 - 6
- 212 (100)
- 30 - 45
- 212 (100)
- 30 - 45
- 240 (115)
- 10 - 20
- 240 (115)
- 10 - 20
- 320 (160)
- 8 - 12
- 185 (85)
- 5 - 10
- 195 (90)
- 25 - 35
- 195 (90)
- 45 - 55
- 195 (90)
- 8 - 12
- 195 (90)
- 20 - 30
- 195 (90)
- 10 - 12
- 185 (85)
- 3 - 8
- 212 (100)
- 7 - 10
- 212 (100)
- 3 - 5
- 212 (100)
- 7 - 10
- 212 (100)
- 15 - 20
- 212 (100)
- 5 - 8
- 240 (115)
- 6 - 8
- 240 (115)
- 12 - 18
- 195 (90)
- 10 - 15
- 212 (100)
- 60 - 90
- 212 (100)
- 5 - 10
- 240 (115)
- 20 - 30
- 185 (85)
- 40 - 50
- 185 (85)
- 10 - 15
- 185 (85)
- 3 - 5
- 212 (100)
- 15 - 25
- 320 (160)
- 5 - 10
- 320 (160)
- 5 - 10
- 320 (160)
- 5 - 10
- 155 (70)
- 15 - 20
- 212 (100)
- 15 - 30
- 350 (180)
- 4 - 8
- 155 (70)
- 10 - 20
- 155 (70)
- 5 - 15
- 185 (85)
- 3 - 10
- MyZone™
- Notes
- Activation
- 1. Tap the cooking position display for the cookware.
- 2. Touch the ¢ symbol.
- 3. Use your finger to scroll down to the symbol. Then touch the 8 symbol to confirm your choice.
- 4. Move the cookware over the cooking surface until the power level you require is set. The power level you have selected will appear on the cooking position display.
- Note:
- Changing the power level
- Note:
- Deactivating
- 1. Touch the power level.
- TeppanyakiPro™ Mode
- Panel Lock
- Pause function
- Automatic Shutoff
- Basic Settings
- MyZone™
- ’
- CAL
- --------
- Home Connect
- Notes
- Connection to your home network
- Setting up the Home Connect app
- Note:
- 1. On your mobile device, go to the App Store (Apple devices) or to the Google Play Store (Android devices).
- 2. Enter "Home Connect" in the search field.
- 3. Select the Home Connect app and install it on your mobile device.
- 4. Start the app and create your Home Connect login details. The app will guide you through the registration process. Make a note of your e-mail address and password.
- Automatic Registration in the Home Network
- 1. To open the basic settings, touch the " symbol on the main screen.
- 2. Scroll left or right with your finger and select the E Home Connect setting.
- 3. The conditions needed to establish a Home Connect connection will be displayed. Touch the 8 symbol to confirm.
- 4. Select the Automatic option and touch the 8 symbol to confirm your choice.
- 5. Press the WPS button on your router within 2 minutes, as shown on the display.
- 6. A message will be displayed to notify you when the cooktop is successfully connected to your home network. Confirm by touching the 8 symbol.
- 7. Now open the Home Connect app on your mobile device and follow the connection instructions on the display.
- 8. A message will be displayed to confirm that connection to the app has been successful. Touch the 8 symbol to confirm.
- Note:
- Manual Registration in the Home Network
- 1. To open the basic settings, touch the " symbol on the main screen.
- 2. Scroll left or right with your finger and select the E Home Connect setting.
- 3. The conditions needed to establish a Home Connect connection will be displayed. Touch the 8 symbol to confirm.
- 4. Select the Manual option and confirm by touching the 8 symbol.
- 5. A message will appear on the display for opening the network settings of the mobile device. Touch the 8 symbol to confirm.
- 6. You now have 5 minutes to register the mobile device with the SSID "HomeConnect" and the password "HomeConnect".
- 7. Then open the Home Connect app on your mobile device.
- 8. A message will be displayed to notify you when the cooktop is successfully connected to your home network. Confirm by touching the 8 symbol.
- 9. Now open the Home Connect app on your mobile device and follow the connection instructions on the display.
- 10. A message will be displayed to confirm that connection to the app has been successful. Touch the 8 symbol to confirm.
- Note:
- Home Connect Settings
- E
- ø
- }
- ú
- --------
- Note:
- Wi-Fi symbols
- E
- Deactivate Wi-Fi
- Note:
- 1. To open the basic settings, touch the " symbol on the main screen.
- 1. To open the basic settings, touch the " symbol on the main screen.
- 1. To open the basic settings, touch the " symbol on the main screen.
- 1. To open the basic settings, touch the " symbol on the main screen.
- 1. To open the basic settings, touch the " symbol on the main screen.
- Software Update
- Information on Data Protection
- Wi-Fi® Module
- Cooktop - Hood Sync
- Notes
- Setting up a connection
- Connecting directly
- Note:
- 1. To open the basic settings, touch the " symbol on the main screen.
- 2. Use your finger to scroll to the left or right and select the A Cooktop - Hood Sync setting.
- 3. Select the "Cooktop - Hood Sync" option and touch the 8 symbol to confirm.
- 4. You have 2 minutes to initiate the connection process on the hood. See hood operating instructions.
- Connecting via your home network
- 1. To open the basic settings, touch the " symbol on the main screen.
- 2. Use your finger to scroll to the left or right and select the A Cooktop - Hood Sync setting.
- 3. Select the Home Connect option and touch the 8 symbol to confirm.
- 4. Press the WPS button on the router within the next 2 minutes.
- 5. You have 2 minutes to initiate the connection process on the hood. See hood operating instructions.
- Note:
- Disconnecting from the network
- Controlling the hood via the cooktop
- Ventilation control settings
- A
- 9
- 6
- ¾
- ú
- --------
- Cleaning and Maintenance
- Frequently-asked questions and answers (FAQ)
- Troubleshooting
- STATEMENT OF LIMITED PRODUCT WARRANTY
- THERMADOR® Support
- READ AND SAVE THESE INSTRUCTIONS

9 IMPORTANT SAFETY INSTRUCTIONS
READ AND SAVE THESE INSTRUCTIONS
6
When using the Cooking Sensor mode, make sure that
the selected cooking zone matches the one on which
you have placed the cookware with the cooking sensor.
WARNING
RISK OF INJURY
The wireless cooking sensor is powered by a battery,
which may become damaged if it is exposed to high
temperatures. Remove the sensor from the cookware
and store it away from any heat sources.
WARNING
RISK OF INJURY
The cooking sensor can be very hot when removing it
from the cookware. Use potholders or a dish towel to
remove it.
Never use the appliance if liquids or foods have spilled
around the control panel. Always turn off the cooktop
and dry the control panel.
Injury and damage to the appliance may occur if control
elements are not used properly.
If the cooktop turns off automatically and can no longer
be operated, it may turn itself on unintentionally at a later
point. Switch off the circuit breaker in the fuse box.
Contact Customer Support for service.
Burn Prevention
DO NOT TOUCH SURFACE UNITS OR AREAS NEAR
UNITS - Surface units may be hot even though they are
dark in color. Areas near surface units may become hot
enough to cause burns. During and after use, do not
touch, or let clothing, potholders, or other flammable
materials contact surface units or areas near units until
they have had sufficient time to cool. Among these areas
are the cooktop and areas facing the cooktop.
Do not heat or warm unopened food containers. Build-up
of pressure may cause the container to burst and cause
injury.
Always use dry potholders. Moist or damp potholders on
hot surfaces may result in burns from steam. Do not let
potholder touch hot heating elements. Do not use a towel
or other bulky cloth.
Always turn hood ON when cooking at high heat or when
flambéing food (i.e. Crêpes Suzette, Cherries Jubilee,
Peppercorn Beef Flambé).
Use high heat settings on the cooktop only when
necessary. To avoid bubbling and splattering, heat oil
slowly on no more than a low-medium setting. Hot oil is
capable of causing extreme burns and injury.
Never move a pan of hot oil, especially a deep fat fryer.
Wait until it is cool.
Secure all loose garments, etc. before beginning. Tie
long hair so that it does not hang loose, and do not wear
loose fitting clothing or hanging garments, such as ties,
scarves, jewelry, or dangling sleeves.
WARNING
RISK OF BURNS
Metallic objects become hot very quickly on the cooktop.
Never set down metallic objects, such as knives, forks,
spoons and lids on the cooktop.
WARNING
RISK OF BURNS
The pan detection shut off feature may not turn off the
cooking zone due to spilled food or objects placed on
the cooktop.
If the display does not work when a cooking area is
heating up, disconnect the circuit breaker or fuse in the
electrical panel. Contact an authorized servicer.
Child Safety
When children become old enough to use the appliance,
it is the responsibility of the parents or legal guardians to
ensure that they are instructed in safe practices by
qualified persons.
Do not allow anyone to climb, stand, lean, sit, or hang on
any part of an appliance, especially a door, warming
drawer, or storage drawer. This can damage the
appliance, and the unit may tip over, potentially causing
severe injury.
Do not allow children to use this appliance unless closely
supervised by an adult. Children and pets should not be
left alone or unattended in the area where the appliance
is in use. They should never be allowed to play in its
vicinity, whether or not the appliance is in use.
CAUTION
Items of interest to children should not be stored in an
appliance, in cabinets above an appliance or on the
backsplash. Children climbing on an appliance to reach
items could be seriously injured.
Cleaning Safety
Do not clean the appliance while it is still hot. Some
cleaners produce noxious fumes when applied to a hot
surface. Wet clothes and sponges can cause burns from
steam.
Do not use steam cleaners to clean the appliance.