
Use and care guide
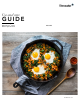

Table Of Contents
- Table of ContentsUse and care manual
- IMPORTANT SAFETY INSTRUCTIONS
- READ ALL INSTRUCTIONS BEFORE USING THE APPLIANCE
- 9 PRECAUTIONS TO AVOID POSSIBLE EXPOSURE TO EXCESSIVE MICROWAVE ENERGY
- WARNING
- WARNING
- GROUNDING INSTRUCTIONS
- TV / Radio Interference
- Intended Use
- Child Safety
- Cleaning Safety
- Cooking Safety
- In Case of Fire
- Liquids
- Cooking Items
- Cooking Utensils
- Metal Tray Turntable
- Thermometers
- Pacemakers
- State of California Proposition 65 Warnings:
- Fan Motor Operation
- SAVE THESE INSTRUCTIONS.
- Causes of Damage
- Protecting the environment
- Getting to Know the Appliance
- Before First Use
- Operating the appliance
- Switching the Appliance On and Off
- Setting the appliance
- 1. Touch the ON l OFF touch button to switch on the appliance.
- 2. Swipe to the left in the top line of the display to select “Heating Mode” ¢.
- 3. Touch “Continue”.
- 4. “True Convection” ‚ is shown as the default mode. Swipe in the top line of the display to set a different mode if desired.
- 5. Touch the bottom line of the display and swipe to the left or right to select the temperature.
- 6. Touch the START l STOP touch button to start the appliance operation.
- 7. When the appliance has reached the set temperature, “preheating completed” is displayed.
- Changing the settings of the current mode
- Changing the operating mode
- 1. Touch the START l STOP touch button.
- 1. Touch the ON l OFF touch button to switch on the appliance.
- Operating features
- Microwave
- Microwave utensil guide
- Microwave power levels
- Setting the microwave
- 1. Touch the ON l OFF touch button to switch on the appliance.
- 2. “Microwave” • is shown as the default mode.
- 3. Touch “Continue”.
- 4. A microwave power level in percent is suggested.
- 5. Touch the power level field and swipe to the left or right to select a different power level.
- Note:
- Note:
- Changing the cooking time
- Add 30 seconds cooking time
- Changing the microwave power level
- The cooking time has elapsed
- Pausing the operation
- Switching the appliance off
- 1. Touch the ON l OFF touch button to switch on the appliance.
- Suggestions for best results
- Microwave programs
- Note:
- Information on the settings
- Setting a Microwave Program
- 1. Touch the ON l OFF touch button.
- 2. Swipe to the right in the upper field of the display to select “Mw Programs” ±.
- 3. Touch “Continue”.
- 4. Swipe to the right or left to select a Microwave Program.
- 5. Touch the Melt Butter program.
- 6. Swipe to the left or right to select 1/4 cup.
- 7. Touch “Continue”.
- 8. A summary of the settings you have made is displayed.
- 9. Touch the START l STOP touch button.
- Changing the operating mode
- When the program is finished
- Switching off the appliance
- 1. Touch the ON l OFF touch button.
- Pizza
- Beverage
- Popcorn
- Sensor Cook
- Sensor Reheat
- Auto Defrost
- Melt Butter
- Melt Chocolate
- Soften Ice Cream
- Soften Cream Cheese
- CookSmart™
- Note:
- Information on the settings
- Selecting food
- Selecting and setting food
- 1. Touch the ON l OFF touch button.
- 2. Touch the COOK SMART touch button.
- 3. Swipe to the left or right to select the required food category.
- 4. Swipe to the left or right to select the required dish.
- 5. Depending on the program you are prompted to select the weight or the pan size for the food you want to cook. Swipe to the left or right to select the correct value.
- 6. Touch “Continue”.
- 7. Touch the START l STOP touch button to start the appliance operation.
- Note:
- Note:
- Pausing the operation
- Note:
- Changing the operating mode
- Switching off the appliance
- 1. Touch the ON l OFF touch button.
- Heating Modes
- --------
- Cookware tips for conventional cooking modes
- True Convection ‚
- Setting
- 1. Open the “Heating Mode” menu. ~ "Setting the appliance" on page 15
- 2. Touch “True Convection” ‚.
- 3. Swipe to the left or right in the bottom line of the display to select the desired temperature.
- 4. Touch the START l STOP touch button.
- 5. The appliance starts preheating. The status bar fills up.
- Pausing the operation
- Note:
- Changing the temperature
- Changing the operating mode
- Switching off the appliance
- Keep Warm «
- Speed Convection n
- Setting
- 1. Open the “Heating Mode” menu. ~ "Setting the appliance" on page 15
- 2. Scroll to the left or right on the upper part of the display and touch “Speed Convection” n.
- 3. Swipe to the left or right in the bottom line of the display to select the desired temperature.
- 4. Touch the START l STOP touch button.
- Pausing the operation
- Note:
- Changing the temperature
- Changing the operating mode
- Switching off the appliance
- Broil ‰
- Note:
- Setting
- 1. Open the “Heating Mode” menu. ~ "Setting the appliance" on page 15
- 2. Scroll to the left or right on the upper part of the display and touch “Broil” ‰.
- 3. Swipe to the left or right in the bottom line of the display to select the desired Broil level.
- 4. Touch the START l STOP touch button.
- Pausing the operation
- Note:
- Changing the temperature
- Changing the operating mode
- Switching off the appliance
- Convection Broil ‡
- --------
- Combi Mode
- Setting
- 1. Touch the ON l OFF touch button to switch on the appliance.
- 2. Swipe to the left in the top line of the display to select “Combi Mode” ¡.
- 3. Touch “Continue”.
- 4. Swipe to the left or right to select Combi Convection.
- 5. Touch the temperature field and swipe to the left or right to adjust the temperature. Touch the 8 symbol.
- 6. Touch the duration field and set the microwave duration. Touch the 8 symbol.
- 7. Touch the START l STOP touch button to start the appliance operation.
- 8. When the set duration is finished, “Combi Mode completed” is displayed. Touch the notification on the display.
- Pausing the operation
- Note:
- Changing the settings of the current mode
- Changing the operating mode
- 1. Touch the START l STOP touch button.
- 1. Touch the ON l OFF touch button to switch on the appliance.
- Setting
- Timer Options
- Panel Lock
- Adjust Basic Settings
- Changing the Settings
- 1. Touch the ON l OFF touch button.
- 2. Swipe to the left or right to select "Settings 4".
- 3. Touch “Continue”.
- 4. Swipe to the left or right to select the required setting.
- 5. Touch the bottom line.
- 6. Swipe to the left or right to select the required setting.
- 7. If required, touch the 8 symbol to apply the setting.
- 8. Touch the upper line.
- 9. Touch the MENU touch button.
- 10. Touch "Save" to save the changes.
- 1. Touch the ON l OFF touch button.
- Available Settings
- Changing the Settings
- Cleaning and Maintenance
- Before Calling for Service
- THERMADOR® Support
- STATEMENT OF LIMITED PRODUCT WARRANTY
- READ ALL INSTRUCTIONS BEFORE USING THE APPLIANCE
- Table des MatièresNotice d’utilisation
- Définitions de sécuritéDéfinitions de sécurité
- CONSIGNES DE SÉCURITÉ IMPORTANTES
- LISEZ TOUTES LES INSTRUCTIONS AVANT D'UTILISER L'APPAREIL
- 9 MESURES DE PRÉCAUTION POUR ÉVITER L’EXPOSITION EXCESSIVE À L’ÉNERGIE MICRO-ONDE
- AVERTISSEMENT
- AVERTISSEMENT
- INSTRUCTIONS DE MISE À LA TERRE
- Interférences radio/télévision
- Utilisation prévue
- Sécurité des enfants
- Consignes en matière de nettoyage
- Sécurité de cuisson
- En cas d’incendie
- Liquides
- Articles de cuisson
- Utensiles de cuisson
- Plateau en metalle
- Thermomètres
- Pacemakers
- Avertissement issue de la proposition 65 de l’État de la Californie :
- Fonctionnement du moteur du ventilateur
- CONSERVEZ CES INSTRUCTIONS.
- Causes des dommages
- Protection de l'environnement
- Familiarisation avec l'appareil
- Avant la première utilisation
- Avant d’utiliser l’appareil pour la première fois
- Fonctionnement initial
- Réglage de l’heure du jour
- 1. Effleurez la ligne du bas.
- 2. Effleurez le champ tactile « Heure » et glissez vers la gauche ou la droite pour sélectionner l’heure actuelle.
- 3. Effleurez le champ tactile « Minute » et glissez vers la gauche ou la droite pour sélectionner les minutes actuelles.
- 4. Effleurez le symbole 8 pour confirmer les réglages.
- Réglage de la langue
- 1. Glissez vers la gauche pour accéder au prochain réglage.
- 1. Glissez vers la gauche pour accéder au prochain réglage.
- Accessoires de nettoyage
- Utilisation de l’appareil
- Mise sous tension ou hors tension de l'appareil
- Réglage de l’appareil
- 1. Effleurez la touche tactile ON l OFF pour mettre l’appareil sous tension.
- 2. Glissez vers la gauche sur la ligne supérieure de l’écran pour sélectionner « Mode de cuisson » ¢.
- 3. Effleurez « Continuer ».
- 4. « Convection véritable » ‚ est affichée comme mode par défaut. Glissez vers la gauche sur la ligne supérieure de l’écran pour sélectionner un otre mode si vous le désirez.
- 5. Effleurez la ligne inférieure de l’écran et glissez vers la gauche ou la droite sur pour sélectionner la température.
- 6. Effleurez la touche tactile START l STOP pour lancer la cuisson.
- 7. Quand l’appareil atteint la température réglée, « Préchauffage terminé » s’affiche.
- Modification des réglages du mode actuel
- Modification du mode de fonctionnement
- 1. Effleurez la touche tactile START l STOP.
- 1. Effleurez la touche tactile ON l OFF pour mettre l’appareil sous tension.
- Caractéristiques de fonctionnement
- Micro-ondes
- Guide des ustensiles pour micro-ondes
- Niveaux de puissance du micro-ondes
- Réglage du micro-ondes
- 1. Effleurez la touche tactile ON l OFF pour mettre l’appareil sous tension.
- 2. « Micro-ondes » • est affichée comme mode par défaut.
- 3. Effleurez « Continuer ».
- 4. L'appareil suggère un niveau de puissance en pourcentage.
- 5. Effleurez le champ niveau de puissance et glissez vers la gauche ou la droite pour sélectionner un niveau de puissance différent.
- Remarque :
- Remarque :
- Modification du temps de cuisson
- Ajout de 30 secondes au temps de cuisson
- Modification du niveau de puissance du micro-ondes
- Temps de cuisson écoulé
- Mise en pause
- Mise hors tension de l'appareil
- 1. Effleurez la touche tactile ON l OFF pour mettre l’appareil sous tension.
- Suggestions pour les meilleurs résultats
- Programmes du micro-ondes
- Remarque :
- Renseignements à propos des réglages
- Réglage du programme de micro-ondes
- 1. Effleurez la touche tactile ON I OFF.
- 2. Glissez vers la droite sur le champ supérieur de l’écran pour sélectionner « Programmes micro- ondes » ±.
- 3. Effleurez « Continuer ».
- 4. Glissez vers la droite ou la gauche pour sélectionner un programme micro-ondes.
- 5. Effleurez le programme Fondre du Beurre.
- 6. Glissez vers la gauche ou la droite pour sélectionner 1/4 tasse.
- 7. Effleurez « Continuer ».
- 8. Un résumé des réglages effectués s’affiche.
- 9. Effleurez la touche tactile START l STOP.
- Changer le programme
- À la fin du programme
- Mise hors tension de l'appareil
- 1. Effleurez la touche tactile ON I OFF.
- Pizza
- Trucs pour la pizza
- Réglage du mode Pizza pour pizza fraîche ou surgelée
- 1. Ouvrez le menu « Programmes de micro-ondes ». ~ "Réglage du programme de micro-ondes" à la page 56
- 2. Sélectionnez « Pizza ».
- 3. Sélectionner le type désiré de pizza.
- 4. Glissez vers la gauche ou la droite pour régler une température.
- 5. Effleurez « Continuer ».
- 6. Effleurez la touche tactile START l STOP.
- 7. Le préchauffage du four est lancé. La barre d’état commence à se remplir.
- Réglage du mode Pizza pour la pizza au micro-ondes
- 1. Ouvrez le menu « Programmes de micro-ondes ». ~ "Réglage du programme de micro-ondes" à la page 56
- Boisson
- Popcorn
- Capteur cuisson
- Remarques
- Réglage
- 1. Ouvrez le menu « Programmes de micro-ondes ». ~ "Réglage du programme de micro-ondes" à la page 56
- 2. Sélectionnez « Capteur cuisson ».
- 3. Glissez vers la gauche ou la droite pour sélectionner l’aliment désiré.
- 4. Effleurez la touche tactile START l STOP.
- 5. Une fois la détection terminée, s’affiche un avis sur l’écran. L’appareil amorce la cuisson. Le temps de cuisson calculé s’écoule à l’écran.
- Remarque :
- Capteur Réchaud
- Décongélation automatique
- Fondre du beurre
- Fondre du chocolat
- Amollir de la crème glacée
- Amollir du fromage à la crème
- CookSmartMD
- Remarque :
- Renseignements à propos des réglages
- Sélection des aliments
- Choix et réglage de cuisson des aliments
- 1. Effleurez la touche tactile ON l OFF.
- 2. Effleurez la touche tactile COOK SMART.
- 3. Glissez vers la gauche ou la droite pour sélectionner la bonne catégorie d'aliment.
- 4. Glissez vers la gauche ou la droite pour sélectionner le plat requis.
- 5. Selon le programme, l'appareil vous invite à choisir le poids ou la dimension de la casserole de l’aliment à cuire. Glissez vers la gauche ou la droite pour sélectionner la bonne valeur.
- 6. Effleurez « Continuer ».
- 7. Effleurez la touche tactile START l STOP pour lancer la cuisson.
- Remarque :
- Remarque :
- Pause
- Remarque :
- Changer le programme
- Mise hors tension de l'appareil
- 1. Effleurez la touche tactile ON l OFF.
- Modes de cuisson
- --------
- Ustensiles de cuisson pour les modes conventionnels de cuisson
- Convection Véritable ‚
- Réglage
- 1. Ouvrez le menu « Mode de cuisson ». ~ "Réglage de l’appareil" à la page 51
- 2. Effleurez « Convection véritable » ‚.
- 3. Glissez vers la gauche ou la droite sur la ligne inférieure de l’écran pour sélectionner la température désirée.
- 4. Effleurez la touche tactile START l STOP.
- 5. Le préchauffage du four est lancé. La barre d’état commence à se remplir.
- Pause
- Remarque :
- Changer la température
- Changer le programme
- Mise hors tension de l'appareil
- Garder au Chaud «
- Convection Rapide n
- Réglage
- 1. Ouvrez le menu « Mode de cuisson ». ~ "Réglage de l’appareil" à la page 51
- 2. Faites défiler vers la gauche ou vers la droite dans la section supérieure de l’écran et effleurez « Convection rapide » n.
- 3. Glissez vers la gauche ou la droite sur la ligne inférieure de l’écran pour sélectionner la température désirée.
- 4. Effleurez la touche tactile START l STOP.
- Pause
- Remarque :
- Changer la température
- Changer le programme
- Mise hors tension de l'appareil
- Gril ‰
- Remarque :
- Réglage
- 1. Ouvrez le menu « Mode de cuisson ». ~ "Réglage de l’appareil" à la page 51
- 2. Faites défiler vers la gauche ou vers la droite dans la section supérieure de l’écran et effleurez « Gril» ‰.
- 3. Glissez vers la gauche ou la droite sur la ligne inférieure de l’écran pour sélectionner le niveau de gril désiré.
- 4. Effleurez la touche tactile START l STOP.
- Pause
- Remarque :
- Changer la température
- Changer le programme
- Mise hors tension de l'appareil
- Gril à Convection ‡
- --------
- Modes Combinés
- Réglage
- 1. Effleurez la touche tactile ON l OFF pour mettre l’appareil sous tension.
- 2. Glissez vers la gauche sur la ligne supérieure de l’écran pour sélectionner « Mode combiné » ¡.
- 3. Effleurez « Continuer »
- 4. Glissez vers la gauche ou la droite pour sélectionner la convection combinée.
- 5. Effleurez le champ de température et glissez vers la gauche ou la droite pour régler la température. Effleurez le symbole 8.
- 6. Effleurez le champ de durée et réglez la durée au micro-ondes. Effleurez le symbole 8.
- 7. Effleurez la touche tactile START l STOP pour lancer la cuisson.
- 8. Quand le temps s’est écoulé, « Mode Combiné terminé » s’affiche. Effleurez l’avis à l’écran.
- Pause
- Remarque :
- Modification des réglages du mode actuel
- Modification du mode de fonctionnement
- 1. Effleurez la touche tactile START l STOP.
- 1. Effleurez la touche tactile ON l OFF pour mettre l’appareil sous tension.
- Réglage
- Options de minuterie
- Verrouillage du Panneau de Commande
- Réglages de base
- Modification des réglages
- 1. Effleurez la touche tactile ON I OFF.
- 2. Glissez vers la gauche ou la droite pour sélectionner « Réglages 4 ».
- 3. Effleurez « Continuer ».
- 4. Glissez vers la gauche ou la droite pour sélectionner le réglage requis.
- 5. Effleurez la ligne du bas.
- 6. Glissez vers la gauche ou la droite pour sélectionner le réglage requis.
- 7. Au besoin, effleurez le symbole 8 pour confirmer le réglage.
- 8. Effleurez la ligne supérieure.
- 9. Effleurez la touche tactile MENU.
- 10. Effleurez « Sauvegarder » pour conserver les modifications.
- 1. Effleurez la touche tactile ON I OFF.
- Réglages offerts
- Modification des réglages
- Nettoyage et entretien
- Dépannage
- Soutien THERMADOR®
- ÉNONCÉ DE LA GARANTIE LIMITÉE
- LISEZ TOUTES LES INSTRUCTIONS AVANT D'UTILISER L'APPAREIL
- Leere Seite
- Leere Seite

9 IMPORTANT SAFETY INSTRUCTIONS
READ ALL INSTRUCTIONS BEFORE USING THE APPLIANCE
8 SAVE THESE INSTRUCTIONS.
Cooking Items
Eggs: Do not cook or reheat whole eggs, with or without
shell. Steam buildup in whole eggs may cause them to
explode, and possibly damage the oven or cause injury.
Reheating sliced hard-boiled eggs and cooking
scrambled eggs is safe.
Popcorn: Use only popcorn in packages designed and
labeled for microwave use, or pop it in a microwave oven
corn popper. Follow popcorn manufacturers’ directions
and use a brand suitable for the wattage of your oven.
Do not continue to heat after popping has stopped.
Popcorn will scorch or burn. Do not leave oven
unattended.
CAUTION
When using pre-packaged microwave popcorn, check
package weight before using the popcorn function. Set
the oven for the weight of the popcorn package. If these
instructions are not followed, popcorn may not pop
adequately or may ignite and cause fire.
Foods with nonporous skins: Potatoes, tomatoes, sweet
potatoes, apples, whole squash and sausages are
examples of foods with nonporous skins. These types of
foods must be pierced before cooking to prevent them
from exploding.
Baby food / Baby formula: Do not heat baby bottles or
food in microwave oven. The glass jar or the surface of
food may appear warm while the interior can burn the
infant’s mouth and esophagus.
Deep fat frying: Do not deep fat fry in oven. Oil can be
heated beyond ideal temperatures very quickly in a
microwave oven. Temperatures can climb high enough
for the cooking oils to reach their respective flash points
and burst into flames. The heated oil may bubble and
spatter causing possible damage to the oven and
perhaps result in burns. Additionally, microwave–safe
utensils may not be able to withstand the temperature of
the hot oil, and could result in the utensil shattering, if it
contains a slight imperfection, scratch or chip.
Home Canning / Drying foods / Small quantities of
foods: Do not use microwave oven for home canning or
heating of any closed jar. Pressure will build up and the
jar may explode. In addition, the oven cannot maintain
the food at the proper canning temperature. Improperly
canned food may spoil and be dangerous to consume.
Small quantities of food or foods with low moisture
content can dry out, burn or catch on fire.
Do not dry meats, herbs, fruits or vegetables in your
oven.
Proper cooking depends on time set and weight of food.
If you use a smaller portion than recommended and
cook at the time for the recommended portion, fire could
result.
Browning dishes: Microwave browning dishes or grills
are designed for microwave cooking only. Preheating
times vary depending on the size of the browning dish
and food being cooked. Always follow instructions
provided by the browning dish or grill manufacturer. Do
not preheat browning dishes more than 6 minutes.
Oven roasting bags: If an oven bag is used for
microwave cooking, prepare according to package
directions. Do not use wire twist–ties to close bags,
instead use nylon ties, cotton string or a strip cut from
the open end of the bag. Make six ½" (12.7 mm) slits by
closure. Place oven cooking bag in a dish slightly larger
than the food being cooked.
Cooking Utensils
See also Microwave Utensil Guide.
Cooking utensils, the ceramic tray and racks get hot
during microwaving. Always use potholders when
removing items from the oven. Allow the ceramic tray
and the metal racks (if used) to cool before handling.
Do not use metal utensils, or dishes with metallic trim in
the oven.
When using aluminum foil in the oven, allow at least
1 inch (25 mm) of space between foil and interior oven
walls or door.
The ceramic tray and the metal racks (if used) will get hot
during cooking. The cooking container and the ceramic
tray can be hot even if the oven is cool.
Never use paper, plastic, or other combustible materials
that are not intended for cooking.
When cooking with paper, plastic, or other combustible
materials, follow manufacturer’s recommendations on
product use. Do not use paper towels which contain
nylon or synthetic fibers. Heated synthetics could melt
and cause paper to ignite.
Do not heat sealed containers or plastic bags in oven.
Food or liquid could expand quickly and cause container
or bag to break. Pierce or open container or bag before
cooking.
Metal Tray Turntable
Do not operate the oven without the metal tray turntable
in place.
Verify that the metal tray turntable is properly positioned
and turning when the oven is in use. Improper cooking or
damage to the oven could result.
Only use the metal tray turntable designed for this oven.
Do not substitute any other tray.
Always replace the metal tray in its proper position.