Operation Manual
Manuals
Brands
Thomson Manuals
Audio
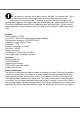
WHP3315 - 131961
1
2
3
4
5
6
7
8
9
10
ON/OFF
5
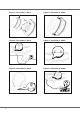
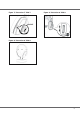
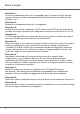
Figure
7/
Illustration
7/
Bild
7:
Figure
9/
Illustration
9/
Bild
9:
Figure
8/
Illustration
8/
Bild
8:
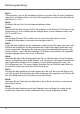
1
...
2
3
4
5
6
7
...
...
44