
Use and Care Manual
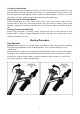
To Stop Engines
With machine in upright position, adjust the cutter cage to maximum height by turning the height
adjustment knob to its farthest position. (This ensures clearance for the rotating cage).
GAS UNIT- Stop engine by depressing kill switch
button located at top of handle.
Maintenance
The machine is generally run in very dusty conditions. Engine life will be extended by maintaining a
clean engine and using a DUST CONTROL UNIT or SHOP-VAC. Keep the air filter clean at all times.
Wash the element in a non-oil based solvent. Squeeze out any residue and allow filter to dry before
re-installing in the air cleaner.
Lubrication: Use proper engine oil as recommended by manufacturer. Deep engine oil clean, change
as required. Maintain crankcase levels as recommended in engine manual.
Spark plug: Check and clean spark plugs regularly. A fouled or dirty spark plug causes difficulty
in starting and poor engine performance; set spark plug gap to recommended clearance in engine
manual.
Drive Shaft: Keep a coating of grease on the drive shaft and threads for easy installation or removal
and longer bushing life.
Spot Checks: Perform as required. Machine should be inspected with ignition in “off” position or
power cord disconnected. Do not perform inspections while machine is running.
● Check all fasteners for tightness- machine is subject to vibration.
● Check “V” belt for wear; adjust or replace as required.
● Check that wheels are clean and rotating freely.
● Check that inside of housing is clean; remove any build-up as required.
● Check that pulleys are aligned properly to ensure that “V” belt is running true (i.e. not at an angle).
Bearing Replacement Procedures
Important: disengage power supply. Do not attempt replacement while machine is operable
Sealed Bearing Replacement – Outboard Side: Remove drive shaft and cutter cage assembly as per
cutter change procedure. Remove snap ring and bearing shield from inside housing. Loosen and
remove bearing block flange by removing screws and lockwashers. Using a soft drift, drive out bearing
sleeve. Remove old bearing and clean parts which will be re-used. Carefully press new bearings into
flange. Clean and install bearing cover plate taking care to seat the plate flush. Re-install bearing sleeve.
Take extreme care to maintain aligned installation. Do not press sleeve into position if misaligned. Mount
bearing block to side of housing but do not tighten. From inside housing install bearing shield and snap
ring. Center block on the housing taking care that shield does not bind on bearing sleeve. Tighten bolts
when bearing block is in a free spin position.
Bearing Replacement – Drive or “V” Belt side: Remove belt guard and “V” belt. Loosen set screws,
remove key and remove pulley. Remove bearing block assembly by removing screws and lockwashers.
Remove snap ring and slip ring. Using a soft drift, drive out spindle. Take care not to burr or flare spindle.
Remove cover plate and bearing. Carefully press new bearing into block, clean and install bearing cover
plate being certain the plate fits flush. Press drive spindle into block. Install slip ring and snap ring.
Center and install spindle assembly to housing. Re-install pulley and key. Ensure pulley butts flush
against shoulder or spindle. Note: When removing spindle or sleeve, care must be taken not to damage
or distort these parts a soft drift is recommended to prevent damage.
6