
All in One Printer User Manual
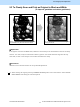
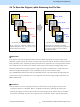
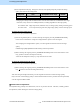
Table Of Contents
- Purpose of the Imaging Manual
- Table of Contents
- 1. General Adjustments – Copying, Printing and e-Filing (Output from Box)
- 1.1 To Obtain a Darker Image
- 1.2 To Adjust the Density on a Solid Colored Image
- 1.3 To Achieve the Image Quality Most Suitable for the Paper Used (To eliminate blur and graininess from an image)
- 1.4 To Minimize Variations in the Image Quality under the Operating Conditions (To optimally program image quality control)
- 1.5 To Correct Out-of-Registration Colors
- 2. Copier-specific Adjustments
- 2.1 To Copy Text Clearly (To eliminate faint, smudged or blurred text)
- 2.2 To Closely Match the Color Balance of the Original
- 2.3 To Improve the Reproducibility of Gray
- 2.4 To Copy in Vivid Colors
- 2.5 To Make the Pale Area of the Original Look Darker and Sharper (To improve the highlight reproducibility)
- 2.6 To Eliminate the Background Color
- 2.7 To Avoid Copying the Image Seen through the Back of a Page Printed on Thin Paper
- 2.8 To Eliminate Moiré
- 2.9 To Copy Sharply (To enhance sharpness)
- 2.10 To Make Photo Edges Look Softer
- 2.11 To Make Solid Filled Bold Text (Logo) Highly Colored
- 2.12 To Sharply Contrast the Hues of Highlighters on the Copy
- 2.13 To Obtain a Good Color Balance on Thick Paper
- 2.14 To Obtain Smooth Gray-Scale Photo Images
- 2.15 To Change the Threshold in Auto Color Mode (To change the threshold between the Full Color mode and the Black mode to meet the user’s needs)
- 2.16 To Adjust the Twin-Color Copy Image Quality
- 2.17 To Adjust the Image Quality Scanned from the RADF
- 2.18 To Program Frequently Used Copy Settings (To Use Custom Mode)
- 2.19 To Copy While Erasing Shadow Outside of Image
- 2.20 To Avoid Copying Blank Page of Original Scanned with RADF
- 2.21 To Obtain Image in Even Density Level
- 3. Printer-specific Adjustments
- Restrictions on Use of Printer Functions
- 3.1 To Maintain a Steady Color Balance
- 3.2 To Maintain a Steady Color Balance on Thick Paper or Special Paper
- 3.3 To Obtain the Desired Color Balance
- 3.4 To Closely Match the Color Balance on the Monitor
- 3.5 To Maintain a Uniform Gray Hue(To maintain Consistency in Gray among Text, Photos and Graphics)
- 3.6 To Use Only the Black Toner to Reproduce Gray Areas(To use only the black toner to reproduce black-and-white photos or gradational images)
- 3.7 To Easily Adjust the Overall Brightness
- 3.8 To Adjust the Overall Saturation
- 3.9 To Easily Adjust the Overall Contrast
- 3.10 To Obtain a Sharper Print Image
- 3.11 To Obtain a Softer Image
- 3.12 To Make Low-resolution Data Look Finer (To soften an image)
- 3.13 To Eliminate Smudges from Highly Colored Text and Lines (To prevent toner scattering around text and lines where a large amount of toner is used)
- 3.14 To Clearly Print Light-Colored Thin Lines or Text
- 3.15 To Make the Light-Colored Area Darker on the Printout
- 3.16 To Clearly Print Thin Lines/Double Lines
- 3.17 To Decrease the Image Density and Save Toner (To Print in the Toner Save Mode)
- 3.18 To Adjust the Image Density in the Toner Save Mode
- 3.19 To Print Illegible Gray or Colored Text in Black
- 3.20 To Ignore Blank Pages for Printing
- 3.21 To Sharply Print Black Text
- 3.22 To Prevent Dark Toner from Coming Off
- 3.23 To Register the Image Quality Adjusted Corresponding to a Preference(To use the Custom Color Settings)
- 3.24 To Print a Full-Color Original in Two Colors
- 3.25 To Use ICC Profile
- 3.25.1 To Create ICC Profiles for Printing on the Paper to be Used
- 3.25.2 To Print Precise Colors Using Existing RGB Source ICC Profiles
- 3.25.3 To Perform Simulated Printing with CMYK Inks of Each Ink Manufacturer
- 3.25.4 To Convert Colors with Specified Source ICC Profiles (Not Using Embedded ICC Profiles)
- 3.25.5 To Perform Further Adjustment After Using ICC Profiles
- 4. e-Filing-specific Adjustments
- 4.1 To Clearly Store a B/W Image in the Auto Color Mode
- 4.2 To Store an Original while Reducing the File Size
- 4.3 To Store a Color Photo Image, while Minimizing Moiré
- 4.4 To Match the Color Balance on the Original(To adjust the color balance in Print to Box)
- 4.5 To Scan and Print, while Minimizing Moiré
- 4.6 To Finely Print the Image Stored in the e-Filing box(To print images stored through Copy to Box or Print to Box)
- 4.7 To Store an Image Suitable for Displaying on the Monitor or Image Editing
- 4.8 To Finely Print Color Images Scanned and Stored(To print images stored through Scan to Box)
- 4.9 Appendix
- 5. Scanning-specific Adjustments
- 5.1 To Clearly Scan Text (To reduce noise around text)
- 5.2 To Scan an Original, while Eliminating the Background Color(To eliminate the background density)
- 5.3 To Clearly Scan and Print an Original in Black and White(To improve gradation and reduce graininess)
- 5.4 To Scan the Original, while Reducing the File Size
- 5.5 To Sharply Scan the Original (To increase the sharpness intensity)
- 5.6 To Scan an Original, while Enhancing Black
- 5.7 To Scan an Original with the Desired Gradation
- 5.8 To Register the Original Mode Optimal for a Particular Type of Original(To have "Custom" selected)
e-STUDIO5520C/6520C/6530C © 2008 TOSHIBA TEC CORPORATION All rights reserved
5-11
5. Scanning-specific Adjustments
5.4.2 To Reduce the File Size in Slim PDF
* Both the service technician and the user can use procedure (1).
* The service technician must use only procedure (2) in adjustment mode [05] (step (b) "To reduce the blurred
area of text and photos"). Both the service technician and the user can use other procedures.
<Note> • Slim PDF will be available only if "SCAN TO FILE OR USB" or "SCAN TO E-MAIL" is
selected in scan mode to scan the original in the Full color mode or the Gray scale mode.
• The image quality or file size in Slim PDF may be more affected than in JPEG or PDF,
depending on the environment (original placing direction) when the original is scanned. In
addition, the scanning will be slowed down.
• Slim PDF is not suitable for the following originals. It is recommended to scan them in JPEG
or PDF.
• Originals blurred when scanned in JPEG or PDF
(If the original is scanned in Slim PDF, the image quality may be further diminished)
• Complicated originals such as tables or maps containing lines or small-sized text
• Originals where stable image quality is required, such as critical documents
(1) When scanning the original, press the [SLIM PDF] button on the Control Panel.
After adjusting the original in Slim PDF, scan the original and check the scanned-in image quality.
If the image quality adjustment in Slim PDF is necessary, use the next procedure.
(2) Adjust the image quality in Slim PDF at a user’s request.
To reduce the blurred area of text and photos
Use steps (a) to (b) to perform the adjustment.
(a) Turn the original and place it. Or when scanning the original, press the [COMMON SETTING]
button on the Control Panel. Change the "Image Rotation" option to turn the original.
After changing the "Image Rotation" option, scan the original and check the scanned-in image
quality.
If further image quality adjustments are still necessary, the service technician must use the next procedure.