FT-8901.
FT-8901.qx 1/5/1 11:28 AM Page 2 GETTING STARTED: DO THIS FIRST! Preparation FIRST, After unpacking your new cordless phone: CHARGE THE HANDSET BATTERY! • Set your new phone in an out-of-the-way place near a power outlet but where it will not be disturbed. • Plug the AC adaptor into the wall power outlet. • Plug the AC adaptor cord into the power jack on the base unit. The “POWER” LED should light. If not, see “TROUBLESHOOTING,” page 31.
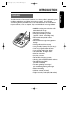
FT-8901.qx 1/5/1 11:28 AM Page 3 INTRODUCTION Toshiba America Consumer Products Inc. takes pride in presenting the cordless telephone and digital answering system. An all digital answering device provides many new conveniences not available on tape machines, such as repeat, skip and individual message delete. BA TALK TT LO W • 900MHz analog transmission with extended talk range • 40 channel auto scanning • All digital recording system (approx. 15min.
FT-8901.qx 1/5/1 11:28 AM Page 4 TABLE OF CONTENTS Preparation INTRODUCTION . . . . . . . . . . . . . . . . . . . . . . . . . . . . . . . . . . . . . . . . . .3 Features . . . . . . . . . . . . . . . . . . . . . . . . . . . . . . . . . . . . . . . . . . . . . .3 IMPORTANT SAFETY INSTRUCTIONS . . . . . . . . . . . . . . . . . . . . . . . .6 LOCATION OF CONTROLS . . . . . . . . . . . . . . . . . . . . . . . . . . . . . . . . .8 Handset . . . . . . . . . . . . . . . . . . . . . . . . . . . . . . . . . . . . .
FT-8901.qx 1/5/1 11:28 AM Page 5 TABLE OF CONTENTS Answering system USING THE MENU MODE . . . . . . . Recording the greeting message . To change the greeting message Setting the clook . . . . . . . . . . . . . Setting the security code (PIN) . . Setting the base ringer volume . . Setting the number of rings . . . . . Setting the recording time . . . . . . . . . . . . . . . . . . . . . . . . . . . . . . . . . . . . . . . . . . . . . . . . . . . . . . . . . . . . . . . . . . . . . . . . . . . . . .
FT-8901.qx 1/5/1 11:28 AM Page 6 Preparation IMPORTANT SAFETY INSTRUCTIONS When using your telephone equipment, basic safety precautions should always be followed to reduce the risk of fire, electric shock and injury. 1 Read and understand all instructions. 2 Follow all warnings and instructions marked on the product. 3 Unplug this product from the wall outlet before cleaning. Do not use liquid cleaners or aerosol cleaners. Use a dry cloth for cleaning.
FT-8901.qx 1/5/1 11:28 AM Page 7 IMPORTANT SAFETY INSTRUCTIONS The RBRCTM Seal on the (easily removable) nickel-cadmium battery (contained in our product) indicates that Toshiba America Consumer Products, Inc. (TACP) is voluntarily participating in an industry program to collect and recycle these batteries at the end of their useful lives, when taken out of service within the United States.
FT-8901.
FT-8901.
FT-8901.qx 1/5/1 11:28 AM Page 10 Preparation INSTALLATION SETTING UP THE BASE UNIT (DESK TOP MOUNTING) For setting up the base unit follow the instructions below. Raise the antenna to a vertical position. Single-Line Telephone Jack (RJ11C) Fasten the AC adaptor cord to prevent it from being disconnected. Telephone Line Cord AC Adaptor Power Outlet (AC 120V, 60Hz) • Plug the AC adaptor firmly into the base unit and the AC 120V outlet.
FT-8901.qx 1/5/1 11:28 AM Page 11 INSTALLATION Preparation SETTING UP THE BASE UNIT (WALL MOUNTING) MOUNTING ON A STANDARD WALL PLATE: Insert the bracket’s tabs into the notches on the base. Flip the switch hook tab over so the tab holds the handset. Raise the antenna. Telephone Line Cord Single-Line Telephone Jack (RJ11C) Power Outlet (AC 120V, 60Hz) AC Adaptor • Route the cords through the guides. • Place the base unit on the posts of the wall plate and push down until it is firmly seated.
FT-8901.qx 1/5/1 11:28 AM Page 12 Preparation INSTALLATION CHARGING THE BATTERY PACK It is important to charge the battery for 12 to 16 hours continuously without any interruption before you use the handset for the first time. Red Black 1 Remove the battery cover on the back of the handset by sliding it down. 2 Plug the battery pack cord into the connector with the correct polarity. (black and red wires). 3 Place the battery pack in the battery compartment.
FT-8901.qx 1/5/1 11:28 AM Page 13 INSTALLATION After the battery pack is fully charged; Preparation Operation Approx. battery life While in use (Talk mode) up to 7 hours While not in use (Standby mode) up to 14 days When the TALK/BATT LOW LED blinks, all handset buttons are disabled and the battery needs to be charged. If this occurs during a call, you hear short beeps. Finish the call as soon as possible and place the handset on the base unit.
FT-8901.qx 1/5/1 11:28 AM Page 14 INSTALLATION Preparation Before using the handset, make sure to read the following instructions. FLASH TONE/ SETTING THE DIAL MODE Depending on your dialing system, set the mode as follows: 1 Press and hold until you hear a confirmation tone. 2 To set the dial mode for pulse dialing, press . Or to set the dial FLASH mode for tone dialing press TONE/ . A confirmation tone sounds to indicate the setting is complete. Note: Most phone systems use tone dialing.
FT-8901.qx 1/5/1 11:28 AM Page 15 BASIC OPERATION Before using the handset, make sure to read the following instructions. RDL/P (Redial/Pause) TALK FLASH Basics TONE/ VOL/RING MUTE CH MAKING A CALL Handset On The Base Handset Off The Base 1) Pick up the handset. 2) Press TALK . 3) Listen for the dial tone. 4) Dial the number. 1) Press TALK . 2) Listen fot the dial tone. 3) Dial the number. To hang up: Press TALK , or return the handset to the base (Auto Standby).
FT-8901.qx 1/5/1 11:28 AM Page 16 BASIC OPERATION REDIAL Handset On The Base Handset Off The Base 1) Pick up the handset and press TALK . 2) Listen for the dial tone. 3) Press RDL/P . 1) Press TALK . 2) Listen for the dial tone. 3) Press RDL/P . Basics OUT OF RANGE During a call, as you begin to move too far from the base unit, the noise increases. Then, you should move close to the base unit. If you travel out-of-range, your call terminates.
FT-8901.qx 1/5/1 11:28 AM Page 17 BASIC OPERATION BASE SPEAKER VOLUME SETTING To adjust the base unit speaker volume, press while speaking. VOLUME/+ or VOLUME/– MUTE To mute a conversation, press MUTE during a conversation. To resume normal conversation, press TALK or MUTE . Basics TONE/ENTERING A PAUSE To Do this To temporarily switch to tone dial (When the base is set to pulse mode) Press TONE/ . The following numbers will be sent as tone dialing (See page 14).
FT-8901.qx 1/5/1 11:28 AM Page 18 MEMORY DIALING You can store up to 10 telephone numbers in the memory. Basics NOTES: • Always press a button within 20 seconds or the phone will return to standby. • If you press a wrong button, an error tone sounds and the handset returns to standby mode. • If you receive an incoming call or a pager call from the base unit during the operation, the operation will be cancelled.
FT-8901.qx 1/5/1 11:28 AM Page 19 MEMORY DIALING 4 Enter the memory address (0 to 9) at which you wish to store the phone number stored in step 3. You will hear a long beep when the number is successfully stored. To store more telephone number, repeat steps 1 to 4. 5 Return the handset to the base unit. 6 Record the telephone numbers on the SPEED DIAL INDEX CARD, and place it on the back of the handset.
FT-8901.qx 1/5/1 11:28 AM Page 20 USING THE MENU MODE Menu mode allows you to setting following Answering System functions. REC MEMO/2WAY MENU VOLUME/+ SET VOLUME/– SELECT SELECT REW REPEAT / SELECT SKIP FF / SELECT LED display PLAY/STOP DELETE GREETING TIME Answering system Menu No.
FT-8901.qx 1/5/1 11:28 AM Page 21 USING THE MENU MODE RECORDING THE GREETING MESSAGE You can record a personalized greeting message (up to 30 seconds) or use the pre-recorded message. When a call is received, the answering machine answers the call and plays the greeting message. 1 Press MENU once. You hear the pre-recorded message or current greeting message. 2 Press REC MEMO/2WAY and you will hear the guidance. Start to record your message. For example: “I can not come to the phone right now.
FT-8901.qx 1/5/1 11:28 AM Page 22 USING THE MENU MODE SETTING THE CLOCK The answering machine announces the day and time that each message was recorded during a play back. 1 Press MENU twice. The system announces the current time. 2 Press SET . You hear the current day and the LED display shows the numbers [ ] through [ ]. 3 Press SELECT or SELECT until the correct day is announced. 4 Press 5 Press SET . Answering system SELECT or SELECT until you hear the correct hour setting.
FT-8901.qx 1/5/1 11:28 AM Page 23 USING THE MENU MODE SETTING THE SECURITY CODE (PIN) To access to your answering machine when you are away from home, you need to identify yourself with a security code or Personal Identification Number (PIN). You can select any two digit number between 00 and 99 as your security code (PIN). 1 Press MENU three times. You hear the current the current setting, and the LED display shows the current security code (PIN). 2 Press SET to change the security code (PIN).
FT-8901.qx 1/5/1 11:29 AM Page 24 USING MENU MODE SETTING THE NUMBER OF RINGS Select one of four ring time setting ( : Toll server). : 2rings, : 4rings, :6rings, 1 Press MENU five times. The current ring time is displayed on the LED display. 2 Press 3 Press SET to change the ring time. or SELECT or until the desired ring time : 2rings, : 4rings, :6rings, : Toll Server) SELECT appears. ( 4 Press SET to set the new ring time. The answering machine announces the ring time that you have set.
FT-8901.qx 1/5/1 11:29 AM Page 25 USING THE ANSWERING MACHINE VOLUME/+ REW REPEAT / SELECT VOLUME/– ANSWER LED display SKIP FF DELETE / SELECT PLAY/STOP GREETING TIME TURNING THE ANSWERING MACHINE ON & OFF Press ANSWER to turn the answering machine on. The ANSWER LED will light, and the number of messages appears on the LED display. The greeting message will be played and you hear a long beep. To turn off the answering machine, press ANSWER . The LED display turns off.
FT-8901.qx 1/5/1 11:29 AM Page 26 USING THE ANSWERING MACHINE CHECKING CLOCK SETTING You can check the time (day, hour, minute, AM, and PM) by using the Time stamp. To check the time, press TIME . The time will be announced. PLAYING RECORDED MESSAGES Answering system The display shows the total number of recorded messages. If new messages have been recorded, the number blinks. To listen to the messages, press PLAY/STOP . Messages will be played in the order they were received.
FT-8901.qx 1/5/1 11:29 AM Page 27 USING THE ANSWERING MACHINE DELETING RECORDED MESSAGES To delete all messages: Press and hold DELETE till a beep sounds after playback of all messages. If there are messages that you have not listened to, an errer tone sounds and the messages will not be deleted. To delete individual messages: While playing back the message you want to delete, press DELETE . The message is deleted and the next message will be played.
FT-8901.qx 1/5/1 11:29 AM Page 28 USING THE ANSWERING MACHINE LEAVING A MEMO MESSAGE You can use the base unit to record a memo (up to 10 minutes), as a reminder to yourself or as a message for someone else in the household. A memo is stored and played back like any other incoming message, and the LED display will blink to indicate that a message has been received. 1 Press and hold REC MEMO/2WAY till a beep sounds. You hear “Record your message after the tone” and a long beep.
FT-8901.qx 1/5/1 11:29 AM Page 29 USING THE ANSWERING MACHINE CALLING IN FROM A REMOTE LOCATION You can retrieve messages or change answering machine settings by calling your phone from a touch-tone phone. Even if the answering machine has been left off, you can still access it by turning it on first. 1 IF THE ANSWERING MACHINE IS OFF: Let the phone ring at least 10 times. The line will connect and you will hear several short beeps. Press # and enter your security code (PIN).
FT-8901.qx 1/5/1 11:29 AM Page 30 USING THE ANSWERING MACHINE TABLE OF COMMANDS Answering system OPERATION Press Remarks To repeat an incoming message; (during playback) # 1 Enter the command within 4 seconds after the beginning of the message to repeat the previous message, and after 4 seconds to repeat the current message. To playback an incoming message (up to 4 minutes) # 2 For longer playback, 2 at the end of press # the message.
FT-8901.qx 1/5/1 11:29 AM Page 31 TROUBLESHOOTING Should any problem occur with the unit, use the following simple tests to determine whether or not servicing is required. PROBLEM SOLUTION • The charging contacts of the handset and base are not clean. → Clean them with a dry cloth. • The battery is not connected with correct polarity. → Install the battery pack correctly. • The battery is several years old. → Replace with a new battery. Battery pack becomes low quickly.
FT-8901.qx 1/5/1 11:29 AM Page 32 Additional Information TROUBLESHOOTING PROBLEM SOLUTION The handset does not ring when it is on the base. • Ringer Volume setting is OFF position. → Set the Ringe Volume to Hi or Lo • The charging contacts of the handset and the base are not clean. → Clean them with a dry cloth. • The battery is several years old. → Replace with a new battery. CHARGE LED will not light when the handset is placed on the base.
FT-8901.qx 1/5/1 11:29 AM Page 33 WARRANTY/SERVICE PROBLEM SOLUTION The answering machine does not answer the call. • The recording capacity is full. → Delete the unnecessary message. Aanswering machine does not play. • No message is recorded. → This is normal. The messages are not recorded/incomplete. • The message was too long or too short. → The message should not be longer than the recording time (1 or 4 minutes), or shorter than 2 seconds. • The recording capacity became full.
FT-8901.qx 1/5/1 11:29 AM Page 34 WARRANTY/SERVICE SERVICE REQUIREMENTS If the cordless telephone should malfunction, or need changes or modifications, all repairs will be performed by an authorized Toshiba Service Station. This unit has been registered with the FCC for direct connection to the telephone network. Under the FCC program, no customer is authorized to repair this unit. This applies to units either in or out of warranty.
FT-8901.qx 1/5/1 11:29 AM Page 35 WARRANTY/SERVICE TELEPHONE/TELEPHONE ANSWER MACHINE LIMITED WARRANTY Toshiba America Consumer Products.Inc(“TACP”) and Toshiba Hawaii,Inc.(“THI”) make the following limited warranties. These limited warranties extend to the original consumer purchaser or any person receiving this set as a gift from the original consumer purchaser and to no other purchaser or transferee.
FT-8901.qx 1/5/1 11:29 AM Page 37 REMOTE OPERATION CARDS CUT REMOTE OPERATION OF FT-8901 A B Call your machine from touch tone phone. After your machine answers, enter # and security code (PIN) pressing each digit for at least 1 second. If you enter # and PIN correctly, your machine sounds invitation tone after the announcement. Now enter the command (# and number) by pressing the keypad. To playback incoming and memo messages, press #2. To skip, press #3 C D during playback.
FT-8901.
FT-8901.qx 1/5/1 11:29 AM Page 40 For technical assistance, purchase of accessories or service, please access www.toshiba.com/tacp. IMPORTANT We suggest you record the following information and retain for your records along with your bill of sale or equipment document. Model no.__________________ Serial no.______________ Purchase date______________ Dealer_________________ Dealer address _____________________________________ © UCZZ01315BZ 2001 TOSHIBA AMERICA CONSUMER PRODUCTS, INC.