PRIMEBOOK C13 P13 EN DE OPERATING INSTRUCTIONS BEDIENUNGSANLEITUNG
CONTENT 1. Welcome………………………………………………………………………………… 4 2. Intended use…………………………………………………………………………… 4 Explanation of Safety Symbols and Keywords 5 3. General Safety Information…………………………………………………… 6 4. Technical specifications…………………………………………………………… 11 Technical specifications of the power adapter 12 5. Content…………………………………………………………………………………… 12 6. Controls and ports………………………………………………………………… 13 7.
15. Connecting the Primebook to the Internet……………………………… 22 Connecting to a stationary wireless network (WiFi) 22 16. Launching the Internet browser/Entering an Internet address… 23 17. Downloading applications from the Windows Store……………… 23 18. Changing the display language……………………………………………… 24 19. Using the camera…………………………………………………………………… 25 20.
1. Welcome We hope you enjoy your new Primebook C13. The online operating instructions, the enclosed Quick Start Guide and the additional brochure "Product Safety and Legal Information" are direct components of the product. Please read all three documents carefully before you turn on your device. They contain important information about device safety, usage and disposal. Please keep these documents in a safe place and pass them on in full to the new owner if the device changes hands.
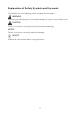
Explanation of Safety Symbols and Keywords This booklet uses the following safety symbols and keywords: WARNING Indicates possible danger to life and/or danger of severe, irreversible injuries CAUTION Follow instructions to avoid injuries and material damage NOTICE Follow instructions to avoid material damage i ADVICE Additional information about using the device 5
3. General Safety Information WARNING Risk of multiple injuries due to reduced physical, sensory, or mental capabilities and/or lack of knowledge or practical experience ■■ Children and vulnerable individuals may only use the device under direct supervision. Risk of suffocation and severe injuries from accessories and packaging materials ■■ Keep accessories and packaging materials out of reach of babies, young children, and pets.
Risk of hearing loss through the use of headsets, earbuds, or headphones The device can generate high sound levels when using headsets, earbuds, or headphones. This may result in hearing loss if your ears are exposed to high sound levels over an extended period of time. The higher you set the volume, the more quickly your hearing can be damaged. Hearing loss may occur slowly over time. ■■ Do not listen to music or other audio files for an extended period of time at high volumes.
Risk of multiple injuries and fire/explosion hazard in potentially explosive atmospheres ■■ Operating the device in potentially explosive atmospheres, such as at filling stations, on construction sites, or in chemical plants, is prohibited. ■■ Switch off the device if you are in areas that contain potentially explosive materials (e. g., gas, fuel, chemicals, particulate matter, grain, dust, or metal powders). Sparks could cause an explosion or fire.
■■ ■■ ■■ ■■ ■■ Only use the device indoors under suitable lighting conditions and avoid harsh light. Hold the device at an appropriate distance from yourself. Ensure that the display is clean. Adjust the screen’s brightness and/or contrast settings to a level that is comfortable for a crisp, clear display. Take regular breaks when using the device. Risk of impairment to the musculoskeletal system and supporting tissue from use over longer periods of time ■■ Repetitive movements (e.g.
■■ ■■ ■■ ■■ ■■ ■■ Keep the device away from open flames such as candles, fireplaces, and campfires to avoid the risk of the battery exploding. Do not expose your device to rain or to dripping or splashing water. Do not use the device outdoors during a storm. Should the device become wet, turn it off immediately. Ensure that the device and/or the power adapter are checked by a qualified person before using it again. Use the device in a dust-free environment.
4. Technical specifications Processor (CPU): Processor design: Operating system: RAM: Storage capacity: Graphics processing unit (GPU): Display size: Display type: Screen resolution: Aspect ratio: Camera: Speaker: Microphone: Interfaces: Network: Frequencies: Supported memory cards: Supported SIM card: Dimensions (B x H x T): Weight: Material/Colour: Keyboard layout: Playable video formats: Video container formats: Gaming: Supported picture formats: Intel® Celeron® N3350 processor (up to 2.
Playable audio formats: Battery: Charge by: Power supply: More: Languages: Temperatures: Relative humidity: MP3, WAV, OGG, FLAC, AAC Li-Polymer (7.4 V / 5500 mAh / 40.70 Wh) DC IN Power adapter (100 V – 240 V) Fingerprint sensor, G-Sensor, Hall-Sensor German, English, Italian, Spanish, French, Dutch 5° C to 30° C 30 % to 70 % * Feature option depending on model Technical specifications of the power adapter Model: Input voltage: Input current: Output: Manufacturer: 5.
Controls and ports A B C Druck HDMI ° ! ^ 1 " § 2 4 ³ USB W & 5 E / 6 R T ( 7 Z { ) [ 8 U ] 0 O ` ? = 9 I } ß P A S Y D X | Fn F C < G V H B J N K µ > Alt L ; M * + , Alt Gr Ä Ö : _ . - Entf Pos1 ´ \ Ü € @ Strg % $ 3 ² Q Einfg ~ ' # Bild ▲ DC IN P Q R S T microSD TYPE-C D E F G 12V/2A O K LM N USB 6. Bild ▼ U Ende Strg SIM V H I M.
J) Touchpad K) Status LED on/off L) Status LED Caps Lock M) Status LED touchpad N) Stereo speaker O) Windows button P) Hinge Q) DC IN R) Audio port S) USB socket 3.1 Gen 1 T) Memory card slot U) On/Off switch V) SIM card slot* * Feature option depending on model 7. Primebook’s modes of use There are four different modes of use for the Primebook. Notebook mode Notebook mode corresponds to the factory default mode. Here, the convertible is used as a conventional notebook.
Presentation mode This mode is useful if you want other people to be able to see quite easily what’s happening on screen or if no other options are available (e.g. corresponding output devices such as monitors or projectors). Tent mode In tent mode, you place the device in front of you and this allows you to operate the touch display with relative ease. The display is very stable for touch operation in this mode and therefore lends itself especially to digital entertainment.
8. Starting up the Primebook for the first time First unpack your Primebook. Remove all components from the packaging and completely remove the packaging material, including the protective film. Check to ensure that the delivery is complete (see Section 5). If you find that there are missing or damaged components, contact customer service immediately. Charging the Primebook Please fully charge your Primebook before you use it for the first time.
Unlocking the display As soon as the device has been set up (and every time it is subsequently switched on and booted up), the lock screen appears. Press any key on the keyboard to unlock the screen. ADVICE If your Primebook is password-protected, you must then enter the password. i 9.
10. Using the keyboard Special keys and function buttons on the keyboard To simplify operation, the keyboard has numerous special keys and function buttons for controlling the Primebook. Fn key (blue) The blue Fn key is used to enable or operate the additional function buttons (blue symbols) on the keyboard.
In reverse, move two fingers towards each other on the touchpad to reduce the display again. Similarly, you can move the screen contents either up or down by placing two fingers on the touchpad in parallel and swiping either up or down. 12. Info Center The Info Center is a bar with quick links to some important Primebook functions, which you can either display or hide. To access the Info Center, click the memo symbol on the bottom right of the display.
Layout of the Start menu In addition to the straightforward navigation list (A) found in the "classic" Start menu, the Start menu of your Primebook has a useful app area (B) to the right of the navigation list. Here, you can "pin" apps and favourites in the form of live tiles and organise them. This gives you quick and easy access to your most frequently used apps and content. ADVICE In the navigation list (A) you find a list of all installed apps in alphabetical order.
Pinning apps a) Call up the Start menu as described above. b) Scroll with the mouse or use the touchpad to navigate to the desired app in the navigation bar in the Start menu. ADVICE Alternatively, you can use the keyboard arrow keys. i c) Now left-click the app you want (or press the left button on the touchpad). Keep your finger on the app you want and drag it to the desired position in the app area of the Start menu.
14. Accessing the settings The button for accessing Settings (a cogwheel symbol) can be found in the bottom-left corner of the Start menu. Alternatively, you can access the settings by opening the Info Center and clicking "All settings". You can also access Settings by using the cogwheel symbol on the keyboard. 15. Connecting the Primebook to the Internet Connecting to a stationary wireless network (WiFi) a) Call up the settings (see Section 14). b) In Settings, tap "Network & Internet".
ADVICE You may be asked whether the Primebook should search for additional devices in the selected network and whether it should automatically connect to these devices (for example, printers or television sets). This is recommended in private home networks that you can trust. If you connect to a public wireless network, we recommend that you decline this option by tapping "Nein". In this way, you protect your private sphere. i You can now surf the Internet as usual using the Internet browser.
If you do not yet have a Microsoft account or are not signed in with it, you must perform these steps. Open the Windows Store and select the desired app. Click the app and then click "Install". An assistant now appears to guide you through the process of setting up a Microsoft account. ADVICE If you set up a Microsoft account and link it to your Primebook, the password for unlocking the Primebook changes. From now on, you have to enter the password for your Microsoft account to unlock the Primebook. i 18.
19. Using the camera The Primebook has a front camera. To use the camera, you must first open the app provided: a) Call up the Start menu (see Section 12). b) Scroll to "C" and tap "Camera". The camera app opens and appears as a window on the display. The following functions are now available: A) Opens the self-timer and an exposure mode for image capture. B) Calls up additional camera settings. C) Switch to video mode.
20. Transferring files between the Primebook and other devices Transferring files via Bluetooth a) Enable the Bluetooth function on the device you want to connect and make the device visible to other devices if necessary. To do so, refer to the operating instructions of the device to be connected. b) Call up the settings (see Section 14). c) In Settings, tap "Devices" and in the following window tap "Bluetooth & other devices" on the left.
ADVICE After a successful file transfer, deactivate the Bluetooth function to save energy. To deactivate the Bluetooth connection move the slider for Bluetooth from right to left. The word "Off" now appears next to the slider. i Transferring files between the Primebook and an external storage device a) Please connect an external storage device (for example, a USB drive or a hard drive) to your Primebook.
21. Connecting the Primebook to a television You can transfer the image and sound from the Primebook to a suitable television via HDMI cable or Miracast. Connecting to a television via HDMI cable To connect the Primebook to a suitable television via HDMI, you require an appropriate cable (Micro-HDMI to HDMI, available in specialist shops). Connect the Primebook to the TV using the HDMI cable, and select the correct HDMI input as the source (the HDMI input to which the cable is connected).
22. Insert M.2 SSD MODULE Follow the step-by-step instructions shown to insert the SSD into the SSD extension slot. Make sure that the computer is switched off before inserting the SSD. ADVICE The SSD extension slot is included as a model-dependant equipment option for Primebook C13 (Wi-Fi). Primebook C13 (Wi-Fi) is only compatible with an SSD module with form factor M.2 2242 in version B & M key and B key.
Step 3: Insert SSD Align the SSD before inserting it into the extension slot. The semicircular recess of the SSD points towards the screw base and the gold-coloured contacts of the SSD point towards the contacts in the SSD extension slot. Insert the SSD slightly diagonally into the SSD extension slot. ADVICE The SSD can only be inserted in one direction. Depending on the connection type that your device features, the SSD may have to be rotated along its longitudinal axis to fit correctly.
23. Reset If the Primebook "freezes" and no longer responds, you can reset it. Press and hold down the on/off switch for at least 10 seconds until the device switches off. Wait for about 20 seconds and then turn the device on normally. ADVICE Any files that have not been saved will be lost when the Primebook is reset. i 24. Switching off/Restarting the Primebook Briefly press the on/off switch on the device to activate the standby mode. Press it again quickly to take the Primebook out of standby mode.
26. Troubleshooting/FAQ In the following, you will find a list of frequently asked questions along with the appropriate answers and proposed solutions. Why is my Primebook slow to charge? If you charge the Primebook while it is under a very high load (for example, video playback at 100 % display brightness and simultaneous surfing, chatting or games), the battery will charge very slowly due to the high load. We therefore recommend charging the Primebook while it is switched off.
My Primebook won’t switch on. What can I do? The battery may not be sufficiently charged to allow the Primebook to switch on. Connect the Primebook to the charger (see Section 8) to recharge the battery. How can I install Windows Updates on my Primebook? Your Primebook checks for new updates daily (an Internet connection must be available) and displays an appropriate message in the Action Center when new updates are available.
27. Glossary Apps/Applications An app (abbreviation of the word "application") or application is a program that you can download from the Windows Store, for example, and install on your Primebook. Games, programs for playing back images and music files, word processing programs and a lot more are available.
Task bar The task bar is the horizontal bar found at the bottom of your Primebook. Unlike your desktop, which can be covered by opened windows, the task bar is almost always visible. The task bar therefore provides you with constant access to the important functions and settings of your Primebook plus an overview of all the windows you have open. USB USB stands for "Universal Serial Bus" and is the name of a cable-based interface on your Primebook.
28. Notes on copyright and trademarks Copyright law prohibits the copying of the content of this document (illustrations, reference documents etc.), as a whole or in part, without the permission of the copyright holder. The Bluetooth word mark and logos are registered trademarks owned by Bluetooth SIG, Inc. and any use of such marks by TREKSTOR GmbH is under license. Other trademarks and trade names are those of their respective owners.
29. Notes on disposal and recycling Notes on disposal v This symbol on the device and in the accompanying documentation indicates that the device must be disposed of separately from normal household waste. This device (and the battery it uses) contain valuable raw materials such as rare earths and precious metals as well as components that are harmful to the environment and/or human health if not disposed of properly.
30. Notes on the warranty The statutory warranty period for consumer products is 24 months. There is no warranty beyond this. Unauthorised modifications to the device (in particular, installing external firmware not approved by the manufacturer or modifying the device’s hardware) may void the warranty. 31. Support information If you have questions about your product or problems, please proceed as follows: ■■ Carefully read the operating instructions.
The manufacturer hereby confirms that the Primebook C13 device complies with the essential requirements and other relevant provisions of Directive 2014/53/EU.
TREKSTOR GmbH Berliner Ring 7 64625 Bensheim, Germany www.trekstor.