
Installation Guide


2
Table of Contents
1 Preparation
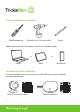
- What is in the box? 5
- Tools needed for installation 6
- Accessories (Sold separately) 6
- Quick Start Guide for Homeowner Installation 7
- Quick Start Guide for Contractor Installation 8
- Precautionary measures 9
- Let's get started! 11
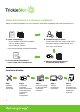
- With or without C-Wire? 12
2 Installation With a C-Wire
- Step 1: Disconnect and label old thermostat wires 13
- Step 2: Remove old jumper wire 14
- Step 3: Unscrew old Mounting Plate 15
- Step 4: Replace with new Thermostat Mounting Plate 16
- Step 5: If the Trim Plate is used (Optional) 17
- Step 6: Pull the labeled wires through the hole of the Mounting Plate 18
- Step 7: Attach the Mounting Plate on the wall 19
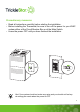
- Step 8: Connect the wires 20
- Step 9: Set the jumpers on the back of your Thermostat 22
- Step 10: Attach the Thermostat onto its Mounting Plate until it clicks 23
- Step 11: Turn on the power 24
- Installation done! 25
3 Installation Without a C-Wire
- Step 1: Check if there are 3 or 4 wires 27
- Step 2: Prepare the necessary tools 29
- Step 3: Open your HVAC system's cover 30
- Step 4: Label the wires 31
- Step 5: Disconnect the wires from the HVAC control board 32
- Step 6: Connect the wires from the C-Wire Kit to the HVAC 33
control board
- Step 7: Connect the disconnected wires from the HVAC control board 34
to the C-Wire Kit
- Step 8: Mount the C-Wire Kit inside your HVAC system 35