
Installation Guide


9
Quick Start Guide for Contractor Installation
Installation Workflow
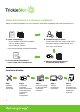
Step 1
Install the
TrickleStar
Thermostat.
D. At Thermostat Setup Wizard,
create a new site for homeowner
Step 2
Connect the
TrickleStar
Thermostat to Wi-Fi
via the Portal and
complete the
Start-Up
Configuration.
Step 3
Select the settings
for the TrickleStar
Thermostat.
(Optional)
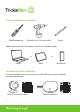
Before you start the installation, be sure to check the Thermostat compatibility and create a Portal account.
+
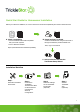
A. Check compatibility
- Is the TrickleStar Thermostat compatible
with your HVAC system?
- Is the C-Wire Kit needed?
https://portal.tricklestar.com/tstat/compatibility
B. Create and log in to Portal
Create a Portal account using the QR code or
through the website: portal.tricklestar.com
Then, log in to the Portal.
C. Add your device and start the
Thermostat Setup Wizard
+
+
Step 5
Add the
TrickleStar App
on homeowner’s
smartphone.
(Optional)
Step 4
Transfer
ownership to
homeowner.
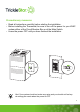
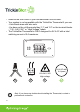
Precautionary measures
OFF
OFF
Hint: Your system should not make any noise and you should not feel any
air exiting your vents when the power is OFF.
•
Read all instructions carefully before starting the installation.
•
Before installing the Thermostat, be sure to turn off the power for your HVAC
system either at the Circuit Breaker Box or at the Main Switch.
•
Leave the power OFF until you have finished the installation.