TriStar Sporting Arms SHARPS MODEL 1863 PERCUSSION RIFLE AND CARBINE MODEL 1874 METALLIC CARTRIDGE RIFLE AND CARBINE INSTRUCTION MANUAL 1
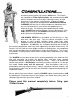
Congratulations…… and thank you for purchasing a quality IAB firearm. This firearm was imported by TriStar Sporting Arms and manufactured by IAB, which is located in the heart of Italy’s Valtrompia Valley, an area famous for its fine firearms craftsmanship. Known as a world leader in the manufacture of reproduction SHARPS RIFLES and CARBINES, IAB was the first Italian company to reproduce these classics characterized as some of the most popular guns in American history.
Important Safety Rules 1. If you do not thoroughly understand the proper use and care of firearms, DO NOT ATTEMPT TO SHOOT THIS GUN. Seek advice from someone you know to be a competent authority in the care, use, and handling of firearms. 2. Keep this firearm pointed in a safe direction at all times. 3. REMEBER TO TREAT EVERY FIREARM AS IF IT IS LOADED! 4. Never operate this firearm without proper eye and hearing protection. 5 Keep your finger off the trigger until you are ready to shoot.
This manual includes instructions for the use and care of both percussion and metallic cartridge rifles and carbines. Please refer to the proper section for your rifle or carbine . Section I: Model 1863 Percussion Rifle and Carbine Step 1 - Initial Cleaning Before firing your percussion Sharps for the first time, you should remove any excess factory lubricants applied to protect the gun during shipping. This process will be great ly simplified by field stripping the gun.
Your Sharps rifle or carbine can be fired using powder and a bullet of the proper caliber. To load y our gun with powder and bullet, first place the hammer in the SAFE position by pulling it back into the half-cock notch. Carefully insert a bullet of the proper caliber into the chamber, making sure it is firmly seat ed against the rifling at the front of the chamber. Next, fill the remaining chamber space with FFg black powder, Pyrodex, or an approved black powder substitute.
If your rifle or carbine fails to fire when the trigger is pulled, CONTINUE TO POINT THE GUN IN A SAFE DIRECTION FOR A T LEAST TWO MINUTES BEFORE ATTE MP TING TO UNLOA D IT. After waiting at least two minutes, wit h the barrel pointing in a s afe direction, carefully remove the musket cap. Next, with the muzzle pointed at the ground, tap the side of the gun a few times to settle any loose powder away from the breech block. Lower the trigger guard, lever to open the breech and expose the powder charge.
CLEANING: Due to the corrosive nature of black powder, it is imperative that your Sharps rifle or carbine be thoroughly cleaned after each shooting session. It may also be necessary to swab the barrel periodically after a few shots to maintain accuracy. After field stripping the gun, the action maybe be cleaned using warm soapy water or a quality black powder solvent. The barrel should also be cleaned to remove any fouling. After the gun is thoroughly cleaned, it should be lubricated with quality gun oil.
Roll the cut nitrated paper around a dowel the same diamet er as the bullet you are shooting. Using a glue stick, glue the paper along the edge to form a cylinder. Press the bullet into the cylinder, sliding it all the way through until it protrudes from the end. At this point, the bullet can be attached to the paper cylinder with glue, or a silk thread can be tied around the cylinder, directly over the bullet lube groove.
ADVICE FROM THE FIELD The Sharps carbine proved to be one of the most effective weapons used during the American Civil War. As the first practical breech loader, it was highly sought after by participants from both sides of the conflict. Like any new weapon, the Sharps were not without its problems. Most of these problems could be easily solved by proper care and cleaning. Modern Sharps reproductions share many of the same characteristics of those early classics.
attempts, it is imperative that the following procedures be used to clear the weapon. Elevate the muzzle as nearly vertical as possible before opening the breech. With the breech open, use a cleaning rod introduced through the muzzle to drive out the cartridge. Insert a new round and close the breech. Only then can the muzzle be lowered. If the breech must be opened with the gun held level, remove the breechblock and clear any accumulated powder from the recesses at the front of the frame before reloading.
the vent in the front of the block. If it only drips, or fails to flow at all, remove the cone and cleanout screw. Thoroughly clean the vent channel with a pipe cleaner or small drill. Some guns have been found with undersize vents. If excessive fouling of the vent is a problem, it may be necessary to enlarge the passage. Once all the parts are cleaned and oiled, the weapon can be reassembled.
cleaning process should include swabbing the bore with several dry cleaning patches to remove all excess oil. The barrel must be clean, dry, and free of obstructions prior to firing. ..Step 2 – Loading The first step in the loading process is to make sure the muzzle of the gun is pointed in a SAFE DIRECTION ! To load y our metallic cartridge Sharps, first plac e the hammer in the half -cock notch and engage the safety by moving it up between the firing ping and breec h block.
Disassembly and Cleaning Before attempting to disassemble your rifle or carbine, you must make sure it is UNLOADED! FIELD STRIPPING: With the action closed, pull the hammer rearward to the “Safe” position. Locate the lever hinge pin (Part # 02) on the right side of the receiver near the rear of the forearm. Next to the lever hinge pin is a small plunger pin that acts as a lock to prevent the lever from rotating accidentally.
CLEANING: Due to the corrosive nature of black powder, it is imperative that your Sharps rifle or carbine be thoroughly cleaned after each shooting session. It may also be necessary to swab the barrel periodically after a few shots to maintain accuracy. After field stripping the gun, the action maybe be cleaned using warm soapy water or a quality black powder solvent. The barrel should also be cleaned to remove any fouling. After the gun is thoroughly cleaned, it should be lubricated with quality gun oil.
Parts Diagram (For Both Cartridge and Percussion Models) N°. 2 3 4 5 6 7 8 9 10 11 12 13 14 15 16 17 18 19 20 21 22 23 24 25 26 27 28 Description.
29 30 Tumbler Tumbler S tirrup 58 59 S addle Ring bar S addle Ring 101 Tumber Fly SPARE PARTS/WARRANTY Ship the firearm prepaid to: TriStar S porting Arms 1816 Linn St. North Kansas City, MO 64116 THANK YOU Thank you for purchasing a TriStar Sharps Rifle . We are sure this gun will bring you years of hunting and/or shooting pleasure. Your satisfaction is the key to our success. Please let us kn ow if we can be or service and relay any observations about your guns performance or appearance.
SHIPPING When returning your firearm for service, please take care in packing. Disassemble you gun wrap in a safe manner and place it in its original bo x. (THIS BOX WILL PROTECT THE GUN BUT IS NOT DESIGNED FOR SHIPPING). Wrap bo x in a cardboard bo x approved for interstate shipping. TriStar is not responsible for damage incurred during shipping.