
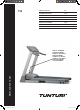
Operation Manual


G B
7
O W N E R ' S M A N U A L • T 2 0
PROGRAMS 1 – 7
PROGRAM 1: manual
PROGRAM 2 – PROGRAM 4: elevation Program
combined speed Program(Elevation and speed will
change automatically during the exercise.)
PROGRAM 5: Speed Program (Speed will change
automatically during the exercise.)
PROGRAM 6: elevation program will change
automatically during the exercise).
a. Press the SPEED + –button to set up your desired
program.
b. The time window will flash. Use the ELEVATION
+ – or SPEED+ –buttons to set up the desired
exercise time.
c. Press the Enter to confirm your setting value.
d. Distance window will flash. Use the ELEVATION
+ – or SPEED+ – buttons to set up the desired
distance to do the exercise.
e. Press the Enter to confirm your setting value.
f. Kcal window will flash. Use the ELEVATION +
– or SPEED+ – buttons to set up the desired calories
to be consumed.
g. Press the Enter to confirm your setting value.
h. Press Start to begin exercise.
NOTE:
1. If you would not like to select any special target to
reach, just press Start to do the exercise.
2. If you would like to skip the target setting, press
the enter key to next setting value and this function
will count up.
3. If you set up more than one target, once reach
the first target, Press Start again and this value will
continue to count down until reach your next target.
PROGRAM P7: HRC TRAINING
Heart rate controlled exercises enable training at
a selected heart rate level. Heart rate controlled
exercises always require heart rate measurement.
1. Press + / - button to input your age and ENTER to
confirm.
2. Press + / - button to input the desired target heart
rate and press ENTER to confirm.
3. Press + / - button to input desired max speed value
in HRC mode and press ENTER to confirm.
4. You can now enter the target time, distance and
calories. Press the START to begin exercise.
USER1 – 2
a. Press SPEED + - or ELEVATION + - button to
enter your desired User setting program.
b. The time window will flash. Use the ELEVATION
+ – or SPEED+ – buttons to set up the desired
exercise time.
c. Press the Enter to confirm your setting value.
d. Distant window will flash. Use the ELEVATION +
– or SPEED+ – buttons to set up the desired distance
to do the exercise.
e. Press the Enter to confirm your setting value.
f. Kcal window will flash. Use the ELEVATION +
– or SPEED+ – buttons to set up the desired calories
to be consumed.
g. Press the Enter to confirm your setting value.
h. Press SPEED+ or –to set up desire speed and/or
Press ELEVATION + or – to set up desired level of
incline.
i. Press Enter to confirm the first column.
j. Follow h points to finish the user setting profile.
Total profile setting is 20 times. (20 columns)
k. Press Start to begin exercise.
NOTE:
1. If you would not like to select any special target to
reach, just press Start to do the exercise.
2. If you would like to skip the target setting, press
the enter key to next setting value and this function
will count up.
3. If you set up more than one target, once reach
the first target, Press Start again and this value will
continue to count down until reach your next target.
SERVICE MENU
1. during the power ON position, first hold the
SELECT button then press the ENTER button
together to enter the Service Menu
2. Speed window shows software version, Time
window shows year, Distance window shows date.
3. Press ENTER button window shows LDU version.
It is software version.
4. Press ENTER button window shows ISP version. It
is software version.
5. Press ENTER button enter KM/MILE switch mode,
1 means KM, 0 means MILE
Press SPEED + - or ELEVATION + - to select KM or
MILE.
6. Press ENTER button window shows total distance.
7. Press ENTER button window shows total hour.
8. Press ENTER button goes back to ON position.
MAINTENANCE
The equipment is safe to use only when periodically
maintained and inspected for faults and wear.
CAUTION! Do not attempt any servicing or adjustment
other than those described in this manual. Any other
servicing must be performed by an authorized service
representative. Check the tightness of all fixing
screws once a year. Do not overtighten.
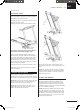
CLEANING AND LUBRICATING THE TREADMILL
FAILURE TO LUBRICATE YOUR TREADMILL MAY
INVALIDATE THE PRODUCT’S WARRANTY!
Wipe the treadmill surfaces, especially the handlebars
and console from dust with a damp cloth or towel.
Do not use solvents. Use a small vacuum nozzle to
carefully vacuum around all visible components (belt,
running deck, side rails etc.). Also keep the area near
the treadmill clean. While in use, the treadmill gathers
dust that may cause problems in the operation of the
equipment.
T20_manual_13-8_1.indd 7 13.8.2007 13:13:14