
Instructions / Assembly


All Style Industries, LLC
2114 Sunset Vista Avenue
Henderson, NV 89052
702-570-5520 or fax 702-754-2597
"mailto:info@stormcollar.com"
www.spinflashing.com, www.stormcollar.com
Installation Instructions
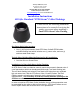
All Style Standard “STD-Storm” Collar Flashings
Small STD-Storm Collar Flashing
One Retro-Split Collar Includes:
1. One (1) All Style Industries Small STD-Storm Collar® EPDM rubber
umbrella flashing boot which includes one (1) storm collar, and one (1)
stainless steel band clamp.
Tools & Other Building Materials Required for Kit Installation:
1. One Nut Driver or Screw Driver
Installation of a Retro-Split Storm Collar Flashing:
An STD-Storm Collar is molded to correctly match the geometric diameter size of
a roof penetration which has already passed through a roof deck flashing jack.
The roof deck flashing jack raises the roof deck level higher than any expected
high rain water level, and the STD-Storm Collar “Counter-Flashes” the Roof
Flashing creating a weatherproof assembly via the down facing overlap or
umbrella effect. It is necessary to order the correct diameter opening on the
STD-Storm collar to create a weatherproof assembly.
In order to install an STD-Storm Collar Umbrella, the top of the penetration must
be accessible for the collar to slide on from the top. STD-Storm Collars are not
retro-fit repair collars and must slide onto a roof penetration.
Please review the following installation
instructions to be assured of receiving the
quality you expect when installing a
Small STD-Storm Collar Flashing