
Instructions / Assembly


Installation Instructions
STD-Storm Collar Flashings
2 of 2
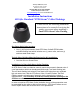
Now, slide the STD-Storm collar facing the wide part of the umbrella downward
and onto the penetration. Wetting the rubber with a little water can make the
assembly slippery, and a little easier, for the rubber to slide along the
penetration. Slide the collar boot assembly down the roof penetration to a height
necessary to create a proper counter-flashing umbrella cover which over laps the
existing roof deck jack flashing.
Finally, the STD-Storm Collar includes a pre-molded nipple with recessed
channels that will accept the width of the hose clamp. Position the band clamp,
around the nipple and into the channel. By using the worm drive action of the
clamp, loosely tighten the clamp.
Before fully tightening the clamp, check the position the STD-Collar and double
check that the elevation is proper to cover and overlay the roof penetration
flashing. The overlap provides a weatherproof counter-flashing umbrella.
After positioning the Collar, complete the tightening process of the stainless-steel
clamp using a screw or nut driver. This compresses the rubber nipples, pressing
and firmly holding the umbrella onto the roof penetration. Be careful not to over
tighten, as this can distort the new storm collar.
Note:
STD-Strom Collar Flashing umbrella boots are not retro-fit roof
counter flashings. Access over the penetration must be
available in order to slide the collar onto the roof penetration.
.