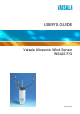
USER'S GUIDE Vaisala Ultrasonic Wind Sensor WS425 F/G M210713EN-C
PUBLISHED BY Vaisala Oyj Phone (int.): +358 9 8949 1 P.O. Box 26 Fax: +358 9 8949 2227 FIN-00421 Helsinki Finland Visit our Internet pages at http://www.vaisala.com/ © Vaisala 2006 No part of this manual may be reproduced in any form or by any means, electronic or mechanical (including photocopying), nor may its contents be communicated to a third party without prior written permission of the copyright holder. The contents are subject to change without prior notice.
________________________________________________________________________________ Table of Contents CHAPTER 1 GENERAL INFORMATION . . . . . . . . . . . . . . . . . . . . . . . . . . . . . . . . . . . . . . 9 About This Manual . . . . . . . . . . . . . . . . . . . . . . . . . . . . . . . . . 9 Contents of This Manual . . . . . . . . . . . . . . . . . . . . . . . . . . . 9 Feedback . . . . . . . . . . . . . . . . . . . . . . . . . . . . . . . . . . . . . . 10 Safety . . . . . . . . . . . . . . . . . . . . .
________________________________________________________________________________ CHAPTER 4 OPERATION . . . . . . . . . . . . . . . . . . . . . . . . . . . . . . . . . . . . . . . . . . . . . . . .37 Power On/Off . . . . . . . . . . . . . . . . . . . . . . . . . . . . . . . . . . . . .37 System Operation . . . . . . . . . . . . . . . . . . . . . . . . . . . . . . . . .37 Diagnostic Operation . . . . . . . . . . . . . . . . . . . . . . . . . . . . . .38 RS-232 Data Format . . . . . . . . . . . . . . . . . .
________________________________________________________________________________ Sensor Interface Cable Removal and Installation . . . . . . . 80 Firmware Download . . . . . . . . . . . . . . . . . . . . . . . . . . . . . . 81 Download Procedure . . . . . . . . . . . . . . . . . . . . . . . . . . 81 Recovery Procedure . . . . . . . . . . . . . . . . . . . . . . . . . . 82 Technical Support . . . . . . . . . . . . . . . . . . . . . . . . . . . . . . . . . 83 Vaisala Service Centers . . . . . . . . . . . . .
________________________________________________________________________________ 4 _______________________________________________________________________________
________________________________________________________________________________ List of Figures Figure 1 Figure 2 Figure 3 Figure 4 Figure 5 Figure 6 Figure 7 Figure 8 Figure 9 Figure 10 Figure 11 Figure 12 Figure 13 Figure 14 Figure 15 Figure 16 Figure 17 Figure 18 Figure 19 Figure 20 Figure 21 Figure 22 Figure 23 Figure 24 Ultrasonic Wind Sensor WS425 F/G . . . . . . . . . . . . . . . . . . . . 16 Components Overview. . . . . . . . . . . . . . . . . . . . . . . . . . . . . . .
________________________________________________________________________________ 6 _______________________________________________________________________________
________________________________________________________________________________ List of Tables Table 1 Table 2 Table 3 Table 4 Table 5 Table 6 Table 7 Table 8 Table 11 Table 9 Table 10 Terminal Block 1 . . . . . . . . . . . . . . . . . . . . . . . . . . . . . . . . . . . . . 31 Terminal Block 2 . . . . . . . . . . . . . . . . . . . . . . . . . . . . . . . . . . . . . 31 Ultrasonic Wind Interrogation Requests. . . . . . . . . . . . . . . . . . . . 39 Explanation of the WA Command Message . . . . . . . . .
________________________________________________________________________________ 8 _______________________________________________________________________________
Chapter 1 ________________________________________________________ General Information CHAPTER 1 GENERAL INFORMATION This chapter provides general notes for the product. About This Manual This manual provides information for installing, operating, and maintaining the product. Contents of This Manual This manual consists of the following chapters: - Chapter 1, General Information: This chapter provides general notes for the product.
User's Guide ______________________________________________________________________ - Chapter 6, Maintenance: This chapter contains instructions for the basic maintenance, fault isolation and installation and removal of the field replaceable units of the Vaisala Ultrasonic Wind Sensor WS425 F/G. - Chapter 7, Technical Data: This chapter provides the technical data of the product and lists the field replaceable units, and the accessories.
Chapter 1 ________________________________________________________ General Information Product Related Safety Precautions The Vaisala Ultrasonic Wind Sensor WS425 F/G delivered to you has been tested for safety and approved as shipped from the factory. Note the following precautions: WARNING Ground the product, and verify outdoor installation grounding periodically to minimize shock hazard. CAUTION Do not modify the unit. Improper modification can damage the product or lead to malfunction.
User's Guide ______________________________________________________________________ Dispose of batteries and the unit according to statutory regulations. Do not dispose of with regular household refuse. License Agreement All rights to any software are held by Vaisala or third parties. The customer is allowed to use the software only to the extent that is provided by the applicable supply contract or Software License Agreement.
Chapter 1 ________________________________________________________ General Information b)The allegedly defective Product or part shall, should Vaisala so require, be sent to the works of Vaisala or to such other place as Vaisala may indicate in writing, freight and insurance prepaid and properly packed and labelled, unless Vaisala agrees to inspect and repair the Product or replace it on site.
User's Guide ______________________________________________________________________ 14 ______________________________________________________________________________
Chapter 2 __________________________________________________________ Product Overview CHAPTER 2 PRODUCT OVERVIEW This chapter introduces the features and advantages of Vaisala Ultrasonic Wind Sensor WS425 F/G. Product History - ASOS Program Vaisala Ultrasonic Wind Sensor WS425 F/G was originally developed for the Automated Surface Observing Systems (ASOS) program, and due to this fact this document contains references to the ASOS.
User's Guide ______________________________________________________________________ The patented three transducer layout provides superior data availability and accuracy in all wind directions. The effects of temperature, humidity, and pressure are fully compensated. The sensor communicates to the system or data logger via an fiber optic connection. The message format is ASOS compatible. The device has no moving parts, so it is virtually maintenance free.
Chapter 2 __________________________________________________________ Product Overview Ultrasonic Wind Sensor WS425 F/G Components 0506-067 Figure 2 Components Overview The following numbers refer to Figure 2 on page 17: 1 = Wind sensor 2 = Power supply 3 = Module assembly, power supply 4 = Fiber optic modem (FOM) assembly The device consists of the following field replaceable units (FRU): - Wind sensor, model WS425 F/G (item 1 in Figure 2 on page 17) - Power supply,WS425PowerUS or WS425P
User's Guide ______________________________________________________________________ 0506-010 Figure 3 Schematic of Ultrasonic Wind Sensor WS425 F/G The following numbers refer to Figure 3 on page 18: 1 = Sensor body 2 = Bird spike 3 = Transducer (3 pcs) 18 ______________________________________________________________________________
Chapter 2 __________________________________________________________ Product Overview 0506-011 Figure 4 NOTE Ultrasonic Wind Sensor Power Supply Figure 4 on page 19 represents the WS425PowerUS power supply made for 115 VAC - the European model WS425PowerEU has different primary (internal) wiring and is made for 240 VAC. The customer must check local regulations concerning the correct and safe wiring of the power supply.
User's Guide ______________________________________________________________________ 0506-012 Figure 5 Power Supply and FOM Module Assembly The following numbers refer to Figure 5 on page 20: 1 = Fiber optic connector TX 2 = Fiber optic connector RX 3 = 12-position terminal block (TB2, see also Figure 11 on page 30 and Table 2 on page 31) 20 ______________________________________________________________________________
Chapter 2 __________________________________________________________ Product Overview 0506-014 Figure 6 Cable Assembly, Sensor The sensor interface cable assembly is 11.2 m in length. The 12 ring lugs (indicated by the arrow in Figure 6 on page 21) of the sensor interface cable are each numbered 1-12. Connect them to the correspondingly numbered terminal positions in the power supply assembly terminal block 2; see Figure 5 on page 20, Figure 11 on page 30 and Table 2 on page 31.
User's Guide ______________________________________________________________________ When using the fiber optic connection between the Ultrasonic Wind sensor and a personal computer, two fiber optic modems are needed. One is supplied as standard with the Ultrasonic Wind sensor enclosed in the power supply module housing. The other is available from Vaisala as an optional accessory. Please note that FOM111 is supplied without a housing. If needed, the customer must source a proper housing locally.
Chapter 3 _______________________________________________________________ Installation CHAPTER 3 INSTALLATION This chapter provides you with information on the installation and alignment procedures, and connections of the power supply and fiber optic modem.
User's Guide ______________________________________________________________________ 0506-015 Figure 8 WS425 F/G Tower Assembly The following numbers refer to Figure 8 on page 24: 1 = WS425 F/G 2 = Cable assembly 3 = Adapter for F/G models 4 = Mounting tube 5 = Lightning rod (not provided by Vaisala) 24 ______________________________________________________________________________
Chapter 3 _______________________________________________________________ Installation Installation of Mounting Arm and Sensor Cable 1. Tilt the tower to a horizontal position. 2. Remove the mounting tube from the shipping container. 3. Find the end of the mounting tube with the two cross holes. 4. Insert this end of the mounting tube on the pole. 5. Rotate the mounting arm in its hole until the two cross-holes in the pole are aligned with the two cross-holes in the mounting tube. 6.
User's Guide ______________________________________________________________________ Installation of Wind Sensor CAUTION 1. Open the sensor shipping box and remove the sensor. 2. Take the wind sensor and connect the cable connector to it. Then insert the sensor over the end of the adapter. The sensor needs to be rotated until its alignment pin slides into the slot of the adapter. Tighten the single set screw that secures the sensor to the adapter.
Chapter 3 _______________________________________________________________ Installation 0506-017 Figure 10 Power Supply and Mount The following numbers refer to Figure 10 on page 27: 1 = WS425PowerUS or WS425PowerEU power supply 2 = Power supply mounting plate 3 = Pole mast installation plate (not provided by Vaisala) 4 = Pole mast (not provided by Vaisala) Connecting Lightning Ground Connect the existing ground wire to the threaded ground stud at the bottom left of the power supply with the
User's Guide ______________________________________________________________________ Connecting Fiber Optic Cable WARNING The fiber optic cable and the power cable share the same conduit. Before proceeding make absolutely sure that the AC power is turned off at the host system power distribution system. Then take an AC voltmeter and measure the AC voltage between the black wire and each of the green white and yellow wires; and between the red wire and each of the green white and yellow wires.
Chapter 3 _______________________________________________________________ Installation Connecting AC Power CAUTION Make sure you have correct mains voltage power supply (WS425PowerUS or WS425PowerEU). 1. Remove the protective cover plate over the AC power terminal block. 2. Connect the AC power wires to the AC power terminal block as shown in Figure 11 on page 30, starting with the green wire. Double-check that each wire is connected as shown in Figure 11 on page 30. 3.
User's Guide ______________________________________________________________________ 0506-071 Figure 11 Power Supply Terminal Blocks The following numbers refer to Figure 11 on page 30: 1 = AC power terminal block 2 = Terminal block 1 (TB1) 3 = Terminal block 2 (TB2) 30 ______________________________________________________________________________
Chapter 3 _______________________________________________________________ Installation Power Supply Terminal Blocks Table 1 Terminal Block 1 TB1 Terminal 1 2 3 4 5 6 7 Name 12.6 V_H1 12.6 V_CT 12.6 V_H2 36 V_H1A 36 V_H2A 36 V_H1B 36 V_H2B Description 12.6 VAC transformer, line 1 12.6 VAC transformer, center tap 12.
User's Guide ______________________________________________________________________ 5. Place the verifier over the sensor and completely cover it with the included bag. Pull the bag drawstrings to close it off at the sensor alignment adapter. 6. Issue five WA commands spaced at least five seconds apart. All five responses must have P status. 7. Turn off the power through the switch in the power supply before performing the alignment procedure.
Chapter 3 _______________________________________________________________ Installation 0003-011 Figure 12 NOTE Sketch of Magnetic Declination The source for the magnetic declination must be current as the declination changes over time. Compass Alignment with Mast Adapter The following steps aim the wind sensor when using the 1-inch adapter for mounting: 1. Use a compass to determine that the N-S transducer heads of the ultrasonic wind sensor are exactly in line with the compass.
User's Guide ______________________________________________________________________ 4. Raise the tower to the vertical position. Figure 13 on page 34 shows the correct alignment.
Chapter 3 _______________________________________________________________ Installation 0208-024 Figure 14 Adjusting the N-S Heads The following letters refer to Figure 14 on page 35: A = The installer is too far to the left. B = The installer is in line with the sensor. C = The appearance of the sensor is shown when the installer is in the correct position. The sensor, however, is not correctly aligned.
User's Guide ______________________________________________________________________ 36 ______________________________________________________________________________
Chapter 4 ________________________________________________________________ Operation CHAPTER 4 OPERATION This chapter contains information needed to operate Vaisala Ultrasonic Wind Sensor WS425 F/G. Power On/Off The power switch is located in the power supply enclosure at the top left. When turned on, the two LEDs labeled +5 V and +12 V will be turned off if their respective supply is operational. If neither is turned on, check the 0.25 A fuse and make sure that AC power is present.
User's Guide ______________________________________________________________________ Diagnostic Operation When a laptop computer is plugged into the TEST connector via the DB-9 connection in the power supply, the following states exist: RTS DTR Description of States LO LO HI LO HI LO HI HI Normal host system operation (TEST, connector unplugged).
Chapter 4 ________________________________________________________________ Operation All user configuration parameters are stored in the non-volatile memory. Command Set There are 18 interrogation requests that the host system and/or operator can send to the Ultrasonic Wind sensor. They are listed below. The sensor response to each command consists of a fixed-length message.
User's Guide ______________________________________________________________________ request. The WD, WT, WF, and WR commands are executed by the ASOS periodically to perform diagnostic checks. The WH, WS, WSST, WSTK, WCDV, and WATE commands are primarily initiated by an operator accessing the sensor via an external laptop through the sensor's RS-232 port. WB Command This command is used to control the baud rate.
Chapter 4 ________________________________________________________________ Operation The sensor will stop the current measurement activity when it receives this command, and will respond with PASSWORD? CR LF At this time, the sensor will expect the password in capital letters and CR LF in caps to be typed. If the password is not correct, the command will be terminated unsuccessfully with the response string: INVALID PASSWORD CR LF and normal operation will resume.
User's Guide ______________________________________________________________________ The sensor response to the WA command consists of the averaged wind speed and direction data, peak wind speed, and associated direction. The average wind speed is a scalar running average of the fundamental one second interval wind speed measurement made by the sensor. The average direction is a unit vector running average over the same run length set with the WJ command.
Chapter 4 ________________________________________________________________ Operation Table 4 Explanation of the WA Command Message Byte Description Value 26-27 28-29 30 31 32 Signal quality Hex checksum (note a) End of text Carriage return Line feed 99 xx ETX CR LF Notes: 1. Bytes 28-29 are the modulo 256 hexadecimal checksum of the ASCII values calculated for bytes 2 through 27. 2.
User's Guide ______________________________________________________________________ WM Command This command locks the heater function ON. The command format is: WM CR LF The sensor response to the WM command indicates the state of the transducer heaters after execution. In this mode the heater has been energized by the external command. The response to this command is the following: Heater control locked ON CR LF The command will energize the array heater circuit.
Chapter 4 ________________________________________________________________ Operation WS Command This command requests the verbose Built-In Test (BIT) results. The command format is: WS CR LF The command gives a textual run down of the results of all Built-In Tests (BITs). In every line except the bad reading counter, the pass/fail indication is given with the single character P or F. This is followed by the description of the parameter measured, which is followed by the actual measured value.
User's Guide ______________________________________________________________________ The test limits for the various tests are as listed below: - Heater voltage good in range 18.0 to 26.0 V - Array heater resistance good in range 4.0 to 6.0 Ω - Heaters off voltage good if below 0.5 V - Incoming supply voltage good in range 10.5 to 13.5 V - 5.0 V supply good in range 4.5 to 5.5 V - 10 V supply good in range 9.0 to 11.
Chapter 4 ________________________________________________________________ Operation WD Command This command reports the status of the BITs. The command format is: WD CR LF The command is intended to be sent by the host system to get a concise report on the pass/fail status of all Built-In Tests.
User's Guide ______________________________________________________________________ Peak wind direction = 567 Wind averaging time = 21 Peak wind averaging time = 09 Wind speed = 876.5 Peak wind speed = 432.1 Example of the WF Command Message The following is an example of the output from the sensor for the WF command: WFF6785672109876.5432.
Chapter 4 ________________________________________________________________ Operation The WR command initiates a system reinitialization. The processor executes the initialization routine and returns the initialization message (firmware revision, sensor status). The response to the WR command contains the following: ASOS Ice-Free Wind Sensor CR LF Manufactured by Vaisala USA Inc. CR LF Model number WAS 425NWS Firmware version 2.01 CR LF Initializing ….
User's Guide ______________________________________________________________________ The WATE command is used in conjunction with the zero wind speed verifier. If the test is performed outdoors, the supplied cloth bag must be placed over the verifier to eliminate the effect of any ambient wind. See Figure 18 on page 68. It is extremely important that the WATE command is performed only when the verifier is installed on the sensor.
Chapter 4 ________________________________________________________________ Operation 1. The wind speed in this WA message must be equal or smaller than 1.0 knots. 2. The SQI value for each measurement path must be equal or higher than 90. The average from the individual SQI values must be equal or higher than 95. Other parameter test limits are the same as with the WS command.
User's Guide ______________________________________________________________________ Calibration in progress CR LF When the calibrate function completes successfully, the sensor response will be the following: Calibration successful, saving parameters CR LF The sensor will save the parameters calculated in the non-volatile memory. After the save completion, the sensor will perform a complete power on the initialization sequence.
Chapter 4 ________________________________________________________________ Operation Byte 5-7: Average wind direction (degrees) CR LF Bytes 8-10: Wind direction at peak wind speed (degrees) CR LF Bytes 11-12: Averaging time for wind speed and direction CR LF Bytes 13-14: Averaging time for peak wind speed and direction CR LF Bytes 15-19: Average wind speed CR LF Bytes 20-24: Peak wind speed CR LF Byte 25: Wind speed units (K = knots) CR LF Byte 26-27: Signal quality CR LF Bytes 28-29: Hex
User's Guide ______________________________________________________________________ WT Command This command requests the short response BIT results and status. The command format is: WT CR LF This command is an abbreviated version of the verbose BIT results and status command. Field descriptors are omitted and only pass/fail status and measured value are reported. The command response is packed in the standard STX – body – CSUM – ETX format. The response is shown below.
Chapter 4 ________________________________________________________________ Operation Bytes 45-46: XX format path 1 Signal Quality Index Byte 47: P or F for path 2 Signal Quality Index pass or fail Bytes 48-49: XX format path 2 Signal Quality Index Byte 50: P or F for path 3 Signal Quality Index pass or fail Bytes 51-52: XX format path 3 Signal Quality Index Byte 53: P or F for path 4 Signal Quality Index pass or fail Bytes 54-55: XX format path 4 Signal Quality Index Byte 56: P or F for path
User's Guide ______________________________________________________________________ response can be calibrated to a known ambient temperature with the WSTK command below. The output is of a fixed character length with 5 characters for the static speed of sound and 6 characters for the sonic temperature. Positive temperatures at or under 99.9° F will be padded with a leading zero. This leading zero will be replaced by a minus sign for negative temperatures. An example of the response: 670.5 023.
Chapter 4 ________________________________________________________________ Operation After the command is issued to the sensor, it will respond with the following prompt: Enter actual temperature in xx.x C It is most important to enter the temperature to the tenth of degree Celsius with a decimal point. A leading minus sign is allowed but is not likely needed since this should be an indoor operation.
User's Guide ______________________________________________________________________ 58 ______________________________________________________________________________
Chapter 5 _________________________________________________________ Operating Principle CHAPTER 5 OPERATING PRINCIPLE This chapter provides you with a brief explanation of the operating principles of Vaisala Ultrasonic Wind Sensor WS425 F/G and its power supply. Wind Measurement Principle The Ultrasonic Wind sensor uses ultrasonic technology. It has an onboard micro controller that captures and processes data and performs serial communications.
User's Guide ______________________________________________________________________ V w = 0.5 u L u 1 e t f – 1 e t r 0505-216 where Vw = Wind velocity L = Distance between two transducers tf = Transit time in the positive direction tr = Transit time in the negative direction Measuring the six transmit times allows Vw to be computed for each of the three ultrasonic paths, which are offset to each other by 120°.
Chapter 5 _________________________________________________________ Operating Principle Power Supply Operating Principle The 12 V linear regulator provides power to the sensor and some internal circuits. The 5 V linear regulator powers the fiber optic modem and the internal logic. The 24 VAC heater power is switched on or off to the sensor enclosure heater and to the transducer and tube heater. The switches are solid state relays that are controlled by two heater control lines originating in the sensor.
User's Guide ______________________________________________________________________ 0506-019 Figure 16 Power Supply Block Diagram CAUTION US & European power supplies (WS425PowerUS and WS425PowerEU) have different primary wiring. Do not attempt to connect WS425PowerUS to 240VAC voltage or WS425PowerEU to 115 VAC voltage! NOTE The enclosure heat LED is always off for the model Ultrasonic Wind Sensor WS425 F/G.
Chapter 5 _________________________________________________________ Operating Principle Verifier Associated Operations The sensor measures elapsed time for sound to travel from one transducer to the other. The only two parameters that affect the accuracy of the sensor are time and distance. The distance that affects the accuracy of the sensor is the distance between transducers. This distance is mechanically validated by the verifier. The verifier has to slide over the sensor without force.
User's Guide ______________________________________________________________________ 64 ______________________________________________________________________________
Chapter 6 ______________________________________________________________ Maintenance CHAPTER 6 MAINTENANCE This chapter contains instructions for the basic maintenance, fault isolation and installation and removal of the field replaceable units of the Vaisala Ultrasonic Wind Sensor WS425 F/G. Visual Inspection of Ultrasonic Wind Sensor WS425 F/G WS425 F/G anemometer is a very reliable and rugged sensor. It has been wind tunnel tested to over 175 knots for mechanical integrity.
User's Guide ______________________________________________________________________ seen on each ceramic transducer. The soldering spots on the ceramic transducer must be oriented outside the array. For the correct alignment, see Figure 17 on page 67. Do not rotate the transducer if the soldering spot is not in the correct location. Replace the anemometer. 2. Do not pull the transducers. Pulling the transducers will destroy the array of the ultrasonic anemometer.
Chapter 6 ______________________________________________________________ Maintenance 0506-020 Figure 17 NOTE Solder Spot and Sensor Handling Orientation of the solder spot is indicated by the thick black arrow in Figure 17 on page 67. Do not rotate, pull, strike, bend, scrape, or touch the transducers with sharp objects. Preventive Maintenance It is recommended that preventive maintenance be performed every 12 months.
User's Guide ______________________________________________________________________ 0506-021 Figure 18 Field Verifier 0506-021 Field Verifier with Cloth Bag Figure 19 68 ______________________________________________________________________________
Chapter 6 ______________________________________________________________ Maintenance CAUTION This procedure must be performed on a relatively calm day when it is safe to lower the wind mast or tower. CAUTION It is very important that the wind sensor be taken off line during this entire procedure or else erroneous wind speeds will be reported into the your system. 1. Open the cover of the power supply. 2. Connect the laptop computer via the RS-232 cable to the TEST port. 3.
User's Guide ______________________________________________________________________ If the sensor is responding to the WA command but the status is F, start with the flow chart in Figure 22 on page 72. If the sensor is responding to the WA command but the status is H, start with the flow chart in Figure 23 on page 73.
Chapter 6 ______________________________________________________________ Maintenance 0506-023 Figure 21 Fault Isolation Flow Chart: Sensor Not Responding Part 2 VAISALA _______________________________________________________________________ 71
User's Guide ______________________________________________________________________ 0506-024 Figure 22 Fault Isolation Flow Chart: Sensor Responds with F Status 72 ______________________________________________________________________________
Chapter 6 ______________________________________________________________ Maintenance 0506-025 Figure 23 Fault Isolation Flow Chart: Sensor Responds with H Status VAISALA _______________________________________________________________________ 73
User's Guide ______________________________________________________________________ Wind Sensor Removal and Installation Removal Procedure 1. Open the power supply cover and turn off the power. 2. Tilt over the wind mast or tower to access the sensor. 3. On the adapter, loosen the single screw close to the sensor. Do not loosen any of the three screws that are used to fasten the adapter to the mounting tube (see Figure 3 on page 18). Loosening these screws will make sensor alignment necessary. 4.
Chapter 6 ______________________________________________________________ Maintenance Power Supply Removal and Installation CAUTION Installation requires power supply with correct primary wiring depending on mains voltage used (WS425PowerUS for 115VAC/ 60Hz and WS425PowerEU for 240VAC/50Hz) WARNING To make absolutely sure that the power is turned off, open the power supply door and measure the AC voltage between the black wire and each of the green white and yellow wires; and between the red wire and eac
User's Guide ______________________________________________________________________ 7. Remove the power supply from the mounting plate by loosening the four flat head screws. 8. Use the same four screws and mount the new power supply to the mounting plate. 9. Tighten the four screws down. 10. Lift this assembly and slide the two slots at the bottom of the mounting plate over the two mounting screws that were left on the tower. 11. Re-install the two screws near the top of the mounting plate.
Chapter 6 ______________________________________________________________ Maintenance Run the Diagnostics Program on the laptop. Choose the option that connects the sensor to the laptop with the system disconnected. Issue the WA command. The sensor must respond with a P status. Now place the verifier over the sensor. Issue five WA commands spaced at least five seconds a part. All five responses must have P status.
User's Guide ______________________________________________________________________ TX and RX fiber connectors in place. Save the ground wire for use when installing the new module. 5. While holding the module so that it will not fall, remove the last Phillips head screw and remove the module. Installation Procedure 1. While holding the module so that it will not fall, install the Phillips head screw in between the fiber optic modem TX and RX fiber connectors.
Chapter 6 ______________________________________________________________ Maintenance 1. #1 Phillips screwdriver 2. ¼-inch width flat blade screwdriver 3. 5/16-inch open end wrench Removal Procedure 1. Open the power supply door and turn off the power to the wind sensor. 2. Remove the 12 sensor cable wires and the ground wire from terminal block TB2. Tie the sensor cable off to one side, so that it is out of the way and protected from damage. 3.
User's Guide ______________________________________________________________________ Sensor Interface Cable Removal and Installation 1. Open the power supply door and turn off the power to the wind sensor. 2. Lower the wind mast or tower. 3. On the adapter, loosen the single screw close to the sensor. Do not loosen any of the three screws that are used to fasten the adapter to the mounting tube (see Figure 3 on page 18). Loosening these three screws would make a solar noon alignment necessary. 4.
Chapter 6 ______________________________________________________________ Maintenance 16. Place the verifier over the sensor. The verifier must be completely covered by the included sack, since ambient airflow may effect the sensor readings. 17. Issue five WA commands spaced at least 5 seconds apart. All five responses must have a P status. 18. Remove the verifier. 19. Raise the wind mast or tower. Disconnect the laptop and close the power supply door.
User's Guide ______________________________________________________________________ 9. Select the sufficient Commport baud rate based on the value given at step 6 by using one of the 2400, 4800, or 9600 and the Change Commport Baudrate buttons. 10. Issue the START TEST Continuous Data button to get data from the sensor. 11. Issue the STOP TEST Continuous Data button. 12. Select the desired sensor baud rate if not valid already by using of the 2400, 4800, or 9600 and Change Sensor Baudrate buttons. 13.
Chapter 6 ______________________________________________________________ Maintenance - If NO, then continue from step 5. 5. Issue the STOP TEST Continuous Data button. 6. Select a new Diagnostics Program baud rate by using 4800 and Change Commport Baudrate buttons. 7. Issue the START TEST Continuous Data button and verify that the sensor responds with wind data. - If NO, then replace the sensor according to the instructions in section Wind Sensor Removal and Installation on page 74. 8.
User's Guide ______________________________________________________________________ NORTH AMERICAN SERVICE CENTER Vaisala Inc., 10-D Gill Street, Woburn, MA 01801-1068, USA. Phone: +1 781 933 4500, Fax: +1 781 933 8029 E-mail: us-customersupport@vaisala.com EUROPEAN SERVICE CENTER Vaisala Instruments Service, Vanha Nurmijärventie 21 FIN-01670 Vantaa, FINLAND. Phone: +358 9 8949 2658, Fax: +358 9 8949 2295 E-mail: instruments.service@vaisala.
Chapter 7 ____________________________________________________________ Technical Data CHAPTER 7 TECHNICAL DATA This chapter provides the technical data of the product and lists the field replaceable units, and the accessories.
User's Guide ______________________________________________________________________ Field Replaceable Units Table 6 Field Replaceable Units of Ultrasonic Wind Sensor WS425 F/G Item Name Order Code US 60 Hz wind sensor, model WS425 F/G (with adapter) EU 50 Hz wind sensor, model WS425 F/G (without adapter) 115 VAC power supply, WS425 F/G 240 VAC power supply, WS425 F/G Module assembly, power supply WS425 F/G Fiber optic modem Cable assembly, sensor WS425 F/G Installation kit for ASOS, WS425 F/G Field ver
Chapter 7 ____________________________________________________________ Technical Data Table 9 Outputs Property Description / Value Communication media optical cable, RS-232 for service mode NWS ASOS compatible 2400, 4800, and 9600 1 ... 30 s 1s Message format Baud rate Available averages Response time (continuous measurement) Table 10 General Property Description / Value Operating voltage Power consumption (max.
User's Guide ______________________________________________________________________ Drawings 0607-008 Figure 24 Sensor Cable Wiring Diagram 88 ______________________________________________________________________________
www.vaisala.