
User Manual
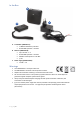
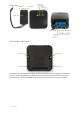
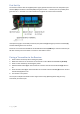
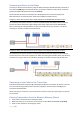
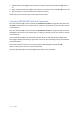
Table Of Contents

P a g e | 4
First Set-Up
Connect the receiver with the supplied power supply: position the bare wires into the power input
terminal (12) on the board. The black (GND) wire goes into the “-“ terminal, the red (+12VDC) wire
goes into the “+” terminal. Use a flat screwdriver to tighten the screws of the terminals.
If the power supply is successfully connected, the power LED (5) will light up and the TUYA LED (6)
will start flashing after a few seconds.
Please do not connect the CH1 RELAY and CH2 RELAY terminals (10 & 11) or close the enclosure yet.
We first need to pair a transmitter or connect to the TUYA IoT cloud.
Pairing a Transmitter to the Receiver
1. Power off the receiver by disconnecting the power.
2. Make sure there are no connections to the receiver on CH1 RELAY and CH2 RELAY (10 & 11).
3. Power on the receiver by connecting the power.
4. Hold the SETUP button (9) on the receiver for at least 3 seconds until the CH2 LED (8) will turn
on.
5. Press the CH1 button (2) on the transmitter for 3 seconds until the CH2 LED (8) will turn off and
the CH1 LED (7) will turn on.
6. The remote is now paired.
You can pair multiple transmitters with a single receiver. Keep following these steps for every
transmitter you want to pair.