
Product Manual
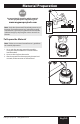

English
8 © Wagner Spray Tech - All Rights Reserved
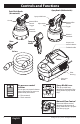
Air and Material Controls
Spray performance will depend upon a number of
factors: material thickness, spray pattern selected,
material volume, and air pressure. With any type
of air-assisted spraying, desired spray results will
be achieved through some trial and error while
adjusting some or all of these variables.
Review these pages to learn about the spray controls
and how they can be used to acheive the desired
spray results.
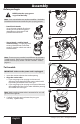
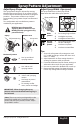
Air Pressure Control Selector
The air pressure control dial adjusts the level of air
pressure produced by the turbine.
• A high air pressure level (2) will result in a
smoother nish.
• A low air pressure level (1) will result in larger
drops of material being sprayed from the gun,
and will create a slightly rougher nish.
0 = OFF
1 = Thin materials
2 = Thick materials
Tip: The thicker the material you are spraying, the
higher the turbine
power
you will need.
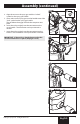
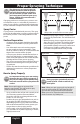
Material Flow Adjustment
The material ow adjustment controls the amount
of spray material that is sprayed from the spray gun.
• For thicker materials, it is recommended that
you start with the highest material ow setting
and then gradually decrease the ow to suit
your particular spraying needs.
• For thinner materials, it is recommended that
you start with a low material ow setting, and
then gradually increase the ow to suit your
particular spraying needs.
• The higher the ow setting, the quicker you will
have to work in order to avoid drips and sags in
your spray pattern.
Set the material volume by turning the red knob on
the trigger of the spray gun.
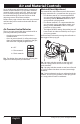
Tip: Spraying with the control set too high will
result in a spray pattern that runs and sags (too
much material).
Tip: Spraying with the control set too low will result
in a spray pattern that does not cover (not enough
material).
Tip: To ensure desired results are achieved with the
controls, test your spray pattern on the spray poster
or a scrap piece of wood or cardboard.