
Installation & Assembly

3 | P a g e
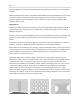
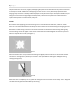
Figure 1 Figure 2 Figure 3
Pasting the Wall
Walls Republic Residential wallpapers are non-woven backings, making installation a breeze. Non-woven
papers mean you apply the paste to the wall, not the paper itself.
Any basic wallpaper paste will be suitable as long as they adhere to non-woven material. These
adhesives contain a fungicide that is necessary for vinyl and scrub-able wall coverings. Read the
instructions of the paste carefully, especially when mixing, to ensure the correct consistency.
Pasting the wall is a quicker, easier process than the traditional pasting the paper method, cutting
installation time in almost half! Do not paste the whole wall at a time, simply paste one section of the
wall at a time, apply the drops of wall paper and carry on. The beauty of paste the wall vs. the traditional
method is it is easy to re adjust your drop of paper if it doesn’t seem quite right!
Starting off Straight
Few walls are truly square or perfectly vertical. To avoid your pattern going askew in the midst of your
hanging process, always reference a vertical line made with a level or your plumb line.
You normally start hanging in the most inconspicuous corner (behind a door or a dark corner near the
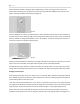
back of the room.) Do not hand directly on the leveled or plumb line mark; hang parallel to it, but about
¼” short of the line, allowing the excess ¼” wrap around the corner and onto the adjoining wall (See
Figure 4, see also, how to deal with corners.) Smooth your wallpaper starting at the line edge and
moving towards the corner.
Figure 4
How’s it Hanging?
Once you have applied your paste to the wall it’s time to start hanging your paper. As explained above,
you generally want to start in the least noticeable corner. Unless you are doing a focal point or feature
wall and want to center the pattern. Make sure you know which end of the wallpaper is designated for
the top (you marked it on the back during the cutting process).
Holding the top of your drop, lightly stick it to the top of your wall, allowing for 1-2” on top for cutting
wastage. Fit your piece exactly into position based on the leveled or plumb line you made.