
Installation manual


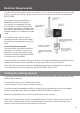

Before installing, draw an installation plan showing the placement of the mats, floor
sensor, and junction box or boxes.
The Foil heating mats should cover at least 80-90% of the floor area of your room to be
used as a primary heat source*.
Choose the combination of heating mats that best enables you to cover the recommended
80-90% of your room. Plan to use the larger foil heating mats as much as possible and to
use smaller mats only as gap fillers.
Note: The mats are supplied with a 3 metre long electrical cold lead. If you need longer
connection leads, these may be extended consult a qualified electrician.
*Depending on insulation, air-flow & overall heat-loss within the room, additional heating
may be required.
It is important to keep an accurate record of where the mats are installed.
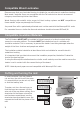
The Foil heater MUST NOT be installed in thinset cement, or in
direct contact with a cement or concrete sub-floor.
There must always be a soft insulation / underlay beneath the
aluminium heating mat/s.
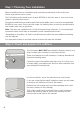
Carefully inspect the subfloor and make sure it is clean, free
of sharp edges, protruding nails and any other materials that
may damage the heating mat.
Lay the Insulation as per the manufacturer instructions.
If you are using the Warmup® insulation board you will need
to install a soft underlay on top of the boards.
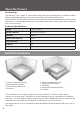
Remove the foil heating mat from the packaging and check
the mats visually for any damage.
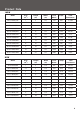
Test using a multi-meter and verify the correct resistance
against the table on page 4. Record the readings on the
control card at the back of the manual.
Step 1: Planning Your Installation
9
Step 2: Check and prepare the subfloor