
Owners manual

2
MANIFOLD REMOVAL PROCEDURE
1. Disconnect the ground cable from the battery.
2. Identify the vacuum and crankcase ventilation hoses (if any) leading to air cleaner and note the routing and connection points.
Remove the air cleaner.
3. Prior to removing any other vacuum lines, identify the routing of the lines. Mark and remove the vacuum lines from the carburetor
and/or intake manifold.
4. Drain the radiator. (It may be necessary to remove the bottom radiator hose if there is no drain plug in the radiator).
WARNING: Hot water and steam may be present if the engine is still warm.
5. Disconnect the throttle linkage, transmission kick-down linkage (auto trans. only), and choke rod from the carburetor, (if applicable).
6. Loosen the gas cap to relieve pressure from the fuel system. Disconnect the fuel line at the carburetor using flare wrenches. Plug
the end of the fuel line to prevent fuel leakage. Remove the carburetor.
7. Tag and disconnect the ignition coil and sensor wires. Remove the ignition coil bracket and the coil.
8. Remove the radiator hose, thermostat housing, and the thermostat.
9. Remove all water and vacuum fittings from the manifold.
10. Remove all remaining brackets (if any) from the manifold.
11. Loosen and remove valve covers to assist in the manifold removal and the new manifold instructions.
IGNITION REMOVAL PROCEDURES
NOTE: In some applications, removal of your distributor is not necessary. If so, move on to step 6 below.
CAUTION: FOLLOW THESE INSTRUCTIONS CAREFULLY, AS SERIOUS DAMAGE CAN OCCUR WHEN THE IGNITION IS NOT
RE-INSTALLED CORRECTLY.
1. Remove the distributor cap.
2. Note the position of the rotor and make a mark on the distributor case in line with the rotor tip.
3. Note the position of the distributor vacuum canister and place some type of reference mark on a convenient surface.
4. Note the position of the points, if open, how much; if closed, note the distance from the point block to the cam lobe.
5. Remove the distributor. DO NOT rotate the engine after removing the distributor.
6. Remove the intake manifold-to-cylinder head bolts.
7. Remove the intake manifold.
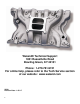
INSTALLING YOUR NEW WEIAND MANIFOLD
1. To prevent gasket pieces from falling into ports and valleys when cleaning old gaskets from head surfaces, lay rags into all ports
and valleys. When clean, remove the stuffing carefully. Make sure that all particles that fell on the rags are completely removed.
Wipe surfaces with rags soaked in lacquer thinner or alcohol to remove any oils or grease. This is a must for proper
manifold/gasket sealing.
2. Apply a thin coat of spray adhesive to the cylinder head side of the intake gasket surface. Lay the manifold gaskets in place.
3. Apply a 1/4” wide bead of oil-resistant RTV-silicone sealant to the front and rear block-sealing surfaces, making sure to overlap
manifold gaskets at all four corners. Do not use cork or rubber seals.
NOTE: Thread sealant should be used on all bolt threads.
4. Carefully, lay your WEIAND® intake manifold in place. If the manifold must be moved, recheck the gaskets. Install the intake bolts
initially torquing to 10 ft./lbs., then 15 ft./lbs., following the factory Ford sequence, and finally torque to 25 ft./lbs.