.owTo_xz AHO_Z _ TM Use And Care A Note to You ........................ 2 Dryer Safety ....................... 3-4 Parts and Features ............... 5 Operating Your Dryer ........... 6 Before starting your dryer ... 6 Starting your dryer .............. 6 Stopping/restarting your dryer ............................ 6 Selecting the right cycle and setting .......................... 7 End of Cycle signal ........... 11 Using End of Cycle signal and FINISH GUARD ® feature ...............................
A Note to You Thank you for buying a Whirlpool ® appliance. Because your life is getting busier and more complicated, Whirlpool dryers are easy to use, save time, and help you manage your home better. To ensure that you enjoy years of troublefree operation, we developed this Use and Care Guide. It contains valuable information about how to operate and maintain your dryer properly and safely. Please read it carefully.
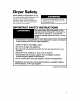
Dryer Safety Your safety is important to us. This guide contains safety statements under warning symbols. Please pay special attention to these symbols and follow any instructions given. Here is a brief explanation of the use of the symbol. IMPORTANT SAFETY and electrical shock. INSTRUCTIONS For your safety, the information in this manual must be followed to minimize the risk of fire or explosion, or to prevent property damage, personal injury, or loss of life.
Important Safety Instructions To reduce the risk of fire, electrical shock, or injury to persons when using your dryer, follow basic precautions, including the following: • Read all instructions before using your dryer. • Dryer must be electrically grounded. See the Installation Instructions. • Do not allow lint to build up inside the dryer or exhaust system. Cleaning should be done periodically by a qualified person.
Parts and Features The parts and features of your dryer are illustrated below. Become familiar with all parts and features before using your dryer. Page references are included next to some features. Refer to those pages for more information about the features. NOTE: The drawings in this book may vary from your dryer model. They are designed to show the different features of all models covered by this book. Your model may not include all features. Temperature (pp.
Operating Your Dryer The information in this section helps you learn to use your dryer efficiently and safely. Refer to "Laundry Tips" on page 17 for additional information on sorting, loading, and drying most types of washables. Before starting your dryer Before using your dryer, wipe the dryer drum with a damp cloth to remove dust from storing and shipping. Starting your Your dryer may have a Dryer Features Guide (usually located on top of the dryer).
Selecting the right cycle and setting The following pages describe the cycles on your dryer. Refer to the charts on pages 9-10 for help in selecting drying cycles. Drying guidelines • Always follow care label directions when they are available. • Use the Fluff Air cycle, or line dry rubber, plastic, delicate, and heat-sensitive fabrics (see page 10). • Overdrying can cause shrinkage, static cling, and damage to some fabrics.
Heavy (on some Dry Cycle models) Use Heavy Dry and a high heat setting to dry large items or items that are thicker or heavier than a regular load (such as heavy cotton bath sheets or robes). Damp (on some Dry Cycle models) Use Damp Dry to dry items to damp level or to dry items that do not require an entire drying cycle. Two examples are heavy cottons, such as jeans, which you do not want to become stiff, or cotton clothes which are easier to press when damp.
Drying cycles chart Use the chart below to help you make drying selections. The chart suggests heat settings and drying times for various loads. • Use an Automatic cycle to dry most loads. • The check mark / in the chart below denotes recommended temperature settings. If some types of loads in the chart have more than one suggested temperature setting, choose the lowest setting available on your dryer. • Use a Timed cycle only if the recommended Automatic cycle is not available.
Fluff Air cycle or line drying The chart below includes examples of items that require drying without heat. Use the Fluff Air cycle (if available on your dryer model), or place the items on a line or rack to air dry. NOTES: • Heat-sensitive fabrics should not be dried in the dryer. • Line dry bonded or laminated fabrics. • Always follow care label directions when they are available. Fire Hazard Do not dry heat-sensitive fabrics, plastic, rubber, or some stuffed items with heat.
End of Cycle (on some signal models) The dryer sounds a signal to let you know when the cycle is finished. The • On some dryers, the end of cycle signal is not adjustable. • On other dryers, the end of cycle signal can be turned On or Off by a selector. The end of cycle On/Off selector is part of the Start Button on some models. The various types of selectors are described in the chart below.
Using (on some the drying rack models) The drying rack lets you dry items that you may not want to tumble. The rack does not move, but the drum turns. 4. Select the Timed drying cycle (and temperature, if needed) or the Fluff Air cycle (see page 7). 5. Push the Start Button. 1. Fit rear legs of the rack into indentations in Lower the front so the legs rest on the dryer opening. the back wall of the dryer. NOTES: 2. Put wet items on top of the rack. Leave _ can reach all surfaces.
Caring for Your Dryer Proper care of your dryer can extend its life. This section explains how to care for your dryer properly and safely. Cleaning Every load the lint screen cleaning The lint screen is located under a lid on top of the dryer. Clean it before each load. A screen blocked by lint can increase drying time. To clean: 1. Open the lid and pull the lint screen straight out. 2. Roll lint off the screen with your fingers. Do remove lint. Wet lint is hard to remove.
Cleaning the dryer interior Garments which contain unstable dyes, such as denim blue jeans or brightly colored cotton items, may discolor the dryer interior. To clean dryer drum: Explosion Hazard • Turn off the electrical power before cleaning the dryer interior. 1. Make a paste with detergent and very warm water. 2. Apply paste to a soft cloth and scrub area • Make sure the dryer is cool. • Use nonflammable cleaner. Failure to do so could result in electrical shock or injury, fire, or explosion.
Removing accumulated Lint can gather inside the dryer and be a fuel for fire. Lint should be removed every 2 to 3 years, or more often, depending on dryer usage. Cleaning should be done by a qualified person. If you have any questions or comments, please call our Consumer Assistance Center at 1-800-253-1301. lint Electrical Shock Hazard • Unplug the power supply cord or turn off the electrical power before removing dryer panels. • Make sure the dryer is cool. • Dryer parts can have sharp edges.
If your dryer is gas and has a full front panel, remove front panel as follows: 1. Unplug the power supply cord or turn off the electrical power. 2. Open lint screen lid. Remove two screws from lint screen area. 3. Open top by pulling forward and up at each front corner (see View A). Rest raised top against wall behind dryer (top is hinged at rear). 4. Remove two internal screws from front panel flanges (near top front corners).
Laundry Tips This section provides information on preparing clothes for drying, drying guidelines, and instructions for drying special-care items. NOTES: • Refer to your Washer Use and Care Guide for proper washing techniques and additional laundry tips. • See pages 3 and 4 of this book for Important Safety Information. Sorting clothes • Separate dark from light colors; colorfast properly sorted for washing are usually properly sorted for from drying.non-colorfast.
Using dryer fabric softeners Dryer fabric softeners are recommended for reducing static cling and for softening fabrics. Always follow package instructions carefully. • Put one fabric softener sheet on top of the • Remove fabric softener stains by wetting the stains and rubbing them with liquid detergent or bar soap and rewash. • Some fabric softeners can clog the lint screen and slow drying. Use fabric softeners labeled as dryer safe. dryer.
Drying special-care items Most garments and household textiles have manufacturer's care labels with laundering instructions. Always follow care label directions when they are available. Pages 9 and 10 include drying instructions for most types of washables. The chart below provides drying instructions for special-care washables. ITEMS DRYING INSTRUCTIONS Blankets and woolens Machine drying knitted woolens is not recommended. Block to shape when wet and allow to air dry.
ITEMS DRYING INSTRUCTIONS Napped items Dry separately or with similar colors to avoid lint transfer. Follow care label instructions. • Corduroy, velveteen 1. Remove from dryer while there is still a trace of moisture. 2. Smooth, reshape, and air dry before putting away. Quilted, downfilled items Follow care label instructions. Snowsuits, jackets Check label for fiber content, then follow care label instructions. • Nylon or polyester 1. Dry garment for about 10 minutes. Remove and turn inside out.
Troubleshooting Most laundering problems are easily solved if you understand the cause. Check the following list for laundry problems you may have and their possible causes. Also refer to the next page for a dryer checklist which can help you solve some simple problems without calling for service. If you still need help, see "Requesting Assistance or Service" on page 23. Common laundry problems PROBLEM CAUSE Greasy spots • Dryer fabric softener improperly used. See manufacturer's directions.
Common dryer problems Before calling for service, check these: Is the dryer door firmly closed? Are the controls set in an ON position? Did you firmly push the Start Button? Is lint screen clogged with lint? Is the power cord plugged in? Have you blown a fuse or tripped the circuit breaker? Is exhaust duct or outside exhaust hood clogged with lint? (_ For gas dryers, are the valves open on the dryer and the supply line? Is the dryer making noise? Is there a thumping sound from support rollers i
Requesting Assistance or Service Before calling for assistance or service, please check "Troubleshooting" on pages 21-22. It may save you the cost of a service call. If you still need help, follow the instructions below. 1. If you need assistance* ... 3. If you Call the Whirlpool Consumer Assistance Dial toll-free from anywhere in the U.S.A.: enter telephone number. 1-800-253-1301 _ and talk with one of our trained consultants.
Index This index is alphabetical. page number. Look for the word or phrase you want, and then look for the TOPIC PAGE AIR DRYING ............................................ AUTOMATIC cycles ................................... CARE/CLEAN ING Dryer interior ......................................... Lint screen ............................................ Vacation ................................................ FLUFF AIR cycle ........................................ 7 HEAVY DRY cycle ..............
WHIRLPOOU Dryer Warranty LENGTH OF WARRANTY WHIRLPOOL WILL PAY FOR FULL ONE-YEAR WARRANTY From Date of Purchase FSP ® replacement parts and repair labor to correct defects in materials or workmanship. Service must be provided by an authorized Whirlpool service company. WHIRLPOOL WILL NOT PAY FOR A. Service calls to: 1. Correct the installation of your dryer. 2. Instruct you how to use your dryer. 3. Replace house fuses or correct house wiring or plumbing. 4. Replace light bulbs. B.