
FREEZER ED25SMIII User Guide


Table Of Contents
- front cover
- parts and features
- toc
- safety first
- before you plug it in
- using your refrigerator
- setting the controls
- changing the control settings
- power saving control
- adjusting crisper humidity control
- adjusting meat pan temperature
- adjusting refrigerator shelves
- removing freezer shelves
- removing freezer basket
- removing the crisper, meat pan and covers
- changing the light bulbs
- removing the base grille
- cold water and ice dispenser
- sounds you may hear
- energy saving tips
- cleaning your refrigerator
- food storage guide
- vacation and moving care
- if you need service or assistance
- back cover
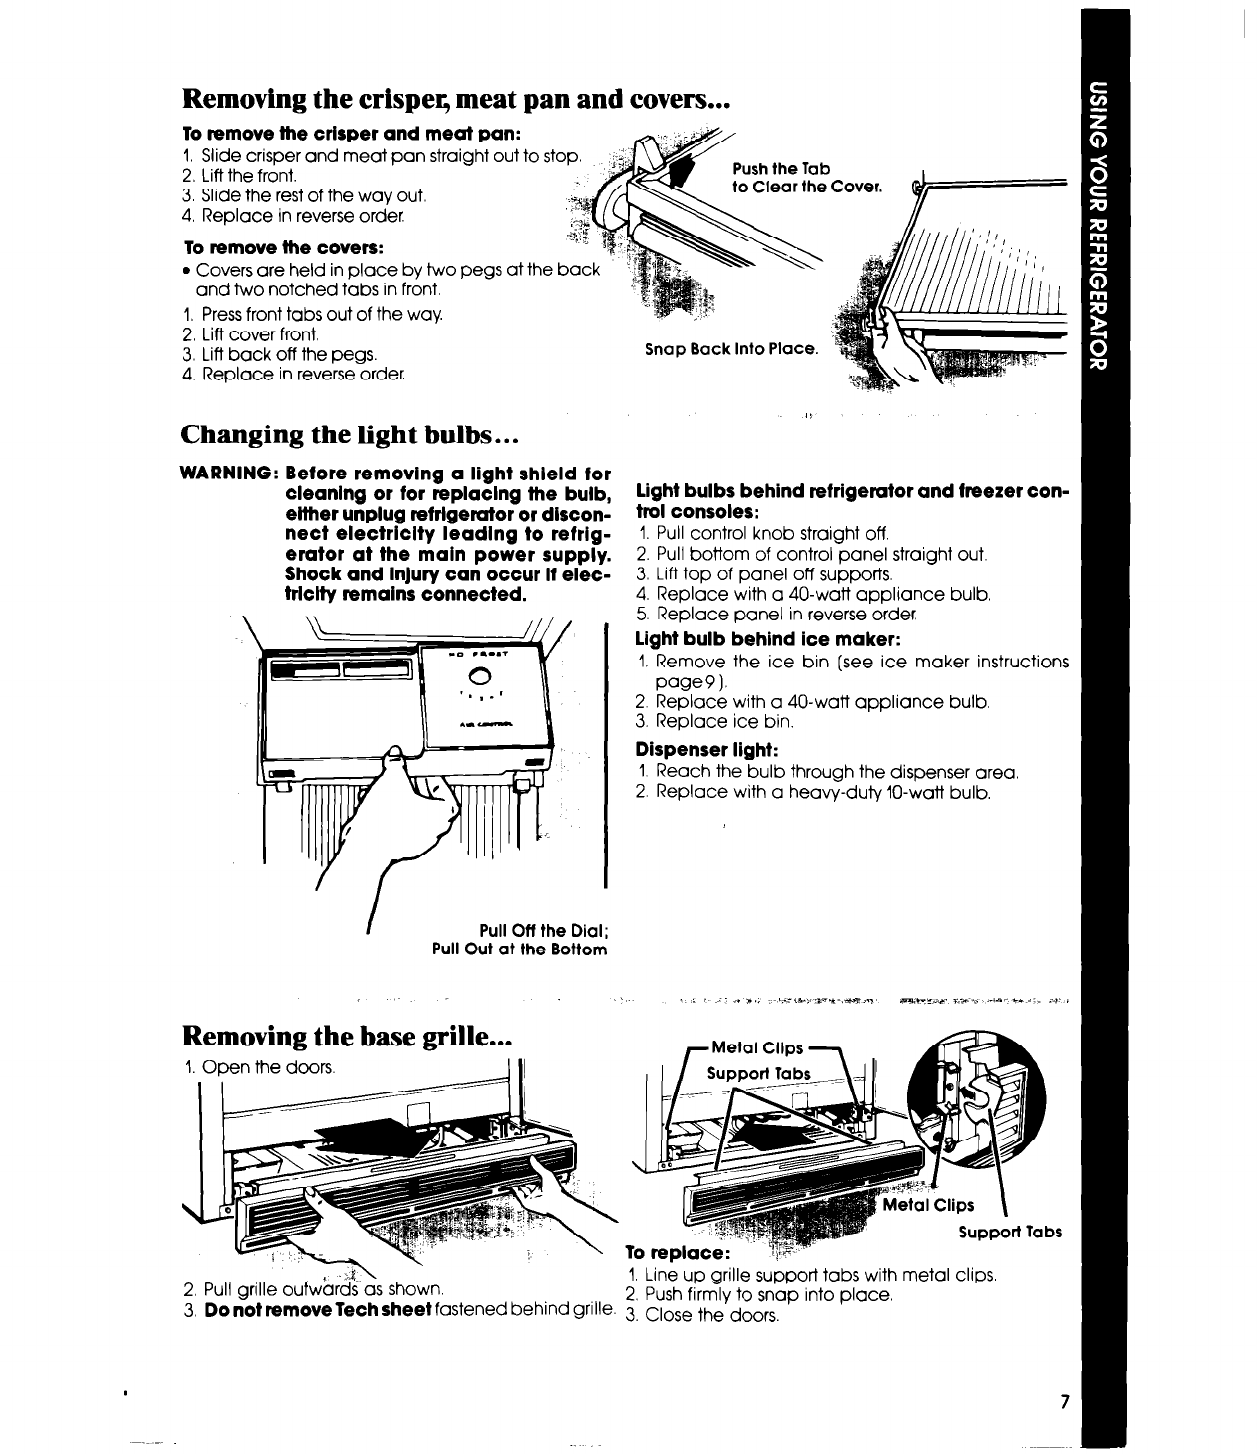
Removing the crispeq meat pan and covers...
l
Covers are held in place by two pegs at the back
and two notched tabs in front.
1. Press front tabs out of the way.
2. Lift cover front.
3. Lift back off the pegs.
4. Replace in reverse order
To remove the crisper and meat pan:
1. Slide crisper and meat pan straight out to
2. Lift the front.
3. Slide the rest of the way out.
4. Replace in reverse order
To remove the covers:
Snap Back Into Place.
Changing the light bulbs.. .
WARNING: Before removing a light shield for
cleaning or for replaclng the bulb,
either unplug refrigerator or dlscon-
nect electrlclty leadlng to refrig-
erator at the main power supply.
Shock and InJury can occur If elec-
trlclty remains connected.
I
Pull Off the Dial;
Pull Out at the Bottom
Removing the base grille...
1. Open the doors.
-I II
light bulbs behind refrigerator and freezer con-
trol consoles:
1. Pull control knob straight off.
2. Pull bottom of control panel straight out.
3. Lift top of panel off supports.
4. Replace with a 40-watt appliance bulb.
5. Replace panel in reverse order.
light bulb behind ice maker:
1. Remove the ice bin [see ice maker instructions
page9 1,
2. Replace with a 40-watt appliance bulb.
3. Replace ice bin.
Dispenser light:
1. Reach the bulb through the dispenser area
2. Replace with a heavy-duty IO-watt bulb.
r Metal
Clips
3. Do not removeTech sheet
faste
2. Pull grille outwards as shown.
1. Line up grille support tabs with metal clips
2. Push firmly to snap into place.
sned behind @le. 3. Close the doors.