
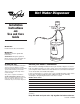
Specifications


Installation Instructions
cont.
8
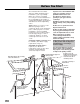
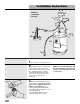
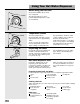
9.Connect clear tubing from spout
to center tank tubing using clamp.
Make sure clear tubing does not kink.
10.Install saddle valve following
kit instructions. If water supply line is
not copper, shut off water supply and
drain line.
Drill a 1/4" hole into water supply line
for the saddle valve piercing pin.
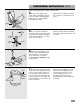
11.Turn saddle valve handle
clockwise until lance pierces soft
copper tubing and valve is firmly
seated. If the water line is not copper,
turn the saddle valve handle
clockwise until the valve is firmly
seated. The valve is now in the
closed position.
Place a bucket under open end of
water supply line. Turn on main water
supply valve to pressurize cold water
line. Check for leaks.
12.Slowly open saddle valve and
flush line into bucket to remove any
foreign material that may have been
trapped in the supply line during
saddle valve installation.
Close saddle valve.
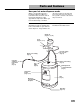
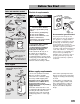
8.Connect 1/4" spout tubing
(longer tubing) to the rear quick-
connect fitting on top of tank. Push
tubing straight into fitting as far as it
will go. Pull on tubing. The tubing
should not come out when properly
installed.
Do Not lengthen, twist or tightly
bend tubing.
NOTE: If you need to remove tubing,
push down on collet. Pull tubing out
of quick-connect fitting.
quick-
connect
fitting
clear
tubing
clamp
closed
open
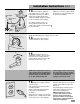
NOTE: Do NOT plug power supply cord into outlet.
collet