
Service manual
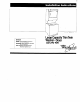

Now Start.. .
with washer/dryer in laundry
area.
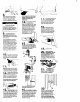
Personal Injury Hazard
More than one person is
required to WI, tilt or move the
washer/dryer because of its
weight and size. Failure IO
lollow these instructions may
result in personal injury.
I
I
Truck only from the rear to prevent
product damage.
l
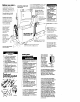
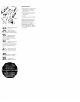
1 wire form
l
4 flat. water hose washers
l
1 grounding wire assembly
2
Remove
pork
from pOCkOQe.
Check that 011 parts were
’ included.
9.
17.
Panel C
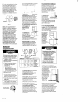
Pull the yellow St&ping
strap
completely oui of the washer/dryec.
3
Remove label that covers the
, yellow shipping strop. Pull to
Completely remove the Shipping strap
from the inside of the washer/dryer.
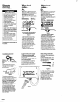
Use new hoses and washers that
came with your washer/dryer.
4.
coupling washer
Insert a flai washer into each end of
the inlet hoses. Check that washers
are firmly seated in couplings.
valve openino
first. Then. second hose
t-
to top inlet valve. Tighten couplings
bv hand: then use Dliers to make an
abditionol two-thirds turn.
II
6
.
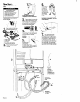
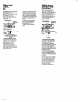
Slide nozzle end
of drain hose
through the
small ‘laop” in
the wire form
Wrap the hook
end of the wire
form around the
drain hose to
form a “hook-
shape.
Do Not force excess length 01 drain
hose down the standpipe. This could
cause stphantng.
7
Put ‘hook’ end of drain
. hose into laundry tub or
stondpipe. Estimate length of drain
hose needed when washer/dryer is
in finol Dosition. If drain hose is too
long - remove clamp ond coupling
Cut flexible end of hose. (Do not
cut hook-shaped end of drain hose.)
Push and twist coupling securely
onto drain hose. (You should feel
top of drain hose through coupling.)
Slide clamp over coupling and hose.
Pull the
yellow
shipping
shop with 3
cotterpins
completely out
of washer/dryer
Install wire
form on drain
hose.
6. 16.
10.
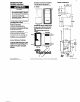
Numbers
correspond
to steps.