
MVC Series- Installation Guide
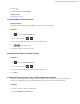
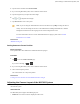

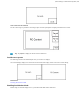
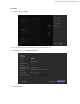


Table Of Contents
- Contents
- Introduction
- Deployment and Connection
- Initial Setup
- Setting up Yealink MVC900/MVC800/MVC500/MVC300
- Basic Settings of Teams Room Systems
- Basic Features for Microsoft Teams Rooms App
- Switching Between Skype User Account And Administrator Account
- Logging into Yealink Management Cloud Service/Yealink Device Management Platform
- Troubleshooting
- Upgrading System Software
- Firmware for Each Device
- General Issues
- Does the MVC900/MVC500/MVC800/MVC300 Come with All the Necessary Software Pre-installed?
- The Room Is Not Enabled for Teams Meetings
- There Is No Content Displayed on the Second Display
- Why Can not Click Finish After Completing the Setup Wizard?
- Any Anti-virus Software Needed to Be Installed on the Mini-PC?
- Restarting the Device
- Checking the Status of Your Device
- Appendix

| Basic Settings of Teams Room Systems | 31
2.
Select .
3.
Enable/Disable the Auto-framing.
Related concepts
VCR20 Remote Control
Controlling Room Camera Position
Before you begin
Only when the auto-framing feature is disabled, can you control the UVC30 Room.
Procedure
1.
Tap to enter the Camera Control page.
If you are in a meeting, tap > .
2.
If you are using MVC900 system, select a desired UVC80 camera.
3.
Tap / to zoom camera out/in.
4.
Tap the arrow keys to pan/tilt the camera.
Resetting Room Camera to Home Position
Procedure
1.
Tap to enter the Camera Control page.
If you are in a meeting, tap > .
2.
If you are using MVC900 system, select a desired UVC80 camera.
3.
Tap Reset.
Creating the Preset Position on the Yealink RoomConnect Plug-in
Presets specify the settings of both the angle and the focal length for the camera that can be used to quickly point a
camera at a pre-defined location. And only administrators have permission to use Yealink RoomConnect.
Procedure
1.
Sign in your MVC system as an administrator.
2.
Run the Yealink RoomConnect plug-in.