
Manual


6
3 GENERAL PHOTOMETER OPERATION
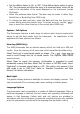
The photometer is controlled by a simple intuitive menu system:
The highlight indicates the active line or section of the screen
The and keys move the highlight through the menu choices
The and keys allow selection of options
The flashing cursor in the ‘Options’ menu at the bottom of the screen
indicates the action which will occur if the [OK] button is pressed.
Operating Modes
The photometer has two distinct operating modes - the PHOTOMETER mode
and the SYSTEM mode.
The PHOTOMETER mode is the normal operating mode for taking photometer
readings. This mode is engaged automatically when the instrument is turned
on by pressing the key.
As a power-saving measure, in normal use, both the 9300 and 9500 photometers
automatically switch off five minutes after the last key is pressed. This may be
adjusted for the 9500 in the System mode.
The SYSTEM mode is used to set the system options. This mode is engaged
when the photometer is turned on using the key and then selecting 'System'
using the and keys and pressing [OK].
Scroll through the menu box to view all the options available.
System - Quick Start
When the instrument is first used, the SYSTEM mode should be used to set
the preferred operating options:
Use the and keys to scroll through the features.
Use the and keys to select the options.
Press [OK] to accept the selections and return to PHOTOMETER mode.
Select the desired language from English, French, German, Spanish or Italian.
Select the desired display units from mg/l, ppm, mmol/l, µmol/l and g/l.
Set the sample number option to ‘On’ to allow the entry of a sample
number during normal photometer operation (model 9500 only).
Set the sample increment option to ‘On’ to automatically increase the
sample number (model 9500 only).