REFRIGERATOR - FREEZER ZX97/5 ZX99/5 ZX99/3 INSTRUCTION BOOKLET 214.3660.
Contents Instructions for the User Instructions for the Installer Safety Instructions 2 Technical Specifications 11 Description of the Appliance 3 Installation 12 Control Panel 4 Unpacking 12 Using the Appliance 5 Positioning 12 Before Use 5 Ventilation 12 Starting the Appliance 5 Levelling 12 Freezer Compartment 5 Freezing Fresh Food 5 Frozen Food Storage 5 Refrigerator Compartment 5 Chill Compartment 5 Food Storage Electrical Requirements Door Reversal 13 13 14 6 En
Safety Instructions These warnings are provided in the interests of your safety. Ensure that you understand them all before installing or using this appliance. If you are unsure of the meanings of these warnings contact the Customer Care Department. Installation This appliance is heavy. Care should be taken when moving it. It is dangerous to alter the specifications or attempt to modify this product in any way.
Description of Appliance The model shown here is ZX99/5W 0 Stand By 3 7 5 3 7 5 C 3 6 O L L E 9 C T I O N 12 Control Panel 1 2 3 Freezer Temperature Control Fridge Temperature Control ON/OFF Button 4 5 6 Door Alarm Temperature Alarm Fast Freezer Button 3
Control Panel The appliance controls are located in the top panel inside the refrigerator compartment. Thermostat Control The freezer and fridge thermostats control the temperature inside the freezer and refrigerator respectively. 1. The Freezer Temperature Control The freezer temperature control, regulates the temperature within the freezer compartment. A change in the control setting in the freezer compartment could affect the temperature in the refrigerator compartment under certain circumstances.
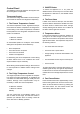
Food Storage Energy Saving Advice Do not install the cabinet close to sources of heat, such as a cooker, dishwasher or radiator. Locate the appliance in a cool well-ventilated room and make sure that the air openings of the cabinet are not obstructed. Avoid unnecessary frosting in the cabinet by packing all foodstuffs into airtight packages before placing them in the freezer. Always leave warm food to cool down to room temperature before placing in the fridge or freezer.
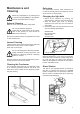
Maintenance and Cleaning Before any maintenance or cleaning work is carried out DISCONNECT the appliance from the ELECTRICITY supply. External Cleaning Wash the outer cabinet with warm soapy water. Do not use abrasive products. There may be sharp edges on the underside of the product so care should be taken when cleaning. Ensure the vents at the back of the appliance are clear of dust and debris etc.
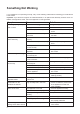
Something Not Working If your appliance is not operating correctly, carry out the following checks before contacting your local Service Force Centre. Important: If you call out an engineer to a fault listed below, or to repair a fault caused by incorrect use or installation a charge will be made, even if the appliance is under guarantee.
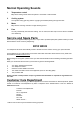
Normal Operating Sounds 1. Temperature control 2. Cooling system 3. Motor 4. Fans May cause clicking sounds when the system is connected or disconnected. The injected cooling gas may produce a gurgling sound while passing through the tubes. May cause a humming noise and or slight knocking sound. You may occasionally hear the fans working. This is normal; the fans help to ensure the air circulates more effectively.
GUARANTEE CONDITIONS Standard guarantee conditions We, Zanussi, undertake that if within 12 months of the date of purchase this Zanussi appliance or any part thereof is proved to be defective by reason only of faulty workmanship or materials, we will, at our option repair or replace the same FREE OF CHARGE for labour, materials or carriage on condition that: The appliance has been correctly installed and used only on the electricity supply stated on the rating plate.
Technical Specifications A distance of 56mm must exist between the appliance and the wall, to allow the door to be fully opened. The refrigeration system and the insulation of this appliance do not contain CFCs or HCFCs. ZX99/5W(SI) ZX97/5W(SI) ZX99/3W Height (mm) 2000 1850 1850 Width (mm) 595 595 595 Depth (mm) 670 670 670 Power Supply 220-240V / 50Hz 220-240V / 50Hz 220-240V / 50Hz Total Power Absorbed 150W 150W 150W Energy Consumption kWh/year 397.85 372.3 357.7 1.09 1.02 0.
Installation Unpacking Remove all transit packaging, including the door transit retainers located under the plinth. (Fig 1) and shelf retainers (Fig 2). Fig. 1 Positioning The appliance should be located in a well-ventilated, dry room. To ensure correct operation the appliance should: Not be exposed to direct sunlight. Not be installed next to radiators, cookers or other sources of heat.
Electrical Connection Any electrical work required to install this appliance must be carried out by a qualified electrician or competent person. This appliance must be earthed. The manufacturer declines any liability should these safety measures not be observed. Electrical Requirements Before switching on, make sure the electricity supply voltage is the same as that indicated on the appliance rating plate. The appliance is supplied with a 13 amp plug fitted.
Door reversal If you wish to change the opening direction of the doors, proceed as follows: B 1. Open the freezer door. Remove the plinth (A) at the bottom of the appliance, by pushing downwards and pulling outwards. (See fig 5) 2. Remove the hinge cover (B) in the plinth and reposition on the opposite side of the plinth. 3. Whilst supporting the lower door, use a 8mm nut driver to remove the 3 hinge retaining bolts and remove the lower hinge. 4. Carefully lower the door off the central hinge. 5.